wheel CHEVROLET ORLANDO 2015 Owners Manual
[x] Cancel search | Manufacturer: CHEVROLET, Model Year: 2015, Model line: ORLANDO, Model: CHEVROLET ORLANDO 2015Pages: 372, PDF Size: 6.71 MB
Page 1 of 372
Black plate (1,1)Chevrolet Orlando Owner Manual - 2013 - CRC - 6/5/12
2013 Chevrolet Orlando Owner ManualM
In Brief. . . . . . . . . . . . . . . . . . . . . . . . 1-1
Instrument Panel . . . . . . . . . . . . . . 1-2
Initial Drive Information . . . . . . . . 1-4
Vehicle Features . . . . . . . . . . . . . 1-14
Performance and Maintenance . . . . . . . . . . . . . . . . 1-18
Keys, Doors, and Windows . . . . . . . . . . . . . . . . . . . . 2-1
Keys and Locks . . . . . . . . . . . . . . . 2-1
Doors . . . . . . . . . . . . . . . . . . . . . . . . . . 2-8
Vehicle Security . . . . . . . . . . . . . . . . 2-9
Exterior Mirrors . . . . . . . . . . . . . . . 2-11
Interior Mirrors . . . . . . . . . . . . . . . . 2-12
Windows . . . . . . . . . . . . . . . . . . . . . 2-14
Roof . . . . . . . . . . . . . . . . . . . . . . . . . . 2-16
Seats and Restraints . . . . . . . . . 3-1
Head Restraints . . . . . . . . . . . . . . . 3-2
Front Seats . . . . . . . . . . . . . . . . . . . . 3-3
Rear Seats . . . . . . . . . . . . . . . . . . . . 3-8
Safety Belts . . . . . . . . . . . . . . . . . . 3-15
Airbag System . . . . . . . . . . . . . . . . 3-24
Child Restraints . . . . . . . . . . . . . . 3-32 Storage
. . . . . . . . . . . . . . . . . . . . . . . 4-1
Storage Compartments . . . . . . . . 4-1
Additional Storage Features . . . 4-2
Roof Rack System . . . . . . . . . . . . . 4-5
Instruments and Controls . . . . 5-1
Controls . . . . . . . . . . . . . . . . . . . . . . . 5-2
Warning Lights, Gauges, and
Indicators . . . . . . . . . . . . . . . . . . . . 5-7
Information Displays . . . . . . . . . . 5-21
Vehicle Messages . . . . . . . . . . . . 5-24
Vehicle Personalization . . . . . . . 5-30
Lighting . . . . . . . . . . . . . . . . . . . . . . . 6-1
Exterior Lighting . . . . . . . . . . . . . . . 6-1
Interior Lighting . . . . . . . . . . . . . . . . 6-6
Lighting Features . . . . . . . . . . . . . . 6-7
Infotainment System . . . . . . . . . 7-1
Introduction . . . . . . . . . . . . . . . . . . . . 7-1
Radio . . . . . . . . . . . . . . . . . . . . . . . . . . 7-7
Audio Players . . . . . . . . . . . . . . . . 7-13
Phone . . . . . . . . . . . . . . . . . . . . . . . . 7-18
Trademarks and License Agreements . . . . . . . . . . . . . . . . . 7-29 Climate Controls
. . . . . . . . . . . . . 8-1
Climate Control Systems . . . . . . 8-1
Air Vents . . . . . . . . . . . . . . . . . . . . . . . 8-6
Driving and Operating . . . . . . . . 9-1
Driving Information . . . . . . . . . . . . . 9-2
Starting and Operating . . . . . . . 9-13
Engine Exhaust . . . . . . . . . . . . . . 9-20
Automatic Transmission . . . . . . 9-21
Manual Transmission . . . . . . . . . 9-24
Brakes . . . . . . . . . . . . . . . . . . . . . . . 9-26
Ride Control Systems . . . . . . . . 9-28
Cruise Control . . . . . . . . . . . . . . . . 9-31
Object Detection Systems . . . . 9-33
Fuel . . . . . . . . . . . . . . . . . . . . . . . . . . 9-38
Towing . . . . . . . . . . . . . . . . . . . . . . . 9-42
Conversions and Add-Ons . . . 9-47
Vehicle Care . . . . . . . . . . . . . . . . . 10-1
General Information . . . . . . . . . . 10-2
Vehicle Checks . . . . . . . . . . . . . . . 10-4
Headlamp Aiming . . . . . . . . . . . 10-25
Bulb Replacement . . . . . . . . . . 10-25
Electrical System . . . . . . . . . . . . 10-30
Wheels and Tires . . . . . . . . . . . 10-37
Page 5 of 372
Black plate (5,1)Chevrolet Orlando Owner Manual - 2013 - CRC - 6/5/12
Introduction v
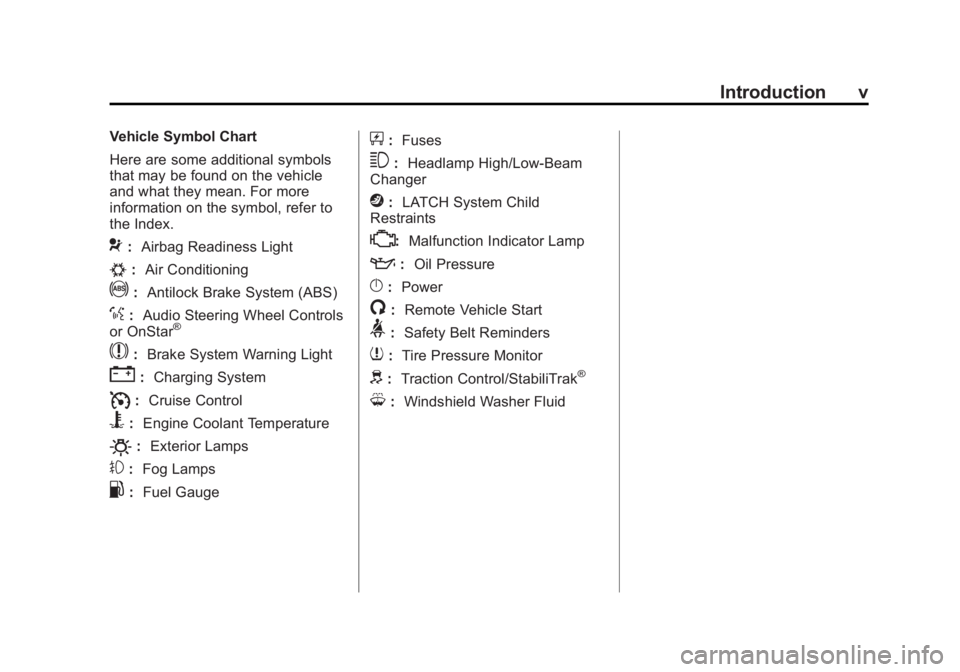
Vehicle Symbol Chart
Here are some additional symbols
that may be found on the vehicle
and what they mean. For more
information on the symbol, refer to
the Index.
9:Airbag Readiness Light
#:Air Conditioning
!:Antilock Brake System (ABS)
%:Audio Steering Wheel Controls
or OnStar®
$: Brake System Warning Light
":Charging System
I:Cruise Control
B: Engine Coolant Temperature
O:Exterior Lamps
#:Fog Lamps
.: Fuel Gauge
+:Fuses
3: Headlamp High/Low-Beam
Changer
j: LATCH System Child
Restraints
*: Malfunction Indicator Lamp
::Oil Pressure
}:Power
/:Remote Vehicle Start
>:Safety Belt Reminders
7:Tire Pressure Monitor
d:Traction Control/StabiliTrak®
M:Windshield Washer Fluid
Page 7 of 372
Black plate (1,1)Chevrolet Orlando Owner Manual - 2013 - CRC - 6/5/12
In Brief 1-1
In Brief
Instrument Panel
Instrument Panel . . . . . . . . . . . . . . 1-2
Initial Drive Information
Initial Drive Information . . . . . . . . 1-4
Remote Keyless Entry (RKE)System . . . . . . . . . . . . . . . . . . . . . . 1-4
Remote Vehicle Start . . . . . . . . . 1-4
Door Locks . . . . . . . . . . . . . . . . . . . 1-5
Liftgate . . . . . . . . . . . . . . . . . . . . . . . . 1-6
Windows . . . . . . . . . . . . . . . . . . . . . . 1-6
Seat Adjustment . . . . . . . . . . . . . . 1-6
Second Row Seats . . . . . . . . . . . 1-8
Third Row Seats . . . . . . . . . . . . . . 1-8
Heated Seats . . . . . . . . . . . . . . . . . 1-8
Head Restraint Adjustment . . . . 1-8
Safety Belts . . . . . . . . . . . . . . . . . . . 1-9
Mirror Adjustment . . . . . . . . . . . . . 1-9
Steering Wheel Adjustment . . . . . . . . . . . . . . . . . 1-10
Interior Lighting . . . . . . . . . . . . . . 1-10
Exterior Lighting . . . . . . . . . . . . . 1-11
Windshield Wiper/Washer . . . . 1-12
Climate Controls . . . . . . . . . . . . . 1-13
Transmission . . . . . . . . . . . . . . . . 1-14
Vehicle Features
Radio(s) . . . . . . . . . . . . . . . . . . . . . 1-14
Satellite Radio . . . . . . . . . . . . . . . 1-15
Portable Audio Devices . . . . . . 1-16
Bluetooth
®. . . . . . . . . . . . . . . . . . . 1-16
Steering Wheel Controls . . . . . 1-16
Cruise Control . . . . . . . . . . . . . . . 1-17
Driver Information
Center (DIC) . . . . . . . . . . . . . . . 1-17
Ultrasonic Parking Assist . . . . 1-17
Storage Compartments . . . . . . 1-18
Power Outlets . . . . . . . . . . . . . . . 1-18
Performance and Maintenance
Traction Control System (TCS) . . . . . . . . . . . . . . 1-18
StabiliTrak
®System . . . . . . . . . 1-19
Tire Pressure Monitor . . . . . . . . 1-19
Tire Sealant and
Compressor Kit . . . . . . . . . . . . . 1-19
Engine Oil Life System . . . . . . 1-20
Driving for Better Fuel Economy . . . . . . . . . . . . . . . . . . . 1-20
Roadside Assistance Program . . . . . . . . . . . . . . . . . . . . 1-20
OnStar
®. . . . . . . . . . . . . . . . . . . . . 1-21
Page 9 of 372
Black plate (3,1)Chevrolet Orlando Owner Manual - 2013 - CRC - 6/5/12
In Brief 1-3
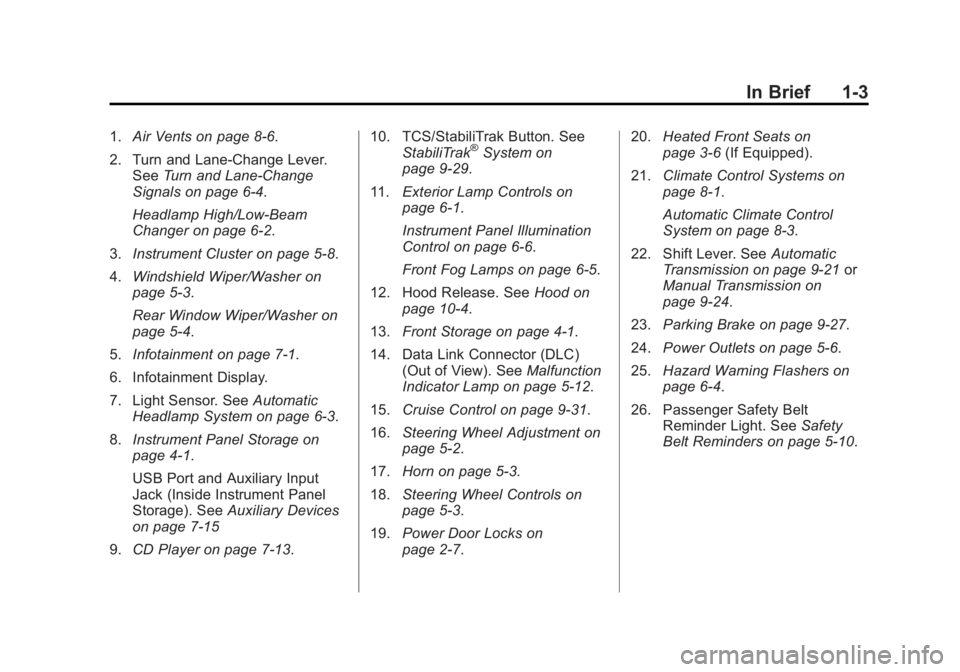
1.Air Vents on page 8‑6.
2. Turn and Lane-Change Lever. See Turn and Lane-Change
Signals on page 6‑4.
Headlamp High/Low-Beam
Changer on page 6‑2.
3. Instrument Cluster on page 5‑8.
4. Windshield Wiper/Washer on
page 5‑3.
Rear Window Wiper/Washer on
page 5‑4.
5. Infotainment on page 7‑1.
6. Infotainment Display.
7. Light Sensor. See Automatic
Headlamp System on page 6‑3.
8. Instrument Panel Storage on
page 4‑1.
USB Port and Auxiliary Input
Jack (Inside Instrument Panel
Storage). See Auxiliary Devices
on page 7‑15
9. CD Player on page 7‑13. 10. TCS/StabiliTrak Button. See
StabiliTrak®System on
page 9‑29.
11. Exterior Lamp Controls on
page 6‑1.
Instrument Panel Illumination
Control on page 6‑6.
Front Fog Lamps on page 6‑5.
12. Hood Release. See Hood on
page 10‑4.
13. Front Storage on page 4‑1.
14. Data Link Connector (DLC) (Out of View). See Malfunction
Indicator Lamp on page 5‑12.
15. Cruise Control on page 9‑31.
16. Steering Wheel Adjustment on
page 5‑2.
17. Horn on page 5‑3.
18. Steering Wheel Controls on
page 5‑3.
19. Power Door Locks on
page 2‑7. 20.
Heated Front Seats on
page 3‑6 (If Equipped).
21. Climate Control Systems on
page 8‑1.
Automatic Climate Control
System on page 8‑3.
22. Shift Lever. See Automatic
Transmission on page 9‑21 or
Manual Transmission on
page 9‑24.
23. Parking Brake on page 9‑27.
24. Power Outlets on page 5‑6.
25. Hazard Warning Flashers on
page 6‑4.
26. Passenger Safety Belt Reminder Light. See Safety
Belt Reminders on page 5‑10.
Page 16 of 372
Black plate (10,1)Chevrolet Orlando Owner Manual - 2013 - CRC - 6/5/12
1-10 In Brief
Interior Mirror
Hold the inside rearview mirror in
the center to move it for a clearer
view of behind your vehicle. Adjust
the inside rearview mirror by moving
it up and down or side to side.
Adjust the mirror to avoid glare from
the headlamps behind you. Push
the tab forward for daytime use and
pull it for nighttime use. SeeManual
Rearview Mirror on page 2‑12.
On vehicles with an automatic
dimming inside rearview mirror, the
mirror reduces glare from the
headlamps of the vehicle behind
you. The dimming feature and
indicator light come on each time
the vehicle is started. See
Automatic Dimming Rearview Mirror
on page 2‑13.
Steering Wheel
Adjustment
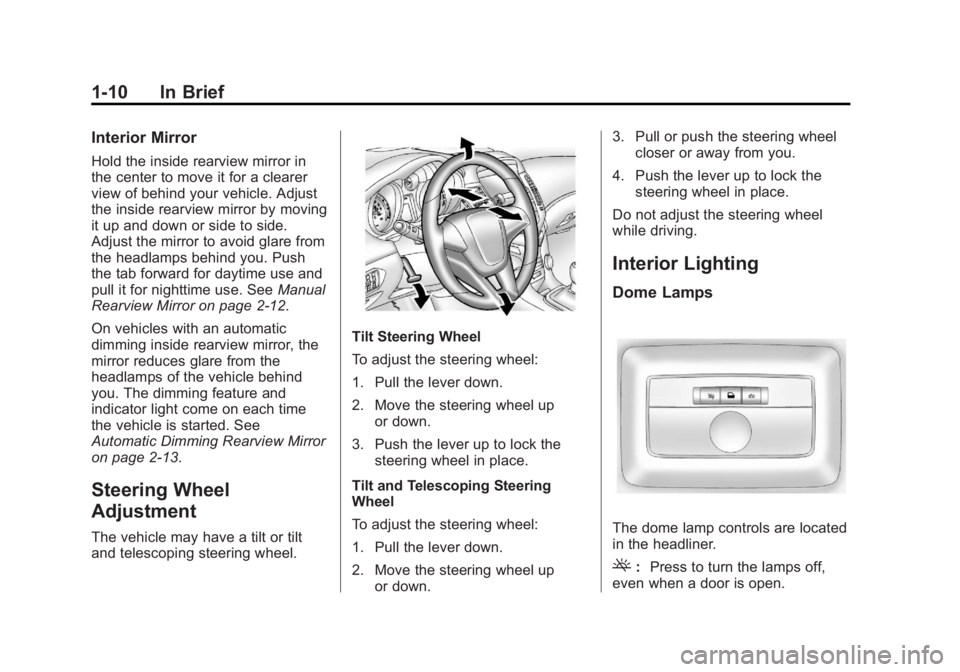
The vehicle may have a tilt or tilt
and telescoping steering wheel.
Tilt Steering Wheel
To adjust the steering wheel:
1. Pull the lever down.
2. Move the steering wheel up
or down.
3. Push the lever up to lock the steering wheel in place.
Tilt and Telescoping Steering
Wheel
To adjust the steering wheel:
1. Pull the lever down.
2. Move the steering wheel up or down. 3. Pull or push the steering wheel
closer or away from you.
4. Push the lever up to lock the steering wheel in place.
Do not adjust the steering wheel
while driving.
Interior Lighting
Dome Lamps
The dome lamp controls are located
in the headliner.
(: Press to turn the lamps off,
even when a door is open.
Page 22 of 372
Black plate (16,1)Chevrolet Orlando Owner Manual - 2013 - CRC - 6/5/12
1-16 In Brief
Portable Audio Devices
Some vehicles have a 3.5 mm
(1/8 in) auxiliary input and a USB
port in the center console bin.
External devices such as iPods®,
laptop computers, MP3 players, CD
changers, and USB drives may be
connected, depending on the audio
system.
SeeAuxiliary Devices on page 7‑15.
Bluetooth®
The Bluetooth® system allows
users with a Bluetooth-enabled
mobile phone to make and receive
hands-free calls using the vehicle
audio system and controls.
The Bluetooth-enabled mobile
phone must be paired with the
in-vehicle Bluetooth system before it
can be used in the vehicle. Not all
phones will support all functions. See
Bluetooth (Overview) on
page 7‑18 orBluetooth (Voice
Recognition) on page 7‑23 or
Bluetooth (Infotainment Controls) on
page 7‑19.
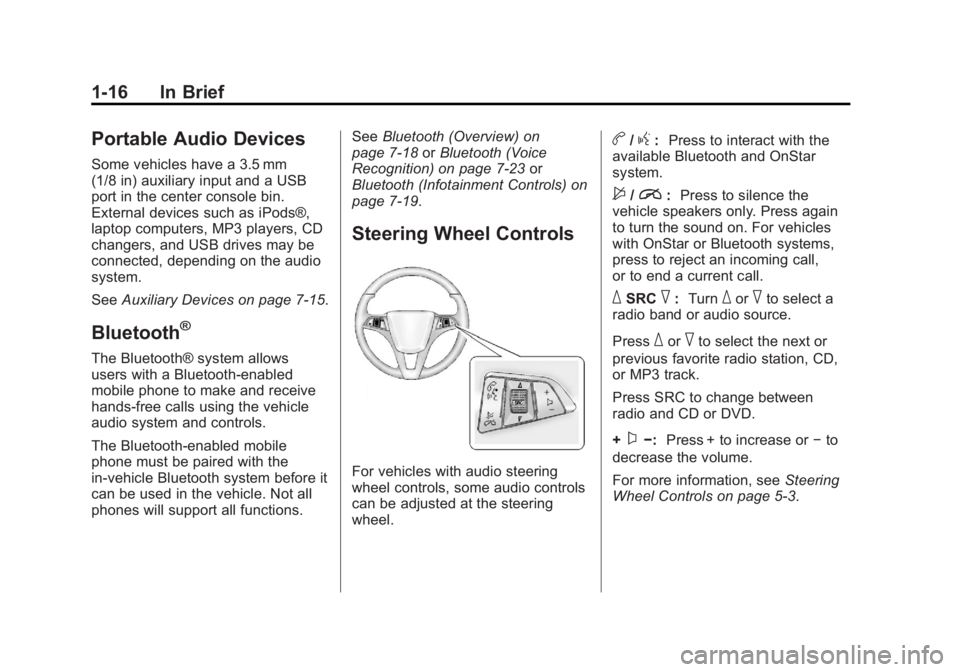
Steering Wheel Controls
For vehicles with audio steering
wheel controls, some audio controls
can be adjusted at the steering
wheel.
b/g: Press to interact with the
available Bluetooth and OnStar
system.
$/i: Press to silence the
vehicle speakers only. Press again
to turn the sound on. For vehicles
with OnStar or Bluetooth systems,
press to reject an incoming call,
or to end a current call.
_SRC^: Turn_or^to select a
radio band or audio source.
Press
_or^to select the next or
previous favorite radio station, CD,
or MP3 track.
Press SRC to change between
radio and CD or DVD.
+
x−: Press + to increase or −to
decrease the volume.
For more information, see Steering
Wheel Controls on page 5‑3.
Page 23 of 372
Black plate (17,1)Chevrolet Orlando Owner Manual - 2013 - CRC - 6/5/12
In Brief 1-17
Cruise Control
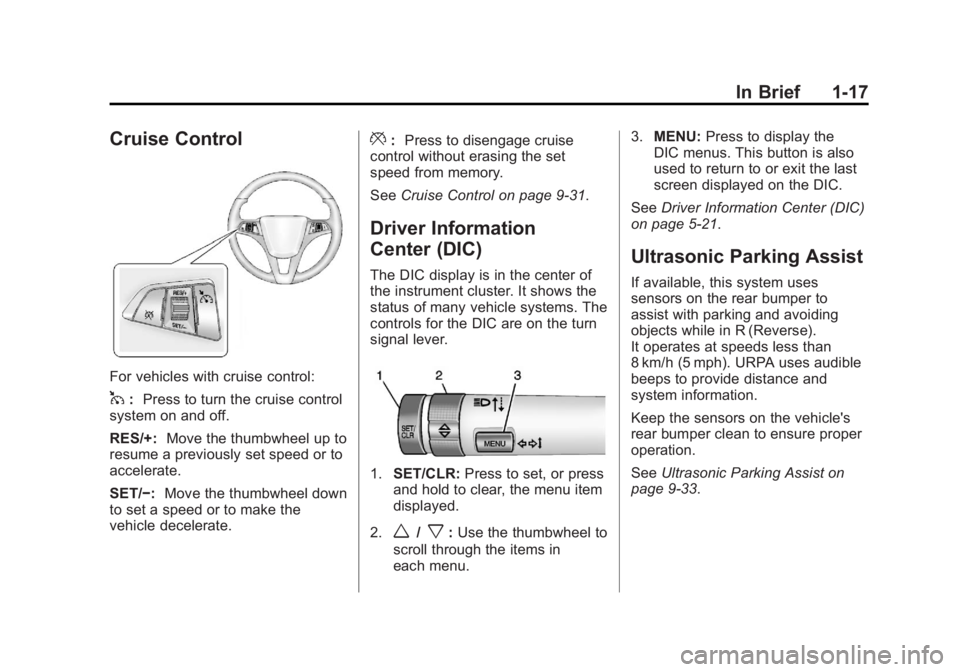
For vehicles with cruise control:
1:Press to turn the cruise control
system on and off.
RES/+: Move the thumbwheel up to
resume a previously set speed or to
accelerate.
SET/−: Move the thumbwheel down
to set a speed or to make the
vehicle decelerate.
*: Press to disengage cruise
control without erasing the set
speed from memory.
See Cruise Control on page 9‑31.
Driver Information
Center (DIC)
The DIC display is in the center of
the instrument cluster. It shows the
status of many vehicle systems. The
controls for the DIC are on the turn
signal lever.
1.SET/CLR: Press to set, or press
and hold to clear, the menu item
displayed.
2.
w/x: Use the thumbwheel to
scroll through the items in
each menu. 3.
MENU: Press to display the
DIC menus. This button is also
used to return to or exit the last
screen displayed on the DIC.
See Driver Information Center (DIC)
on page 5‑21.
Ultrasonic Parking Assist
If available, this system uses
sensors on the rear bumper to
assist with parking and avoiding
objects while in R (Reverse).
It operates at speeds less than
8 km/h (5 mph). URPA uses audible
beeps to provide distance and
system information.
Keep the sensors on the vehicle's
rear bumper clean to ensure proper
operation.
See Ultrasonic Parking Assist on
page 9‑33.
Page 24 of 372
Black plate (18,1)Chevrolet Orlando Owner Manual - 2013 - CRC - 6/5/12
1-18 In Brief
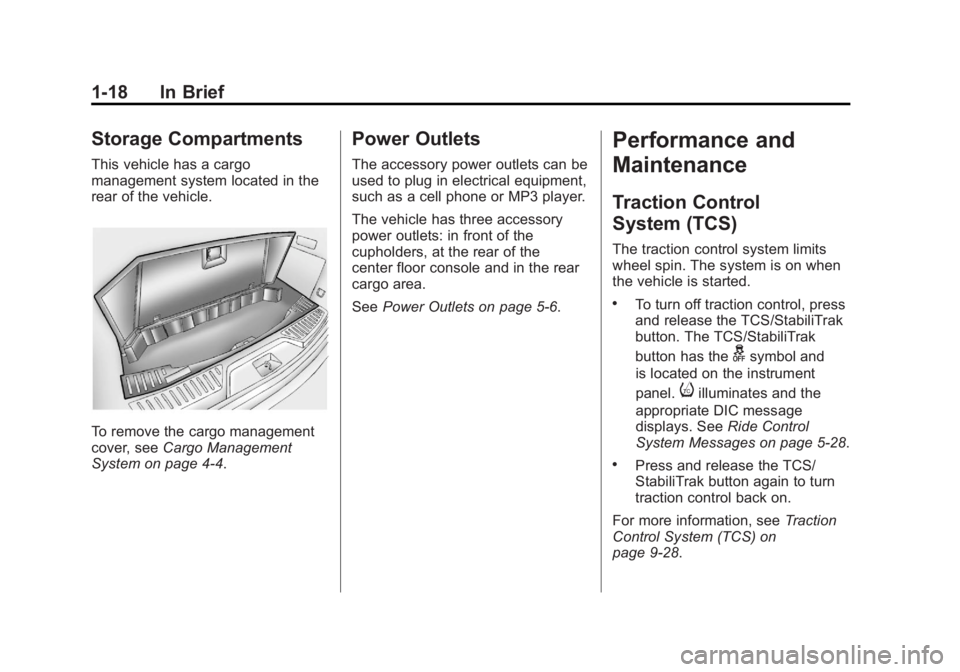
Storage Compartments
This vehicle has a cargo
management system located in the
rear of the vehicle.
To remove the cargo management
cover, seeCargo Management
System on page 4‑4.
Power Outlets
The accessory power outlets can be
used to plug in electrical equipment,
such as a cell phone or MP3 player.
The vehicle has three accessory
power outlets: in front of the
cupholders, at the rear of the
center floor console and in the rear
cargo area.
See Power Outlets on page 5‑6.
Performance and
Maintenance
Traction Control
System (TCS)
The traction control system limits
wheel spin. The system is on when
the vehicle is started.
.To turn off traction control, press
and release the TCS/StabiliTrak
button. The TCS/StabiliTrak
button has the
gsymbol and
is located on the instrument
panel.
iilluminates and the
appropriate DIC message
displays. See Ride Control
System Messages on page 5‑28.
.Press and release the TCS/
StabiliTrak button again to turn
traction control back on.
For more information, see Traction
Control System (TCS) on
page 9‑28.
Page 26 of 372
Black plate (20,1)Chevrolet Orlando Owner Manual - 2013 - CRC - 6/5/12
1-20 In Brief
Engine Oil Life System
The engine oil life system calculates
engine oil life based on vehicle use
and displays the CHANGE ENGINE
OIL SOON DIC message or Code
82 DIC message when it is time to
change the engine oil and filter. The
oil life system should be reset to
100% only following an oil change.
Resetting the Oil Life System
1. Turn the ignition to ON/RUN withthe engine off.
2. Press the DIC MENU button on the turn signal lever to enter the
Vehicle Information Menu. Use
the thumbwheel to scroll through
the menu items until you reach
REMAINING OIL LIFE.
3. Press the SET/CLR button to reset the oil life at 100%.
4. Turn the ignition to LOCK/OFF.
See Engine Oil Life System on
page 10‑9.
Driving for Better Fuel
Economy
Driving habits can affect fuel
mileage. Here are some driving tips
to get the best fuel economy
possible.
.Avoid fast starts and accelerate
smoothly.
.Brake gradually and avoid
abrupt stops.
.Avoid idling the engine for long
periods of time.
.When road and weather
conditions are appropriate, use
cruise control.
.Always follow posted speed
limits or drive more slowly when
conditions require.
.Keep vehicle tires properly
inflated.
.Combine several trips into a
single trip.
.Replace the vehicle's tires with
the same TPC Spec number
molded into the tire's sidewall
near the size.
.Follow recommended scheduled
maintenance.
Roadside Assistance
Program
U.S.: 1-800-243-8872
TTY Users (U.S. Only):
1-888-889-2438
Canada: 1-800-268-6800
As the owner of a new Chevrolet,
you are automatically enrolled in the
Roadside Assistance program.
See Roadside Assistance Program
on page 13‑5.
Page 70 of 372
Black plate (24,1)Chevrolet Orlando Owner Manual - 2013 - CRC - 6/5/12
3-24 Seats and Restraints
New parts and repairs may be
necessary even if the safety belt
system was not being used at the
time of the crash.
Have the safety belt pretensioners
checked if the vehicle has been in a
crash, or if the airbag readiness light
stays on after you start the vehicle
or while you are driving. SeeAirbag
Readiness Light on page 5‑11.Airbag System
The vehicle has the following
airbags:
.A frontal airbag for the driver.
.A frontal airbag for the front
outboard passenger.
.A seat-mounted side impact
airbag for the driver.
.A seat-mounted side impact
airbag for the front outboard
passenger.
.A roof-rail airbag for the driver
and the passenger seated
directly behind the driver.
.A roof-rail airbag for the front
outboard passenger and the
passenger seated directly
behind the front outboard
passenger.
All vehicle airbags have the word
AIRBAG on the trim or on a label
near the deployment opening. For frontal airbags, the word
AIRBAG is on the center of the
steering wheel for the driver and on
the instrument panel for the front
outboard passenger.
For seat-mounted side impact
airbags, the word AIRBAG is on the
side of the seatback closest to
the door.
For roof-rail airbags, the word
AIRBAG is on the ceiling or trim.
Airbags are designed to supplement
the protection provided by safety
belts. Even though today's airbags
are also designed to help reduce
the risk of injury from the force of an
inflating bag, all airbags must inflate
very quickly to do their job.