air conditioning CHEVROLET PRIZM 1998 3.G Owners Manual
[x] Cancel search | Manufacturer: CHEVROLET, Model Year: 1998, Model line: PRIZM, Model: CHEVROLET PRIZM 1998 3.GPages: 364, PDF Size: 18.79 MB
Page 136 of 364
Downloaded from www.Manualslib.com manuals search engine Comfort Controls
With this system, you can control the heating and
ventilation in your vehicle.
If you have the air
conditioning option, you can also control cooling.
Your vehicle also has the flow-through ventilation
system described later in this section.
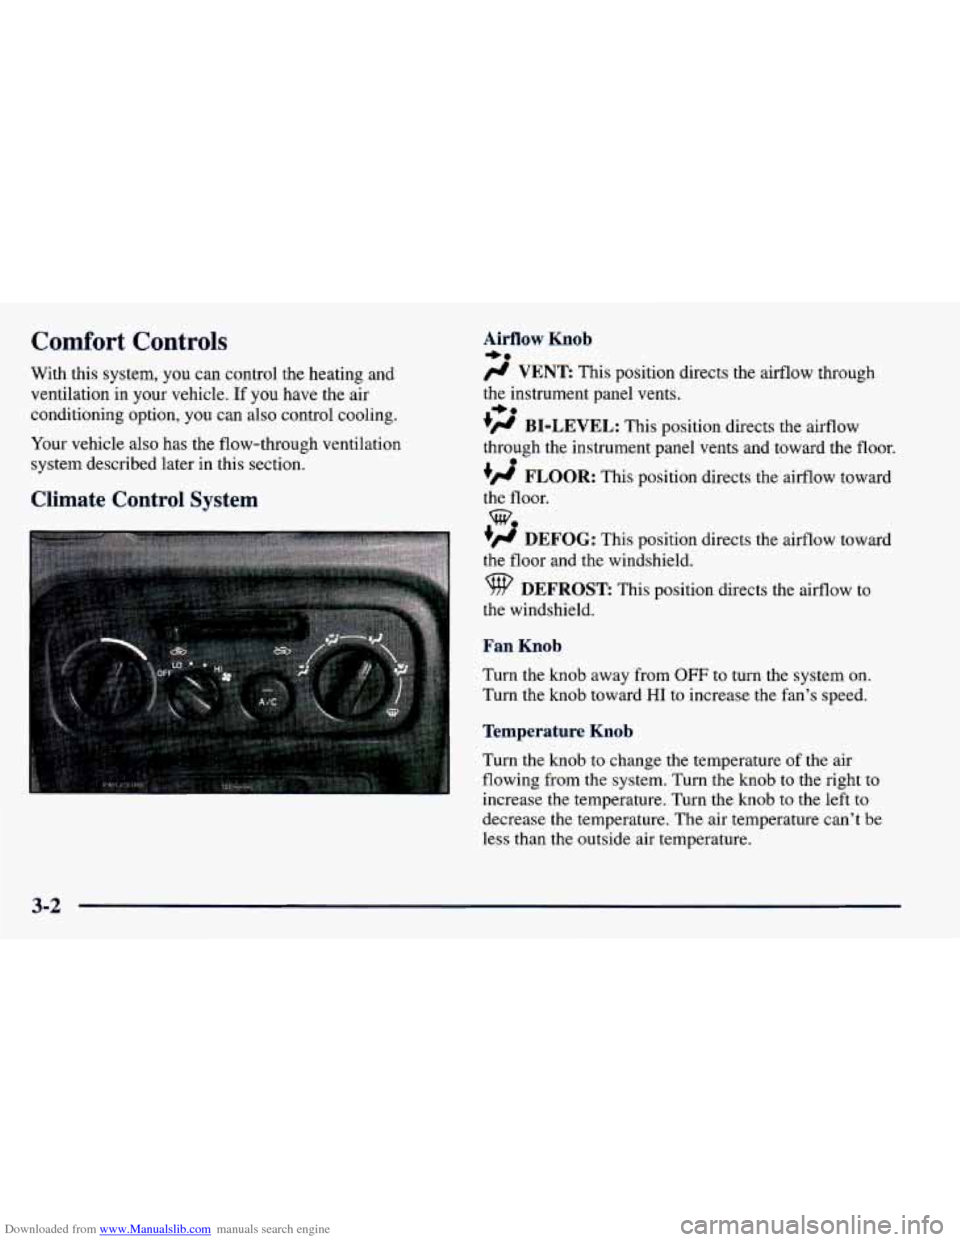
Climate Control System
Airflow Knob
/J VENT This position directs the airflow through
the instrument panel vents.
+’ BI-LEVEL: This position directs the airflow
through the instrument panel vents and toward the floor.
#’ FLOOR: This position directs the airflow toward
the floor.
+# DEFOG: This position directs the airflow toward
the floor and the windshield.
9 DEFROST: This position directs the airflow to
the windshield.
Fan Knob
Turn the knob away from OFF to turn the system on.
Turn the knob toward
HI to increase the fan’s speed.
Temperature Knob
Turn the knob to change the temperature of the air
flowing from the system. Turn the knob to the right to
increase the temperature. Turn the knob to the left
to
decrease the temperature. The air temperature can’t be
less than the outside
air temperature.
+e
+e
e
we
3-2
Page 137 of 364
Downloaded from www.Manualslib.com manuals search engine Air Intake Lever RECIRCULATE:
Choose this position to
recirculate the inside air through the comfort
control system.
outside air through the comfort control system.
CIRCULATE: Choose this position to circulate
Air Conditioner Controls (Option)
The air conditioning system uses the same controls as
described previously.
The function of each control is explained under
“Climate Control System” in this part. The incoming air
is cooled and dehumidified instead of being heated.
Push the NC button to change your comfort control
system from heating to air conditioning. A light will
come on when the air conditioning is
on. The NC
button can also control the humidity in your vehicle.
The air conditioner works best if
you keep your
windows closed. On very hot days, open the windows
just long enough for the hot air
to escape.
For normal cooling, push the A/C button and move the
air intake lever
to CIRCULATE for normal cooling. For faster cooling, move
the lever to RECIRCULATE.
Then move the airflow knob to VENT and turn the
temperature control knob to the left. Turn the fan knob
to HI.
On days when it is raining or the humidity is high,
follow these dehumidifying steps instead of the cooling
directions. It will help clean windows that are cloudy
with moisture.
Move the air intake lever to CIRCULATE and turn the
airflow knob to DEFROST. Turn the fan knob to
HI and
adjust the temperature knob to
a comfortable setting.
Heating
For the quickest results, move the air intake lever to
RECIRCULATE and the airflow knob to FLOOR.
Turn the temperature knob to the right for warmer air
and turn the fan knob toward
HI. You should switch
to CIRCULATE once in a while to avoid stale air
and cloudy windows. To prevent cold air from
blowing in, you may shut
off the outer dash vents by
using the thumbwheels.
3-3
Page 138 of 364
Downloaded from www.Manualslib.com manuals search engine Bi-Level
You may want to use bi-level heating on cool, but sunny
days. This setting directs outside air toward your body
and warmer air toward your feet.
Move the air intake lever to CIRCULATE and turn the
airflow knob
to BI-LEVEL. Turn the temperature knob
to the white area and the fan knob toward
HI.
Ventilation System
For mild outside temperatures, when very little heating
is required,
you can still direct outside air through
your vehicle.
Move the air intake lever to CIRCULATE and turn the
airflow knob
to VENT. Turn the temperature knob to a
comfortable setting and the fan knob toward
HI.
Airflow through the side vents is normal in all airflow
modes.
To optimize the effectiveness of your system in
FLOOR, DEFOG, or DEFROST modes, turn
the
outboard vent (shut-off) thumbwheels down to the
closed position.
Your vehicle's flow-through ventilation system
supplies outside air into the vehicle when it
is moving.
Outside air will also enter the vehicle when the heater or
the air conditioning fan is running and
the air intake
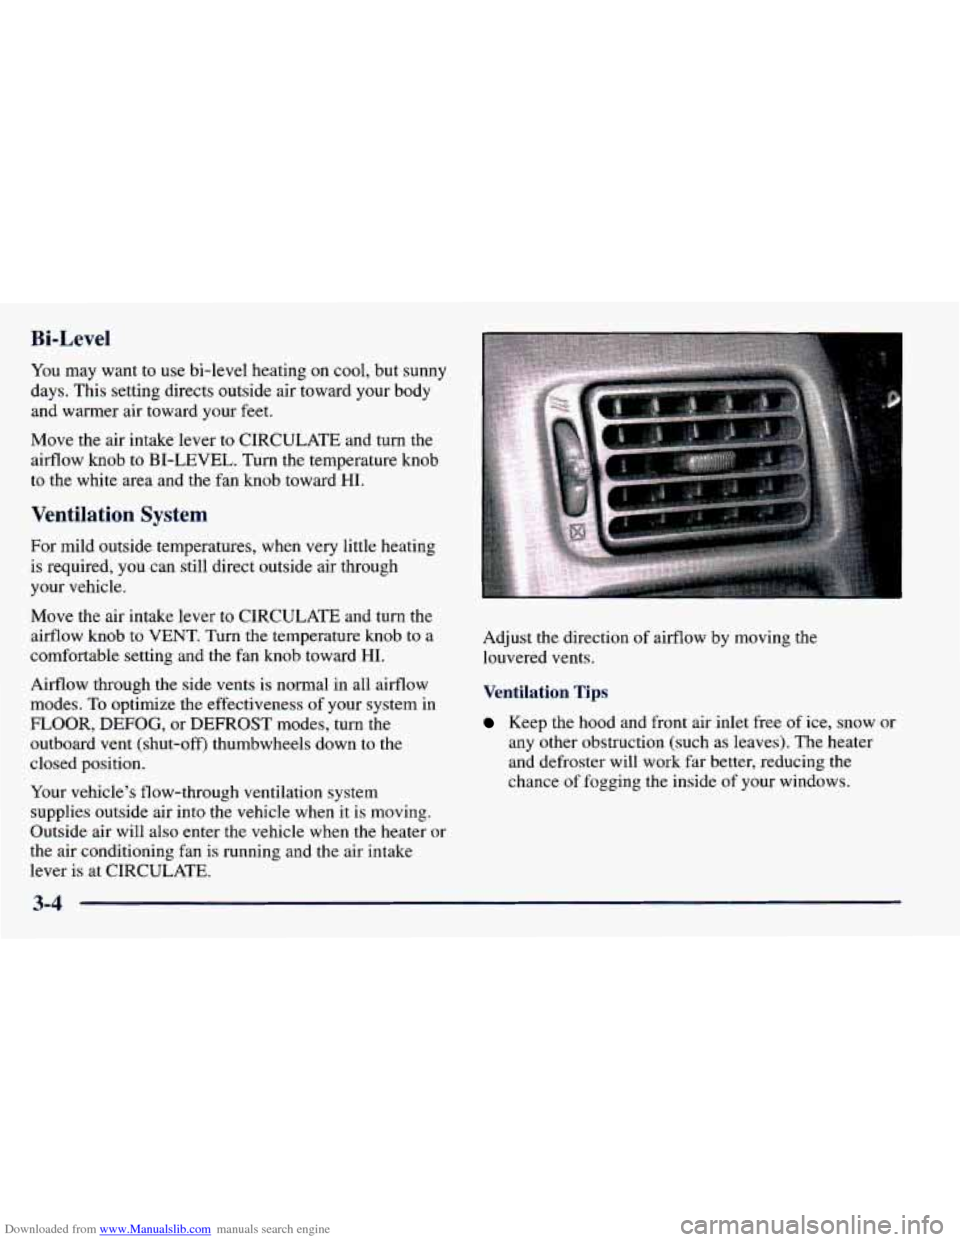
lever is at CIRCULATE. Adjust the direction
of airflow
by moving the
louvered vents.
Ventilation Tips
Keep the hood and front air inlet free of ice, snow or
any other obstruction (such as leaves). The heater
and defroster will work far better, reducing the
chance of fogging
the inside of your windows.
3-4
Page 227 of 364
Downloaded from www.Manualslib.com manuals search engine 0 Section 6 Service and Appearance Care
Here you will find information about the care of your vehicle. This section begins with service and fuel information,
and then
it shows how to check important fluid and lubricant levels. There is also technical information about your
vehicle, and
a part devoted to its appearance care.
6-2
6-
3
6-5
6-6
6-
8
6-9
6-12
6-16
6-18
6-2
1
6-22 6-23
6-25
6-25
6-26
6-27
Service
Fuel
Fuels in Foreign Countries
Filling Your Tank
Filling a Portable
Fuel Container
Checking Things Under the Hood
Engine Oil
Air Cleaner
Automatic Transaxle Fluid
Manual Transaxle Fluid
Hydraulic Clutch
Engine Coolant
Radiator Pressure Cap
Thermostat Power Steering Fluid
Windshield Washer Fluid
6-28
6-32
6-33
6-37
6-44
6-45
6-47
6-47
6-48
6-53
6-53
6-5
8
6-59 6-60
Brakes
Battery
Bulb Replacement
Tires
Appearance Care
Cleaning the Inside
of Your Vehicle
Cleaning the Built-in Child Restraint
Care of Safety Belts and Built-in Child
Restraint Harness
Cleaning the Outside of Your Vehicle
Vehicle Identification Number
(VIN)
Electrical System
Replacement Bulbs
Capacities and Specifications
Air Conditioning Refrigerants
Page 283 of 364
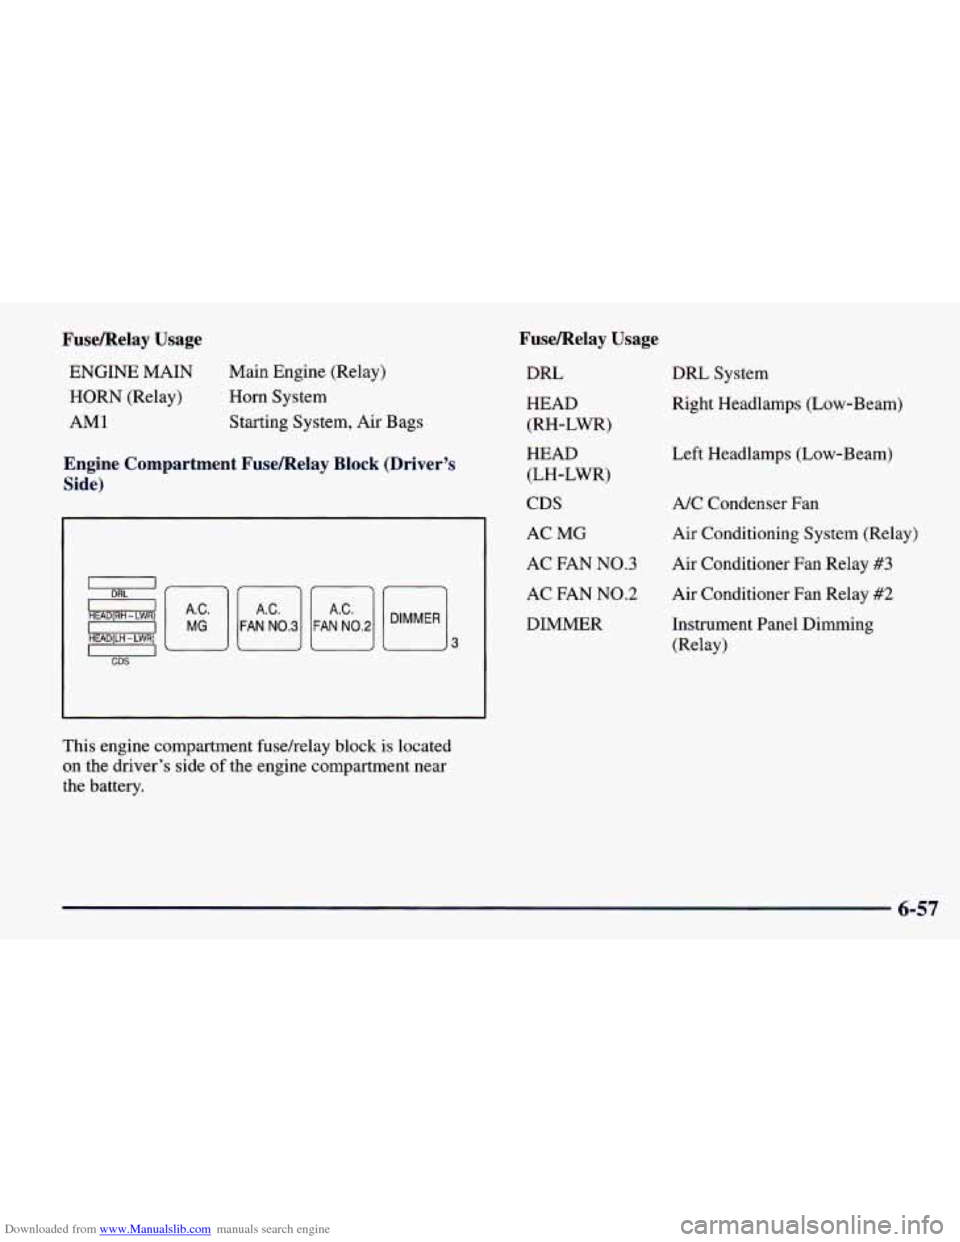
Downloaded from www.Manualslib.com manuals search engine Fusemelay Usage
ENGINE MAIN
HORN (Relay)
AM1 Main Engine (Relay)
Horn System
Starting System, Air Bags
Engine Compartment Fusemelay Block (Driver’s
Side)
-
e5 HEAD(RH - LWR)
0
0
HEAD(LH -LWR)
CDS Elm FAN N0.3 FAN N0.2 El3
DIMMER
This engine compartment fusehelay block is located
on the driver’s side of the engine compartment near
the battery.
Fusemelay Usage
DRL
HEAD
(RH-LWR)
HEAD (LH-LWR)
CDS
AC
MG
AC FAN N0.3
AC FAN
N0.2
DIMMER DRL System
Right Headlamps (Low-Beam)
Left Headlamps (Low-Beam)
A/C Condenser Fan
Air Conditioning System (Relay)
Air Conditioner Fan Relay
#3
Air Conditioner Fan Relay #2
Instrument Panel Dimming
(Relay)
6-57
Page 284 of 364
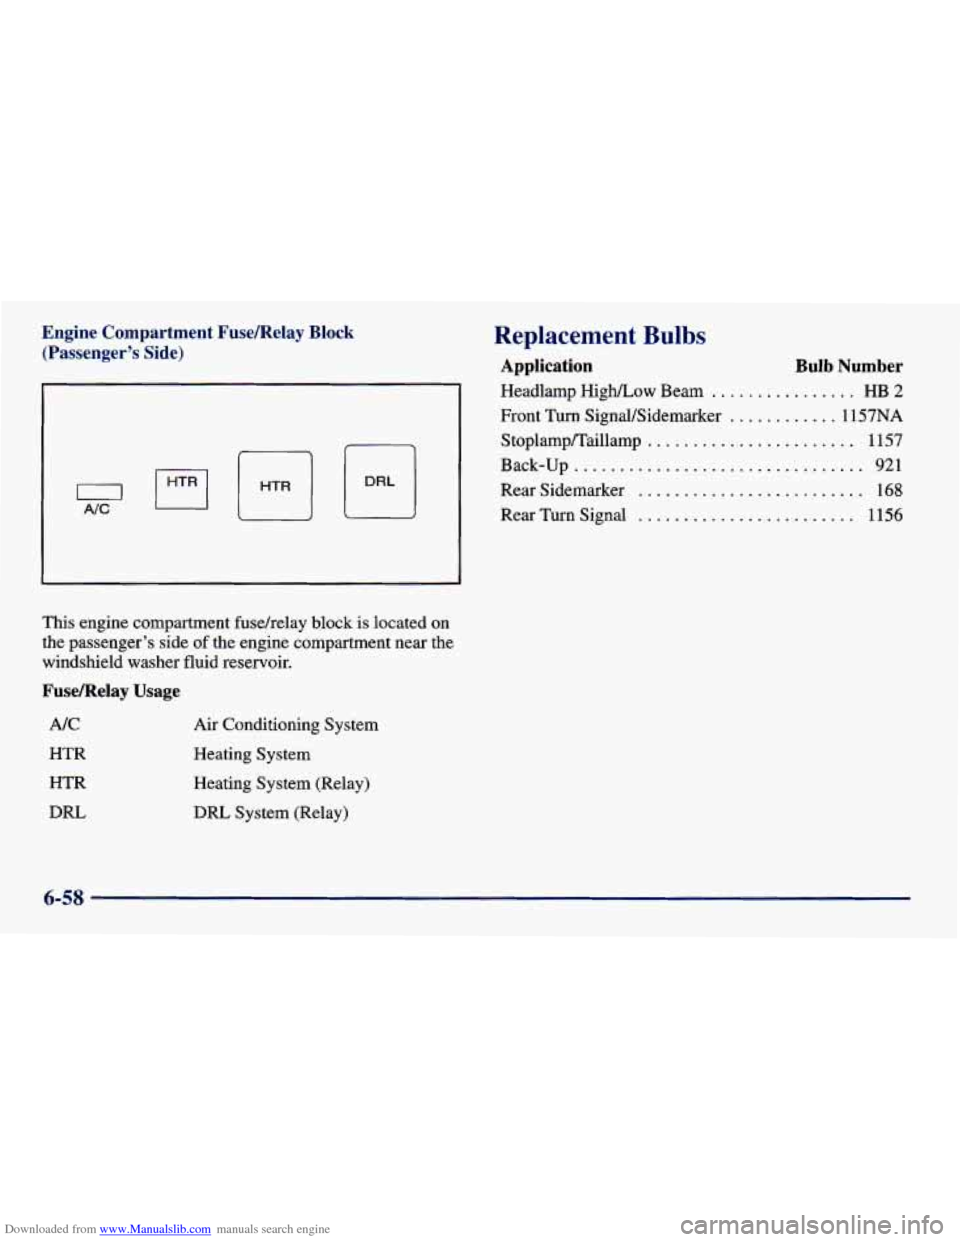
Downloaded from www.Manualslib.com manuals search engine Engine Compartment Fusemelay Block (Passenger's Side)
n
This engine compartment fusehelay block is located on
the passenger's side
of the engine compartment near the
windshield washer fluid reservoir.
Fusemelay Usage
NC
HTR
HTR
DRL Air Conditioning System
Heating System
Heating System (Relay)
DRL System (Relay)
Replacement Bulbs
Headlamp High/Low Beam ................ HB 2
Front Turn SignaVSidemarker ............ 1157NA
Application Bulb Number
Stoplamp/"aillamp ....................... 1157
Back-up
................................ 921
Rear Sidemarker ......................... 168
Rear Turn Signal
........................ 1156
6-58
Page 285 of 364
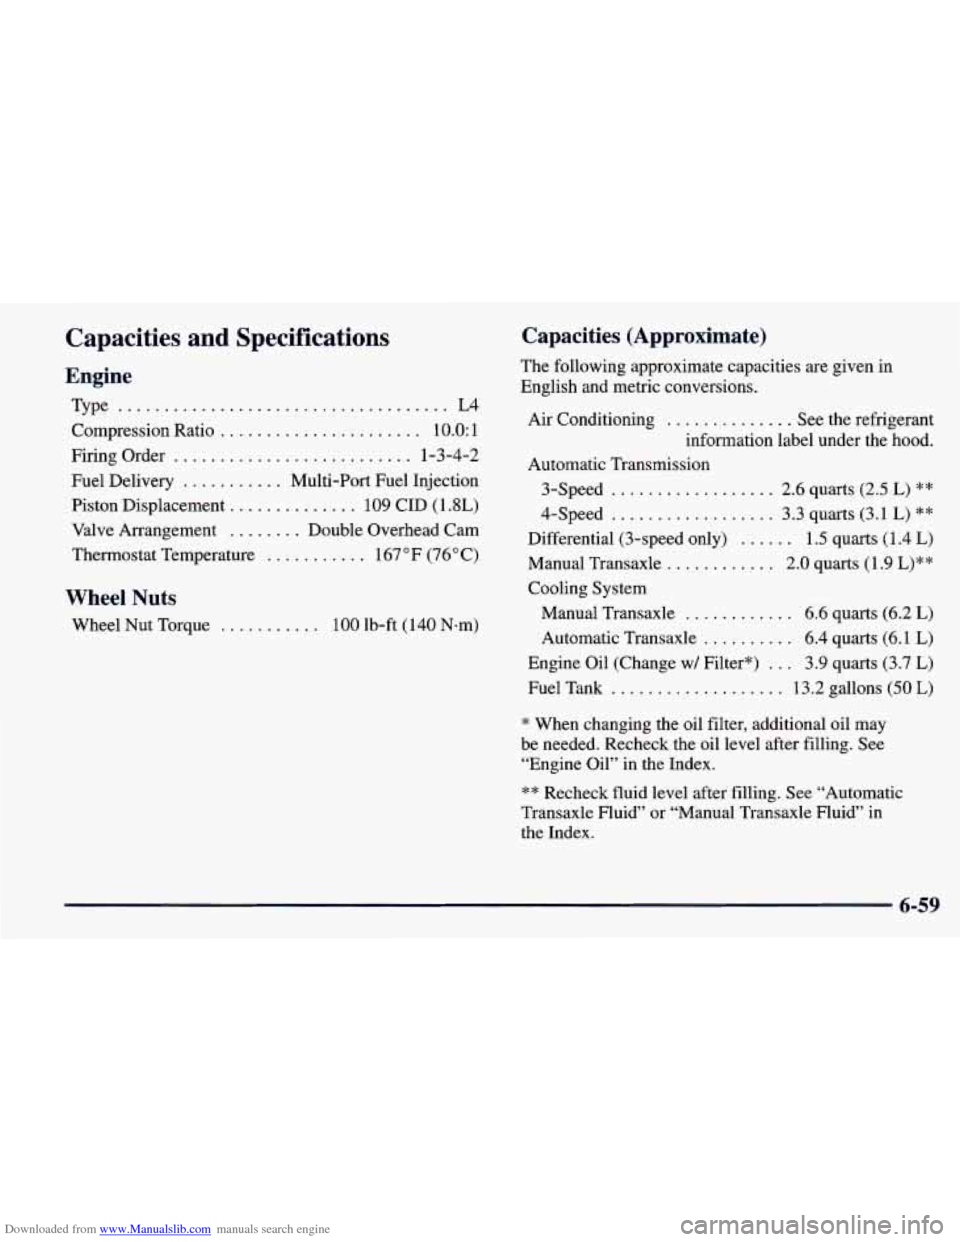
Downloaded from www.Manualslib.com manuals search engine Capacities and Specifications
Engine
Type .................................... L4
Compression Ratio ...................... 10.0: 1
Firing Order
.......................... 1-3-4-2
Fuel Delivery
........... Multi-Port Fuel Injection
Piston Displacement
.............. 109 CID (1.8L)
Valve Arrangement
........ Double Overhead Cam
Thermostat Temperature
........... 167°F (76°C)
Wheel Nuts
Wheel Nut Torque ........... 100 lb-ft (140 Nem)
Capacities (Approximate)
The following approximate capacities are given in
English and metric conversions.
Air Conditioning
.............. See the refrigerant
information label under the hood.
Automatic Transmission
3-Speed
.................. 2.6 quarts (2.5 L) **
4-Speed .................. 3.3 quarts (3.1 L) **
Differential (3-speed only) ...... 1.5 quarts (1.4 L)
Manual Transaxle ............ 2.0 quarts (1.9 L)**
Cooling System
Manual Transaxle
.......... 6.6 quarts (6.2 L)
Automatic Transaxle .......... 6.4 quarts (6.1 L)
Fuel Tank ................... 13.2 gallons (50 L)
Engine Oil (Change w/ Filter*)
... 3.9 quarts (3.7 L)
* When changing the oil filter, additional oil may
be needed. Recheck the oil level after filling. See “Engine Oil” in the Index.
** Recheck fluid level after filling. See “Automatic
Transaxle Fluid” or “Manual Transaxle Fluid”
in
the Index.
6-59
Page 286 of 364
Downloaded from www.Manualslib.com manuals search engine Vehicle Dimensions
Wheelbase ................ .97.1 inches (247 cm)
Length
................... 175.0 inches (445 cm)
Width
.................... .66.7 inches (169 cm)
Height
.................... .53.5 inches (1 36 cm)
Tread Front
................... .57.9 inches (147 cm)
Rear
.................... -57.5 inches (146 cm)
Air Conditioning Refrigerants
Not all air conditioning refrigerants are the same.
If the air conditioning system
in your vehicle needs
refrigerant, be sure the proper refrigerant
is used. If
you’re not sure, ask your dealer.
Normal Maintenance
Replacement Parts
Air Cleaner Filter .......... GM Part No. 94853522
Battery
............................... .35-60
Engine Oil Filter .......... GM Part No. 25014441
Fuel Filter
................ GM Part No. 94854620
PCV Valve
............... GM Part No. 94853556
Radiator Pressure Cap
........... 15 psi (105 kPa)
Spark Plug*
Denso K16TR11 ........ 0.043 inch (1.1 mm) gap
NGK BKRSEKB-11
..... 0.043 inch (1.1 mm) gap
*Your engine is fitted
with twin ground electrode spark
plugs. Use
only twin ground electrode spark plugs for
better engine performance.
6-60
Page 328 of 364
Downloaded from www.Manualslib.com manuals search engine Part C: Periodic Maintenance
Inspections
Listed below are inspections and services which should
be performed at least twice a year (for instance, each
spring and fall).
You should let your dealer’s service
department or other qualified service center do these
jobs. Make sure any necessary repairs are completed
at once.
Proper procedures to perform these services may be
found
in a service manual. See “Service and Owner
Publications” in the Index.
Steering, Suspension and Front Drive
Axle Boot and Seal Inspection
Inspect the front and rear suspension and steering
system for damaged, loose or missing parts, signs of
wear or lack
of lubrication. Inspect the power steering
lines and hoses for proper hook-up, binding, leaks,
cracks, chafing, etc. Clean and then inspect the drive
axle boot seals for damage. tears or leakage. Replace
seals if necessary.
Exhaust System Inspection
Inspect the complete exhaust system. Inspect the body
near the exhaust system.
Look for broken, damaged,
missing or out-of-position parts
as well as open seams,
holes, loose connections or other conditions which
could cause a heat build-up
in the floor pan or could let
exhaust fumes into the vehicle. See “Engine Exhaust’’
in the Index.
Engine Cooling System Inspection
Inspect the hoses and have them replaced if they are
cracked, swollen or deteriorated. Inspect all pipes,
fittings and clamps; replace as needed. Clean the outside
of the radiator and air conditioning condenser.
To help
ensure proper operation,
a pressure test of the cooling
system and pressure cap is recommended at least once
a year.
7-42
Page 349 of 364
Downloaded from www.Manualslib.com manuals search engine 0 Section 9 Index
Adding Equipment to the Outside of Your Vehicle ..... 6-3
AirBag
....................................... 1-21
How Does it Restrain .......................... 1-27
How it Works ................................ 1-24
Location
.................................... 1-24
Readiness Light
......................... 1.23. 2.46
Servicing
................................... 1-29
What Makes
it Inflate .......................... 1-26
What Will You See After it Inflates
............... 1-27
When Should it Inflate
......................... 1-26
Aircleaner
............................... 6.16. 6.60
Air Conditioning Refrigerants
................ 6.59. 6.60
Alignment and Balance. Tire
...................... 6-42
Antenna
...................................... 3-17
Antifreeze
..................................... 6-23
Anti-Lock Brake System Warning Light
................ 2.48. 4.7
Brakes
...................................... 4-7
Appearancecare
............................... 6-44
Appearance Care Materials
....................... 6-52
Arbitration Program
.............................. 8-9
Ashtrays
...................................... 2-38
Audio Systems
.................................. 3-6
Automatic Light Control
......................... 2-33
Automatic Transaxle Fluid
....................................... 6-18
Air Conditioning
................................ 3-3
Fluid Level Check
............................ 7-38
Operation
................................... 2-14
Park Mechanism Check
........................ 7-41
Starting Your Engine
.......................... 2-13
Backing Up While Driving a Trailer
............... 4-35
Back-up Lamp Bulb Replacement
................. 6-36
Battery
....................................... 6-32
Jump Starting ................................. 5-3
Replacement. Keyless Entry
..................... 2-8
Warnings
................................ 5.3. 5.5
BBB Auto Line ................................. 8-9
Better Business Bureau Mediation
................... 8-9
Blizzard
...................................... 4-26
Brake Adjustment
.................................. 6-32
Fluid
....................................... 6-28
Master Cylinder
.............................. 6-28
Parking
..................................... 2-20
PedalTravel
................................. 6-31
Replacing System Parts
........................ 6-32
System Warning Light
......................... 2-47
Trailer
...................................... 4-34
Transaxle Shift Interlock
.................. 2.22. 7.40
Transaxle Shift Interlock Check
.................. 7-40
Wear
....................................... 6-31
9-1