air conditioning CHEVROLET S10 1993 2.G Owners Manual
[x] Cancel search | Manufacturer: CHEVROLET, Model Year: 1993, Model line: S10, Model: CHEVROLET S10 1993 2.GPages: 356, PDF Size: 20.85 MB
Page 103 of 356
Downloaded from www.Manualslib.com manuals search engine Inside Mirror
Press the tab under the mirror to reduce glare from headlights behind you.
If your vehicle has optio.nal map lights, they will automatically \
come on for
approximately
15 seconds when either front door is opened, or until the
ignition is turned to
RUN.
You can also turn the map lights on and off by pressing the switch near
each light. However, the ignition must be turned to
RUN for the map lights to
come on.
Outside Mirrors
I
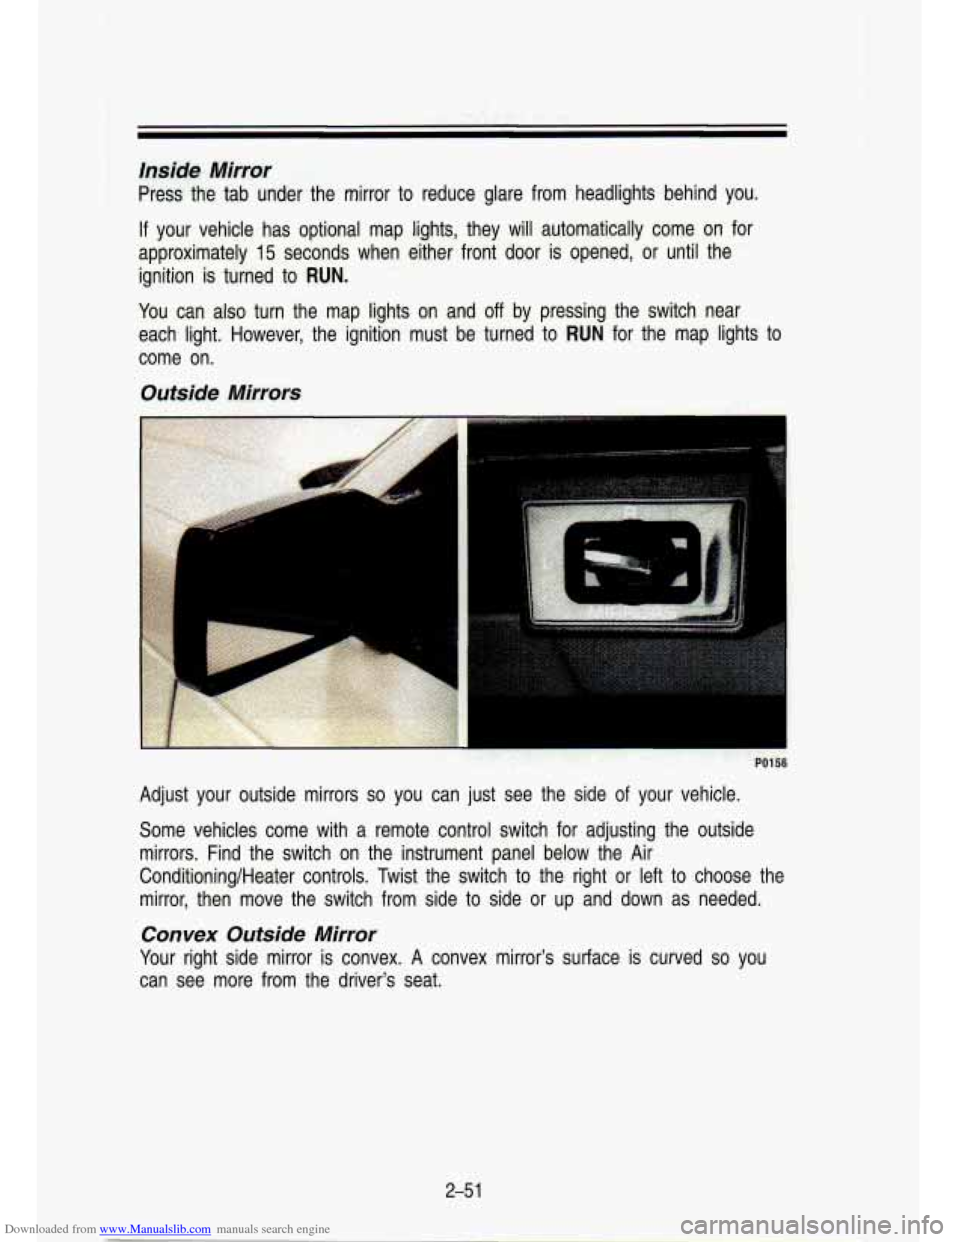
Adjust your outside mirrors so you can just see the side of your vehicle.
Some vehicles come with a remote control switch for adjusting the o\
utside
mirrors. Find the switch on the instrument panel below the Air\
Conditioning/Heater controls. Twist the switch to the right or left to choose the
mirror, then move the switch from side to side or up and down as needed.
Convex Outside Mirror
Your right side mirror is convex. A convex mirror's surface is curved so you
can see more from the driver's seat.
2-5 1
Page 129 of 356
Downloaded from www.Manualslib.com manuals search engine Comforf Controls & Audio Systems
In this part you’ll find out how to operate the comfort contro\
l systems and
audio systems offered with your vehicle. Be sure to read about the particular
system supplied with your vehicle.
For explanation of vehicle
symbols, refer to “Vehicle Symbols” in
Section
0.
Comfort Controls ..............I..........I....I..........................I.......r......\
........................... 3-3
Flow-Through Ventilation System
..................................................................... 3-3
Heating System
.... -..- ........................................................................\
.................. 3-5
Heating/Air Conditioning System
............................................*.......,-.. ........ - ...... 3-6
Engine Block Heater
........................................................................\
..................... 3-7
Audio Systems
..................................................I....I................\
I.I..I.I...................I.I. 3-7
FM Stereo ........................................................................\
.................................. 3-8 .
AM ........ -...... ........ =....... ........ ...... ...... ........ ..... ...... .......... . ....... ........... .............. . .... .3-8
AM Stereo
................... ........................ ............................................................. 3-8
How to Operate Your ETR* AM Radio
..... .................... -.. ............ .......... 3-9
How to Operate
Your ETRB AM-FM
Stereo Audio System
........................................................................\
........... 3-11
How to Operate Your ETR@ AM-FM
Stereo Audio Cassette System
................................................................... 3-1 3
3-1
Page 131 of 356
Downloaded from www.Manualslib.com manuals search engine Comfort Controls
Flow-Through Ventilatr'on System
I
KO502
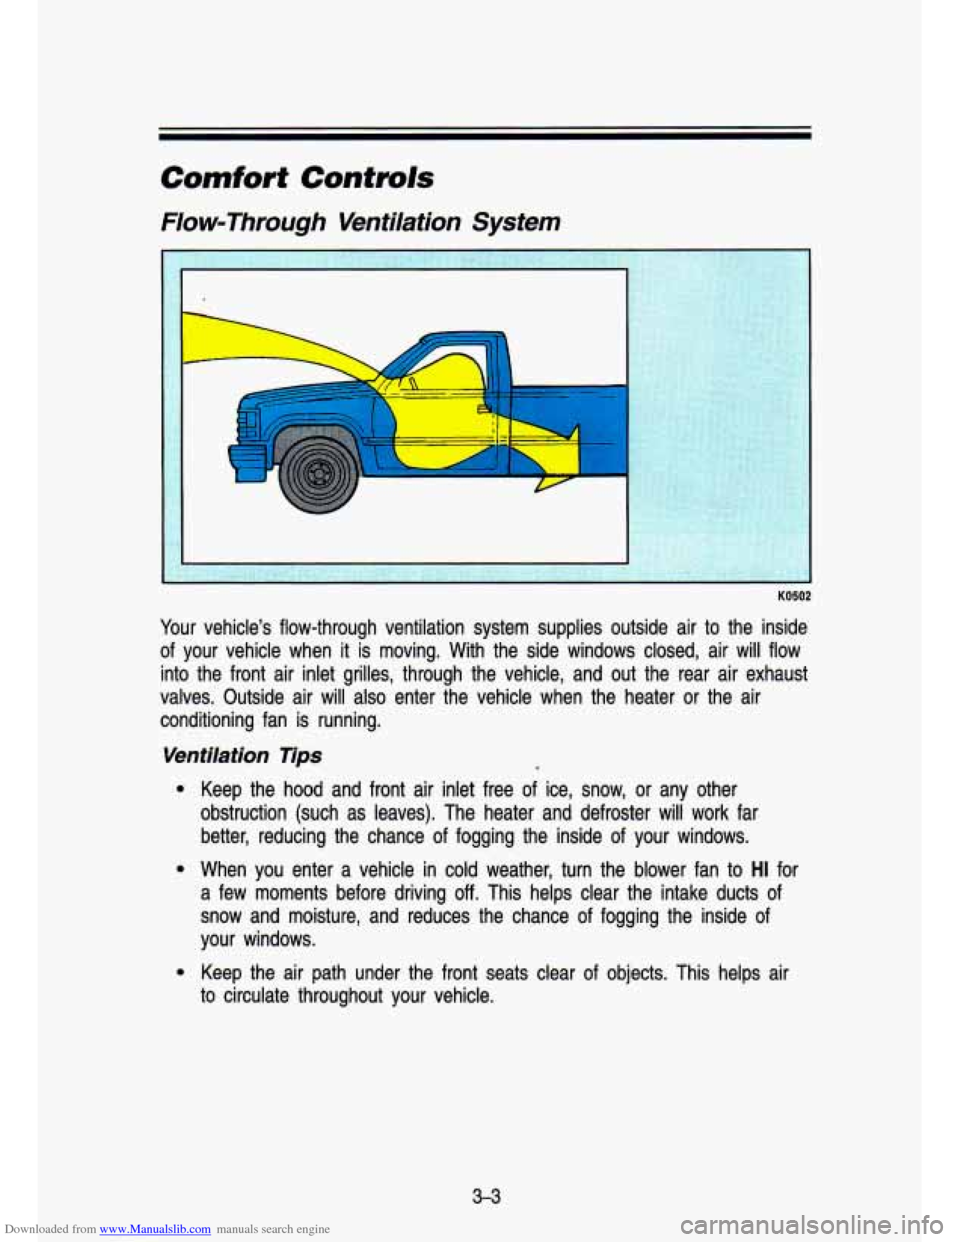
Your vehicle's flow-through ventilation system supplies outside air to\
the inside
of your vehicle when it
is moving. With the side windows closed, air will flow
into the front air inlet grilles, through the vehicle, and out\
the rear air exhaust
valves. Outside air will also enter the vehicle when the heate\
r or the air
conditioning fan is running.
Ventilation Tips
e
e Keep the hood and front air inlet free of ice, snow, or any other
obstruction (such as leaves). The heater and defroster will w\
ork far better, reducing the chance of fogging the inside of your wind\
ows.
When you enter a vehicle in cold weather, turn the blower fan
to HI for
a few moments before driving off. This helps clear the intake ducts of
snow and moisture, and reduces the chance of fogging the inside of
your windows.
Keep the air path under the front seats clear of objects. This helps air
to circulate throughout your vehicle.
3-3
Page 132 of 356
Downloaded from www.Manualslib.com manuals search engine Comfort Controls & Audio Systems
Air Vents
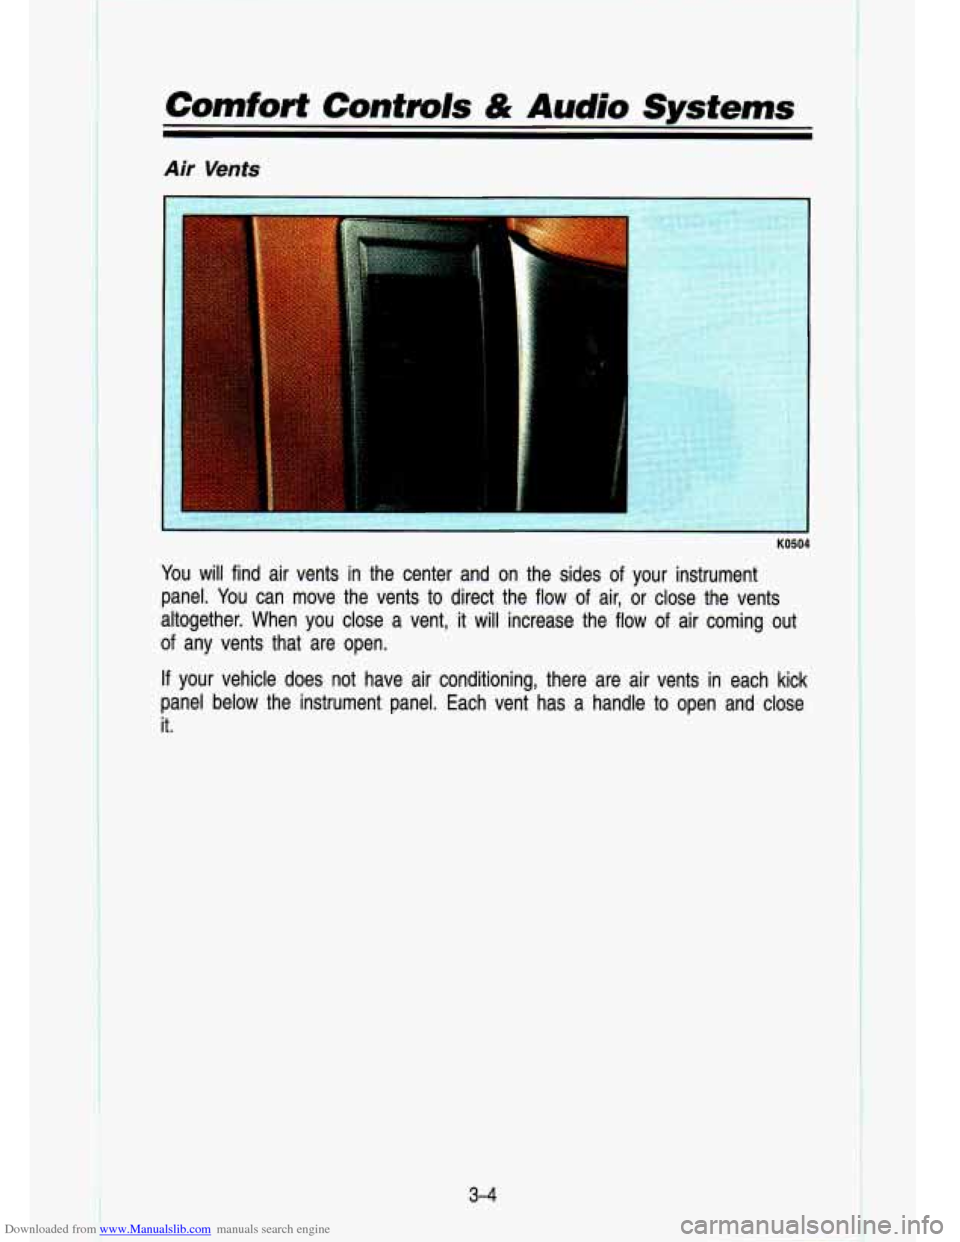
You will find air vents in the center and on the sides of your instrument
panel. You can move the vents to direct the flow of air, or close the vents
altogether. When
you close a vent, it will increase the flow of air coming out
of any vents that are open.
If your vehicle does not have air conditioning, there are air vents in each kick
panel below the instrument panel. Each vent has
a handle to open and close
it.
3-4
t
I
Page 134 of 356
Downloaded from www.Manualslib.com manuals search engine Comforf Controls & Audio Systems
HeatingAir Conditioning System
K05ur
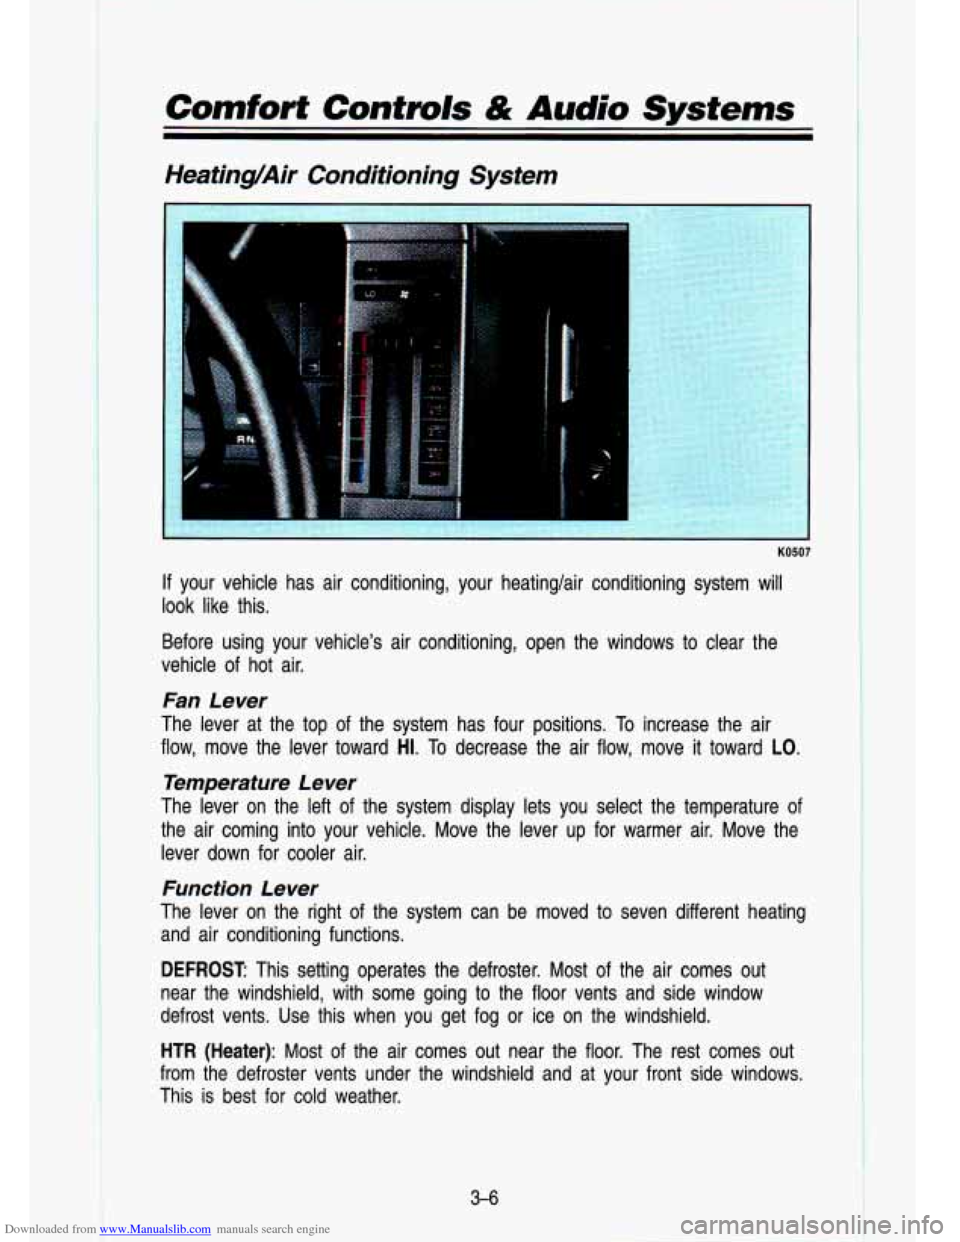
If your vehicle has air conditioning, your heatinglair conditioning \
system will
look like this.
Before using your vehicle’s air conditioning, open the window\
s to clear the
vehicle of hot air.
Fan Lever
The lever at the top of the system has four positions. To increase the air
flow, move the lever toward
H1. To decrease the air flow, move it toward LO.
Temperature Lever
The lever on the left of the system display lets you select the temperature of
the air coming into your vehicle. Move the lever up for warmer air. Move the
lever down for cooler air.
Function Lever
The lever on the right of the system can be moved to seven different heating
and air conditioning functions.
DEFROST This setting operates the defroster. Most of the air comes out
near the windshield, with some going to the floor vents and s\
ide window
defrost vents. Use this when you get fog or ice on the windshield.
HTR (Heater): Most of the air comes out near the floor. The rest comes out
from the defroster vents under the windshield and at your front
side windows.
This is best for cold weather.
3-6
Page 278 of 356
Downloaded from www.Manualslib.com manuals search engine . ..
Service & Appearance Care
To Check Brake Fluid:
You can check the brake fluid without taking off the cap. Just look at the
windows on the brake fluid reservoir. The fluid levels should be above
MIN. If
they aren’t, have your brake system checked to see if there is a leak.
After work is done on the brake hydraulic system, make sure t\
he levels are above
MIN and below the top of each window.
What To Add
When you do need brake fluid, use only DOT-3 brake fluid-such as Delco
Supreme
11 @ (GM Part No. 1052535). Use new brake fluid from a sealed
container only.
Replacing Brake System Parts
The braking system on a modern vehicle is complex. Its many parts have to
be of top quality and work well together if the vehicle is to have really good
braking. Vehicles we design and test have top-quality GM brake parts in
them, as your vehicle does when
it is new. When you replace parts of your
braking system-for example, when your brake linings wear down and you
have to have new ones put in-be sure you get new genuine GM
replacement parts.
If you don’t, your brakes may no longer work properly. For
example,
if someone puts in brake linings that are wrong for your vehicle, the
balance between your front and rear brakes can change, for the\
worse. The braking performance you’ve come
to expect can change in many other ways
if someone puts in the wrong replacement brake parts.
Fluid Leak Check
After the vehicle has been parked for a while, inspect the su\
rface under the
vehicle for water, oil, fuel or other fluids. Water dripping from the air
conditioning system after
it has been used is normal. If you notice fuel leaks
or fumes, the causes should be found and corrected at once.
6-30
Page 283 of 356
Downloaded from www.Manualslib.com manuals search engine Windshield Wiper Blade Inserts
i
.. i. KO637 .. .,' :-, ;iyy ?-is;+;.-, &!!f$i& . l'jf:. j<-:q;* j';gi3f47!:;I' b,(..;',$< t&..YT:i;; ;.l:z~ .''! ..' :.. y.?;i'!g.tyz , . ..
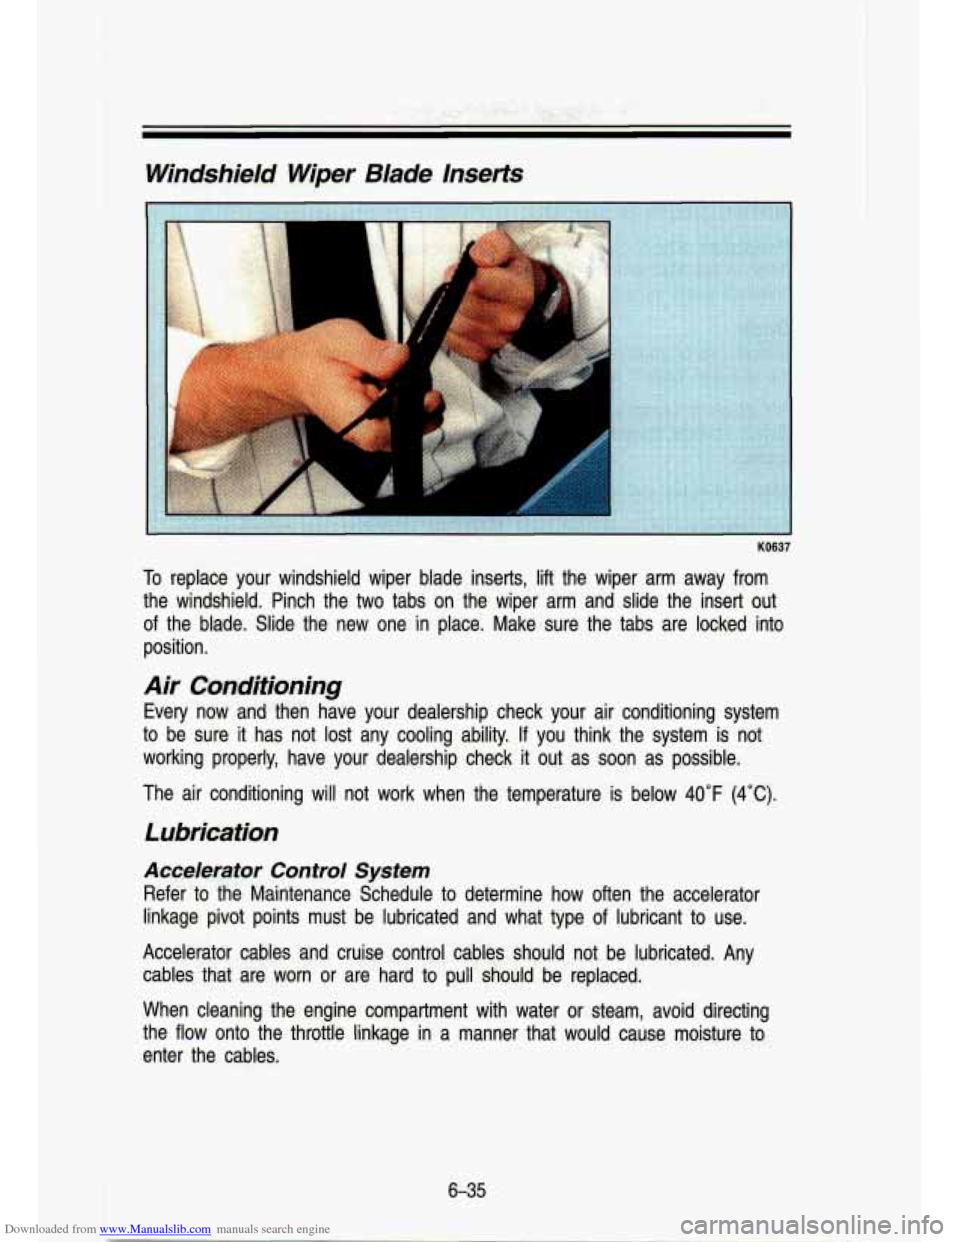
o rep ace your wlndshleld wiper blade inserts, lift the wiper ar\
m away from
the windshield. Pinch the
two tabs on the wiper arm and slide the insert out
of the bl'ade. Slide the new one in place. Make sure the tabs are locked into
position.
Air Conditioning
Every now and then have your dealership check your alr conditi\
oning system
to be sure it has not lost any cooling ability. If you think the system is not
working prope'rly, have your dealership check
it out as soon as possible.
The air conditioning will not work when the temperature is below
40°F (4°C).
Lubrication
Accelerator Control System
Refer to the Maintenance Schedule to determine how often the accelerator
linkage pivot points must be lubricated and what type
of lubricant to use.
Accelerator cables and cruise control cables should not be lubr\
icated. Any
cables that are worn or are hard
to pull should be replaced.
When cleaning the engine compartment with water or steam, avoid\
directing
the flow onto the throffle linkage in a manner that would cause moisture
to
enter the cables.
Page 313 of 356
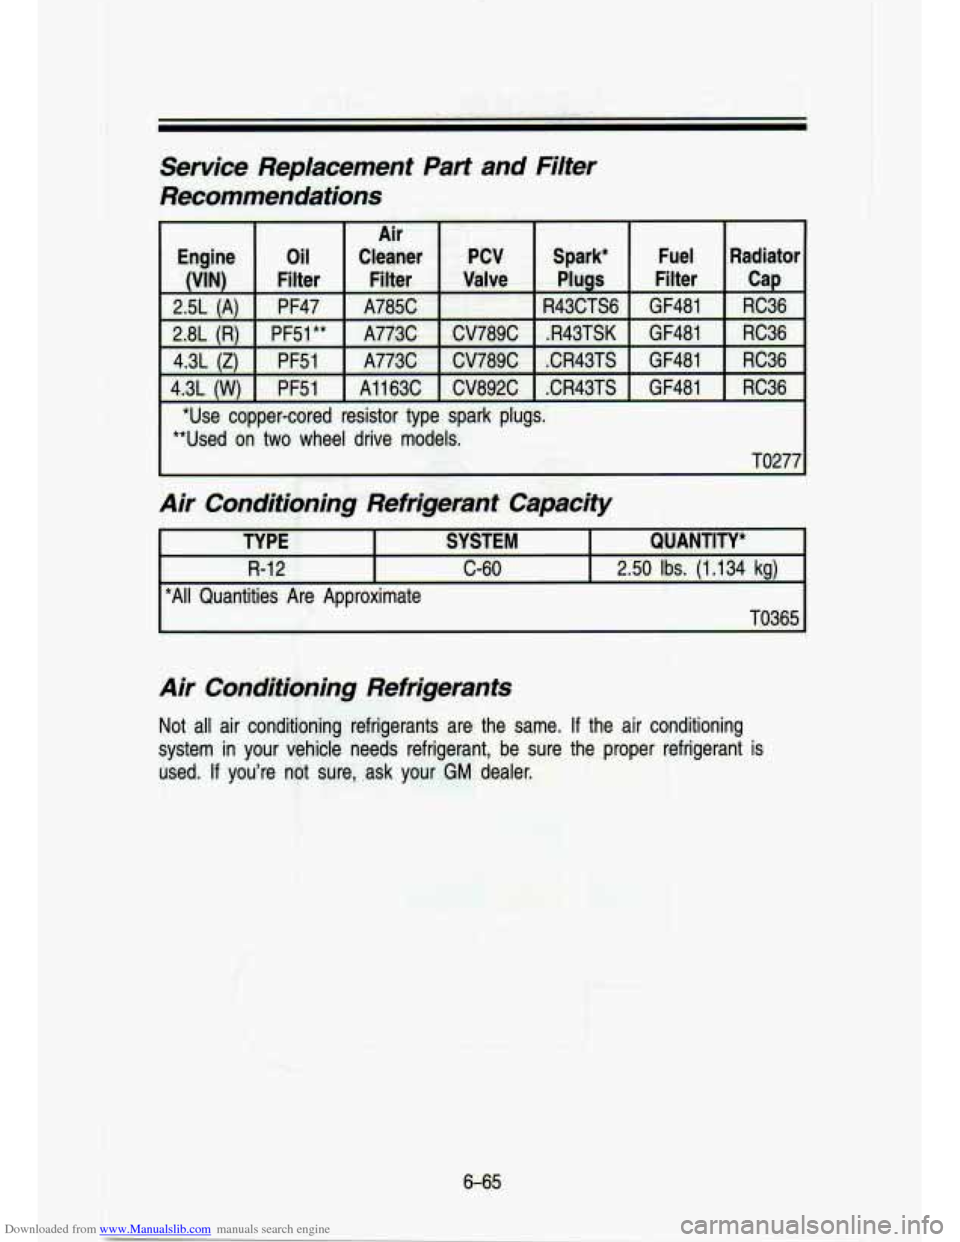
Downloaded from www.Manualslib.com manuals search engine Service Replacement Part an'd Filter
Recommendations
2.8L (R)
4.3L
(Z)
4.3L CW)
Oil Cleaner PCV
Filter Filter
Valve
;
A773C CV78@C
PF51
I A1163C I CV892C
PF51 I A1163C I CV892C
A773C CV78@C Air
Oil Cleaner PCV Spark*
.R43TSK
I GF481
Spark*
.R43TSK I GF481
.CR43TS
I GF481
.CR43TS
I GF481
1
1
Radsiator
RC36
Radsiator
RC36
RC36
I RC36 I
*Use copper-cored resistor type spark plugs.
**Used on two wheel drive m!odels. TO277
Air Conditioning Refrigerant Capacity
TYPE SYSTEM WANTITY'
R-12 C-60 2.50 Ibs. (1.134 kg)
*All Quantities Are Approximate
TO365
Air Conditioning Refrigerants
Not all air conditio'ning refrigerants are the same. If the air conditioning
system in your vehimcle needs lefrigerant, be sure
the pro'per refriaerant is
used. If you're not we, .ask your GM dealer.
6-65
. ."
Page 315 of 356
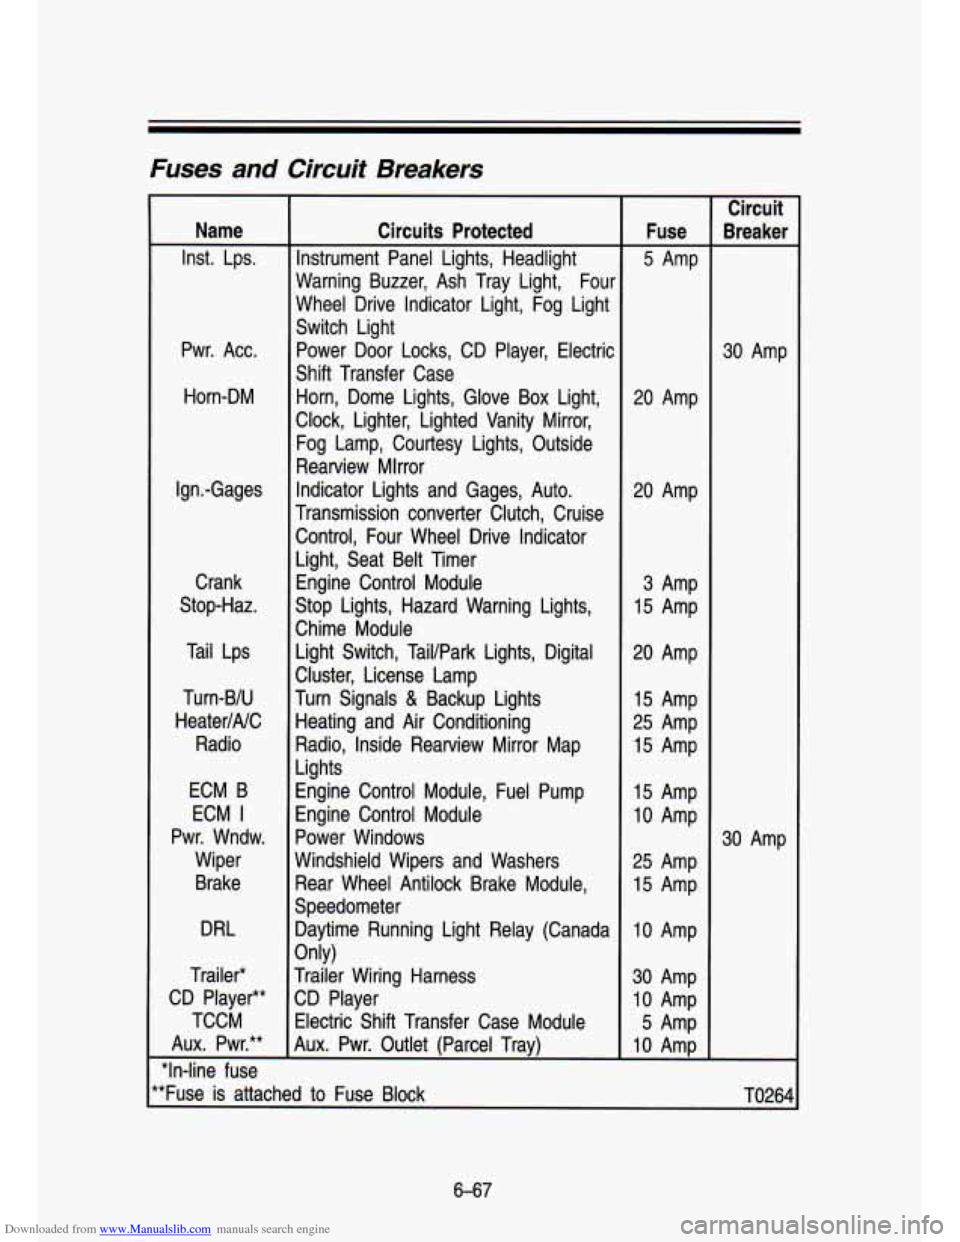
Downloaded from www.Manualslib.com manuals search engine Fuses and Circuit Breakers
Name
Inst. Lps.
Pwr. Acc. Horn-DM
Ign.-Gages Crank
Stop-Haz.
Tail Lps
Turn-BIU
HeaterINC Radio
ECM B
ECM
I
Pwr. Wndw. Wiper
Brake
DRL
Trailer*
CD Player**
TCCM
Aux. Pwr.**
"In-line fuse Circuits Protected
Instrument Panel Lights, Headlight
Warning Buzzer, Ash Tray Light, Four
Wheel Drive Indicator Light, Fog Light
Switch Light Power Door Locks, CD Player, Electric
Shift Transfer Case Horn, Dome Lights, Glove Box Light,
Clock, Lighter, Lighted Vanity Mirror,
Fog Lamp, Courtesy Lights, Outside
Rearview Mlrror
Indicator Lights and Gages, Auto.
Transmission converter Clutch, Cruise Control, Four Wheel Drive Indicator
Light, Seat Belt Timer Engine Control Module
Stop Lights, Hazard Warning Lights,
Chime Module Light Switch, Tail/Park Lights, Digital
Cluster, License Lamp
Turn Signals
& Backup Lights
Heating and Air Conditioning
Radio, Inside Rearview Mirror Map
Lights
Engine Control Module, Fuel Pump
Engine Control Module
Power Windows
Windshield Wipers and Washers Rear Wheel Antilock Brake Module,
Speedometer Daytime Running Light Relay (Canada
Trailer Wiring Harness
CD Player
Electric Shift Transfer Case Module
Aux. Pwr. Outlet (Parcel Trav)
Only) Fuse
5 Amp
20 Amp
20 Amp
3 Amp
15 Amp
20 Amp 15 Amp
25 Amp
15 Amp
15 Amp
10 Amp
25 Amp
15 Amp
10 Amp
30 Amp
10 Amp
5 Amp
10 AmD Circuit
kea ker
30 Amp
30 Amp
'*Fuse is attached to Fuse Block
TO264
6-67
Page 324 of 356
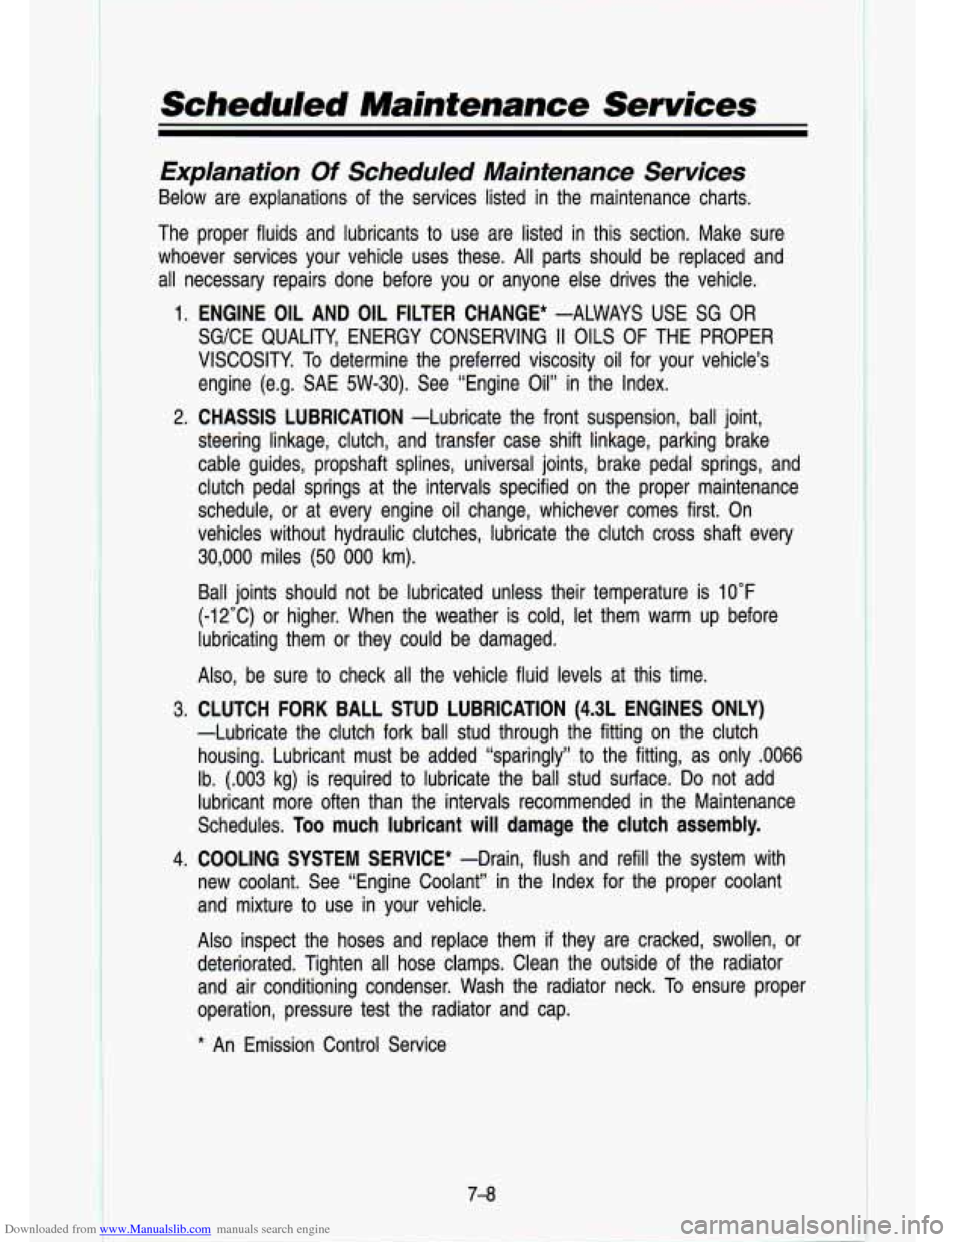
Downloaded from www.Manualslib.com manuals search engine Scheduled Maintenance Services
Explanation Of Scheduled Maintenance Services
Below are explanations of the services listed in the maintenance charts.
The proper fluids and lubricants to use are listed in this se\
ction. Make sure whoever services your vehicle uses these. All parts should be \
replaced and all necessary repairs done before you or anyone else drives th\
e vehicle.
1. ENGINE OIL AND OIL FILTER CHANGE* -ALWAYS USE SG OR SG/CE QUALITY, ENERGY CONSERVING
II OILS OF THE PROPER
VISCOSITY. To determine the preferred viscosity oil for your vehicle’s
engine (e.g. SAE 5W-30). See “Engine Oil” in the Index.\
2. CHASSIS LUBRICATION -Lubricate the front suspension, ball joint,
steering linkage, clutch, and transfer case shift linkage, parki\
ng brake
cable guides, propshaft splines, universal joints, brake pedal s\
prings, and
clutch pedal springs at the intervals specified on the proper \
maintenance
schedule, or at every engine oil change, whichever comes first.\
On
vehicles without hydraulic clutches, lubricate the clutch cross \
shaft every
30,000 miles
(50 000 km).
Ball joints should not be lubricated unless their temperature i\
s 10°F
(-12°C) or higher. When the weather is cold, let them war\
m up before
lubricating them or they could be damaged.
Also, be sure to check all the vehicle fluid levels at this \
time.
3. CLUTCH FORK BALL STUD LUBRICATION (4.3L ENGINES ONLY)
-Lubricate the clutch fork ball stud through the fitting on th\
e clutch housing. Lubricant must be added “sparingly” to the fittin\
g, as only
.0066
Ib. (.003 kg) is required to lubricate the ball stud surface\
. Do not add
lubricant more often than the intervals recommended in the Main\
tenance
Schedules. Too much lubricant
will damage the clutch assembly.
4. COOLING SYSTEM SERVICE* -Drain, flush and refill the system wit\
h
new coolant. See “Engine Coolant’’ in the Index for th\
e proper coolant
and mixture to use in your vehicle.
Also inspect the hoses and replace them
if they are cracked, swollen, or
deteriorated. Tighten all hose clamps. Clean the outside of the radiator
and air conditioning condenser. Wash the radiator neck. To ensure proper
operation, pressure test the radiator and cap.
* An Emission Control Service
7-8