glove box CHEVROLET S10 1993 2.G Owners Manual
[x] Cancel search | Manufacturer: CHEVROLET, Model Year: 1993, Model line: S10, Model: CHEVROLET S10 1993 2.GPages: 356, PDF Size: 20.85 MB
Page 60 of 356
Downloaded from www.Manualslib.com manuals search engine Theft
Vehicle theft is a big business, especially in some cities. Although your
vehicle has a number of theft deterrent features, we know that nothing we
put on
it can make it impossible to steal. However, there are ways you can
help.
Key in the Ignition:
If you walk away from your vehicle with the keys inside,
it’s an easy target for joy riders or professional thieves-s\
o don’t
do it. when^
you park your vehicle and open the driver’s door, you’ll \
hear a tone reminding
you to remove your key from the ignition and take it with you. Always
do
this. Your steering wheel will be locked, and so will your ignition. If you have
an automatic transmission, taking your key out also locks your \
transmission.
And remember to lock the doors.
Parking at Night: Park in a lighted spot, close all windows and lock your
vehicle. Remember to keep your valuables out of sight. Put them in a storage
area, or take them with you.
Parking Lots:
If you park in a lot where someone will be watching your
vehicle, it’s best to lock it up and take your keys. But what
if you have to
leave your ignition key? What
if you have to leave somethina valuable in vour
vehicle?
Put your valuables in a storage area, like your glove DOX.
Lock the glove box.
Lock all doors except the driver’s.
Then take the door key with you.
2-8
1
Page 107 of 356
Downloaded from www.Manualslib.com manuals search engine Storage Compartments
PO1 58
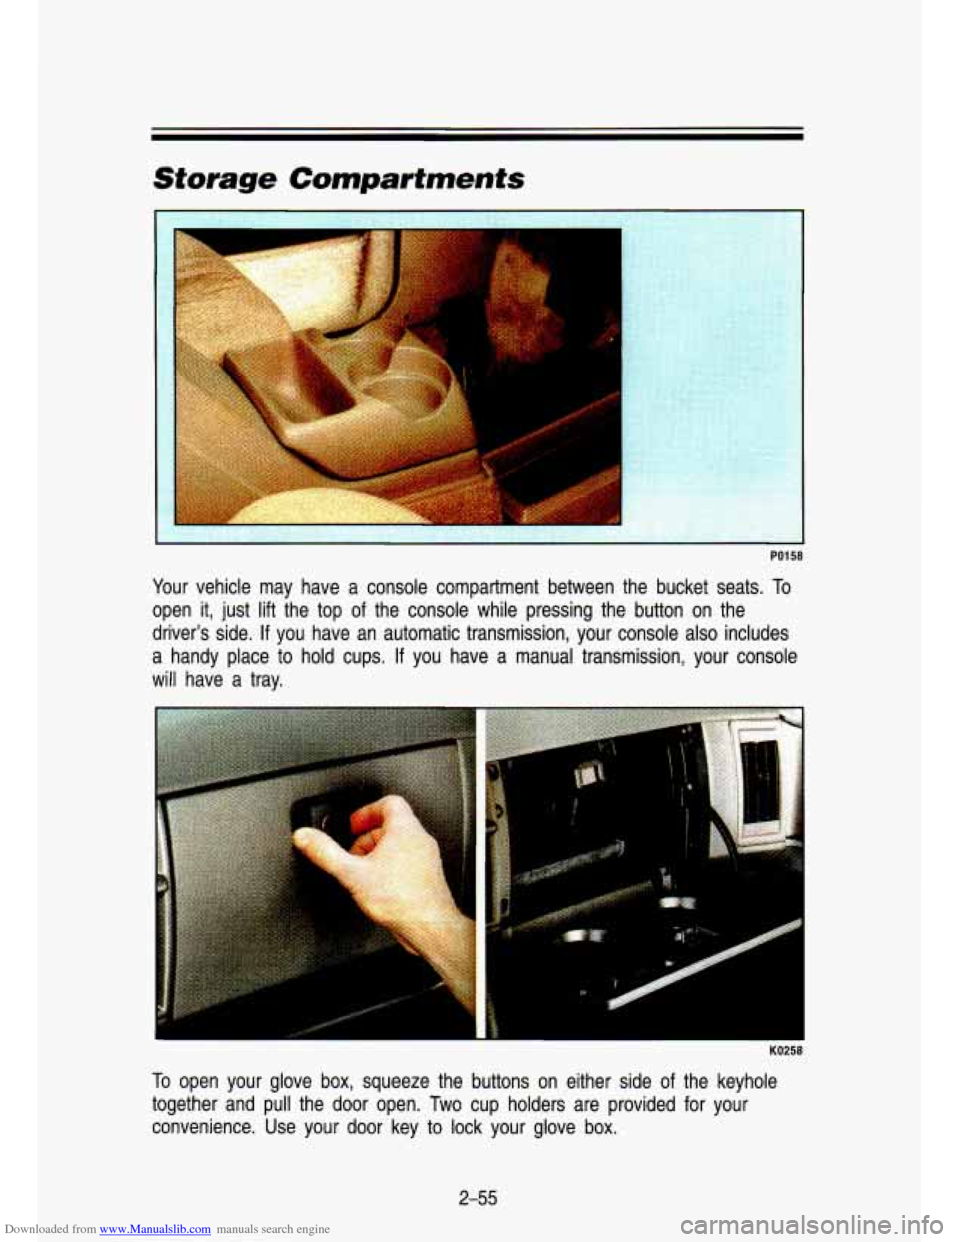
Your vehicle may have a console compartment between the bucket seats\
. To
open it, just lift the top of the console while pressing the button on the
driver’s side.
If you have an automatic transmission, your console also includes
a handy place to hold cups.
If you have a manual transmission, your console
will have a tray.
t
KO258
To open your glove box, squeeze the buttons on either side of the keyhole
together and pull the door open.
Two cup holders are provided for your
convenience. Use your door key to lock your glove box.
2-55
Page 289 of 356
Downloaded from www.Manualslib.com manuals search engine Truck-Camper Loading Information
PO338
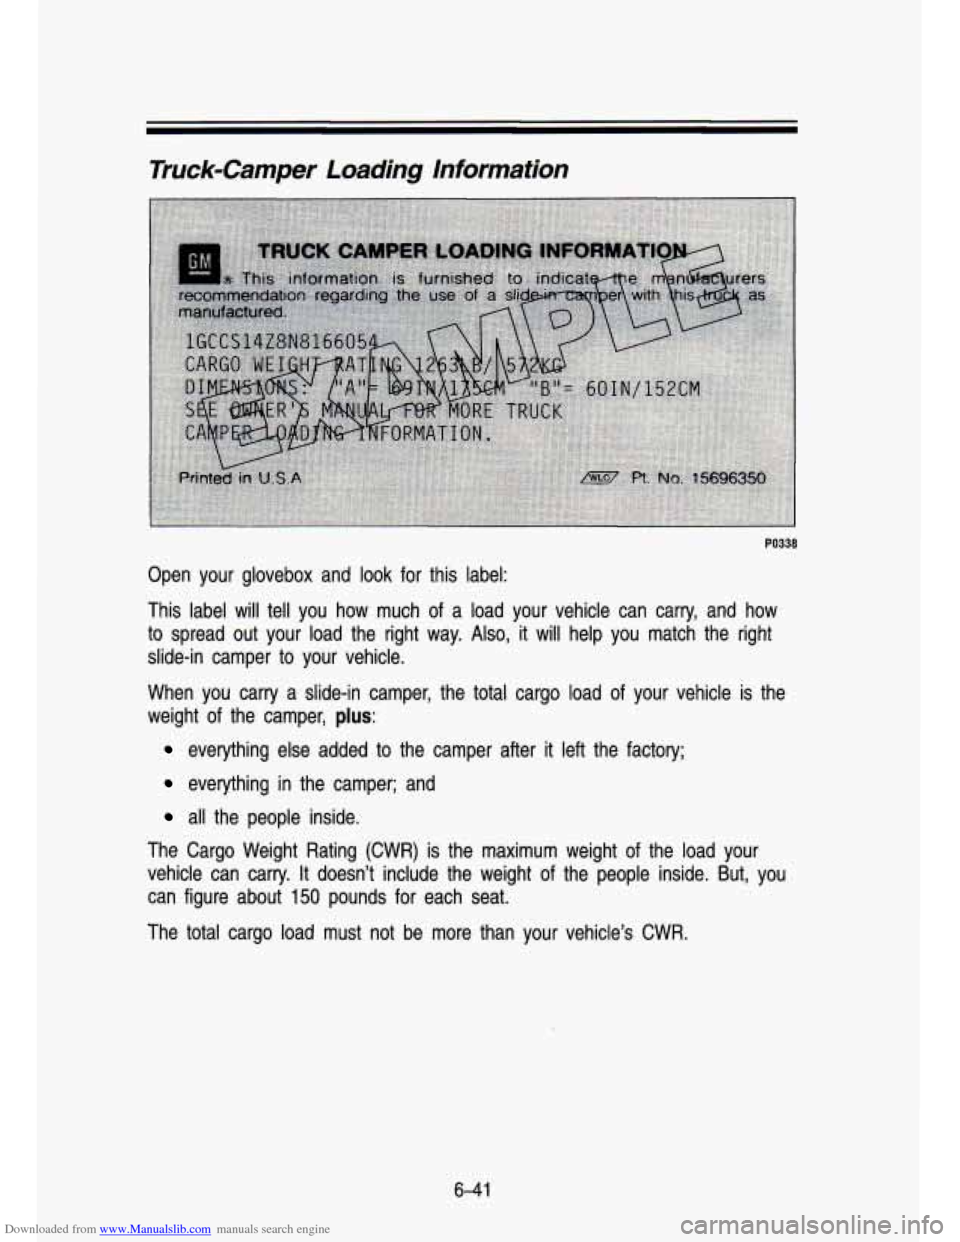
Open your glovebox and look for this label:
This label will tell you how much of a load your vehicle can carry, and how
to spread out your load the right way.
Also, it will help you match the right
slide-in camper to your vehicle.
When you carry a slide-in camper, the total cargo load of you\
r vehicle is the
weight of the camper,
plus:
everything else added to the camper after it left the factory;\
everything in the camper; and
all the people inside.
The Cargo Weight Rating (CWR) is the maximum weight
of the load your
vehicle can carry. It doesn’t include the weight of the people inside. But, you
can figure about
150 pounds for each seat.
The total cargo load must not be more than your vehicle’s
CWR.
6-41
Page 290 of 356
Downloaded from www.Manualslib.com manuals search engine I
Service & Appearance Care
TRUCK LOADING INFORMATION EXAMPLE OF PROPER TRUICK
AND CAMPER MATCH
1. Recommended location for cargo 7. Camper center of gravity.
center
of gravity for cargo weight 2. Recommended center of gravity
rating (Pickup Truck).
K-L.<:- location zone.
Note: Use rear edge of load floor : .‘$Ti: * .Refer to Truck Camper Loading
for measurement purposes.
- - Information label in glove box for
“A” and “B” dimensions.
.Y %!, -
PO254
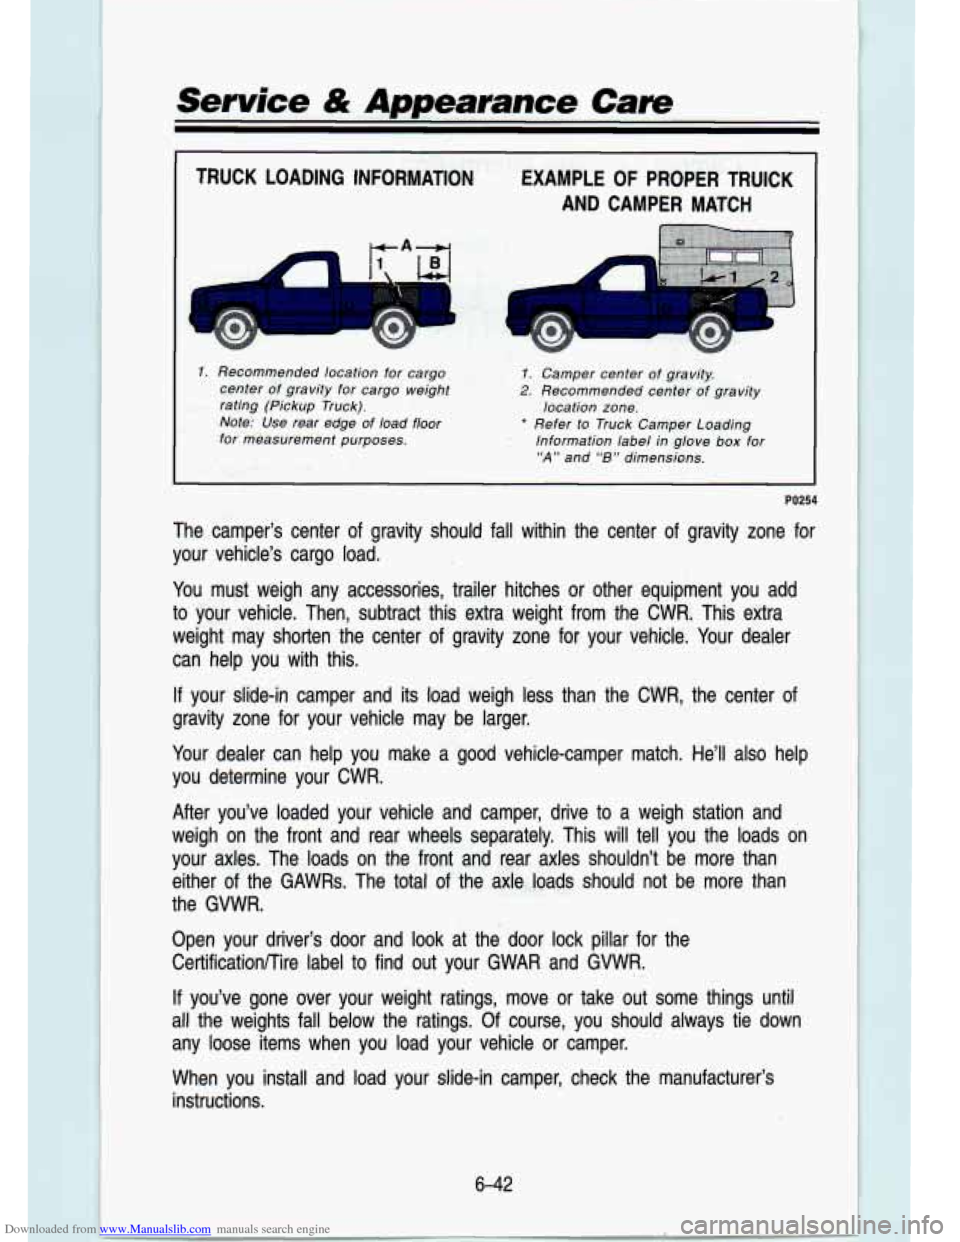
The camper’s center of gravity should fall within the center of gravity zone for
your vehicle’s cargo load.
You must weigh any accessories, trailer hitches or other equipment you add
to your vehicle. Then, subtract this extra weight from the CWR,
This extra
weight may shotten the center of gravity zone for your vehicle. Your dealer
can help you with this.
If your slide-in camper and its load weigh less than the CWR, the center of
gravity zone for your vehicle may be larger.
Your dealer can help you make
a good vehicle-camper match. He’ll also help
you determine your CWR.
After you’ve loaded your vehicle and camper, drive to a weigh station and
weigh on the front and rear wheels separately. This will tell you the loads on
your
axles. The loads on the front and rear axles shouldn’t be more th\
an
either
of the GAWRs. The total of the axie..loads should not be more than
the GVWR.
Open your driver’s door and look at the door lock pillar f\
or the CertificationKire label to find out your GWAR and GWVR.
If you’ve gone over your weight ratings, move or take out some\
things until
all the weights fall below the ratings. Of course, you should always tie down
any loose items when you load your vehicle or camper.
When you install and load your slide-in camper, check the manufacturer’s
instructions.
6-42
Page 315 of 356
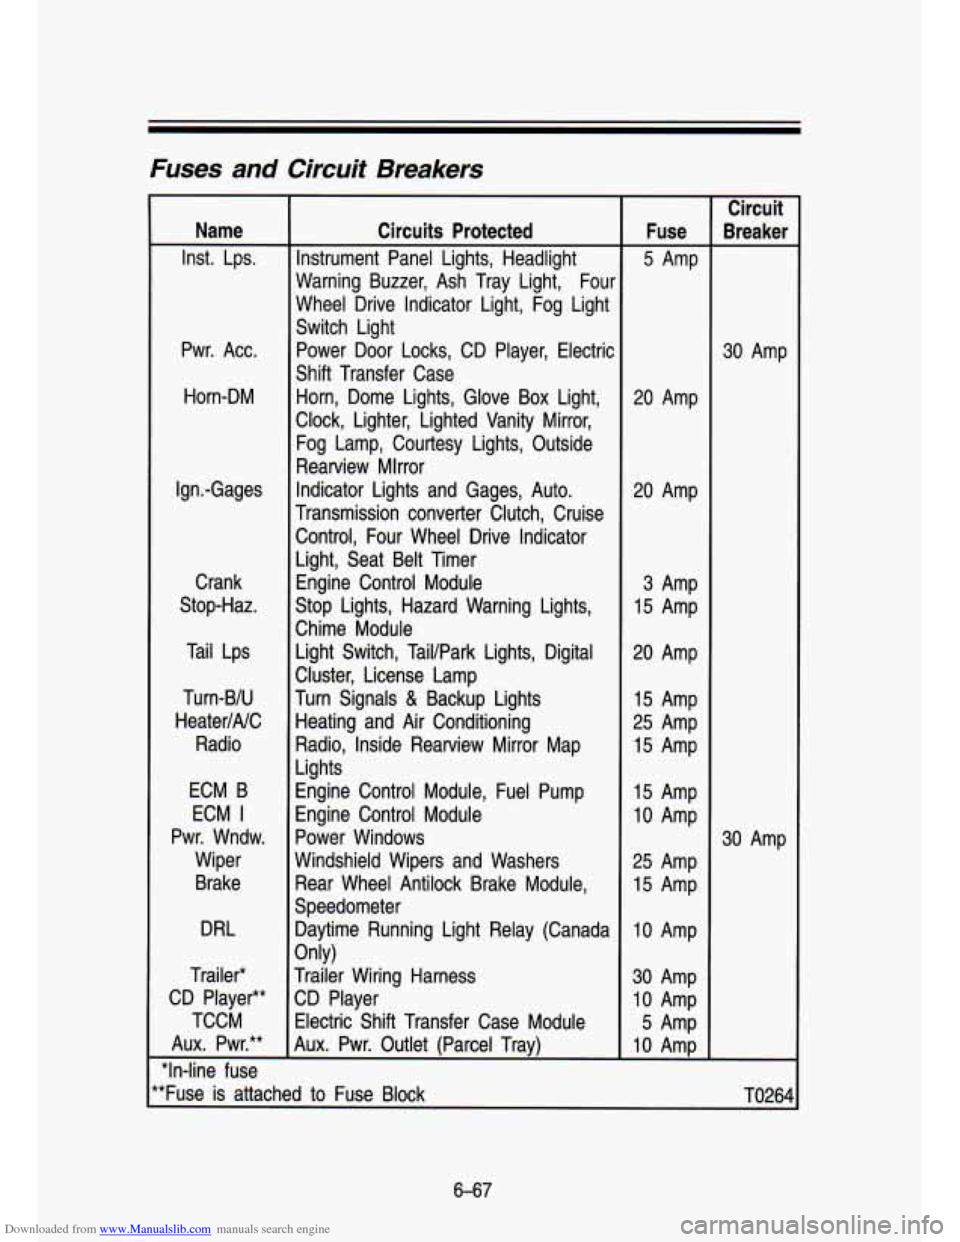
Downloaded from www.Manualslib.com manuals search engine Fuses and Circuit Breakers
Name
Inst. Lps.
Pwr. Acc. Horn-DM
Ign.-Gages Crank
Stop-Haz.
Tail Lps
Turn-BIU
HeaterINC Radio
ECM B
ECM
I
Pwr. Wndw. Wiper
Brake
DRL
Trailer*
CD Player**
TCCM
Aux. Pwr.**
"In-line fuse Circuits Protected
Instrument Panel Lights, Headlight
Warning Buzzer, Ash Tray Light, Four
Wheel Drive Indicator Light, Fog Light
Switch Light Power Door Locks, CD Player, Electric
Shift Transfer Case Horn, Dome Lights, Glove Box Light,
Clock, Lighter, Lighted Vanity Mirror,
Fog Lamp, Courtesy Lights, Outside
Rearview Mlrror
Indicator Lights and Gages, Auto.
Transmission converter Clutch, Cruise Control, Four Wheel Drive Indicator
Light, Seat Belt Timer Engine Control Module
Stop Lights, Hazard Warning Lights,
Chime Module Light Switch, Tail/Park Lights, Digital
Cluster, License Lamp
Turn Signals
& Backup Lights
Heating and Air Conditioning
Radio, Inside Rearview Mirror Map
Lights
Engine Control Module, Fuel Pump
Engine Control Module
Power Windows
Windshield Wipers and Washers Rear Wheel Antilock Brake Module,
Speedometer Daytime Running Light Relay (Canada
Trailer Wiring Harness
CD Player
Electric Shift Transfer Case Module
Aux. Pwr. Outlet (Parcel Trav)
Only) Fuse
5 Amp
20 Amp
20 Amp
3 Amp
15 Amp
20 Amp 15 Amp
25 Amp
15 Amp
15 Amp
10 Amp
25 Amp
15 Amp
10 Amp
30 Amp
10 Amp
5 Amp
10 AmD Circuit
kea ker
30 Amp
30 Amp
'*Fuse is attached to Fuse Block
TO264
6-67
Page 328 of 356
Downloaded from www.Manualslib.com manuals search engine Scheduled Maintenance Services
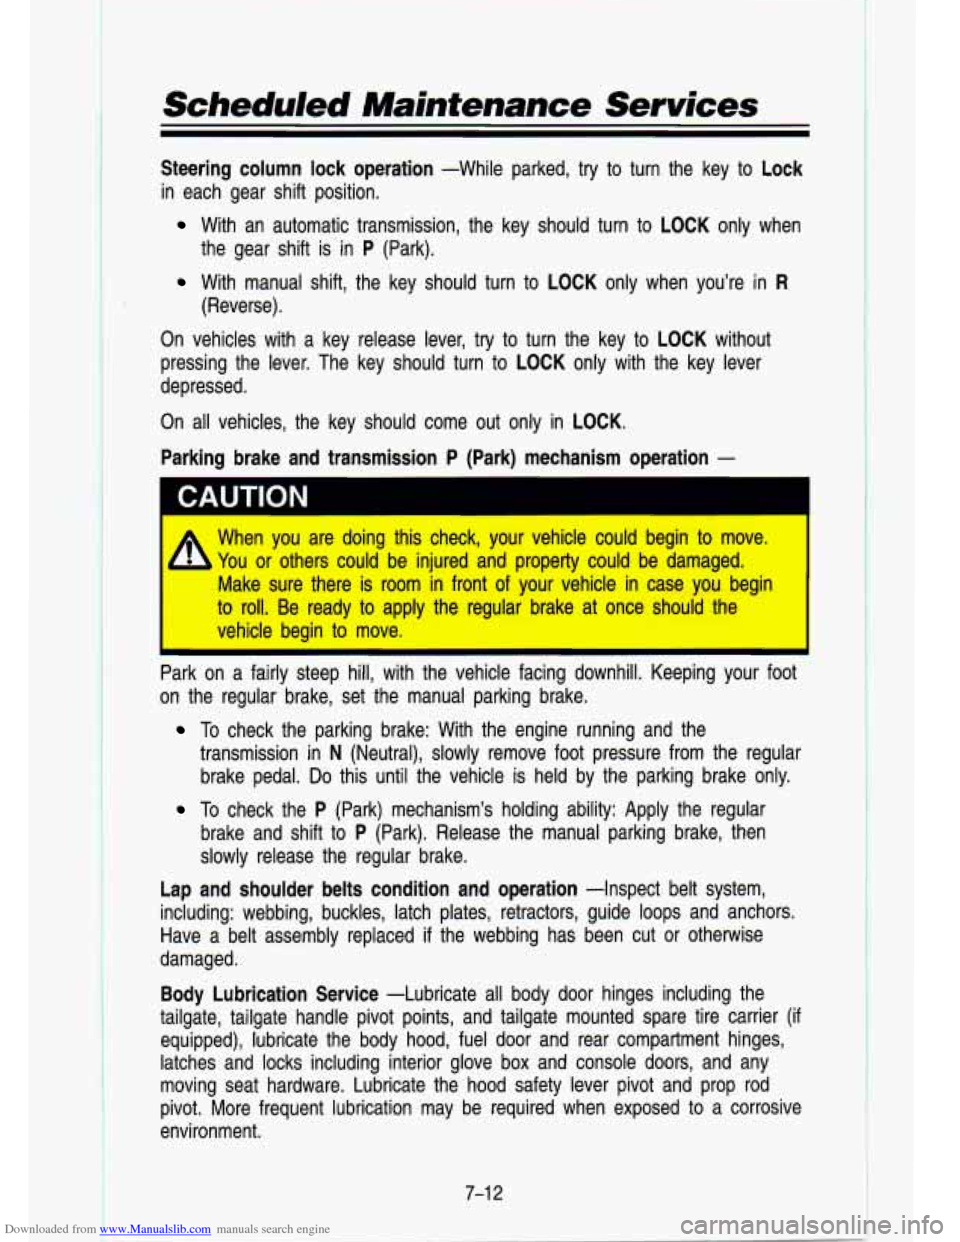
Steering column lock operation -While parked, try to turn the \
key to Lock
in each gear shift position.
With an automatic transmission, the key should turn to LOCK only when
the gear shift is in P (Park).
With manual shift, the key should turn to LOCK only when you’re in R
(Reverse).
On vehicles with a key release lever, try
to turn the key to LOCK without
pressing the lever. The key should turn to LOCK only with the key lever
depressed.
On all vehicles, the key should come out only in LOCK.
Parking brake and transmission
P (Park) mechanism operation -
CAUTION
A When you are doing this check, your vehicle could begin to move.
You or others could be injured and property could be damaged.
Make sure there is room in front of your vehicle in case you begin
to roll. Be ready to apply the regular brake at once should the
vehicle begin to move.
Park on a fairly steep hill, with the vehicle facing downhill.\
1.- )ping your foot
on the regular brake, set the manual parking brake.
To check the parking brake: With the engine running and the
transmission in
N (Neutral), slowly remove foot pressure from the regular
brake pedal.
Do this until the vehicle is held by the parking brake only.
To check the P (Park) mechanism’s holding ability: Apply the \
regular
brake and shift to
P (Park). Release the manual parking brake, then
slowly release the regular brake.
Lap and shoulder belts condition and operation -Inspect belt sy\
stem,
including: webbing, buckles, latch plates, retractors, guide loop\
s and anchors. Have a belt assembly replaced
if the webbing has been cut or otherwise
damaged.
Body Lubrication Service -Lubricate all body door hinges including th\
e
tailgate, tailgate handle pivot points, and tailgate mounted spa\
re tire carrier (if equipped), lubricate the body hood, fuel door and rear compartment hinges,
latches and locks including interior glove box and console door\
s, and any
moving seat hardware. Lubricate the hood safety lever pivot and\
prop rod
pivot. More frequent lubrication may be required when exposed to a corrosive
environment.
7-1 2