CD player CHEVROLET S10 1994 2.G Owners Manual
[x] Cancel search | Manufacturer: CHEVROLET, Model Year: 1994, Model line: S10, Model: CHEVROLET S10 1994 2.GPages: 340, PDF Size: 18.45 MB
Page 115 of 340
Downloaded from www.Manualslib.com manuals search engine Comfort Controls & Audio Systems
Section
I .
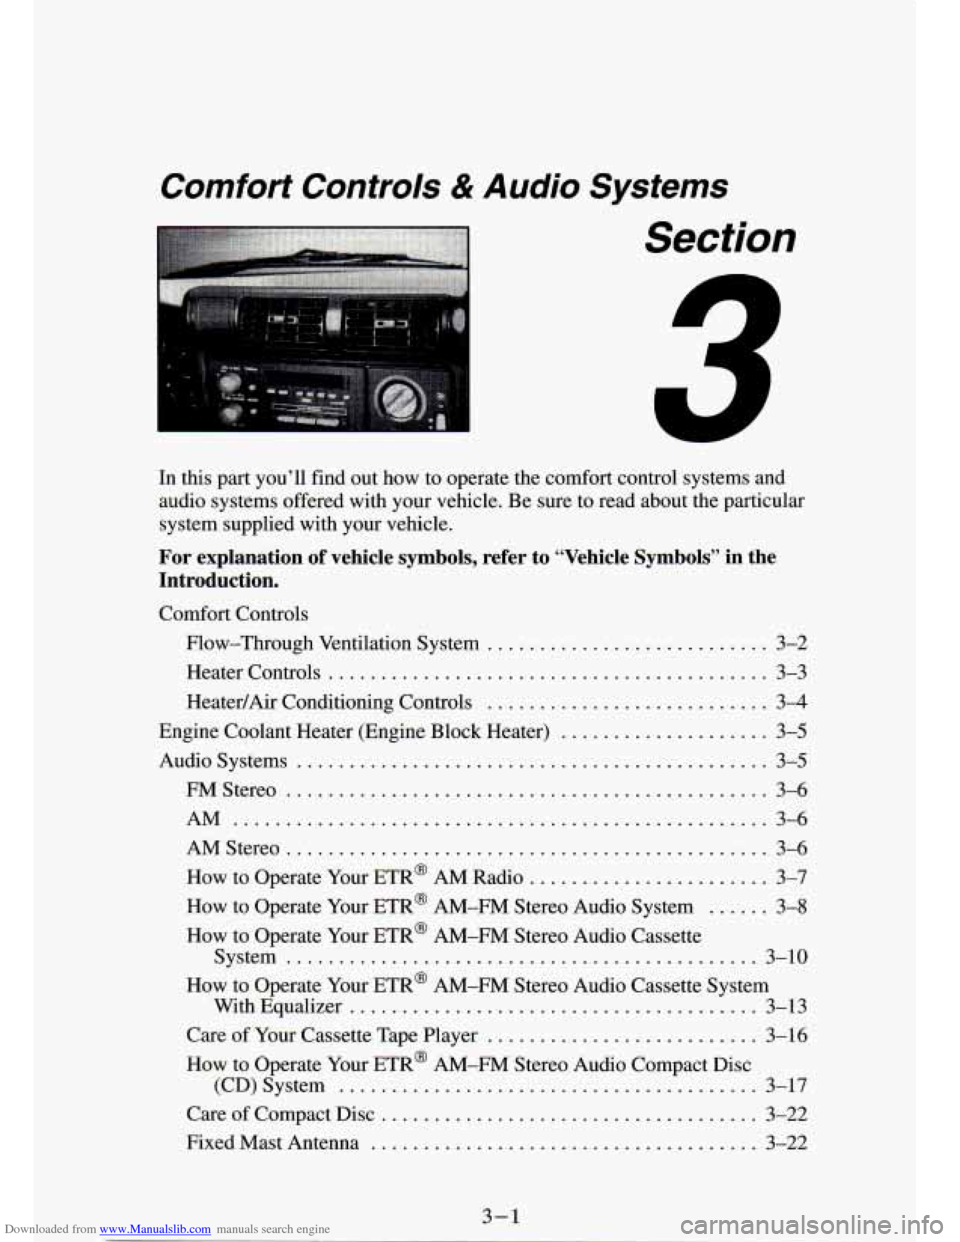
In this part you’ll find out how to operate the comfort co\
ntrol systems and audio systems offered with your vehicle
. Be sure to read about the particular
system supplied with your vehicle
.
For explanation of vehicle symbols. refer to “Vehicle Symbols” in the
Introduction
.
Comfort Controls
Flow-Through Ventilation System
........................... 3-2
Heater Controls
.......................................... 3-3
Heater/Air Conditioning Controls
........................... 3-4
Engine Coolant Heater (Engine Block Heater)
.................... 3-5
Audiosystems
............................................. 3-5
FMStereo
.............................................. 3-6
AM
................................................... 3-6
AM Stereo
.................. ... -* ........ I ............ 3-6
How to Operate Your
E I R@ AM Radio ....................... 3-7
How to Operate Your ETR@ AM-FM Stereo Audio System
...... 3-8
How to Operate Your ETR@ AM-FM Stereo Audio Cassette
System
............................................. 3-10
How to Operate Your ETR@ AM-FM Stereo Audio Cassette System
With Equalizer
....................................... 3-13
Care
of Your Cassette Tape Player .......................... 3-16
How to Operate Your
ETR@ AM-FM Stereo Audio Compact Disc
(CD)Systern
........................................ 3-17
Care of Compact Disc
.................................... 3-22
Fixed Mast Antenna
..................................... 3-22
3-1
Page 120 of 340
Downloaded from www.Manualslib.com manuals search engine To help avoid hemng loss or aamL_,z
Adjust the volume control to the lowest setting.
0 Increase volume slowly until you hear comfortably and clearly.
FM Stereo
FM stereo will give you the best sound. But FM signals will reach only
about
10 to 40 miles (16 to 65 km). And, tall buildings or hills can interfere
with FM signals, causing the sound to come and go.
AM
The range for most AM stations is greater than for FM, especially at night.
The longer range, however, can cause stations to interfere with eac\
h other.
AM can pick up noise from things like storms and power lines. Tr\
y reducing
the treble to reduce this noise if you ever get
it.
AM Stereo
This means the Delco’ system can receive C-QUAM’ stereo broadcasts.
Many AM stations around the country use C-QUAM@ to produce ste\
reo, though some
do not. (C-QUAM@ is a registered trademark of Motorola,
kc.) If your DelcoB system can get C-QUAM@, your “STEREO’ light will
come on when you’re receiving it.
NOTICE:
Before you add any sound equipment to your ~ehicle - like a
tape player,
CB radio, mobile telephone or two-way radio - be
sure you can add
what you want. If you can, it’s very important
to do
it properly. Added sound equipment may interfere with the
operation of your vehicle’s engine, Delco@ radio or other
systems, and even damage them. And, your vehicle’s systems
may interfere with the operation of sound equipment that has
been added improperly.
So, before adding sound equipment, check with your dealer and
be sure to check Federal rules covering mobile radio and
telephone units.
3-6
1
Page 126 of 340
Downloaded from www.Manualslib.com manuals search engine t
Clock
To set the clock, just:
Press the SET pushbutton.
Within 5 seconds, press and hold SEEK until the correct minute
Press and hold SCAN until the correct hour appears on the display.
appears on the display.
TREBLE
Slide
the TREBLE lever up to increase the treble response. If the station is
weak or noisy, slide the
TREBLE lever down to reduce the noise.
BASS
Slide the BASS lever up to increase the bass response. Adjust the BASS
lever to give a pleasing sound to your ear.
AUTO DNR @
This unit is equipped with an automatic Dynamic Noise Reduction system.
DNR@reduces background hiss on
AM and FM radio broadcasts, as well as
on cassette tapes.
DNR@
is a registered trademark of National Semiconductor Corporation.
To Play A Cassette
Your tape player is built to work best with tapes that are 30 to 45 minutes
long on each side. Tapes longer than that are
so thin they may not work well
in this player.
Once
the tape is playing, use the upper and lower knobs for volume,
balance, and fade just as you do for the radio. The arrows indicate which
side
of the tape is being played.
Fast Forward
Press the button with the arrow pointing in the same direction that the tape
is playing. The
arrow light next to the arrow button will be lit. To stop fast
forward, press the
STOP-E JECT button.
Reverse
Press the button with the arrow pointing in the opposite direction that the
tape is playing. The arrow light next to the arrow button will be lit\
. To stop
reverse, press the
STOP-E JECT button.
PROGRAM
To change sides of the tape, press the PWR-VOL-PROG-RCL knob.
STOP- EJECT
To stop playing a tape, fully press this button (the cassette will be partially \
ejected, and the radio will begin playing).
3-12
Page 129 of 340
Downloaded from www.Manualslib.com manuals search engine AUTO DNR @
This unit is equipped with an automatic Dynamic Noise Reduction system.
DNR@reduces background
hiss on AM and FM radio broadcasts, as well as
on cassette tapes.
DNR@ is a registered trademark of National Semiconductor Corporation.
To Play A Cassette
Your tape player is built to worK Pesr with tapes that are 30 to 45 minutes
long on each side. Tapes longer than that are
so thin they may not work well
in this player.
Once the tape is playing, use the upper and lower
knobs for volume, balance
and fade, just as you do for the radio. The arrows indicate which side of the
tape is being played.
Fast Forward
Press the button with the arrow pointing in the same direction that the tape
is playing. The arrow light next to the
arrow button will be lit. To stop fast
forward, press the
STOP-E JECT button.
Reverse
Press the button with the arrow pointing in the opposite direction that the
tape is playing. The arrow light next to the arrow button will be lit. To stop
reverse, press the
STOP-EJECT button.
SEARCH
Press the SEARCH button.
Press
FWR to go to the beginning of the next selection.
Press
REV and the tape will reverse to the beginning of the current
selection.
Cr02
The Cr02 button lets you set the system for the type of cassette being used.
If you are using chrome or metal tapes, push the
CrO2 button in.
PROGRAM
To change sides of the tape, press the PWR-VOL-PROG-RCL knob.
To stop playing a tape, fully press this button (the cassette will be partially
ejected, and
the radio will begin playing).
STOP-E JECT
Page 130 of 340
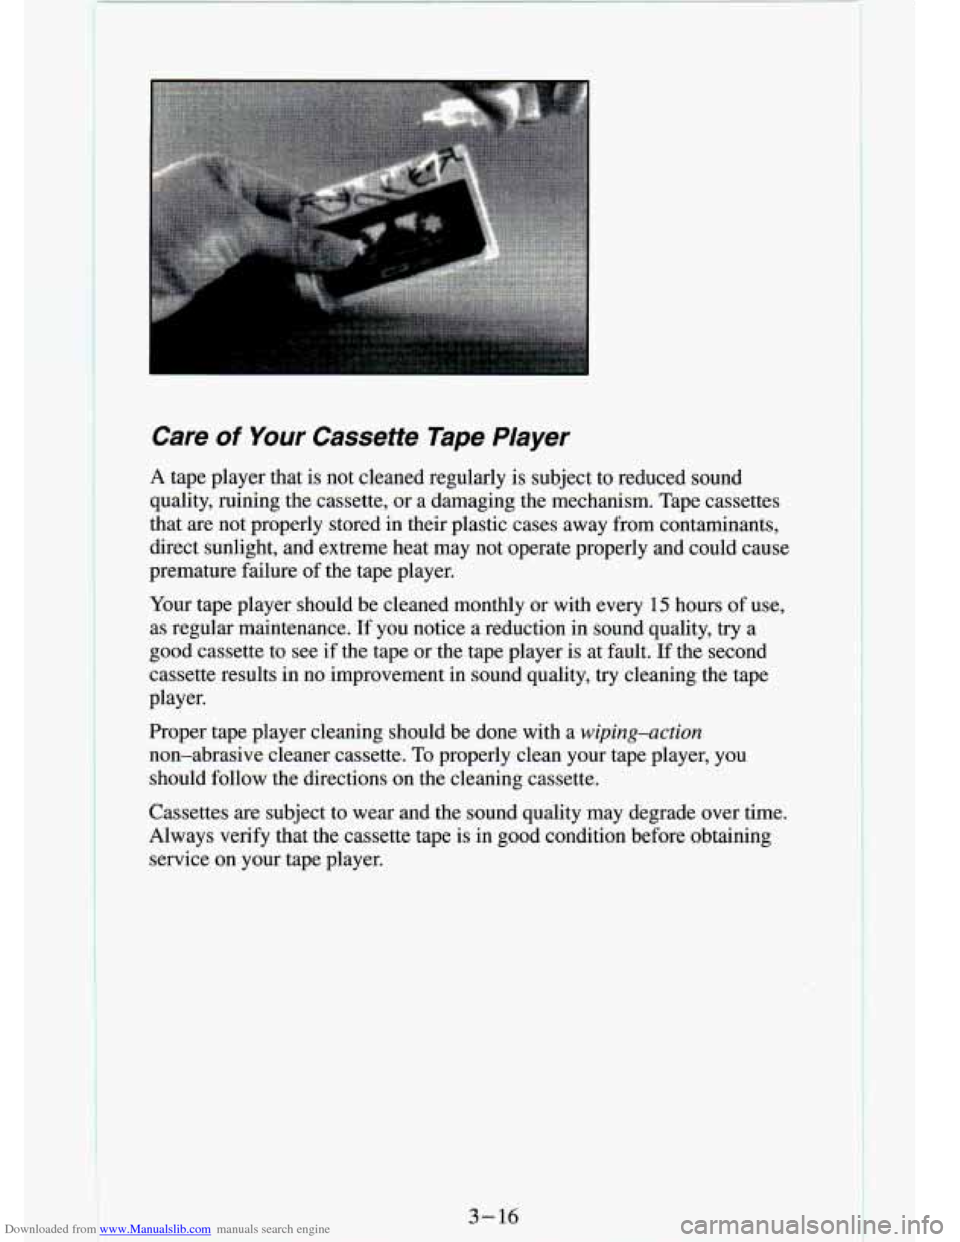
Downloaded from www.Manualslib.com manuals search engine Care of Your Cassette Tape PIayer
A tape player that is not cleaned regularly is subject to reduced sound
quality, ruining the cassette, or
a damaging the mechanism. Tape cassettes
that are not properly stored in their plastic cases away from \
contaminants,
direct sunlight, and extreme heat may not operate properly and could cause
premature failure of the tape player.
Your tape player should be cleaned monthly or with every
15 hours of use,
as regular maintenance. If you notice a reduction in sound quality, try a
good cassette to see
if the tape or the tape player is at fault. If the second
cassette results in
no improvement in sound quality, try cleaning the tape
player.
Proper tape player cleaning should be done with a
wiping-action
non-abrasive cleaner cassette. To properly clean your tape player, you
should follow the directions on the cleaning cassette.
Cassettes are subject to wear and the sound quality may degrad\
e over time.
Always verify that the cassette tape is in good condition befo\
re obtaining service on your tape player.
3-16
Page 131 of 340
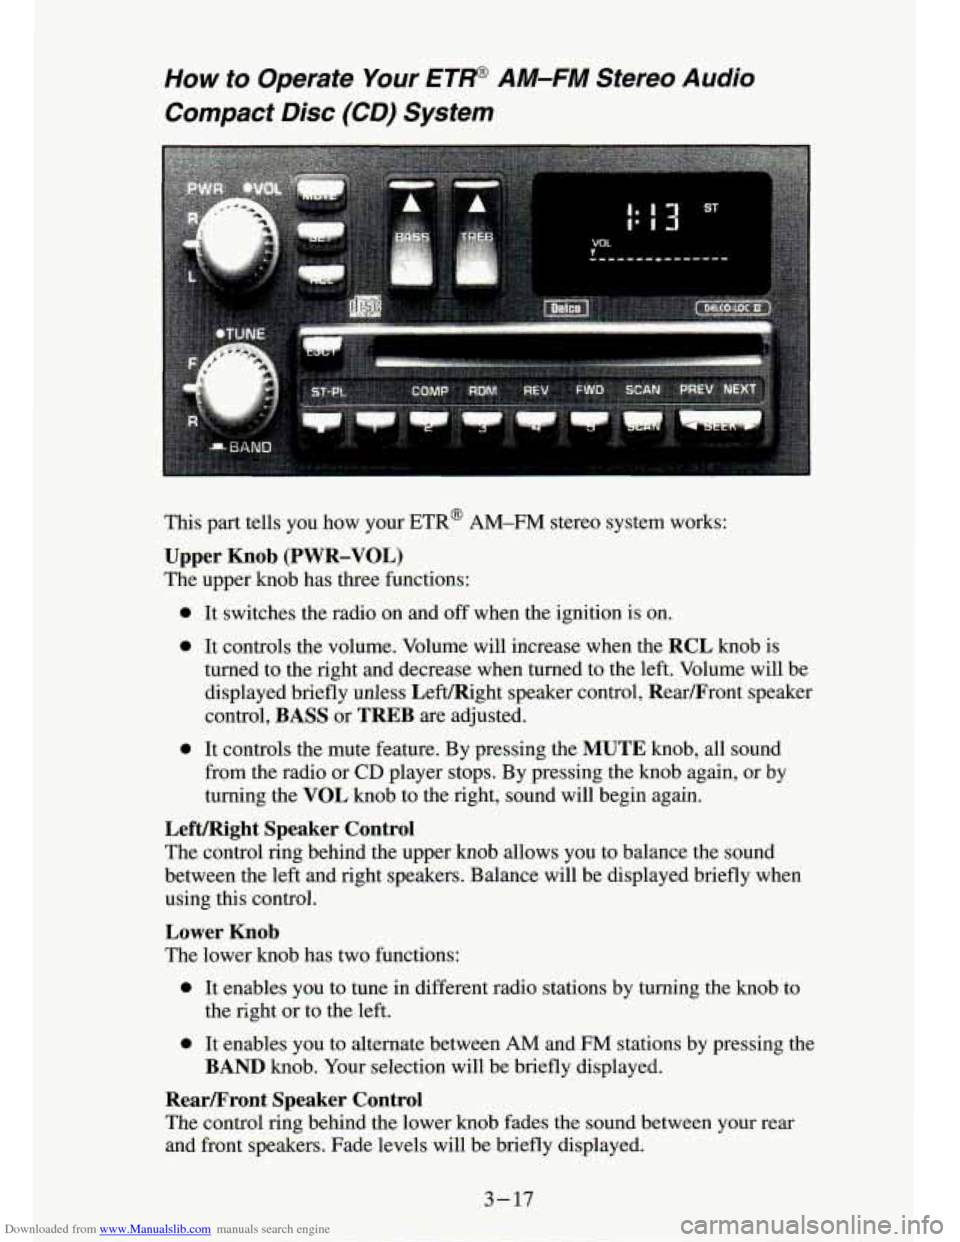
Downloaded from www.Manualslib.com manuals search engine How to Operate Your ET@ AM-FM Stereo Audio
Compact Disc (CD) System
This part tells you how your ETR@ AM-FM stereo system works:
Upper Knob (PWR-VOL)
The upper knob has three functions:
0 It switches the radio on and off when the ignition is on.
0 It controls the volume. Volume will increase when the RCL knob is
turned to the right and decrease when turned to the left. Volume will be
displayed briefly unless LeftIRight speaker control, Rearmront speaker
control,
BASS or TREB are adjusted.
0 It controls the mute feature. By pressing the MUTE knob, all sound
from the radio or
CD player stops. By pressing the knob again, or by
turning the
VOL knob to the right, sound will begin again.
Lefmght Speaker Control
The control ring behind the upper knob allows you to balance the \
sound
between the left and right speakers. Balance will be displayed briefly when
using this control.
Lower Knob
The lower knob has two functions:
0 It enables you to tune in different radio stations by turning the knob to
0 It enables you to alternate between AM and FM stations by pressing the
the right or to the left.
BAND knob. Your selection will be briefly displayed.
Rearmront Speaker Control
The
control ring behind the lower knob fades the sound between your rear
and front speakers. Fade levels will be briefly displayed.
3-17
Page 133 of 340
Downloaded from www.Manualslib.com manuals search engine To PIay A Compact Disc (CD)
NOTI( ::
I
Before you Degin, please note: DO NOT use mini-discs that are
called singles. They won’t eject.
USE FULL-SIZE COMPACT
DISCS.
If the disc player is very hot, or if you’re driving on a very rough
road,
a disc may come out or just not play. If you see the word
HOT on the display, the disc player is too hot to play the disc.
Press RCL to make the word HOT
go off the display. When
things get back
to normal, the disc should play again. Press
PWR to turn the system on.
Insert a disc partway into the slot, label side up. The player will pull it in.
Wait a few seconds and the disc should play.
If the disc comes back out, check whether:
The disc is upside down.
It is dirty, scratched, or wet.
0 Too much moisture is in the air. (If there is, wait about one hour and try
again.)
RCL
Press RCL to see what track is playing. Press
it again within 5 seconds to
see how long
it has been playing. The track number also appears when you
change the volume or when a new track starts to play.
COMP
Press the COMP button
to make soft and loud passages more nearly equal
in volume. COMP appears in the display while using this command.
RDM
The RDM button means random and when it is pressed, it causes the
CD
mechanism to play the tracks in a random order rather than in the sequential
1,2, 3 order.
REV
Press and hold the REV button to quickly return to a favorite passage. The
counter reading will be displayed when using this control.
FWD
Press and hold the FWD button
to advance quickly within a track. Release it
to resume playing. Watch the display to stop at a specific passage.
Page 134 of 340
Downloaded from www.Manualslib.com manuals search engine SCAN
Press SCAN to sample each track for approximately 10 seconds. Scanning
will continue until the
RDM, SCAN or any other motion button is pressed
again.
PREV
If you hold the PREV (4 SEEK) button, or press it more than once, the
disc will return to previous tracks.
NEXT
Press NEXT (SEEK b) to hear the next track now instead of waiting until
the present track is finished.
If you hold this button or press it more than
once, the disc will advance further.
Press
ST-PL (Stop-Play) to make the disc stop and the radio play. Press
ST-PL again to restart the disc at the point where it stopped.
ST-PL
Press PWR or turn the ignition key off to stop the disc player. The disc
stays in the player and will resume playing at the point where it stopped.
Press
EJCT to eject the disc and make the radio play. The disc will start at
track
1 when you reinsert it.
Anti-Theft Feature
Delco LOC 11’ is an Anti-Theft feature for the compact disc player. It can
be used or ignored. If ignored,
the. system plays normally. If it is used, your
player won’t be usable if it is ever stolen, because it won’t turn on.
The instructions below tell you how to enter a secret code into t\
he system. If
your car loses battery power for any reason, you must unlock the system
with the secret code before the radio will turn on.
To Lock The System:
1. Write down any 6 digit number and keep it in a safe place.
2. Turn the ignition to the ACC (Accessory) or RUNposition.
3. Press the PWR button to turn the radio off.
4. Press the 1 and 4 buttons together. Hold them down until “- - -” shows
on the display.
You are now ready to enter your
- ;ret code. Don’t wait more than 15
seconds between steps.
5. rress SET and 000 will appear on the display.
6. Press the SEEK b or 4 button to make the first number appear.
7. Press SCAN to make the last two numbers agree with your code.
3-20 I-
.- - ... ..
. t-
Page 295 of 340
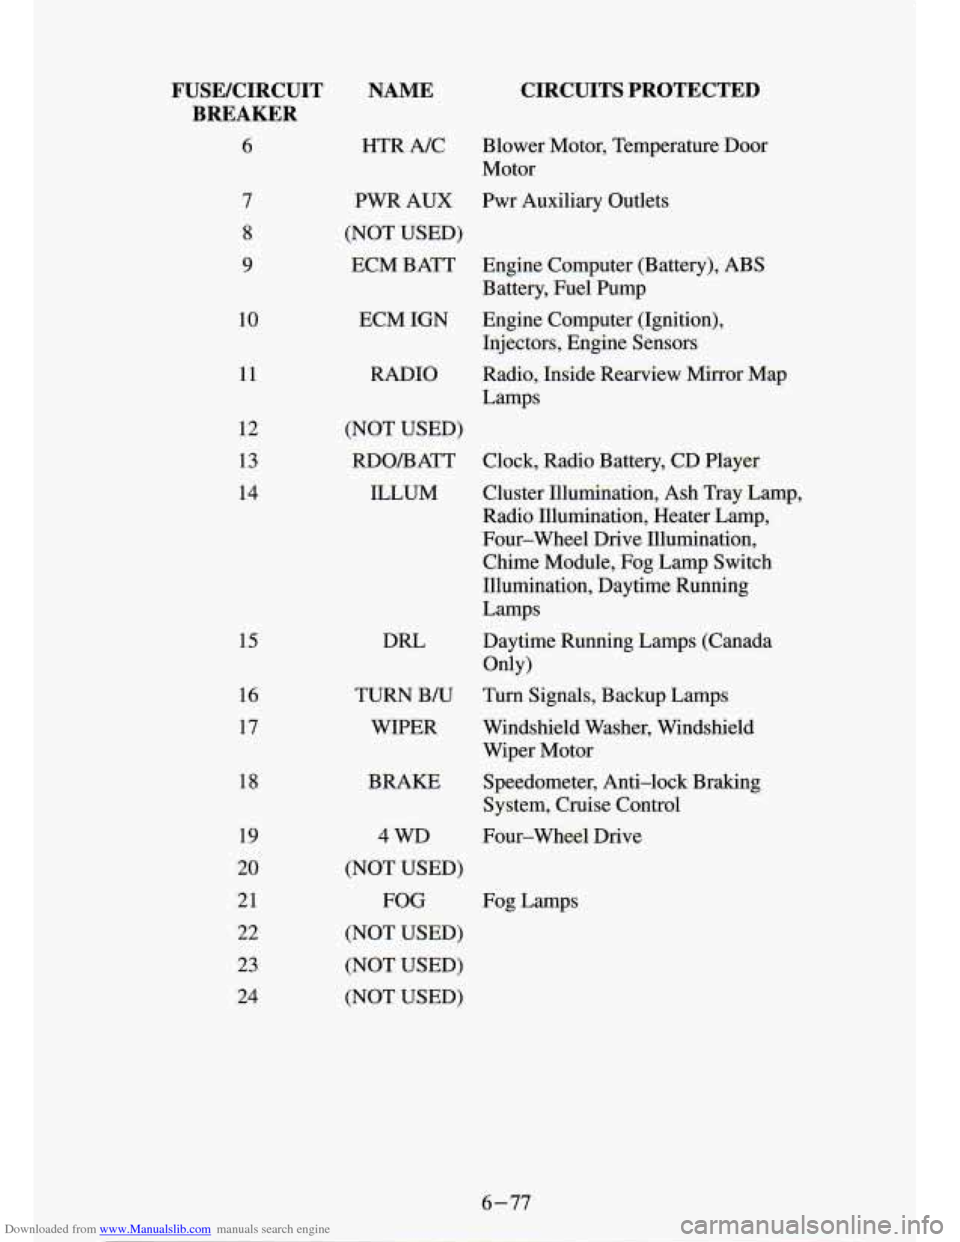
Downloaded from www.Manualslib.com manuals search engine FUSEKIRCUIT BREAKER
6
10
11
12
13
14
15
16
17
18
19
20
21
22
23
24
NAME
HTR NC
CIRCUITS PROTECTED
Blower Motor, Temperature Door
Motor
PWR AUX Pwr Auxiliary Outlets
(NOT USED) ECM BATT Engine Computer (Battery), ABS
Battery, Fuel Pump
ECM IGN Engine Computer (Ignition), Injectors, Engine Sensors
RADIO
(NOT USED) RDO/BATT ILLUM
DRL
TURN B/U
WIPER
BRAKE
4 WD
(NOT USED) FOG
(NOT USED)
(NOT USED)
(NOT USED) Radio,
Inside Rearview
Mirror Map
Lamps
Clock, Radio Battery, CD Player
Cluster Illumination, Ash Tray Lamp,
Radio Illumination, Heater Lamp,
Four-wheel Drive Illumination, Chime Module, Fog Lamp Switch
Illumination, Daytime Running
Lamps
Daytime Running Lamps (Canada
Turn Signals, Backup Lamps
Windshield Washer, Windshield
Wiper Motor Only)
Speedometer, Anti-lock Braking
System, Cruise Control
Four-wheel Drive
Fog Lamps
Page 327 of 340
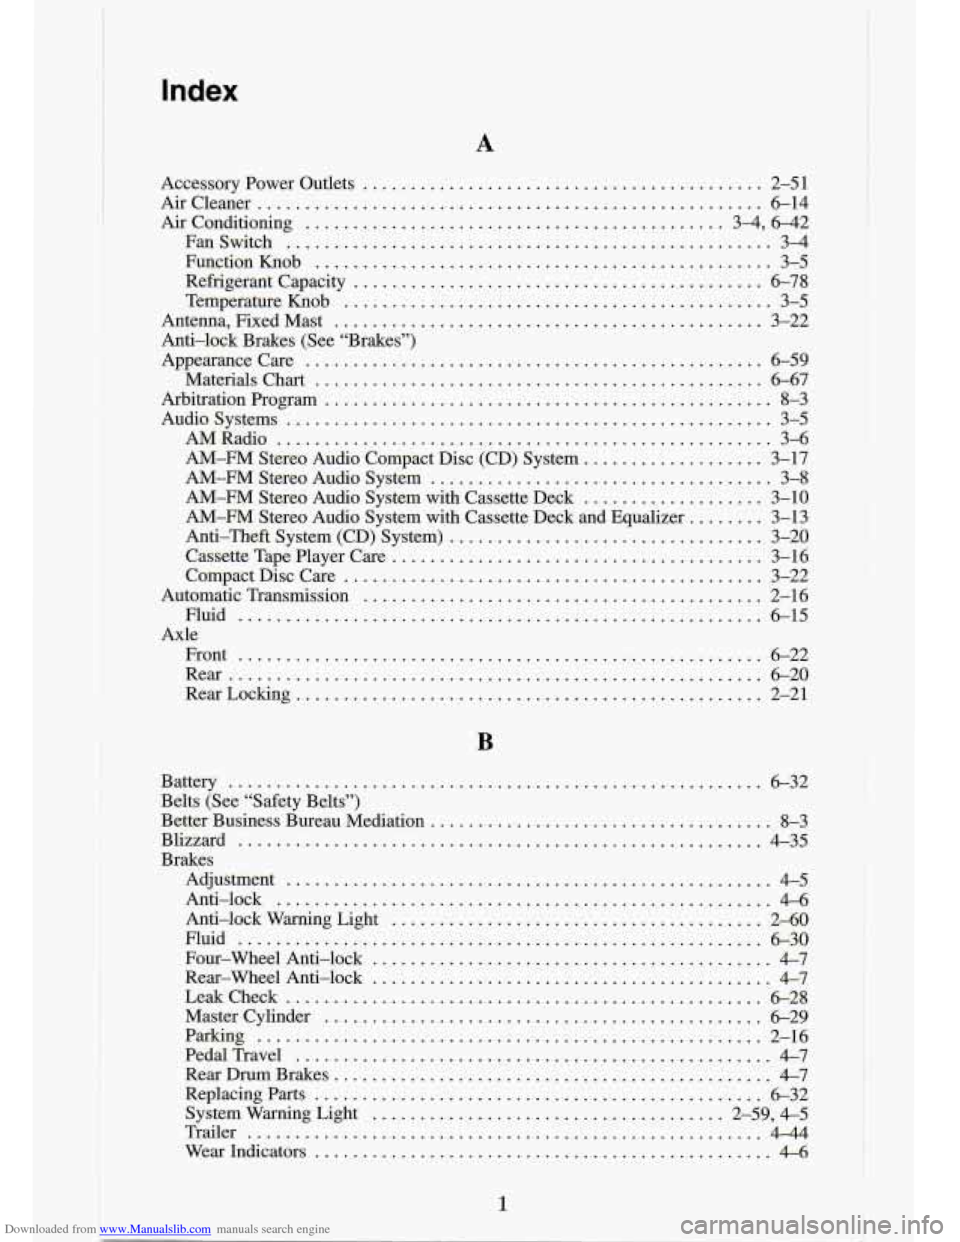
Downloaded from www.Manualslib.com manuals search engine Index
A
Accessory rower Outlets .......................................... 2-51
Aircleaner ..................................................... 6-14
Airconditioning
............................................ 3-4. 6-42
Fanswitch
................................................... 34
Functionhob
................................................ 3-5
Refrigerantcapacity
........................................... 6-78
Antenna. FixedMast
............................................. 3-22
Anti-lock Brakes (See “Brakes”)
Appearancecare
................................................ 6-59
Materials
Chart ............................................... 6-67
Arbitration Program
............................................... 8-3
Audiosystems
................................................... 3-5
AMRadio
.................................................... 3-6
AM-FM Stereo Audio Compact Disc (CD) System
................... 3-17
AM-FM Stereo Audio System
.................................... 3-8
AM-FM Stereo Audio System with Cassette Deck
................... 3-10
AM-FM Stereo Audio System with Cassette Deck and Equalizer ........ 3-13
Anti-Theft System (CD) System)
................................. 3-20
Cassette Tape Player Care
....................................... 3-16
CompactDiscCare
............................................ 3-22
Automatic Transmission
.......................................... 2-16
Axle Fluid
6-15
Front
....................................................... 6-22
Rear
........................................................ 6-20
Temperature Knob
............................................. 3-5
.......................................................
RearLocking ................................................. 2-21
B
Battery ........................................................ 6-32
Belts (See “Safety Belts”)
Better Business Bureau Mediation
.................................... 8-3
Blizzard
....................................................... 4-35
Brakes
Adjustment
................................................... 4-5
Anti-lock
.................................................... 4-6
Anti-lock Warning Light
....................................... 2-60
Fluid
....................................................... 6-30
Four-wheel Anti-lock
.......................................... 4-7
Rear-Wheel Anti-lock
.......................................... 4-7
Leakcheck .................................................. 6-28
Mastercylinder
.............................................. 6-29
Pedal Travel
.................................................. 4-7
RearDrumBrakes
.............................................. 4-7
Replacingparts
............................................... 6-32
System Warning Light
..................................... 2.59. 4-5
Trailer ...................................................... 444
Wear Indicators
................................................ 4-6
Paking
..................................................... 2-16