turn signal bulb CHEVROLET S10 1995 2.G Owners Manual
[x] Cancel search | Manufacturer: CHEVROLET, Model Year: 1995, Model line: S10, Model: CHEVROLET S10 1995 2.GPages: 354, PDF Size: 18.92 MB
Page 80 of 354
Downloaded from www.Manualslib.com manuals search engine Turn Signal and Lane Change Indicator
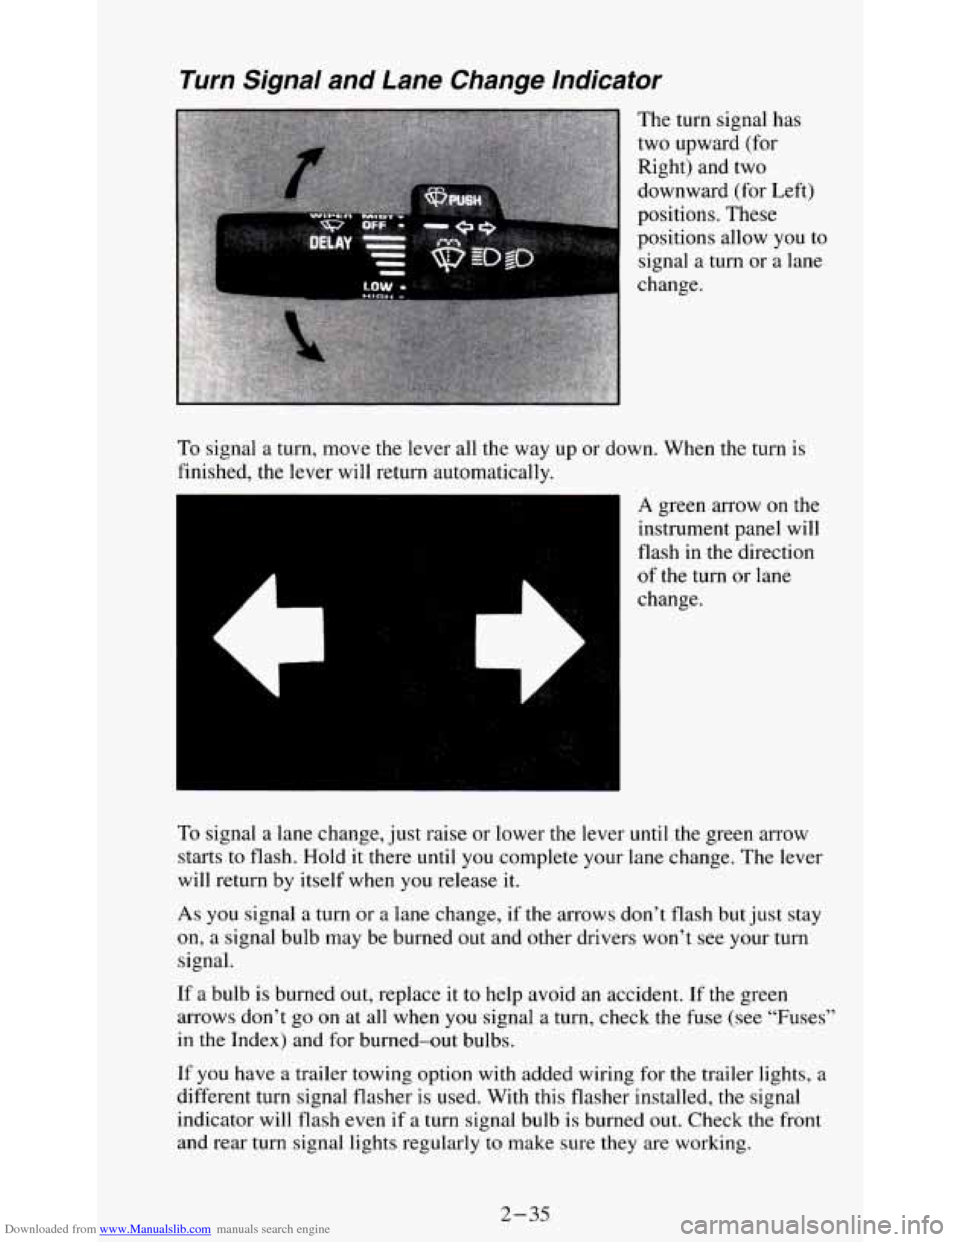
The turn signal has
two upward (for
Right) and two
downward (for Left)
positions. These
positions allow you
to
signal a turn or a lane
change.
To signal a turn, move the lever all the way up or down. When the turn is
finished, the lever will return automatically.
es
A green arrow on the
instrument panel will
flash in the direction
of the turn or lane
change.
To signal a lane change, just raise or lower the lever
until the green arrow
starts
to flash. Hold it there until you complete your lane change. The lever
will return by itself when
you release it.
As you signal a turn or a lane change, if the arrows don’t flash but just stay
on, a signal bulb may be burned out and other drivers won’t see your turn
signal.
If a bulb is burned out, replace it to help avoid an accident. If the green
arrows don’t go on at all when
you signal a turn, check the fuse (see “Fuses”
in the Index) and for burned-out bulbs.
If you have a trailer towing option with added wiring for the trailer lights, a
different turn signal flasher is used. With this flasher installed, the signal
indicator will flash even
if a turn signal bulb is burned out. Check the front
and rear turn signal lights regularly
to make sure they are working.
2-35
Page 180 of 354
Downloaded from www.Manualslib.com manuals search engine Following Distance
Stay at least twice as far behind the vehicle ahead as you would when
driving your vehicle without a trailer. This can help
you avoid situations that
require heavy braking and sudden turns.
Passing
You’ll need more passing distance up ahead when you’re towing a trailer.
And, because you’re
a good deal longer, you’ll need to go much farther
beyond the passed vehicle before
you can return to your lane.
Backing Up
Hold the bottom of the steering wheel with one hand. Then, to move the
trailer to the left, just move that hand
to the left. To move the trailer to the
right, move your hand to the right. Always back up slowly and, if possible,
have someone guide you.
Making Turns
I NOTICE:
Making very sharp turns while trailering could cause the traile\
r
to come in contact with the vehicle. Your vehicle could be
damaged. Avoid making very sharp turns while trailering.
When you’re turning with a trailer, make wider turns than normal. Do this
so your trailer won’t strike soft shoulders, curbs, road signs, trees, or other
objects. Avoid jerky or sudden maneuvers. Signal well in advance.
Turn Signals When Towing a Trailer
When you tow a trailer, your vehicle has to have extra wiring and a
heavy-duty turn signal flasher (included in the optional trailering package).
The green arrows on your instrument panel will flash whenever you signal a
turn or lane change. Properly hooked up, the trailer lamps will also flash,
telling other drivers you’re about
to turn, change lanes or stop.
When towing a trailer, the green arrows on your instrument panel will flash
for turns even if the bulbs on the trailer are burned out. Thus, you may think
drivers behind you are seeing your signal when they are
not. It’s important
to check occasionally to be sure the trailer bulbs are still working.
4-47
Page 250 of 354
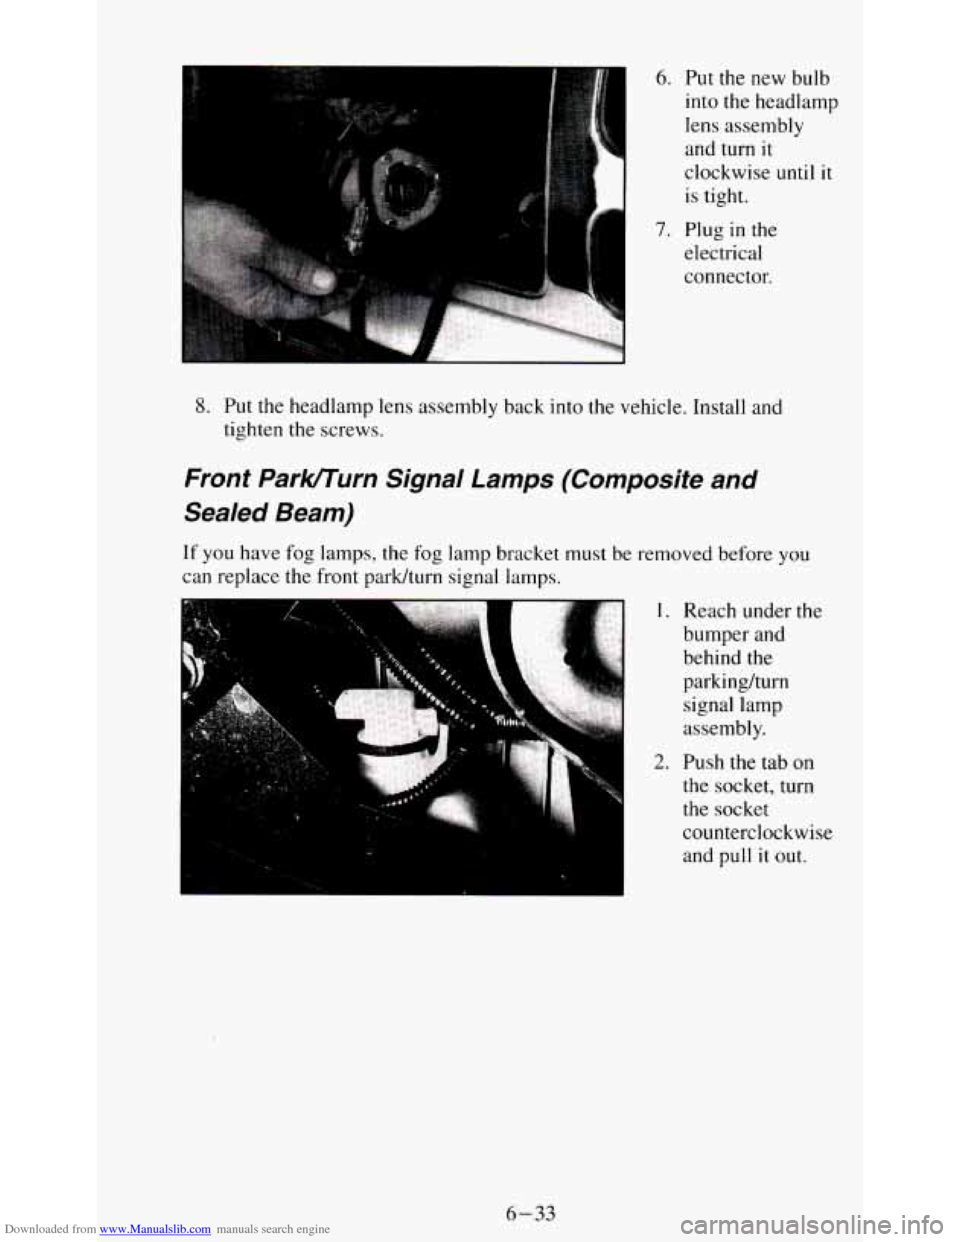
Downloaded from www.Manualslib.com manuals search engine 6. Put the new bulb
into the headlamp
lens assembly
and turn
it
clockwise until it
is tight.
7. Plug in the
electrical
connector.
8. Put the headlamp lens assembly back into the vehicle. Install and
tighten the screws.
Front Parlcrrurn Signal Lamps (Composite and
Sealed Beam)
If you have fog lamps, the fog lamp bracket must be removed before you
can replace the front park/turn signal lamps.
,. ,.: :; . I. Reach under the
bumper and
behind the
parkinghrn
signal lamp
assembly.
2. Push the tab on
the socket, turn
the socket
counterclockwise
and
pull it out.
6-33
Page 251 of 354
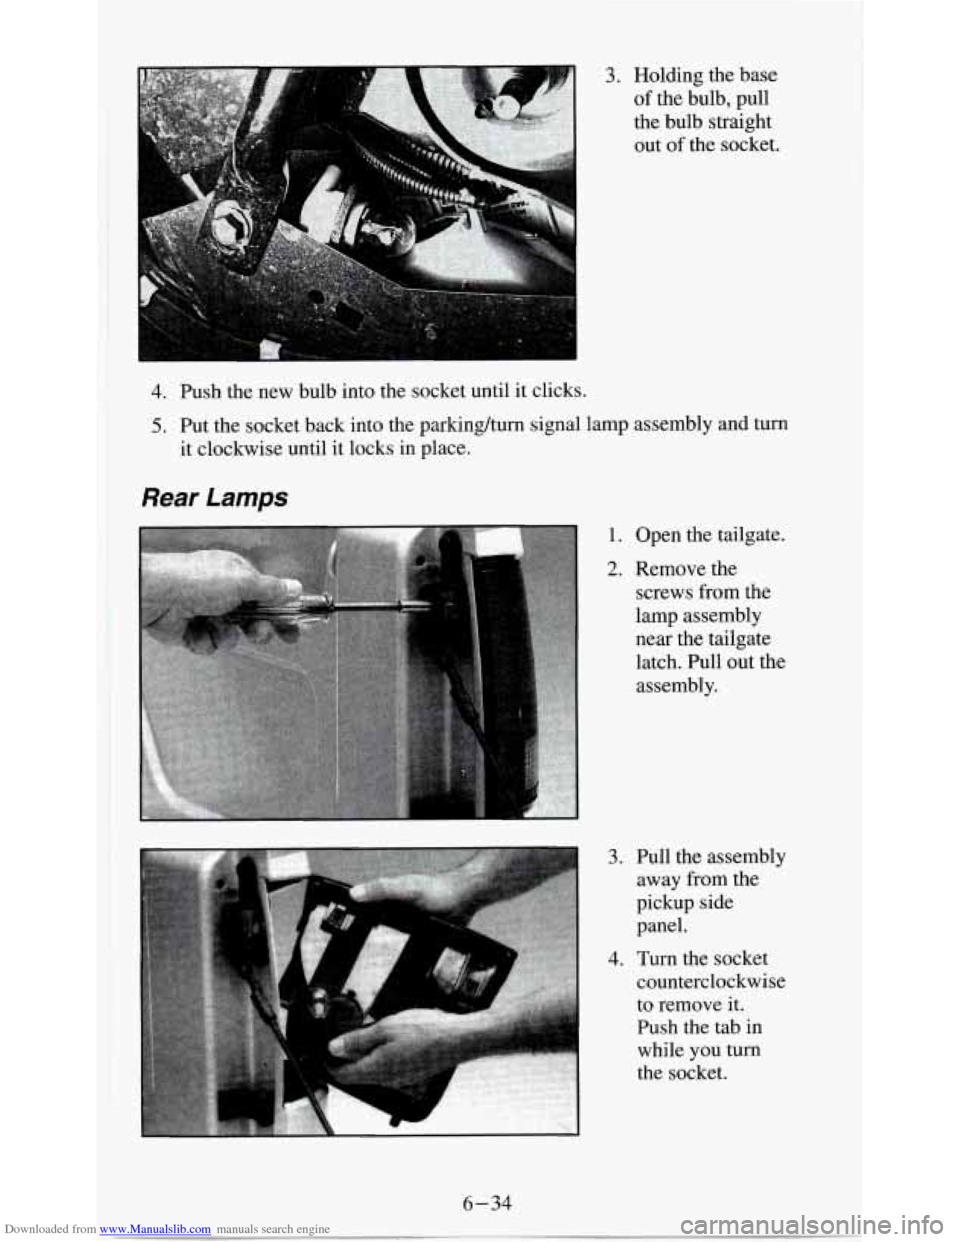
Downloaded from www.Manualslib.com manuals search engine 3. Holding the base
of the bulb, pull
the bulb straight out of the socket.
4. Push the new bulb into the socket until it clicks.
5. Put the socket back into the parkinghum signal lamp assembly and turn
it clockwise until it locks in place.
Rear Lamps
1. Open the tailgate.
2. Remove the
screws from the
lamp assembly
near the tailgate
latch. Pull out the assembly.
3. Pull the assembly away from the
pickup side
panel.
4. Turn the socket
counterclockwise to remove it.
Push the tab in
while you turn
the socket.
6-34
Page 281 of 354
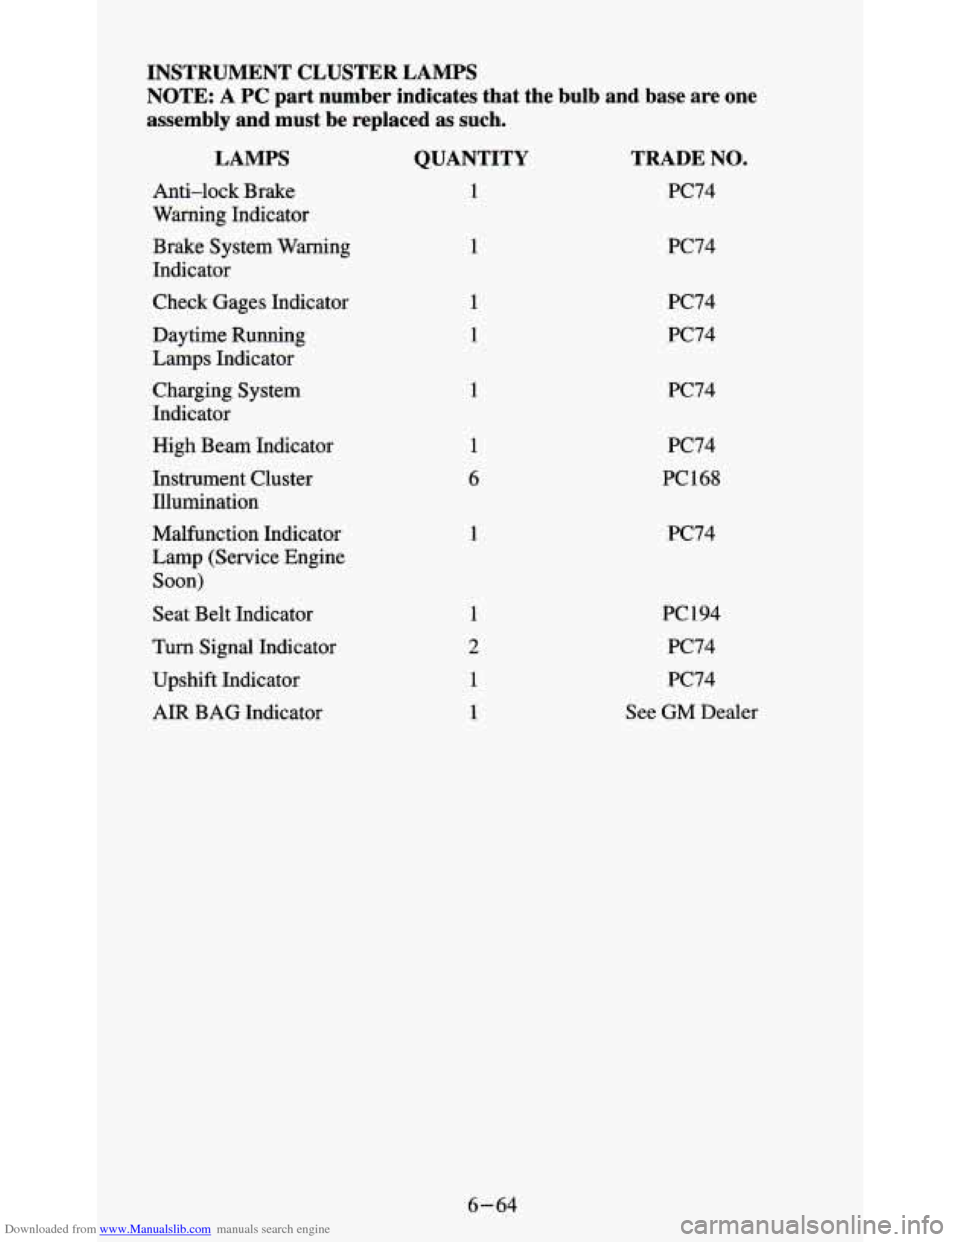
Downloaded from www.Manualslib.com manuals search engine INSTRUMENT CLUSTER LAMPS
NOTE:
A PC part number indicates that the bulb and base are one
assembly and must be replaced as such.
LAMPS
Anti-lock Brake
Warning Indicator
Brake System Warning
Indicator
Check Gages Indicator
Daytime Running
Lamps Indicator
Charging System
Indicator
High Beam Indicator
Instrument Cluster Illumination
Malfunction Indicator
Lamp (Service Engine
Soon)
Seat Belt Indicator
Turn Signal Indicator
Upshift Indicator
AIR BAG Indicator
QUANTITY
1
1
1
1
6
1
TRADE NO.
PC74
PC74
PC74
PC74
PC74
PC74
PC168
PC74
PC194 PC74
PC74
See GM Dealer
6-64
Page 345 of 354
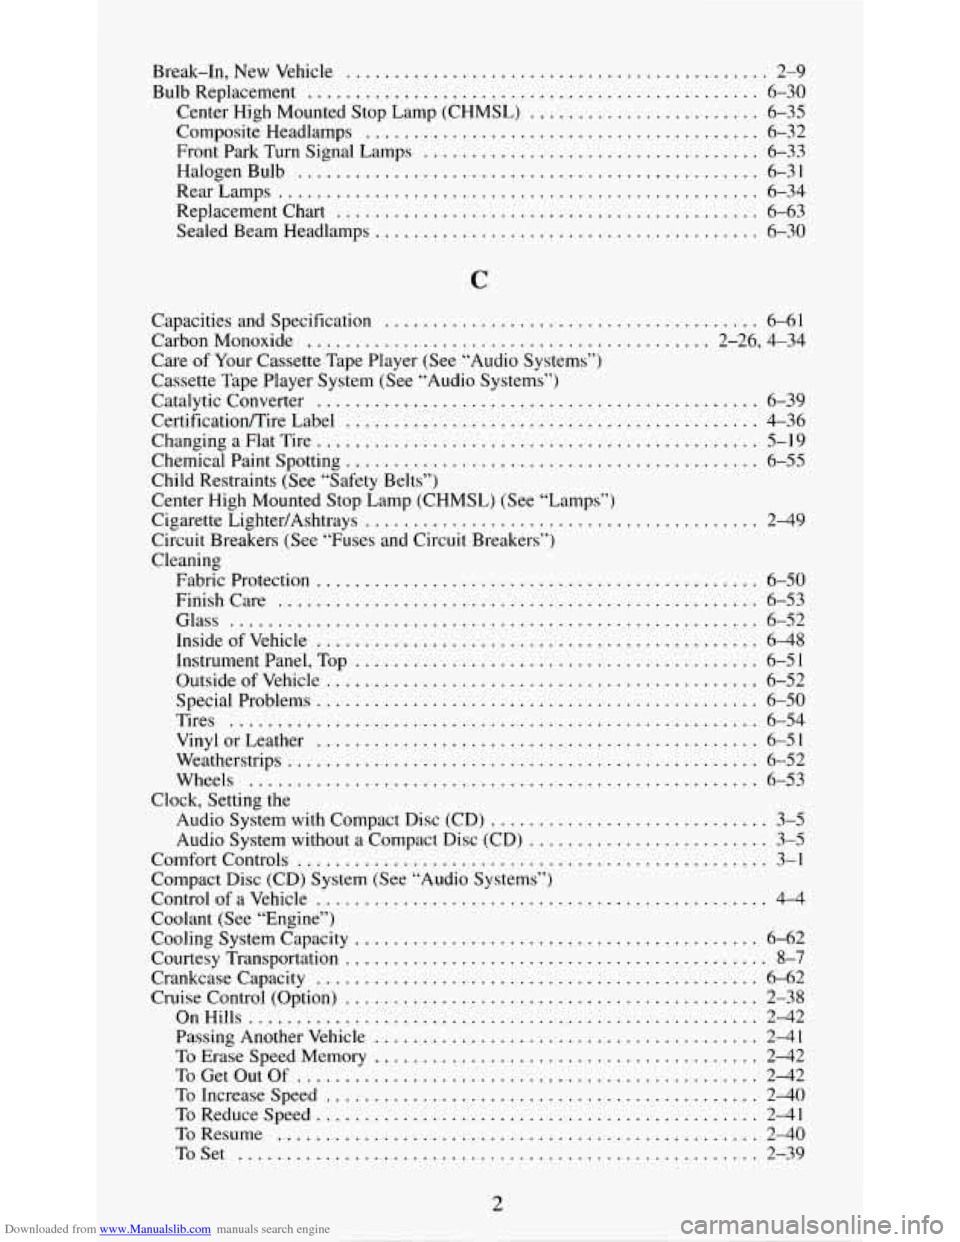
Downloaded from www.Manualslib.com manuals search engine Break.1n. New Vehicle ............................................ 2-9
Bulb Replacement
............................................... 6-30
Composite Headlamps
......................................... 6-32
Halogen Bulb
................................................ 6-31
Replacement Chart ............................................ 6-63
Sealed Beam Headlamps
........................................ 6-30
Center
High Mounted Stop Lamp (CHMSL)
........................ 6-35
Front Park Turn Signal Lamps
................................... 6-33
RearLamps .................................................. 6-34
Capacities and Specification
............ ....................... 6-61
CarbonMonoxide
.......................................... 2-26, 4-34
Care of Your Cassette Tape Player (See “Audio Systems”)
Cassette Tape Player System (See “Audio Systems”)
Catalytic Converter
.............................................. 6-39
CertificatiodTire Label
........................................... 4-36
Changing
a Flat Tire .............................................. 5-19
Chemical Paint Spotting
........................................... 6-55
Cigarette LightedAshtrays
......................................... 2-49
Child
Restraints (See “Safety Belts”)
Center High Mounted Stop Lamp (CHMSL) (See “Lamps“)
Circuit Breakers (See “Fuses and Circuit Breakers”)
Cleaning Fabric Protection
.............................................. 6-50
Finishcare
.................................................. 6-53
Glass ....................................................... 6-52
InsideofVehicle
.............................................. 6-48
Instrumentpanel, Top .......................................... 6-51
Outsideofvehicle
............................................. 6-52
Tires
....................................................... 6-54
VinylorLeather
.............................................. 6-51
Wheels
........................................ ........ 6-53
Special
Problems
.............................................. 6-50
Weatherstrips ................................................. 6-52
Audio System with Compact Disc (CD)
............................. 3-5
Clock, Setting
the
Audio System without
a Compact Disc (CD) ......................... 3-5
Comfort Controls
................................................. 3-1
Compact Disc (CD) System (See “Audio Systems”)
Control
of a Vehicle ........................................... 4-4
Coolant (See “Engine”)
Cooling System Capacity
.......................................... 6-62
Courtesy Transportation
............................................ 8-7
Crankcase Capacity .............................................. 6-62
Cruise Control (Option)
........................................... 2-38
Passing Another Vehicle
........................................ 2-41
To Erase Speed Memory
........................................ 2-42
To Increase Speed
............................................. 2-40
OnHills
..................................................... 2-42
ToGetOutOf
................................................ 2-42
ToReduceSpeed
.............................................. 2-41
ToResume .................................................. 2-40
ToSet ...................................................... 2-39
2
Page 348 of 354
Downloaded from www.Manualslib.com manuals search engine I
If You’re Stuck: In Sand. Mud. Ice. or Snow ........................... 5-32
Ignitionswitch
.................................................. 2-10
Inflation-Tire Pressure
( See “Tires”)
Instrument Cluster
............................................... 2-53
Instrumentpanel
................................................ 2-53
Jacking Equipment Storage
........................................ 5-20
Jumpstarting .................................................... 5-2
K
KeyLockCylinders .............................................. 6-39
Key Release Button
.............................................. 2-11
Keyless Entry System
............................................. 2-6
Keys
........................................................... 2-1
L
Labels
Lamps Certificatioflire
( See “Certification/Tire Label”)
Center High Mounted
Stop Lamp (CHMSL) ........................ 2-67
Dome
....................................................... 2-46
FogLamps
.................................................. 2-44
Headlights (See “Headlamps”)
Replacement
(See “Bulb Replacement”)
Lights
......................................................... 2-43
Air Bag Readiness Light
........................................ 2-57
Anti-Lock Brake System Warning Light
........................... 2-59
BrakeSystemLight
............................................ 2-58
Charging System Indicator Light
................................. 2-62
Check Gages Indicator Light
.................................... 2-62
Daytime Running Lamps (DRL) Indicator Light
................ 2-45. 2-63
Headlamp High Beam Indicator Light
............................. 2-64
Headlights (See “Headlamps”)
Malfunction Indicator
..................................... 2-60. 6-39
Safety Belt Reminder Light
..................................... 2-57
Service Engine Soon (See “Malfunction Indicator”) Shift Indicator Light
...................................... 2-21. 2-63
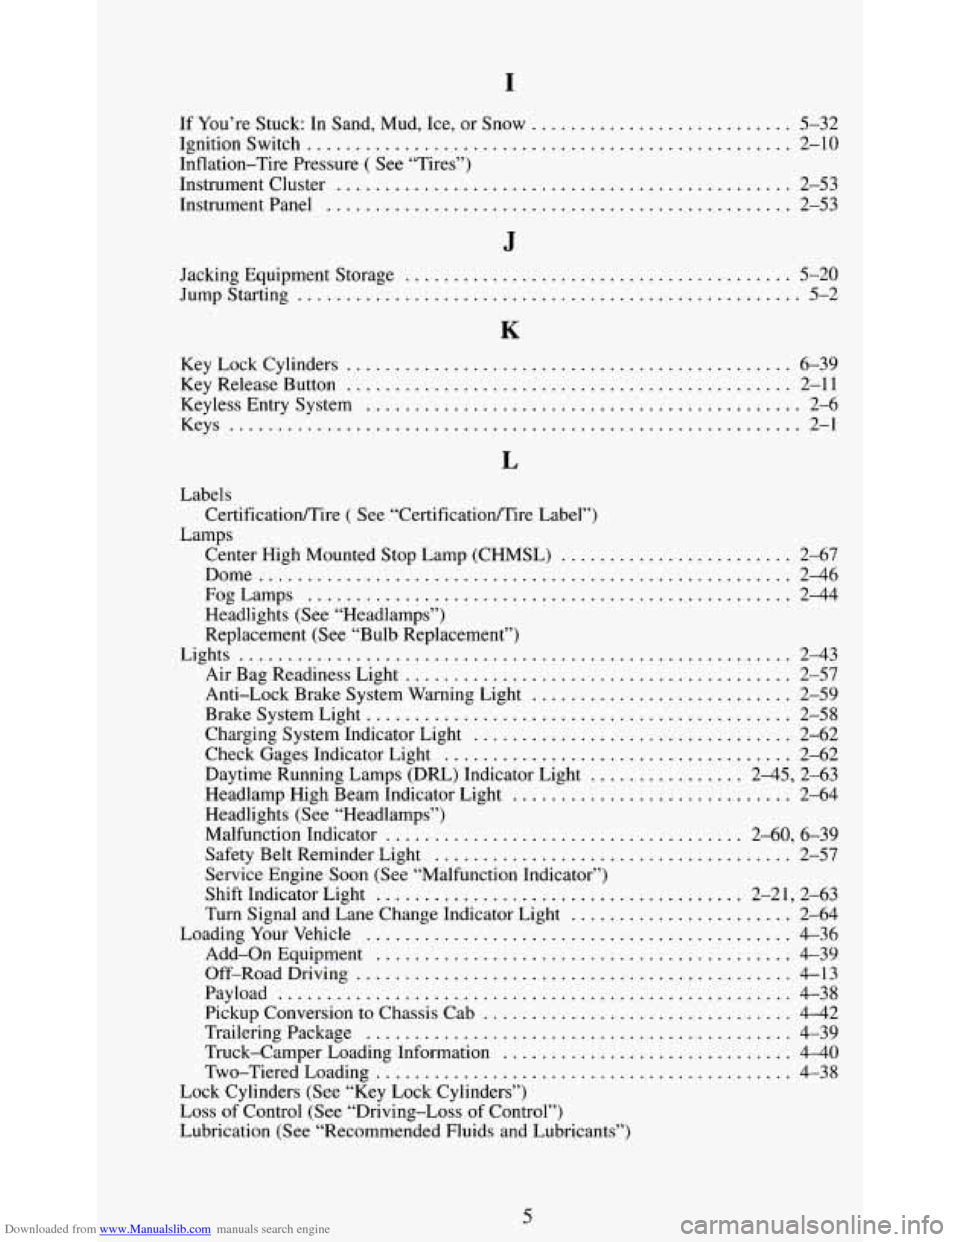
Turn Signal and Lane Change Indicator Light
....................... 2-64
Loading Your Vehicle
............................................ 4-36
Add-on Equipment
........................................... 4-39
Off-Road Driving
............................................. 4-13
Payload ..................................................... 4-38
Pickup Conversion to Chassis Cab
................................ 4-42
TraileringPackage
............................................ 4-39
Truck-Camper Loading Information
.............................. 440
Two-Tiered Loading ........................................... 4-38
Lock Cylinders (See “Key Lock Cylinders”)
Loss of Control (See “Driving-Loss of Control”)
Lubrication (See “Recommended Fluids and Lubricants”)
5