check oil CHEVROLET S10 2003 2.G User Guide
[x] Cancel search | Manufacturer: CHEVROLET, Model Year: 2003, Model line: S10, Model: CHEVROLET S10 2003 2.GPages: 432, PDF Size: 2.82 MB
Page 282 of 432
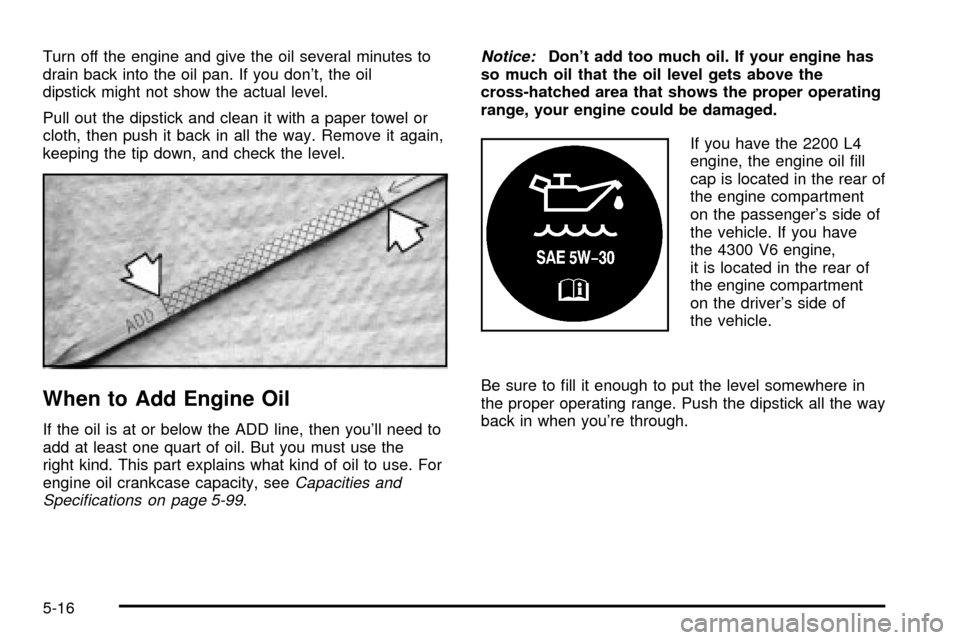
Turn off the engine and give the oil several minutes to
drain back into the oil pan. If you don't, the oil
dipstick might not show the actual level.
Pull out the dipstick and clean it with a paper towel or
cloth, then push it back in all the way. Remove it again,
keeping the tip down, and check the level.
When to Add Engine Oil
If the oil is at or below the ADD line, then you'll need to
add at least one quart of oil. But you must use the
right kind. This part explains what kind of oil to use. For
engine oil crankcase capacity, see
Capacities and
Speci®cations on page 5-99.
Notice:Don't add too much oil. If your engine has
so much oil that the oil level gets above the
cross-hatched area that shows the proper operating
range, your engine could be damaged.
If you have the 2200 L4
engine, the engine oil ®ll
cap is located in the rear of
the engine compartment
on the passenger's side of
the vehicle. If you have
the 4300 V6 engine,
it is located in the rear of
the engine compartment
on the driver's side of
the vehicle.
Be sure to ®ll it enough to put the level somewhere in
the proper operating range. Push the dipstick all the way
back in when you're through.
5-16
Page 288 of 432
Automatic Transmission Fluid
When to Check and Change
A good time to check your automatic transmission ¯uid
level is when the engine oil is changed.
Change both the ¯uid and ®lter every 15,000 miles
(25 000 km) if the vehicle is mainly driven under one or
more of these conditions:
·In heavy city traffic where the outside temperature
regularly reaches 90ÉF (32ÉC) or higher.
·In hilly or mountainous terrain.
·When doing frequent trailer towing.
·Uses such as found in taxi, police or delivery
service.
If you do not use your vehicle under any of these
conditions, change the ¯uid and ®lter every
50,000 miles (83 000 km).
See
Part A: Scheduled Maintenance Services on
page 6-4.
How to Check
Because this operation can be a little difficult, you may
choose to have this done at the dealership service
department.
If you do it yourself, be sure to follow all the instructions
here, or you could get a false reading on the dipstick.
Notice:Too much or too little ¯uid can damage
your transmission. Too much can mean that some
of the ¯uid could come out and fall on hot engine
part or exhaust system parts, starting a ®re.
Too little ¯uid could cause the transmission to
overheat. Be sure to get an accurate reading if you
check your transmission ¯uid.
Wait at least 30 minutes before checking the
transmission ¯uid level if you have been driving:
·When outside temperatures are above 90ÉF (32ÉC).
·At high speed for quite a while.
·In heavy traffic±especially in hot weather.
·While pulling a trailer.
5-22
Page 291 of 432
Manual Transmission Fluid
When to Check
A good time to have it checked is when the engine oil is
changed. However, the ¯uid in your manual transmission
doesn't require changing.
How to Check
Because this operation can be a little difficult, you may
choose to have this done at your GM dealership
service department.
If you do it yourself, be sure to follow all the instructions
here, or you could get a false reading.
Notice:Too much or too little ¯uid can damage
your transmission. Too much can mean that some
of the ¯uid could come out and fall on hot engine
part or exhaust system parts, starting a ®re.
Too little ¯uid could cause the transmission to
overheat. Be sure to get an accurate reading if you
check your transmission ¯uid.
Check the ¯uid level only when your engine is off, the
vehicle is parked on a level place and the transmission
is cool enough for you to rest your ®ngers on the
transmission case.Then, follow these steps:
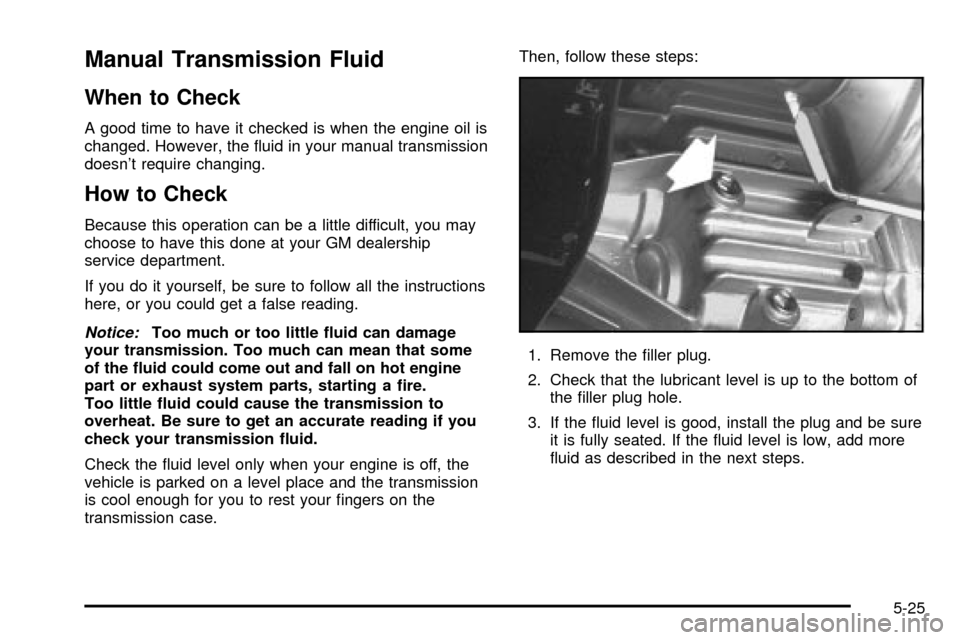
1. Remove the ®ller plug.
2. Check that the lubricant level is up to the bottom of
the ®ller plug hole.
3. If the ¯uid level is good, install the plug and be sure
it is fully seated. If the ¯uid level is low, add more
¯uid as described in the next steps.
5-25
Page 293 of 432
How to Check and Add Fluid
The proper ¯uid should be added if the level does not
reach the bottom of the diaphragm when it's in place in
the reservoir. See the instructions on the reservoir cap.
Engine Coolant
The cooling system in your vehicle is ®lled with
DEX-COOLžengine coolant. This coolant is designed
to remain in your vehicle for 5 years or 150,000 miles
(240 000 km), whichever occurs ®rst, if you add
only DEX-COOL
žextended life coolant.
The following explains your cooling system and how to
add coolant when it is low. If you have a problem
with engine overheating, see
Engine Overheating on
page 5-30.A 50/50 mixture of clean, drinkable water and
DEX-COOL
žcoolant will:
·Give freezing protection down to-34ÉF (-37ÉC).
·Give boiling protection up to 265ÉF (129ÉC).
·Protect against rust and corrosion.
·Help keep the proper engine temperature.
·Let the warning lights and gages work as they
should.
Notice:When adding coolant, it is important that
you use only DEX-COOLž(silicate-free) coolant.
If coolant other than DEX-COOLžis added to
the system, premature engine, heater core or
radiator corrosion may result. In addition, the engine
coolant will require change sooner -- at 30,000 miles
(50,000 km) or 24 months, whichever occurs ®rst.
Damage caused by the use of coolant other
than DEX-COOL
žis not covered by your new vehicle
warranty.
5-27
Page 294 of 432
What to Use
Use a mixture of one-halfclean, drinkable waterand
one-half DEX-COOLžcoolant which won't damage
aluminum parts. If you use this coolant mixture, you don't
need to add anything else.
{CAUTION:
Adding only plain water to your cooling system
can be dangerous. Plain water, or some other
liquid such as alcohol, can boil before the
proper coolant mixture will. Your vehicle's
coolant warning system is set for the proper
coolant mixture. With plain water or the wrong
mixture, your engine could get too hot but you
wouldn't get the overheat warning. Your engine
could catch ®re and you or others could be
burned. Use a 50/50 mixture of clean, drinkable
water and the proper coolant.
Notice:If you use an improper coolant mixture, your
engine could overheat and be badly damaged. The
repair cost wouldn't be covered by your warranty.
Too much water in the mixture can freeze and crack
the engine, radiator, heater core and other parts.If you have to add coolant more than four times a year,
have your dealer check your cooling system.
Notice:If you use the proper coolant, you don't
have to add extra inhibitors or additives which claim
to improve the system. These can be harmful.
Checking Coolant
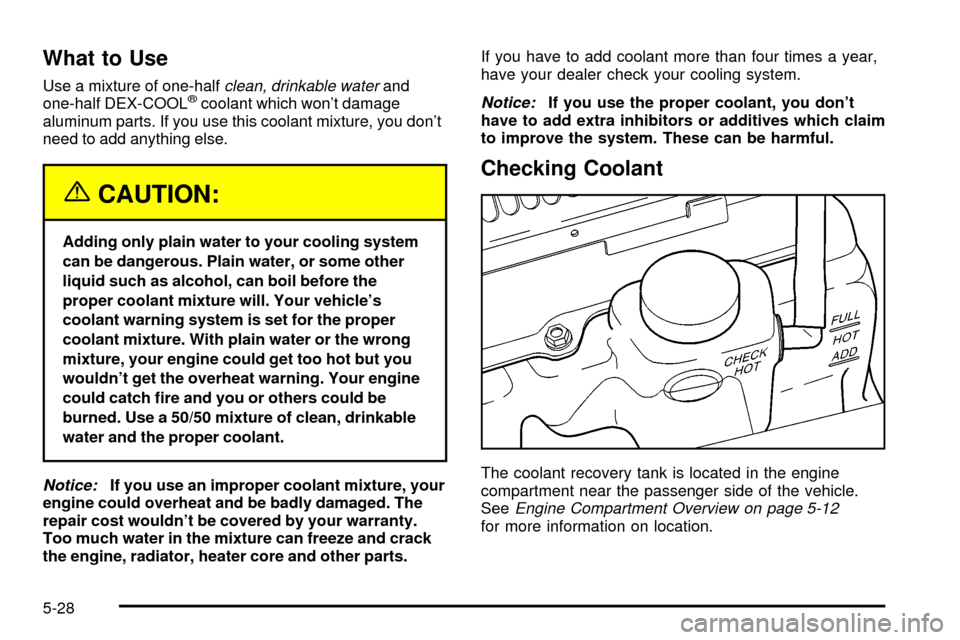
The coolant recovery tank is located in the engine
compartment near the passenger side of the vehicle.
See
Engine Compartment Overview on page 5-12for more information on location.
5-28
Page 309 of 432
Checking Brake Fluid
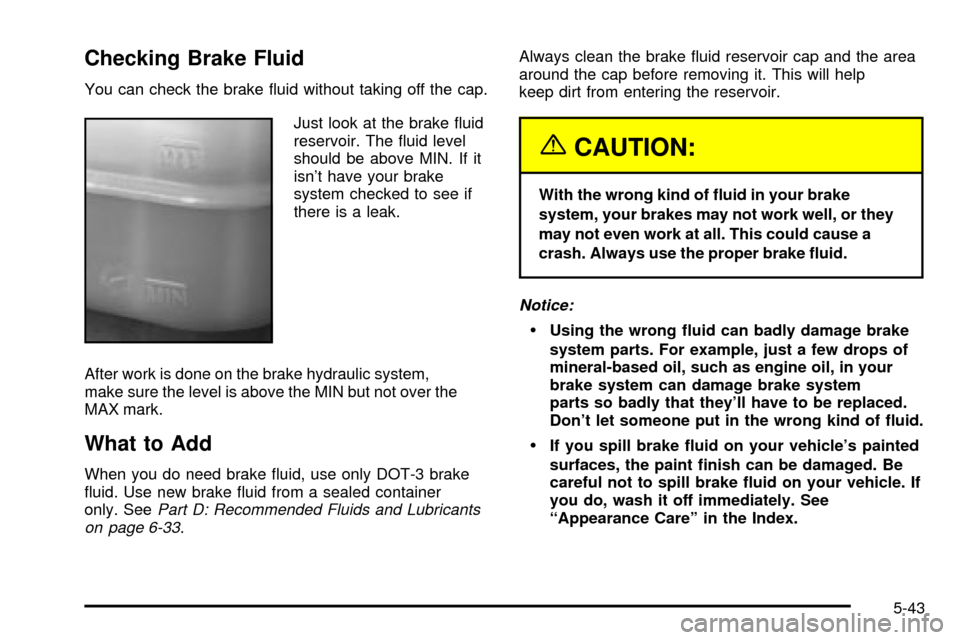
You can check the brake ¯uid without taking off the cap.
Just look at the brake ¯uid
reservoir. The ¯uid level
should be above MIN. If it
isn't have your brake
system checked to see if
there is a leak.
After work is done on the brake hydraulic system,
make sure the level is above the MIN but not over the
MAX mark.
What to Add
When you do need brake ¯uid, use only DOT-3 brake
¯uid. Use new brake ¯uid from a sealed container
only. See
Part D: Recommended Fluids and Lubricants
on page 6-33.Always clean the brake ¯uid reservoir cap and the area
around the cap before removing it. This will help
keep dirt from entering the reservoir.
{CAUTION:
With the wrong kind of ¯uid in your brake
system, your brakes may not work well, or they
may not even work at all. This could cause a
crash. Always use the proper brake ¯uid.
Notice:
·Using the wrong ¯uid can badly damage brake
system parts. For example, just a few drops of
mineral-based oil, such as engine oil, in your
brake system can damage brake system
parts so badly that they'll have to be replaced.
Don't let someone put in the wrong kind of ¯uid.
·If you spill brake ¯uid on your vehicle's painted
surfaces, the paint ®nish can be damaged. Be
careful not to spill brake ¯uid on your vehicle. If
you do, wash it off immediately. See
ªAppearance Careº in the Index.
5-43
Page 354 of 432

Finish Care
Occasional waxing or mild polishing of your vehicle by
hand may be necessary to remove residue from the
paint ®nish. You can get GM-approved cleaning products
from your dealer. See
Vehicle Care/Appearance
Materials on page 5-90.
If your vehicle has a ªbasecoat/clearcoatº paint ®nish.
The clearcoat gives more depth and gloss to the colored
basecoat. Always use waxes and polishes that are
non-abrasive and made for a basecoat/clearcoat paint
®nish.
Notice:Machine compounding or aggressive
polishing on a basecoat/clearcoat paint ®nish may
dull the ®nish or leave swirl marks.
Foreign materials such as calcium chloride and other
salts, ice melting agents, road oil and tar, tree sap, bird
droppings, chemicals from industrial chimneys, etc.,
can damage your vehicle's ®nish if they remain
on painted surfaces. Wash the vehicle as soon as
possible. If necessary, use non-abrasive cleaners that
are marked safe for painted surfaces to remove
foreign matter.
Exterior painted surfaces are subject to aging, weather
and chemical fallout that can take their toll over a
period of years. You can help to keep the paint ®nish
looking new by keeping your vehicle garaged or covered
whenever possible.
Protecting Exterior Bright Metal Parts
Bright metal parts should be cleaned regularly to keep
their luster. Washing with water is all that is usually
needed. However, you may use chrome polish on
chrome or stainless steel trim, if necessary.
Use special care with aluminum trim. To avoid damaging
protective trim, never use auto or chrome polish, steam or
caustic soap to clean aluminum. A coating of wax, rubbed
to high polish, is recommended for all bright metal parts.
Cleaning the Windshield and Wiper
Blades
If the windshield is not clear after using the windshield
washer, or if the wiper blade chatters when running,
wax, sap or other material may be on the blade or
windshield.
Clean the outside of the windshield with a full-strength
glass cleaning liquid. The windshield is clean if beads do
not form when you rinse it with water.
Grime from the windshield will stick to the wiper blades
and affect their performance. Clean the blade by
wiping vigorously with a cloth soaked in full-strength
windshield washer solvent. Then rinse the blade
with water.
Check the wiper blades and clean them as necessary;
replace blades that look worn.
5-88
Page 370 of 432
Maintenance Schedule
Introduction
Important: Keep engine oil at the proper level and
change as recommended.
Have you purchased the GM Protection Plan? The Plan
supplements your new vehicle warranties. See your
Warranty and Owner Assistance booklet or your dealer
for details.
Your Vehicle and the Environment
Proper vehicle maintenance not only helps to keep your
vehicle in good working condition, but also helps the
environment. Improper vehicle maintenance can
even affect the quality of the air we breathe. Improper
¯uid levels or the wrong tire in¯ation can increase
the level of emissions from your vehicle. To help protect
our environment, and to keep your vehicle in good
condition, be sure to maintain your vehicle properly.
Maintenance Requirements
Maintenance intervals, checks, inspections and
recommended ¯uids and lubricants as prescribed in this
manual are necessary to keep your vehicle in good
working condition. Any damage caused by failure to
follow scheduled maintenance may not be covered by
warranty.
6-2
Page 375 of 432
Every 100,000 Miles (166 000 km):Spark Plug Wire
Inspection. Spark Plug Replacement. 4.3L V6 Engine
Only: Positive Crankcase Ventilation (PCV) Valve
Inspection.
Every 150,000 Miles (240 000 km):Cooling System
Service (or every 60 months, whichever occurs
®rst). Engine Accessory Drive Belt Inspection.
These intervals only summarize maintenance services.
Be sure to follow the complete scheduled maintenance
on the following pages.
Short Trip/City Scheduled
Maintenance
The services shown in this schedule up to 100,000 miles
(166 000 km) should be repeated after 100,000 miles
(166 000 km) at the same intervals for the life of
this vehicle. The services shown at 150,000 miles
(240 000 km) should be repeated at the same interval
after 150,000 miles (240 000 km) for the life of this
vehicle.
See
Part B: Owner Checks and Services on page 6-26andPart C: Periodic MaintenanceInspections on
page 6-31.
Footnotes
²The U.S. Environmental Protection Agency or the
California Air Resources Board has determined that the
failure to perform this maintenance item will not nullify
the emission warranty or limit recall liability prior to
the completion of the vehicle's useful life. We, however,
urge that all recommended maintenance services be
performed at the indicated intervals and the
maintenance be recorded.
#Lubricate the front suspension, ball joints, steering
linkage, parking brake cable guides, propshaft splines,
universal joints, constant velocity joint and brake
pedal springs.
+A good time to check your brakes is during tire
rotation. See Brake System Inspection on page 6-32.
**
Drive axle service. See Part D: Recommended Fluids
and Lubricants on page 6-33for proper lubricant to use:
·Check ¯uid level and add ¯uid as needed. If driving in
dusty areas or when towing a trailer, drain ¯uid and
re®ll every 15,000 miles (25 000 km).
·If your vehicle has a locking differential, drain ¯uid
and re®ll at ®rst engine oil change.
·More frequent lubrication may be required for
heavy-duty or off-road use.
6-7
Page 376 of 432

3,000 Miles (5 000 km)
qChange engine oil and ®lter (or every 3 months,
whichever occurs ®rst).An Emission Control Service.
qLubricate chassis components (or every 3 months,
whichever occurs ®rst).(See footnote #.)
qCheck rear/front axle ¯uid level and add ¯uid as
needed. Check constant velocity joints and axle seals
for leaking.
(See footnote **.)
6,000 Miles (10 000 km)
qChange engine oil and ®lter (or every 3 months,
whichever occurs ®rst).An Emission Control Service.
qLubricate chassis components (or every 3 months,
whichever occurs ®rst).(See footnote #.)
qCheck rear/front axle ¯uid level and add ¯uid as
needed. Check constant velocity joints and axle seals
for leaking.
(See Footnote **.)
qRotate tires. SeeTire Inspection and Rotation on
page 5-64for proper rotation pattern and additional
information.(See footnote +.)
9,000 Miles (15 000 km)
qChange engine oil and ®lter (or every 3 months,
whichever occurs ®rst).An Emission Control Service.
qLubricate chassis components (or every 3 months,
whichever occurs ®rst).(See footnote #.)
qCheck rear/front axle ¯uid level and add ¯uid as
needed. Check constant velocity joints and axle seals
for leaking.
(See footnote **.)
12,000 Miles (20 000 km)
qChange engine oil and ®lter (or every 3 months,
whichever occurs ®rst).An Emission Control Service.
qLubricate chassis components (or every 3 months,
whichever occurs ®rst).(See footnote #.)
qCheck rear/front axle ¯uid level and add ¯uid as
needed. Check constant velocity joints and axle seals
for leaking.
(See footnote **.)
qRotate tires. SeeTire Inspection and Rotation on
page 5-64for proper rotation pattern and additional
information.(See footnote +.)
15,000 Miles (25 000 km)
qChange engine oil and ®lter (or every 3 months,
whichever occurs ®rst).An Emission Control Service.
qLubricate chassis components (or every 3 months,
whichever occurs ®rst).(See footnote #.)
qInspect engine air cleaner ®lter. If necessary, replace
the ®lter. If vehicle is driven in dusty/dirty conditions,
inspect ®lter at every engine oil change. See
Engine Air Cleaner/Filter on page 5-19for more
information.An Emission Control Service. (See
footnote ².)
qCheck rear/front axle ¯uid level and add ¯uid as
needed. Check constant velocity joints and axle seals
for leaking.
(See footnote **.)
6-8