ECU CHEVROLET SILVERADO 1500 2022 Repair Manual
[x] Cancel search | Manufacturer: CHEVROLET, Model Year: 2022, Model line: SILVERADO 1500, Model: CHEVROLET SILVERADO 1500 2022Pages: 461, PDF Size: 11.09 MB
Page 388 of 461
Chevrolet Silverado 1500 Owner Manual (GMNA-Localizing-U.S./Canada/
Mexico/Paraguay-14632303) - 2021 - CRC - 11/9/20
Vehicle Care 387
{Warning
Wheel nuts that are improperly or
incorrectly tightened can cause the
wheels to become loose or come off. The
wheel nuts should be tightened with a
torque wrench to the proper torque
specification after replacing. Follow the
torque specification supplied by the
aftermarket manufacturer when using
accessory locking wheel nuts. See
Capacities and Specifications0424 for
original equipment wheel nut torque
specifications.
Caution
Improperly tightened wheel nuts can lead
to brake pulsation and rotor damage. To
avoid expensive brake repairs, evenly
tighten the wheel nuts in the proper
sequence and to the proper torque
specification. See Capacities and
Specifications 0424 for the wheel nut
torque specification.
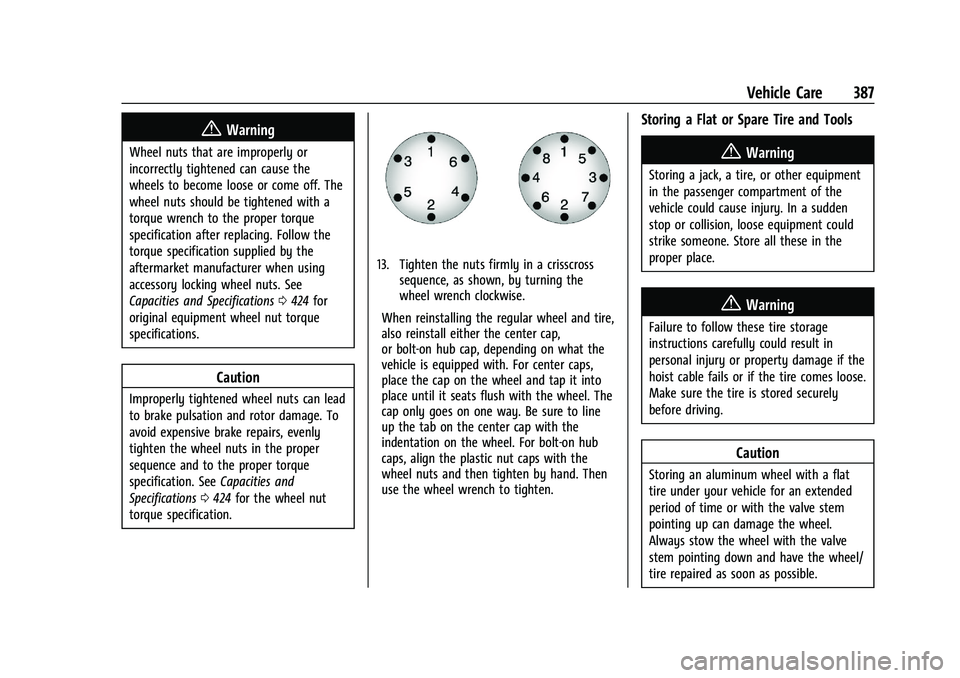
13. Tighten the nuts firmly in a crisscross sequence, as shown, by turning the
wheel wrench clockwise.
When reinstalling the regular wheel and tire,
also reinstall either the center cap,
or bolt-on hub cap, depending on what the
vehicle is equipped with. For center caps,
place the cap on the wheel and tap it into
place until it seats flush with the wheel. The
cap only goes on one way. Be sure to line
up the tab on the center cap with the
indentation on the wheel. For bolt-on hub
caps, align the plastic nut caps with the
wheel nuts and then tighten by hand. Then
use the wheel wrench to tighten.
Storing a Flat or Spare Tire and Tools
{Warning
Storing a jack, a tire, or other equipment
in the passenger compartment of the
vehicle could cause injury. In a sudden
stop or collision, loose equipment could
strike someone. Store all these in the
proper place.
{Warning
Failure to follow these tire storage
instructions carefully could result in
personal injury or property damage if the
hoist cable fails or if the tire comes loose.
Make sure the tire is stored securely
before driving.
Caution
Storing an aluminum wheel with a flat
tire under your vehicle for an extended
period of time or with the valve stem
pointing up can damage the wheel.
Always stow the wheel with the valve
stem pointing down and have the wheel/
tire repaired as soon as possible.
Page 391 of 461
Chevrolet Silverado 1500 Owner Manual (GMNA-Localizing-U.S./Canada/
Mexico/Paraguay-14632303) - 2021 - CRC - 11/9/20
390 Vehicle Care
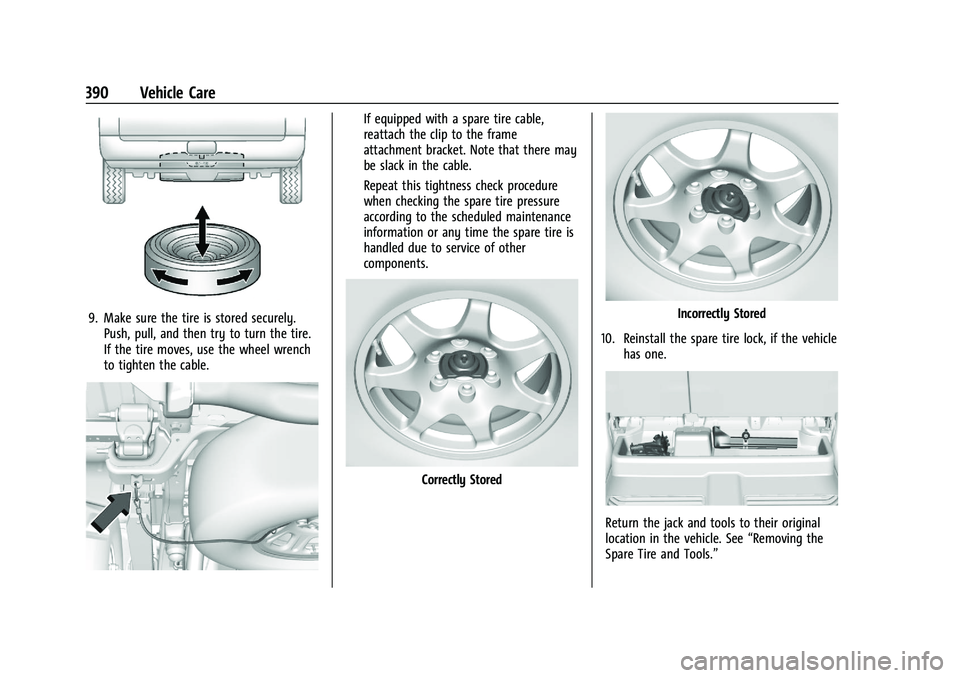
9. Make sure the tire is stored securely.Push, pull, and then try to turn the tire.
If the tire moves, use the wheel wrench
to tighten the cable.
If equipped with a spare tire cable,
reattach the clip to the frame
attachment bracket. Note that there may
be slack in the cable.
Repeat this tightness check procedure
when checking the spare tire pressure
according to the scheduled maintenance
information or any time the spare tire is
handled due to service of other
components.
Correctly Stored
Incorrectly Stored
10. Reinstall the spare tire lock, if the vehicle has one.
Return the jack and tools to their original
location in the vehicle. See “Removing the
Spare Tire and Tools.”
Page 395 of 461
Chevrolet Silverado 1500 Owner Manual (GMNA-Localizing-U.S./Canada/
Mexico/Paraguay-14632303) - 2021 - CRC - 11/9/20
394 Vehicle Care
vehicle has one. Negative (−) will go to a
heavy, unpainted metal engine part or to
a remote negative (−) terminal if the
vehicle has one.
Do not connect positive (+) to negative
(−) or you will get a short that would
damage the battery and maybe other
parts too. And do not connect the
negative (−) cable to the negative (−)
terminal on the dead battery because
this can cause sparks.
7. Connect one end of the red positive (+) cable to the remote positive (+) terminal
of the vehicle with the discharged
battery.
8. Do not let the other end touch metal. Connect it to the positive (+) terminal of
the good battery. Use a remote
positive (+) terminal if the vehicle
has one.
9. Connect one end of the black negative (−) cable to the negative (−) terminal of
the good battery. Use a remote negative
(−) terminal if the vehicle has one.
Do not let the other end touch anything
until the next step. 10. Connect the other end of the negative
(−) cable to the remote negative (−)
terminal to the discharged battery.
11. Start the vehicle with the good battery and run the engine for a while.
12. Try to start the vehicle that had the dead battery. If it will not start after a
few tries, it probably needs service.
Caution
If the jumper cables are connected or
removed in the wrong order, electrical
shorting may occur and damage the
vehicle. The repairs would not be covered
by the vehicle warranty. Always connect
and remove the jumper cables in the
correct order, making sure that the cables
do not touch each other or other metal.
Jumper Cable Removal
Reverse the sequence exactly when
removing the jumper cables.
After starting the disabled vehicle and
removing the jumper cables, allow it to idle
for several minutes.
Towing the Vehicle
Caution
Incorrectly towing a disabled vehicle may
cause damage. The damage would not be
covered by the vehicle warranty. Do not
lash or hook to suspension components.
Use the proper straps around the tires to
secure the vehicle. Do not drag a locked
wheel/tire. Use tire skates or dollies
under any locked wheel/tire while
loading the vehicle. Do not use a sling
type lift to tow the vehicle. This could
damage the vehicle.
Caution
Improper use of the tow eye can damage
the vehicle. If equipped, use the tow eye
to load a disabled vehicle onto a flatbed
tow truck from a flat road surface, or to
move the vehicle a short distance. Use
caution and low speeds. The transmission
must be in (N) Neutral when moving the
vehicle.
Page 397 of 461
Chevrolet Silverado 1500 Owner Manual (GMNA-Localizing-U.S./Canada/
Mexico/Paraguay-14632303) - 2021 - CRC - 11/9/20
396 Vehicle Care
Dinghy Towing (Two-Wheel-Drive
Vehicles and Vehicles with a
Single-Speed Transfer Case)
Caution
If a vehicle with two-wheel drive or a
single-speed transfer case is towed with
all four wheels on the ground, the
drivetrain components could be damaged.
The repairs would not be covered by the
vehicle warranty.
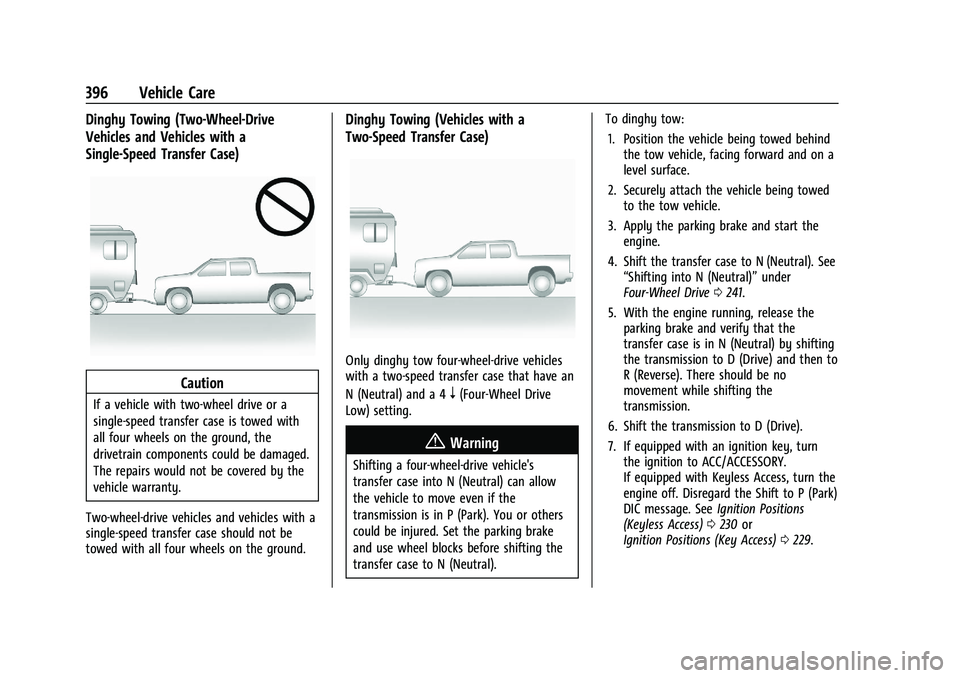
Two-wheel-drive vehicles and vehicles with a
single-speed transfer case should not be
towed with all four wheels on the ground.
Dinghy Towing (Vehicles with a
Two-Speed Transfer Case)
Only dinghy tow four-wheel-drive vehicles
with a two-speed transfer case that have an
N (Neutral) and a 4
n(Four-Wheel Drive
Low) setting.
{Warning
Shifting a four-wheel-drive vehicle's
transfer case into N (Neutral) can allow
the vehicle to move even if the
transmission is in P (Park). You or others
could be injured. Set the parking brake
and use wheel blocks before shifting the
transfer case to N (Neutral). To dinghy tow:
1. Position the vehicle being towed behind the tow vehicle, facing forward and on a
level surface.
2. Securely attach the vehicle being towed to the tow vehicle.
3. Apply the parking brake and start the engine.
4. Shift the transfer case to N (Neutral). See “Shifting into N (Neutral)” under
Four-Wheel Drive 0241.
5. With the engine running, release the parking brake and verify that the
transfer case is in N (Neutral) by shifting
the transmission to D (Drive) and then to
R (Reverse). There should be no
movement while shifting the
transmission.
6. Shift the transmission to D (Drive).
7. If equipped with an ignition key, turn the ignition to ACC/ACCESSORY.
If equipped with Keyless Access, turn the
engine off. Disregard the Shift to P (Park)
DIC message. See Ignition Positions
(Keyless Access) 0230 or
Ignition Positions (Key Access) 0229.
Page 398 of 461
Chevrolet Silverado 1500 Owner Manual (GMNA-Localizing-U.S./Canada/
Mexico/Paraguay-14632303) - 2021 - CRC - 11/9/20
Vehicle Care 397
{Warning
To avoid death, serious injury,
or property damage, before dinghy
towing the vehicle, always disconnect and
secure the negative battery cable and
cover the negative battery post and cable
with a non-conductive material. If the
battery is left connected or the battery
cable contacts the post, the Electric
Parking Brake may activate during
towing, which could cause a crash.
8. Disconnect the negative (–) battery cable. See “Negative Battery Cable
Disconnection” inBattery - North
America 0342.
9. Shift the transmission to P (Park).
Caution
If the steering column is locked, vehicle
damage may occur.
10. Move the steering wheel to make sure the steering column is unlocked.
11. If the vehicle has an ignition key, keep it in the towed vehicle in ACC/ACCESSORY
to prevent the steering column from
locking. If the vehicle is equipped with Keyless Access, keep the RKE transmitter
outside of the vehicle and manually lock
the doors. Access the vehicle by using
the key in the door lock. See
Door Locks
0 21.
Disconnecting the Towed Vehicle
Before disconnecting from the tow vehicle: 1. Park on a level surface. Secure the vehicle with wheel blocks.
2. Re-connect the negative (–) battery. See Battery - North America 0342.
3. Turn on the ignition with the engine off. For vehicles with a key, turn the ignition
to ON/RUN with the engine off. If the
vehicle is equipped with Keyless Access,
with your foot off the brake pedal, press
and hold ENGINE START/STOP for
five seconds until the green light comes
on in the button. See Ignition Positions
(Keyless Access) 0230 or
Ignition Positions (Key Access) 0229.
4. Set the parking brake. See Electric
Parking Brake 0246.
5. Disconnect from the tow vehicle.
6. Shift the transmission to N (Neutral). 7. Shift the transfer case to 2
m(Two-Wheel
Drive High). When the shift to 2
m
(Two-Wheel Drive High) is complete, the
light in the instrument cluster will stop
flashing and stay lit. See
Four-Wheel-Drive Light 0118.
8. Start the engine. Check that the vehicle is in 2
m(Two-Wheel Drive High) by
starting the engine and shifting the
transmission to D (Drive) and then to
R (Reverse). There should be movement
of the vehicle while shifting.
9. Shift the transmission to P (Park) and turn off the ignition.
10. Release the parking brake and remove the wheel blocks.
11. Reset any lost presets. The outside temperature display will
default to 0 °C (32 °F) but will reset with
normal usage.
Page 407 of 461
Chevrolet Silverado 1500 Owner Manual (GMNA-Localizing-U.S./Canada/
Mexico/Paraguay-14632303) - 2021 - CRC - 11/9/20
406 Vehicle Care
Use the following guidelines for proper floor
mat/liner usage:
.The original equipment floor mats/liners
were designed for your vehicle. If the
floor mats/liners need replacing, it is
recommended that GM certified floor
mats/liners be purchased. Non-GM floor
mats/liners may not fit properly and may
interfere with the pedals. Always check
that the floor mat, liner, or liner insert
does not interfere with the pedals.
.Do not use a floor mat/liner if the vehicle
is not equipped with a floor mat retainer
on the driver side floor.
.Use the floor mat/liner insert with the
correct side up. Do not turn it over.
.Do not place anything on top of the
driver side floor mat/liner.
.Use only a single floor mat/liner on the
driver side.
.Do not place one floor mat/liner on top
of another.
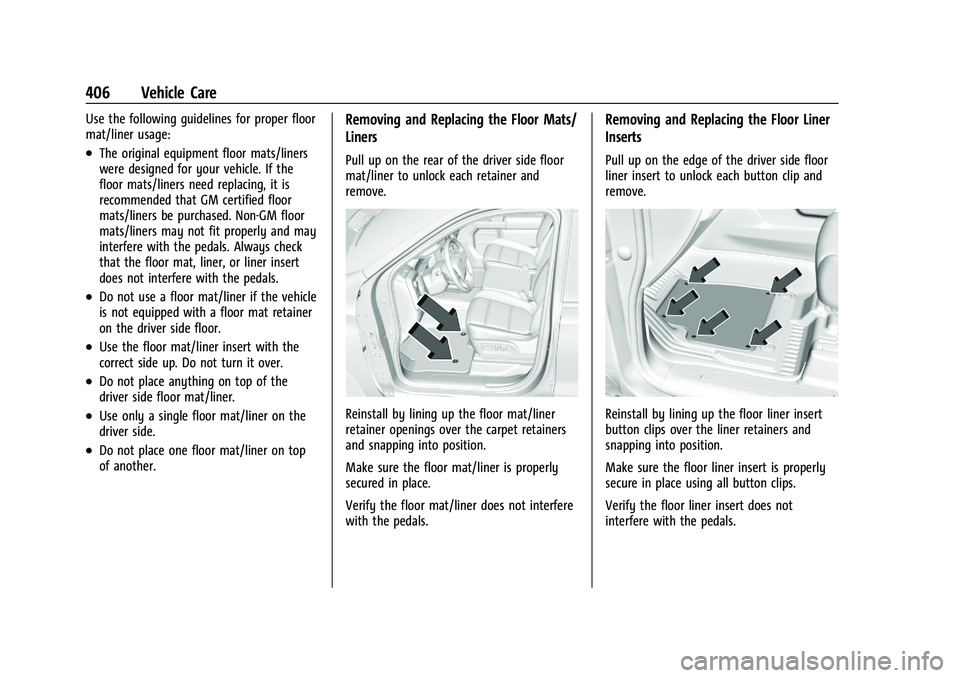
Removing and Replacing the Floor Mats/
Liners
Pull up on the rear of the driver side floor
mat/liner to unlock each retainer and
remove.
Reinstall by lining up the floor mat/liner
retainer openings over the carpet retainers
and snapping into position.
Make sure the floor mat/liner is properly
secured in place.
Verify the floor mat/liner does not interfere
with the pedals.
Removing and Replacing the Floor Liner
Inserts
Pull up on the edge of the driver side floor
liner insert to unlock each button clip and
remove.
Reinstall by lining up the floor liner insert
button clips over the liner retainers and
snapping into position.
Make sure the floor liner insert is properly
secure in place using all button clips.
Verify the floor liner insert does not
interfere with the pedals.
Page 429 of 461
Chevrolet Silverado 1500 Owner Manual (GMNA-Localizing-U.S./Canada/
Mexico/Paraguay-14632303) - 2021 - CRC - 11/9/20
428 Customer Information
Customer Information
Customer Information
Customer Satisfaction Procedure . . . . . . 428
Customer Assistance Offices . . . . . . . . . . . 430
Customer Assistance for Text Telephone(TTY) Users . . . . . . . . . . . . . . . . . . . . . . . . . . 430
Online Owner Center . . . . . . . . . . . . . . . . . . 430
GM Mobility Reimbursement Program . . . . . . . . . . . . . . . . . . . . . . . . . . . . . 431
Roadside Assistance Program . . . . . . . . . . 431
Scheduling Service Appointments . . . . . . 433
Courtesy Transportation Program . . . . . 433
Collision Damage Repair . . . . . . . . . . . . . . . 434
Publication Ordering Information . . . . . . 436
Radio Frequency Statement . . . . . . . . . . . 436
Reporting Safety Defects
Reporting Safety Defects to the United States Government . . . . . . . . . . . . . . . . . . 436
Reporting Safety Defects to the Canadian Government . . . . . . . . . . . . . . . 437
Reporting Safety Defects to General Motors . . . . . . . . . . . . . . . . . . . . . . . . . . . . . . 437
Vehicle Data Recording and Privacy
Vehicle Data Recording and Privacy . . . 437
Cybersecurity . . . . . . . . . . . . . . . . . . . . . . . . . 438
Event Data Recorders . . . . . . . . . . . . . . . . . . 438
OnStar . . . . . . . . . . . . . . . . . . . . . . . . . . . . . . . . 439
Infotainment System . . . . . . . . . . . . . . . . . . 439Customer Information
Customer Satisfaction Procedure
Your satisfaction and goodwill are important
to your dealer and to Chevrolet. Normally,
any concerns with the sales transaction or
the operation of the vehicle will be resolved
by your dealer's sales or service
departments. Sometimes, however, despite
the best intentions of all concerned,
misunderstandings can occur. If your concern
has not been resolved to your satisfaction,
the following steps should be taken:
STEP ONE : Discuss your concern with a
member of dealership management.
Normally, concerns can be quickly resolved
at that level. If the matter has already been
reviewed with the sales, service, or parts
manager, contact the owner of your
dealership or the general manager.
STEP TWO : If after contacting a member of
dealership management, it appears your
concern cannot be resolved by your
dealership without further help, in the U.S.,
call the Chevrolet Customer Assistance
Center at 1-800-222-1020. In Canada, call
General Motors of Canada Customer Care
Centre at 1-800-263-3777 (English),
or 1-800-263-7854 (French).
Page 433 of 461
Chevrolet Silverado 1500 Owner Manual (GMNA-Localizing-U.S./Canada/
Mexico/Paraguay-14632303) - 2021 - CRC - 11/9/20
432 Customer Information
In the U.S., anyone driving the vehicle is
covered. In Canada, a person driving the
vehicle without permission from the owner
is not covered.
Roadside Assistance is not a part of the New
Vehicle Limited Warranty. General Motors
North America and Chevrolet reserve the
right to make any changes or discontinue
the Roadside Assistance program at any
time without notification.
General Motors North America and Chevrolet
reserve the right to limit services or
payment to an owner or driver if they
decide the claims are made too often, or the
same type of claim is made many times.
Services Provided
.Emergency Fuel Delivery:Delivery of
enough fuel for the vehicle to get to the
nearest service station.
.Lock-Out Service: Service to unlock the
vehicle if you are locked out. A remote
unlock may be available if you have
OnStar. For security reasons, the driver
must present identification before this
service is given.
.Emergency Tow from a Public Road or
Highway: Tow to the nearest Chevrolet
dealer for warranty service, or if the vehicle was in a crash and cannot be
driven. Assistance is not given when the
vehicle is stuck in the sand, mud,
or snow.
.Flat Tire Change:
Service to change a flat
tire with the spare tire. The spare tire,
if equipped, must be in good condition
and properly inflated. It is the owner's
responsibility for the repair or
replacement of the tire if it is not covered
by the warranty.
.Battery Jump Start: Service to jump start
a dead battery.
.Trip Interruption Benefits and Assistance:
If your trip is interrupted due to a
warranty event, incidental expenses may
be reimbursed within the Powertrain
warranty period. Items considered are
reasonable and customary hotel, meals,
rental car, or a vehicle being delivered
back to the customer, up to 500 miles.
Services Not Included in Roadside
Assistance
.Impound towing caused by violation of
any laws
.Legal fines
.Mounting, dismounting, or changing of
snow tires, chains, or other traction
devices
Service is not provided if a vehicle is in an
area that is not accessible to the service
vehicle or is not a regularly traveled or
maintained public road, which includes ice
and winter roads. Off-road use is not
covered.
Services Specific to Canadian-Purchased
Vehicles
.Fuel Delivery: Reimbursement is up to
7 liters. If available, diesel fuel delivery
may be restricted. Propane and other
fuels are not provided through this
service.
.Lock-Out Service: Vehicle registration is
required.
.Trip Interruption Benefits and Assistance:
Must be over 150 km from where your
trip was started to qualify.
Pre-authorization, original detailed
receipts, and a copy of the repair orders
are required. Once authorization has been
received, the Roadside Assistance advisor
will help to make arrangements and
explain how to receive payment.
Page 439 of 461
Chevrolet Silverado 1500 Owner Manual (GMNA-Localizing-U.S./Canada/
Mexico/Paraguay-14632303) - 2021 - CRC - 11/9/20
438 Customer Information
Cybersecurity
GM collects information about the use of
your vehicle including operational and safety
related information. We collect this
information to provide, evaluate, improve,
and troubleshoot our products and services
and to develop new products and services.
The protection of vehicle electronics systems
and customer data from unauthorized
outside electronic access or control is
important to GM. GM maintains appropriate
security standards, practices, guidelines and
controls aimed at defending the vehicle and
the vehicle service ecosystem against
unauthorized electronic access, detecting
possible malicious activity in related
networks, and responding to suspected
cybersecurity incidents in a timely,
coordinated and effective manner. Security
incidents could impact your safety or
compromise your private data. To minimize
security risks, please do not connect your
vehicle electronic systems to unauthorized
devices or connect your vehicle to any
unknown or untrusted networks (such as
Bluetooth, WIFI or similar technology). In
the event you suspect any security incident
impacting your data or the safe operation of
your vehicle, please stop operating your
vehicle and contact your dealer.
Event Data Recorders
This vehicle is equipped with an event data
recorder (EDR). The main purpose of an EDR
is to record, in certain crash or near
crash-like situations, such as an air bag
deployment or hitting a road obstacle, data
that will assist in understanding how a
vehicle’s systems performed. The EDR is
designed to record data related to vehicle
dynamics and safety systems for a short
period of time, typically 30 seconds or less.
The EDR in this vehicle is designed to record
such data as:
.How various systems in your vehicle were
operating;
.Whether or not the driver and passenger
safety belts were buckled/fastened;
.How far (if at all) the driver was
depressing the accelerator and/or brake
pedal; and,
.How fast the vehicle was traveling.
These data can help provide a better
understanding of the circumstances in which
crashes and injuries occur.
Note
EDR data are recorded by your vehicle only
if a non-trivial crash situation occurs; no
data are recorded by the EDR under normal driving conditions and no personal data
(e.g., name, gender, age, and crash location)
are recorded. However, other parties, such
as law enforcement, could combine the EDR
data with the type of personally identifying
data routinely acquired during a crash
investigation.
To read data recorded by an EDR, special
equipment is required, and access to the
vehicle or the EDR is needed. In addition to
the vehicle manufacturer, other parties, such
as law enforcement, that have the special
equipment, can read the information if they
have access to the vehicle or the EDR.
GM will not access these data or share it
with others except: with the consent of the
vehicle owner or, if the vehicle is leased,
with the consent of the lessee; in response
to an official request by police or similar
government office; as part of GM's defense
of litigation through the discovery process;
or, as required by law. Data that GM collects
or receives may also be used for GM
research needs or may be made available to
others for research purposes, where a need
is shown and the data is not tied to a
specific vehicle or vehicle owner.
Page 441 of 461
Chevrolet Silverado 1500 Owner Manual (GMNA-Localizing-U.S./Canada/
Mexico/Paraguay-14632303) - 2021 - CRC - 11/9/20
440 OnStar
OnStar
OnStar Overview
OnStar Overview . . . . . . . . . . . . . . . . . . . . . . 440
OnStar Services
Emergency . . . . . . . . . . . . . . . . . . . . . . . . . . . . 441
Security . . . . . . . . . . . . . . . . . . . . . . . . . . . . . . . 441
OnStar Additional Information
OnStar Additional Information . . . . . . . . . 441
OnStar Overview
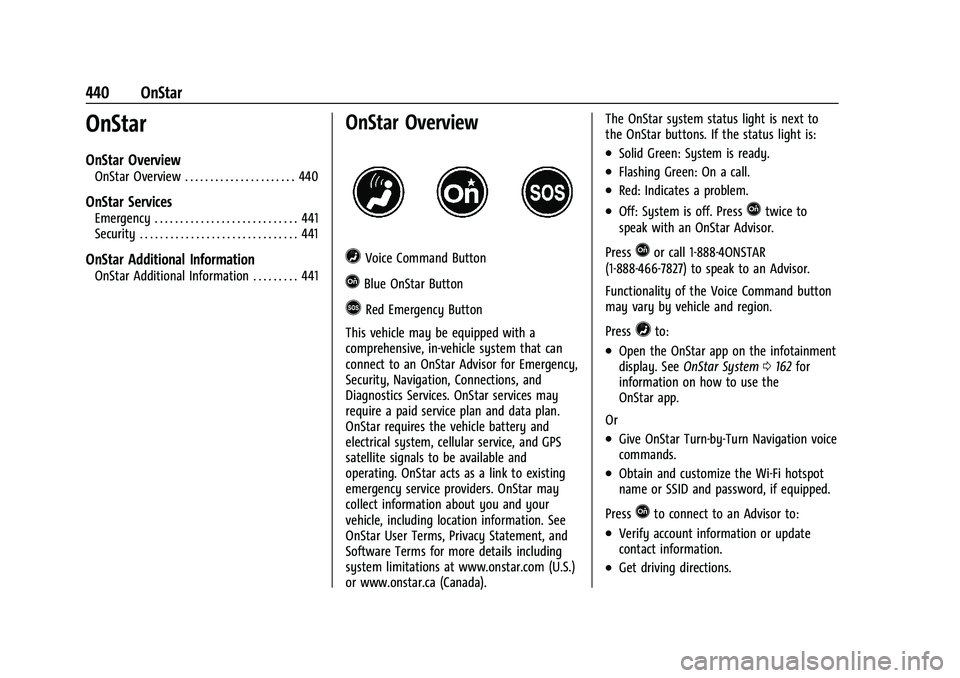
=Voice Command Button
QBlue OnStar Button
>Red Emergency Button
This vehicle may be equipped with a
comprehensive, in-vehicle system that can
connect to an OnStar Advisor for Emergency,
Security, Navigation, Connections, and
Diagnostics Services. OnStar services may
require a paid service plan and data plan.
OnStar requires the vehicle battery and
electrical system, cellular service, and GPS
satellite signals to be available and
operating. OnStar acts as a link to existing
emergency service providers. OnStar may
collect information about you and your
vehicle, including location information. See
OnStar User Terms, Privacy Statement, and
Software Terms for more details including
system limitations at www.onstar.com (U.S.)
or www.onstar.ca (Canada). The OnStar system status light is next to
the OnStar buttons. If the status light is:
.Solid Green: System is ready.
.Flashing Green: On a call.
.Red: Indicates a problem.
.Off: System is off. PressQtwice to
speak with an OnStar Advisor.
Press
Qor call 1-888-4ONSTAR
(1-888-466-7827) to speak to an Advisor.
Functionality of the Voice Command button
may vary by vehicle and region.
Press
=to:
.Open the OnStar app on the infotainment
display. See OnStar System 0162 for
information on how to use the
OnStar app.
Or
.Give OnStar Turn-by-Turn Navigation voice
commands.
.Obtain and customize the Wi-Fi hotspot
name or SSID and password, if equipped.
Press
Qto connect to an Advisor to:
.Verify account information or update
contact information.
.Get driving directions.