tow CHEVROLET SILVERADO 1500 LD 2019 Owner's Guide
[x] Cancel search | Manufacturer: CHEVROLET, Model Year: 2019, Model line: SILVERADO 1500 LD, Model: CHEVROLET SILVERADO 1500 LD 2019Pages: 490, PDF Size: 6.74 MB
Page 114 of 490
Chevrolet Silverado LD 1500 and Silverado 2500/3500 Owner Manual (GMNA-
Localizing-U.S./Canada-12162993) - 2019 - crc - 7/30/18
Seats and Restraints 113
6. If the child restraint has a toptether, follow the child restraint
manufacturer's instructions
regarding the use of the top
tether. See Lower Anchors and
Tethers for Children (LATCH
System) 098 for more
information on using the top
tether anchors.
7. Before placing a child in the child restraint, make sure it is
securely held in place. To
check, grasp the child restraint
at the seat belt path and
attempt to move it side to side
and back and forth. When the
child restraint is properly
installed, there should be no
more than 2.5 cm (1 in) of
movement.
To remove the child restraint,
unbuckle the vehicle seat belt and
let it return to the stowed position.
If the top tether is attached to a top
tether anchor, disconnect it.
For outboard rear seating positions,
if the child restraint cannot be
installed properly with the head
restraint in place, the head restraint may be removed. See your dealer
for assistance with removal, and
store the removed head restraint in
a secure place. When the child
restraint is removed, reinstall the
head restraint before the seating
position is used. For reinstallation
instructions, see
“Head Restraint or
Headrest Removal and
Reinstallation” underLower Anchors
and Tethers for Children (LATCH
System) 098.
Securing Child Restraints
(With the Seat Belt in the
Center Front Seat)
{Warning
A child in a child restraint in the
center front seat can be badly
injured or killed by the frontal
airbags if they inflate. Never
secure a child restraint in the
center front seat. It is always
better to secure a child restraint in
a rear seat. Do not use child restraints in the
center front seat position.
Securing Child Restraints
(With the Seat Belt in the
Front Seat)
With Passenger Sensing
System
This vehicle has airbags. A rear
seat is a safer place to secure a
forward-facing child restraint. See
Where to Put the Restraint
096.
In addition, the vehicle may have a
passenger sensing system which is
designed to turn off the front
outboard passenger frontal airbag
under certain conditions.
See Passenger Sensing System
0 84 and Passenger Airbag Status
Indicator 0145 for more information,
including important safety
information.
Never put a rear-facing child
restraint in the front. This is because
the risk to the rear-facing child is so
great, if the airbag deploys.
Page 117 of 490
Chevrolet Silverado LD 1500 and Silverado 2500/3500 Owner Manual (GMNA-
Localizing-U.S./Canada-12162993) - 2019 - crc - 7/30/18
116 Seats and Restraints
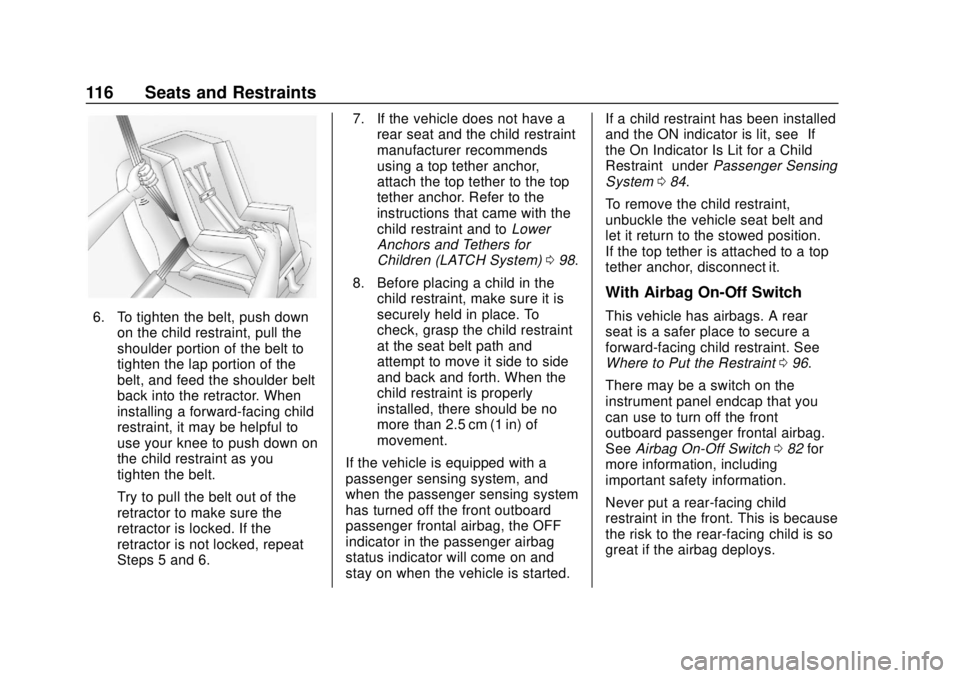
6. To tighten the belt, push downon the child restraint, pull the
shoulder portion of the belt to
tighten the lap portion of the
belt, and feed the shoulder belt
back into the retractor. When
installing a forward-facing child
restraint, it may be helpful to
use your knee to push down on
the child restraint as you
tighten the belt.
Try to pull the belt out of the
retractor to make sure the
retractor is locked. If the
retractor is not locked, repeat
Steps 5 and 6. 7. If the vehicle does not have a
rear seat and the child restraint
manufacturer recommends
using a top tether anchor,
attach the top tether to the top
tether anchor. Refer to the
instructions that came with the
child restraint and to Lower
Anchors and Tethers for
Children (LATCH System) 098.
8. Before placing a child in the child restraint, make sure it is
securely held in place. To
check, grasp the child restraint
at the seat belt path and
attempt to move it side to side
and back and forth. When the
child restraint is properly
installed, there should be no
more than 2.5 cm (1 in) of
movement.
If the vehicle is equipped with a
passenger sensing system, and
when the passenger sensing system
has turned off the front outboard
passenger frontal airbag, the OFF
indicator in the passenger airbag
status indicator will come on and
stay on when the vehicle is started. If a child restraint has been installed
and the ON indicator is lit, see
“If
the On Indicator Is Lit for a Child
Restraint” underPassenger Sensing
System 084.
To remove the child restraint,
unbuckle the vehicle seat belt and
let it return to the stowed position.
If the top tether is attached to a top
tether anchor, disconnect it.
With Airbag On-Off Switch
This vehicle has airbags. A rear
seat is a safer place to secure a
forward-facing child restraint. See
Where to Put the Restraint 096.
There may be a switch on the
instrument panel endcap that you
can use to turn off the front
outboard passenger frontal airbag.
See Airbag On-Off Switch 082 for
more information, including
important safety information.
Never put a rear-facing child
restraint in the front. This is because
the risk to the rear-facing child is so
great if the airbag deploys.
Page 120 of 490
Chevrolet Silverado LD 1500 and Silverado 2500/3500 Owner Manual (GMNA-
Localizing-U.S./Canada-12162993) - 2019 - crc - 7/30/18
Seats and Restraints 119
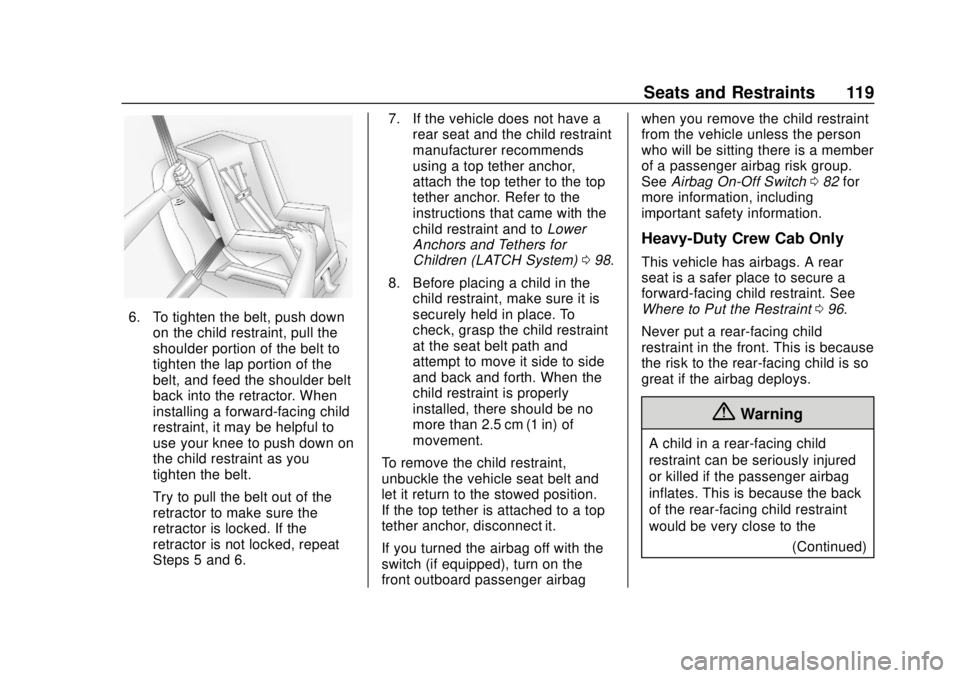
6. To tighten the belt, push downon the child restraint, pull the
shoulder portion of the belt to
tighten the lap portion of the
belt, and feed the shoulder belt
back into the retractor. When
installing a forward-facing child
restraint, it may be helpful to
use your knee to push down on
the child restraint as you
tighten the belt.
Try to pull the belt out of the
retractor to make sure the
retractor is locked. If the
retractor is not locked, repeat
Steps 5 and 6. 7. If the vehicle does not have a
rear seat and the child restraint
manufacturer recommends
using a top tether anchor,
attach the top tether to the top
tether anchor. Refer to the
instructions that came with the
child restraint and to Lower
Anchors and Tethers for
Children (LATCH System) 098.
8. Before placing a child in the child restraint, make sure it is
securely held in place. To
check, grasp the child restraint
at the seat belt path and
attempt to move it side to side
and back and forth. When the
child restraint is properly
installed, there should be no
more than 2.5 cm (1 in) of
movement.
To remove the child restraint,
unbuckle the vehicle seat belt and
let it return to the stowed position.
If the top tether is attached to a top
tether anchor, disconnect it.
If you turned the airbag off with the
switch (if equipped), turn on the
front outboard passenger airbag when you remove the child restraint
from the vehicle unless the person
who will be sitting there is a member
of a passenger airbag risk group.
See
Airbag On-Off Switch 082 for
more information, including
important safety information.
Heavy-Duty Crew Cab Only
This vehicle has airbags. A rear
seat is a safer place to secure a
forward-facing child restraint. See
Where to Put the Restraint 096.
Never put a rear-facing child
restraint in the front. This is because
the risk to the rear-facing child is so
great if the airbag deploys.
{Warning
A child in a rear-facing child
restraint can be seriously injured
or killed if the passenger airbag
inflates. This is because the back
of the rear-facing child restraint
would be very close to the (Continued)
Page 122 of 490
Chevrolet Silverado LD 1500 and Silverado 2500/3500 Owner Manual (GMNA-
Localizing-U.S./Canada-12162993) - 2019 - crc - 7/30/18
Seats and Restraints 121
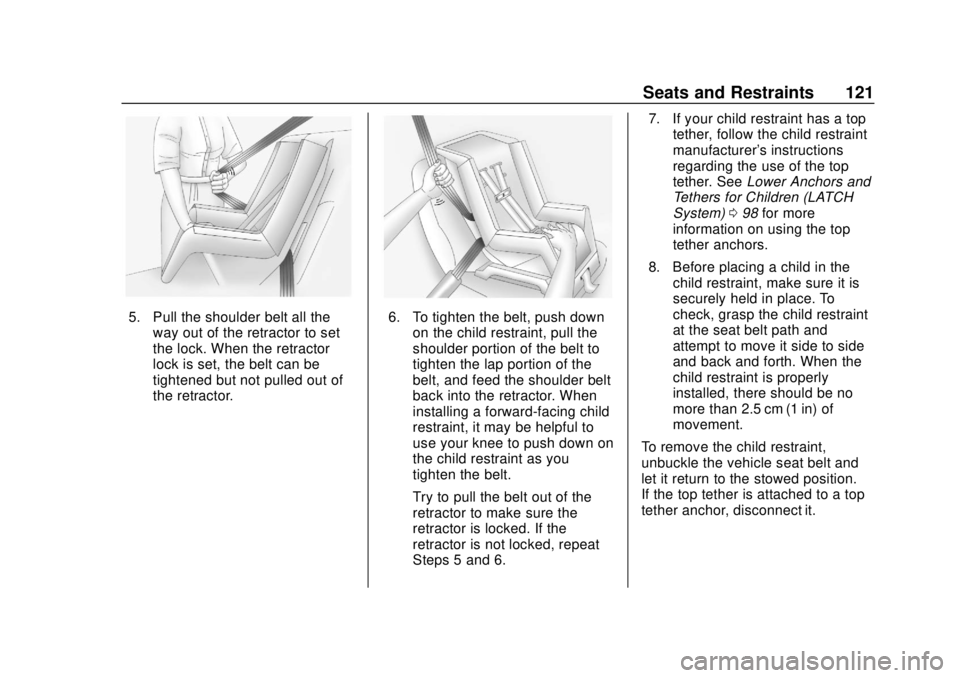
5. Pull the shoulder belt all theway out of the retractor to set
the lock. When the retractor
lock is set, the belt can be
tightened but not pulled out of
the retractor.6. To tighten the belt, push downon the child restraint, pull the
shoulder portion of the belt to
tighten the lap portion of the
belt, and feed the shoulder belt
back into the retractor. When
installing a forward-facing child
restraint, it may be helpful to
use your knee to push down on
the child restraint as you
tighten the belt.
Try to pull the belt out of the
retractor to make sure the
retractor is locked. If the
retractor is not locked, repeat
Steps 5 and 6. 7. If your child restraint has a top
tether, follow the child restraint
manufacturer's instructions
regarding the use of the top
tether. See Lower Anchors and
Tethers for Children (LATCH
System) 098 for more
information on using the top
tether anchors.
8. Before placing a child in the child restraint, make sure it is
securely held in place. To
check, grasp the child restraint
at the seat belt path and
attempt to move it side to side
and back and forth. When the
child restraint is properly
installed, there should be no
more than 2.5 cm (1 in) of
movement.
To remove the child restraint,
unbuckle the vehicle seat belt and
let it return to the stowed position.
If the top tether is attached to a top
tether anchor, disconnect it.
Page 127 of 490
Chevrolet Silverado LD 1500 and Silverado 2500/3500 Owner Manual (GMNA-
Localizing-U.S./Canada-12162993) - 2019 - crc - 7/30/18
126 Instruments and Controls
Instruments and
Controls
Controls
Steering Wheel Adjustment . . . 127
Steering Wheel Controls . . . . . . 127
Heated Steering Wheel . . . . . . . 128
Horn . . . . . . . . . . . . . . . . . . . . . . . . . . 128
Windshield Wiper/Washer . . . . 128
Compass . . . . . . . . . . . . . . . . . . . . . 129
Clock . . . . . . . . . . . . . . . . . . . . . . . . . 129
Power Outlets . . . . . . . . . . . . . . . . 130
Wireless Charging . . . . . . . . . . . . 132
Warning Lights, Gauges, and
Indicators
Warning Lights, Gauges, andIndicators . . . . . . . . . . . . . . . . . . . 135
Instrument Cluster . . . . . . . . . . . . 136
Speedometer . . . . . . . . . . . . . . . . . 139
Odometer . . . . . . . . . . . . . . . . . . . . . 139
Trip Odometer . . . . . . . . . . . . . . . . 139
Tachometer . . . . . . . . . . . . . . . . . . . 139
Fuel Gauge . . . . . . . . . . . . . . . . . . . 139
Engine Oil Pressure Gauge . . . . . . . . . . . . . . . . . . . . . . 140
Engine Coolant Temperature Gauge . . . . . . . . . . . . . . . . . . . . . . 141 Voltmeter Gauge . . . . . . . . . . . . . 142
Seat Belt Reminders . . . . . . . . . 143
Airbag Readiness Light . . . . . . . 143
Airbag On-Off Light . . . . . . . . . . . 144
Passenger Airbag Status
Indicator . . . . . . . . . . . . . . . . . . . . 145
Charging System Light . . . . . . . 146
Malfunction Indicator Lamp . . . 146
Brake System Warning Light . . . . . . . . . . . . . . . . . . . . . . . . 148
Antilock Brake System (ABS) Warning Light . . . . . . . . . . . . . . . 149
Four-Wheel-Drive Light . . . . . . . 150
Tow/Haul Mode Light . . . . . . . . . 150
Hill Descent Control Light . . . . 150
Lane Departure Warning (LDW) Light (2500/3500
Series) . . . . . . . . . . . . . . . . . . . . . . 150
Lane Keep Assist (LKA) Light (1500 Series) . . . . . . . . . . . . . . . 151
Vehicle Ahead Indicator . . . . . . 151
Traction Off Light . . . . . . . . . . . . . 151
StabiliTrak OFF Light . . . . . . . . . 151
Traction Control System (TCS)/ StabiliTrak Light . . . . . . . . . . . . . 152
Tire Pressure Light . . . . . . . . . . . 152
Low Fuel Warning Light . . . . . . 153
Security Light . . . . . . . . . . . . . . . . . 153
High-Beam On Light . . . . . . . . . . 153
Front Fog Lamp Light . . . . . . . . . 153 Lamps On Reminder . . . . . . . . . 154
Cruise Control Light . . . . . . . . . . 154
Information Displays
Driver Information Center (DIC)
(Base Level) . . . . . . . . . . . . . . . . 154
Driver Information Center (DIC) (Uplevel) . . . . . . . . . . . . . . . . . . . . 156
Vehicle Messages
Vehicle Messages . . . . . . . . . . . . 159
Engine Power Messages . . . . . 159
Vehicle Speed Messages . . . . . 159
Vehicle Personalization
Vehicle Personalization . . . . . . . 160
Universal Remote System
Universal Remote System . . . . 167
Universal Remote SystemProgramming . . . . . . . . . . . . . . . 167
Universal Remote System Operation . . . . . . . . . . . . . . . . . . . 170
Page 128 of 490
Chevrolet Silverado LD 1500 and Silverado 2500/3500 Owner Manual (GMNA-
Localizing-U.S./Canada-12162993) - 2019 - crc - 7/30/18
Instruments and Controls 127
Controls
Steering Wheel
Adjustment
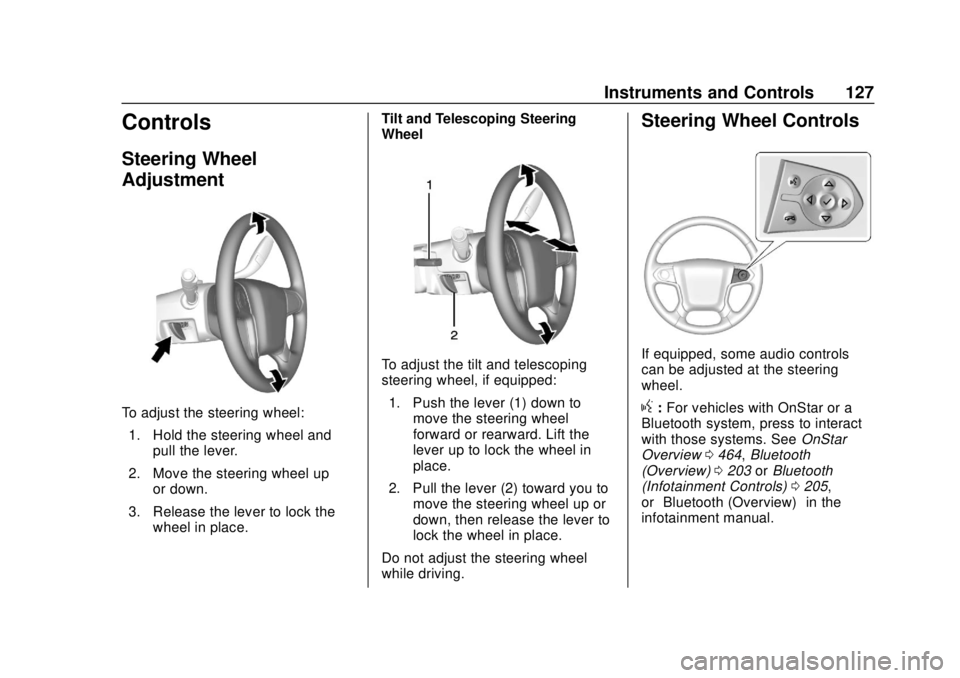
To adjust the steering wheel:1. Hold the steering wheel and pull the lever.
2. Move the steering wheel up or down.
3. Release the lever to lock the wheel in place. Tilt and Telescoping Steering
Wheel
To adjust the tilt and telescoping
steering wheel, if equipped:
1. Push the lever (1) down to move the steering wheel
forward or rearward. Lift the
lever up to lock the wheel in
place.
2. Pull the lever (2) toward you to move the steering wheel up or
down, then release the lever to
lock the wheel in place.
Do not adjust the steering wheel
while driving.
Steering Wheel Controls
If equipped, some audio controls
can be adjusted at the steering
wheel.
g: For vehicles with OnStar or a
Bluetooth system, press to interact
with those systems. See OnStar
Overview 0464, Bluetooth
(Overview) 0203 orBluetooth
(Infotainment Controls) 0205,
or “Bluetooth (Overview)” in the
infotainment manual.
Page 148 of 490
Chevrolet Silverado LD 1500 and Silverado 2500/3500 Owner Manual (GMNA-
Localizing-U.S./Canada-12162993) - 2019 - crc - 7/30/18
Instruments and Controls 147
Malfunctions are often indicated by
the system before any problem is
noticeable. Being aware of the light
and seeking service promptly when
it comes on may prevent damage.
Caution
If the vehicle is driven continually
with this light on, the emission
control system may not work as
well, the fuel economy may be
lower, and the vehicle may not
run smoothly. This could lead to
costly repairs that might not be
covered by the vehicle warranty.
Caution
Modifications to the engine,
transmission, exhaust, intake,
or fuel system, or the use of
replacement tires that do not
meet the original tire
specifications, can cause this light
to come on. This could lead to
costly repairs not covered by the
vehicle warranty. This could also
affect the vehicle’s ability to pass
an Emissions Inspection/
Maintenance test. See
Accessories and Modifications
0326.
If the light is flashing : A
malfunction has been detected that
could damage the emission control
system and increase vehicle
emissions. Diagnosis and service
may be required.
To help prevent damage, reduce
vehicle speed and avoid hard
accelerations and uphill grades. If towing a trailer, reduce the
amount of cargo being hauled as
soon as possible.
If the light continues to flash, find a
safe place to park. Turn the vehicle
off and wait at least 10 seconds
before restarting the engine. If the
light is still flashing, follow the
previous guidelines and see your
dealer for service as soon as
possible.
If the light is on steady :
A
malfunction has been detected.
Diagnosis and service may be
required.
Check the following:
. If fuel has been added to the
vehicle using the capless funnel
adapter, make sure that it has
been removed. See “Filling the
Tank with a Portable Gas Can”
under Filling the Tank 0291.
Page 150 of 490
Chevrolet Silverado LD 1500 and Silverado 2500/3500 Owner Manual (GMNA-
Localizing-U.S./Canada-12162993) - 2019 - crc - 7/30/18
Instruments and Controls 149
MetricEnglish
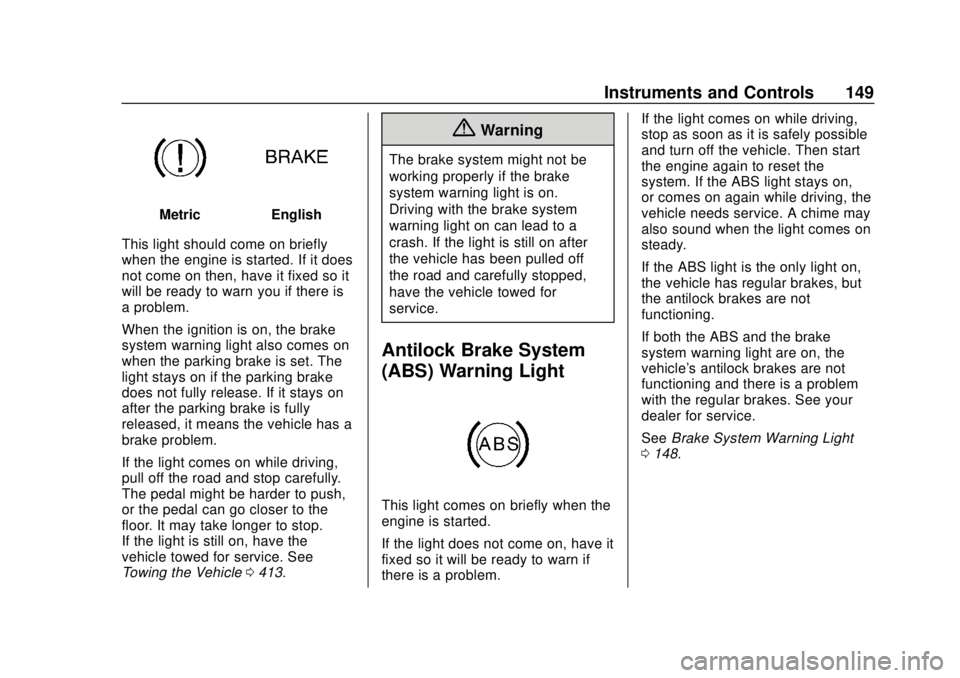
This light should come on briefly
when the engine is started. If it does
not come on then, have it fixed so it
will be ready to warn you if there is
a problem.
When the ignition is on, the brake
system warning light also comes on
when the parking brake is set. The
light stays on if the parking brake
does not fully release. If it stays on
after the parking brake is fully
released, it means the vehicle has a
brake problem.
If the light comes on while driving,
pull off the road and stop carefully.
The pedal might be harder to push,
or the pedal can go closer to the
floor. It may take longer to stop.
If the light is still on, have the
vehicle towed for service. See
Towing the Vehicle 0413.
{Warning
The brake system might not be
working properly if the brake
system warning light is on.
Driving with the brake system
warning light on can lead to a
crash. If the light is still on after
the vehicle has been pulled off
the road and carefully stopped,
have the vehicle towed for
service.
Antilock Brake System
(ABS) Warning Light
This light comes on briefly when the
engine is started.
If the light does not come on, have it
fixed so it will be ready to warn if
there is a problem. If the light comes on while driving,
stop as soon as it is safely possible
and turn off the vehicle. Then start
the engine again to reset the
system. If the ABS light stays on,
or comes on again while driving, the
vehicle needs service. A chime may
also sound when the light comes on
steady.
If the ABS light is the only light on,
the vehicle has regular brakes, but
the antilock brakes are not
functioning.
If both the ABS and the brake
system warning light are on, the
vehicle's antilock brakes are not
functioning and there is a problem
with the regular brakes. See your
dealer for service.
See
Brake System Warning Light
0 148.
Page 151 of 490
Chevrolet Silverado LD 1500 and Silverado 2500/3500 Owner Manual (GMNA-
Localizing-U.S./Canada-12162993) - 2019 - crc - 7/30/18
150 Instruments and Controls
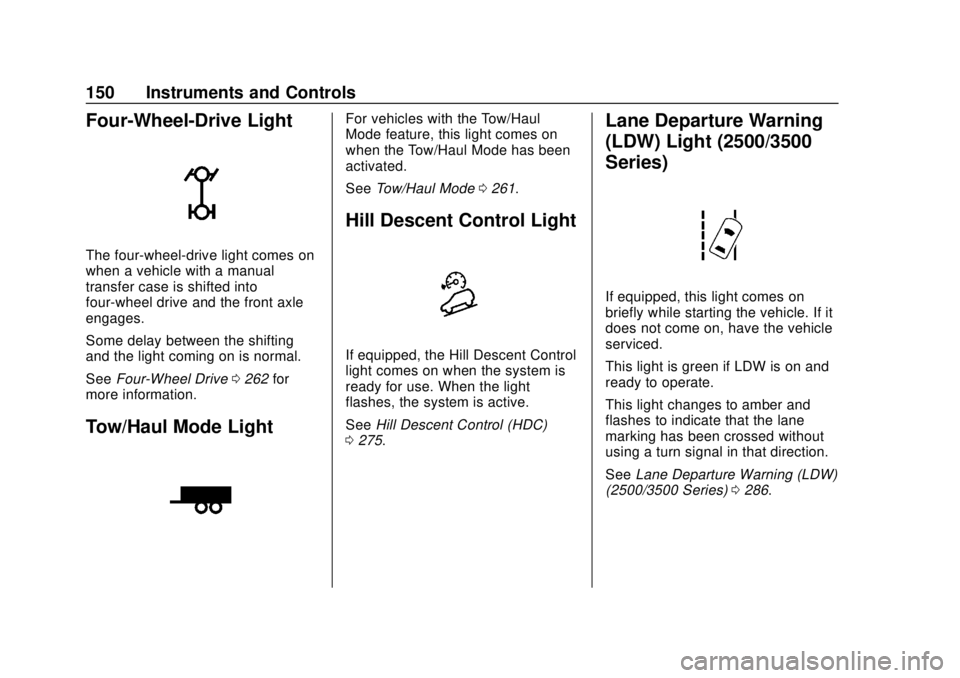
Four-Wheel-Drive Light
The four-wheel-drive light comes on
when a vehicle with a manual
transfer case is shifted into
four-wheel drive and the front axle
engages.
Some delay between the shifting
and the light coming on is normal.
SeeFour-Wheel Drive 0262 for
more information.
Tow/Haul Mode Light
For vehicles with the Tow/Haul
Mode feature, this light comes on
when the Tow/Haul Mode has been
activated.
See Tow/Haul Mode 0261.
Hill Descent Control Light
If equipped, the Hill Descent Control
light comes on when the system is
ready for use. When the light
flashes, the system is active.
See Hill Descent Control (HDC)
0 275.
Lane Departure Warning
(LDW) Light (2500/3500
Series)
If equipped, this light comes on
briefly while starting the vehicle. If it
does not come on, have the vehicle
serviced.
This light is green if LDW is on and
ready to operate.
This light changes to amber and
flashes to indicate that the lane
marking has been crossed without
using a turn signal in that direction.
See Lane Departure Warning (LDW)
(2500/3500 Series) 0286.
Page 163 of 490
Chevrolet Silverado LD 1500 and Silverado 2500/3500 Owner Manual (GMNA-
Localizing-U.S./Canada-12162993) - 2019 - crc - 7/30/18
162 Instruments and Controls
adjusted to this level. To set the
maximum startup volume, touch +
or−to increase or decrease.
Audio Cue Volume
This feature sets the volume of
audio files played at system startup
and shutdown.
Select On, then touch + or −to
increase or decrease the volume.
Vehicle
Select and the following may
display:
. Climate and Air Quality
. Collision/Detection Systems
. Comfort and Convenience
. Lighting
. Power Door Locks
. Remote Lock, Unlock, Start
Climate and Air Quality
Select and the following may
display:
.Auto Fan Speed
. Auto Rear Defog Auto Fan Speed
This feature will set the auto fan
speed.
Select Low, Medium, or High.
Auto Rear Defog
This feature will automatically turn
on the rear defogger when it is cold
outside.
Select Off or On.
Collision/Detection Systems
Select and the following may
display:
.
Alert Type
. Forward Collision System
. Park Assist
Alert Type
This feature will set crash alerts to
beeps or seat vibrations. This
setting affects all crash alerts
including Forward Collision, Lane
Departure Warning, and Park Assist
alerts.
Select Beeps or Safety Alert Seat. Forward Collision System
This feature will turn on or off
Forward Collision Alert (FCA) and
Forward Automatic Braking (FAB).
The Off setting disables all FCA and
FAB functions. With the Alert and
Brake setting, both FCA and FAB
are available. The Alert setting
disables FAB. See
Forward
Automatic Braking (FAB) (1500
Series) 0285.
Select Off, Alert and Brake, or Alert.
Park Assist
If equipped, this feature can assist
in backing up and parking the
vehicle. See Assistance Systems for
Parking or Backing 0280.
Select Off, On, or On with Towbar.
Comfort and Convenience
Select and the following may
display:
. Auto Memory Recall
. Easy Exit Options
. Chime Volume
. Reverse Tilt Mirror