CHEVROLET SILVERADO 2005 1.G Owners Manual
Manufacturer: CHEVROLET, Model Year: 2005, Model line: SILVERADO, Model: CHEVROLET SILVERADO 2005 1.GPages: 580, PDF Size: 3.44 MB
Page 391 of 580
Camper/Fifth-Wheel Trailer Wiring Package
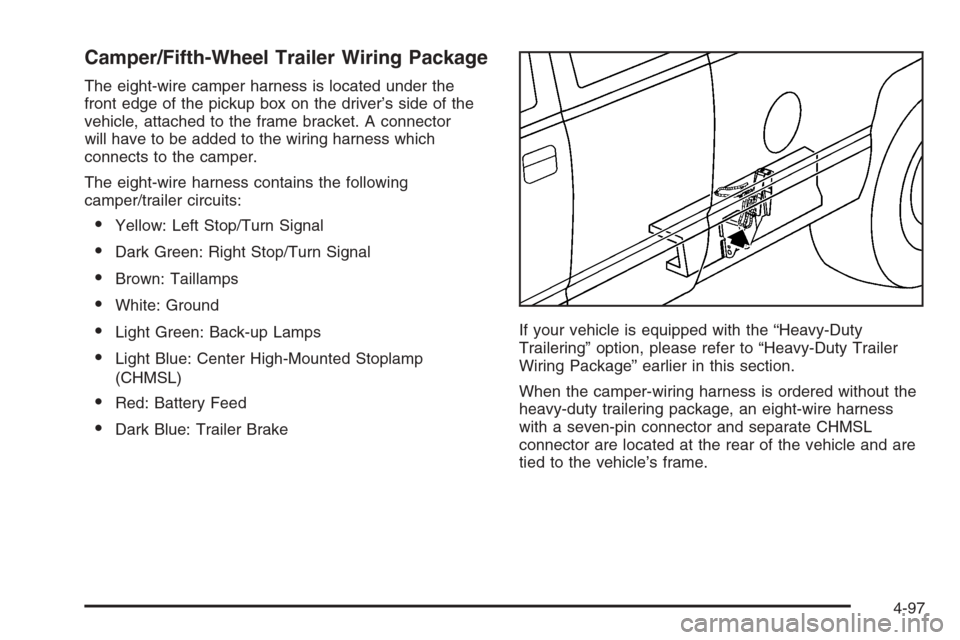
The eight-wire camper harness is located under the
front edge of the pickup box on the driver’s side of the
vehicle, attached to the frame bracket. A connector
will have to be added to the wiring harness which
connects to the camper.
The eight-wire harness contains the following
camper/trailer circuits:
Yellow: Left Stop/Turn Signal
Dark Green: Right Stop/Turn Signal
Brown: Taillamps
White: Ground
Light Green: Back-up Lamps
Light Blue: Center High-Mounted Stoplamp
(CHMSL)
Red: Battery Feed
Dark Blue: Trailer BrakeIf your vehicle is equipped with the “Heavy-Duty
Trailering” option, please refer to “Heavy-Duty Trailer
Wiring Package” earlier in this section.
When the camper-wiring harness is ordered without the
heavy-duty trailering package, an eight-wire harness
with a seven-pin connector and separate CHMSL
connector are located at the rear of the vehicle and are
tied to the vehicle’s frame.
4-97
Page 392 of 580
Electric Brake Control Jumper
{CAUTION:
Be sure to use only the correct trailer brake
harness, the one intended for use on your
vehicle. If you use some other trailer brake
harness, even if it seems to �t, your trailer
brakes may not work at all. You could have a
crash in which you or others could be injured.
Use only the trailer brake harness intended for
your vehicle. If it is no longer available to you,
be sure to get a proper replacement from your
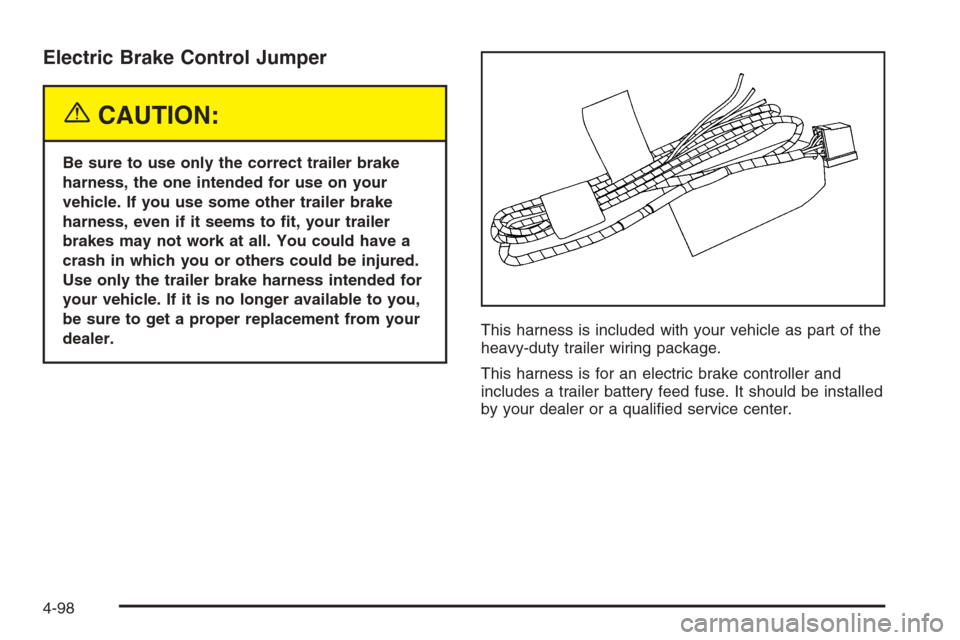
dealer.This harness is included with your vehicle as part of the
heavy-duty trailer wiring package.
This harness is for an electric brake controller and
includes a trailer battery feed fuse. It should be installed
by your dealer or a quali�ed service center.
4-98
Page 393 of 580
Four-Wire Harness Adapter
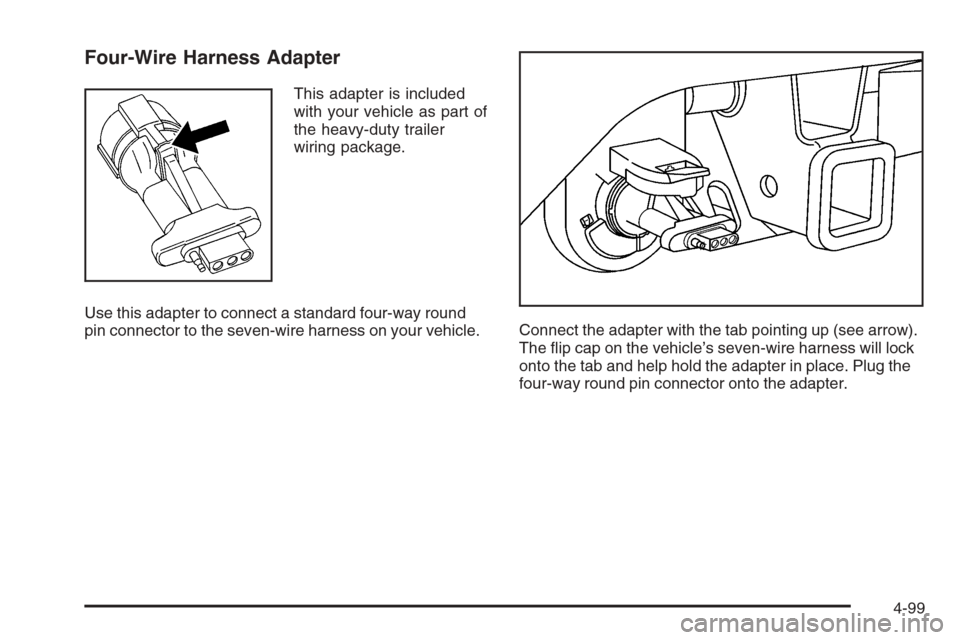
This adapter is included
with your vehicle as part of
the heavy-duty trailer
wiring package.
Use this adapter to connect a standard four-way round
pin connector to the seven-wire harness on your vehicle.Connect the adapter with the tab pointing up (see arrow).
The �ip cap on the vehicle’s seven-wire harness will lock
onto the tab and help hold the adapter in place. Plug the
four-way round pin connector onto the adapter.
4-99
Page 394 of 580
Auxiliary Battery
The auxiliary battery provision can be used to supply
electrical power to additional equipment that you
may choose to add, such as a slide-in camper.
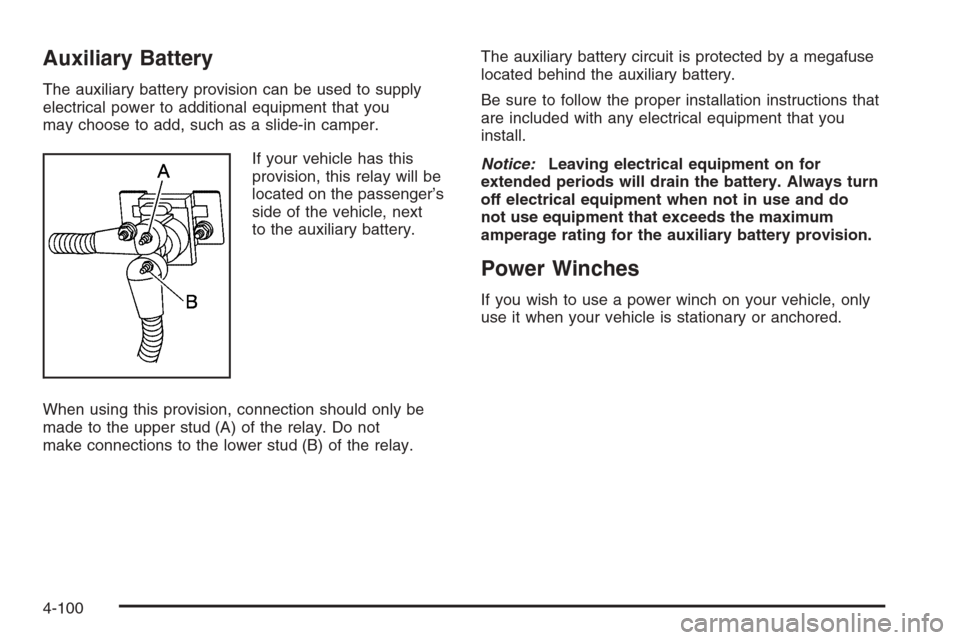
If your vehicle has this
provision, this relay will be
located on the passenger’s
side of the vehicle, next
to the auxiliary battery.
When using this provision, connection should only be
made to the upper stud (A) of the relay. Do not
make connections to the lower stud (B) of the relay.The auxiliary battery circuit is protected by a megafuse
located behind the auxiliary battery.
Be sure to follow the proper installation instructions that
are included with any electrical equipment that you
install.
Notice:Leaving electrical equipment on for
extended periods will drain the battery. Always turn
off electrical equipment when not in use and do
not use equipment that exceeds the maximum
amperage rating for the auxiliary battery provision.
Power Winches
If you wish to use a power winch on your vehicle, only
use it when your vehicle is stationary or anchored.
4-100
Page 395 of 580
Power Take-Off (PTO)
Before using a Power Take-Off (PTO), if equipped,
refer to the manufacturer’s or installer’s instructions.
To engage a PTO on a vehicle with a manual
transmission do the following:
1. Hold the clutch pedal down.
2. Set the parking brake.
3. Shift the transmission into NEUTRAL.
4. Engage the PTO. Refer to the manufacturer’s
or installer’s for instructions on electrically
engaged PTOs.
5. For mobile operations, shift the transmission into
the gear you want, apply the regular brakes and
release the parking brake. For stationary operations,
leave the parking brake applied.
6. Release the clutch and regular brakes as you
normally would. When the clutch is released,
the PTO will start.
7. Turn the PTO rotary switch to ON.To engage a PTO on a vehicle with an automatic
transmission do the following:
1. For stationary use shift the transmission into
PARK (P).
2. Turn the PTO rotary switch ON.
3. If the engine speed is below the PTO engage
speed limit, the PTO will start. The blinking LED
on the PTO control switch indicates PTO engage is
requested. When PTO engages the LED will
switch from blinking to a steady light.
To use PTO speed control in Preset Mode (Factory
Setting) do the following:
1. Engage the PTO.
2. Select PARK (P) or NEUTRAL (N) range. Apply the
parking brake if NEUTRAL (N) is selected. Torque
Converter Clutch (TCC) is not available in
NEUTRAL (N) and is available only in PARK (P)
when engine speed is above 1,100 rpm.
3. Make sure your foot is off the brake pedal (and off
the clutch on vehicles equipped with a manual
transmission).
4. Select the desired engine speed for PTO operation.
Read the following preset mode information
regarding operation.
4-101
Page 396 of 580
Preset Mode:PTO speed control mode is used for
stationary applications. (PTO will remain engaged while
mobile in the preset mode, however PTO set and
resume speed controls will be inoperative.) This mode
provides a default standby speed of 800 or 850 rpm
(depending on the engine/transmission combination) and
two default PTO control speeds which follow:
1. PTO Set Speed of 1,250 rpm, or
2. PTO Resume Speed of 1,700 rpm.
Please note that the standby speed (800/850 rpm) is
not to be used as a PTO control speed. Vehicles
not equipped with cruise control will not have the
resume speed capability.
To use PTO speed control in variable mode
(while mobile) do the following:
1. Engage the PTO.
2. Vehicle speed must be greater than 5 mph.
3. Make sure your foot is off the brake pedal (and off
the clutch for vehicles equipped with a manual
transmission).
4. Select the desired engine speed by using the foot
pedal, and select SET on the PTO switch or the
cruise control.To use PTO speed control in variable mode
(while stationary) do the following:
1. Engage the PTO.
2. Vehicle speed must be less than 5 mph.
3. Make sure your foot is off the brake pedal (and off
the clutch for vehicles equipped with a manual
transmission).
4. Select the desired engine speed by using the foot
pedal, and select SET on the PTO switch or the
cruise control.
Variable Mode:PTO speed control mode can be used
for both stationary and mobile applications. This mode
allows PTO to be controlled in a fashion similar to
how cruise control sets vehicle speed. The operator can
set to an rpm (between 800 and 2,200) with the
cruise control feature or with the SET position on the
PTO switch. The operator is then able to increase rpm in
increments of 100, or “tap up” with the resume position
on the cruise control. The operator can also decrease
rpm in increments of 100 with the SET switch on
the PTO or the cruise control.
Vehicles not equipped with cruise control will not have
the “tap up” capability.
4-102
Page 397 of 580
All engine speed values listed above are factory preset
values. With the exception of the TCC lockup speed
(1,100 rpm) and the “tap” increment (100 rpm), all
of these values are programmable and can be adjusted
by your dealer or body up�tter. If the PTO software
settings do not match the settings shown here, then they
may have already been altered in order to satisfy the
requirements of the installed PTO system and body
equipment.
When the PTO switch is turned on, the engine is limited
to 2,200 rpms. If there are no accessories installed
on the vehicle, make sure the PTO switch is turned off.Step-Bumper Pad
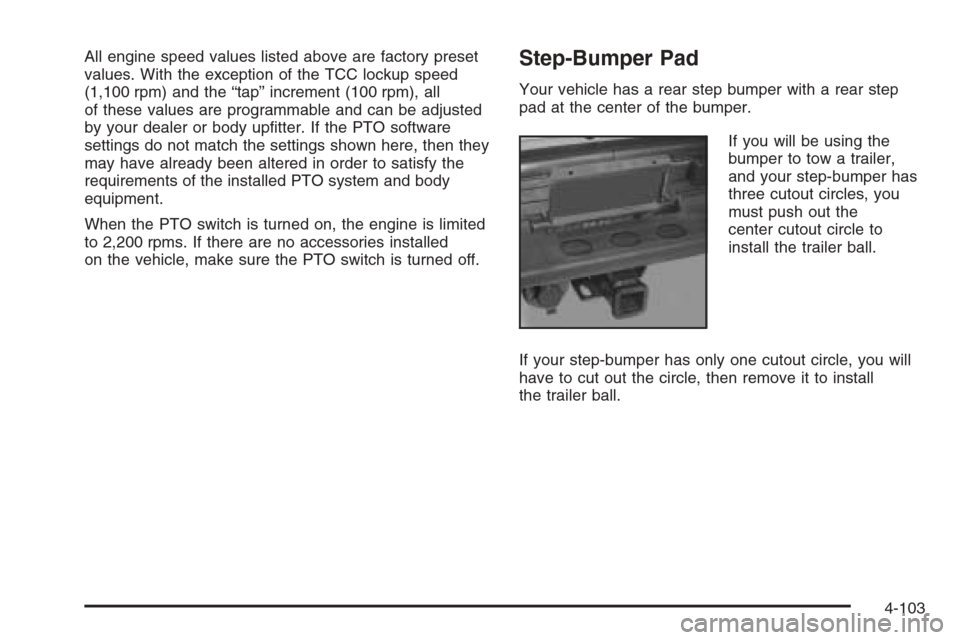
Your vehicle has a rear step bumper with a rear step
pad at the center of the bumper.
If you will be using the
bumper to tow a trailer,
and your step-bumper has
three cutout circles, you
must push out the
center cutout circle to
install the trailer ball.
If your step-bumper has only one cutout circle, you will
have to cut out the circle, then remove it to install
the trailer ball.
4-103
Page 398 of 580
✍NOTES
4-104
Page 399 of 580
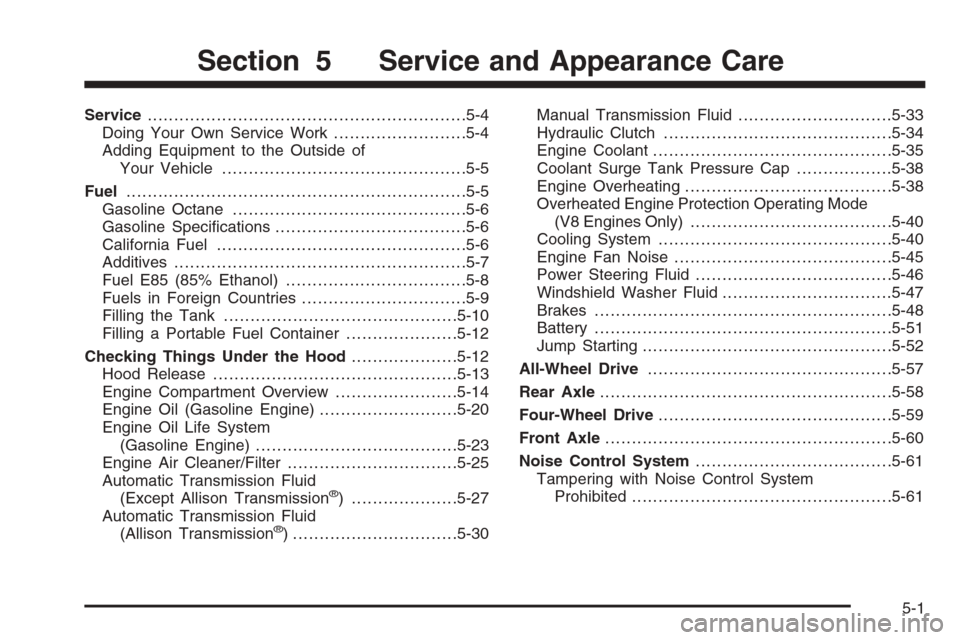
Service............................................................5-4
Doing Your Own Service Work.........................5-4
Adding Equipment to the Outside of
Your Vehicle..............................................5-5
Fuel................................................................5-5
Gasoline Octane............................................5-6
Gasoline Speci�cations....................................5-6
California Fuel...............................................5-6
Additives.......................................................5-7
Fuel E85 (85% Ethanol)..................................5-8
Fuels in Foreign Countries...............................5-9
Filling the Tank............................................5-10
Filling a Portable Fuel Container.....................5-12
Checking Things Under the Hood....................5-12
Hood Release..............................................5-13
Engine Compartment Overview.......................5-14
Engine Oil (Gasoline Engine)..........................5-20
Engine Oil Life System
(Gasoline Engine)......................................5-23
Engine Air Cleaner/Filter................................5-25
Automatic Transmission Fluid
(Except Allison Transmission
®) ....................5-27
Automatic Transmission Fluid
(Allison Transmission
®) ...............................5-30Manual Transmission Fluid.............................5-33
Hydraulic Clutch...........................................5-34
Engine Coolant.............................................5-35
Coolant Surge Tank Pressure Cap..................5-38
Engine Overheating.......................................5-38
Overheated Engine Protection Operating Mode
(V8 Engines Only)......................................5-40
Cooling System............................................5-40
Engine Fan Noise.........................................5-45
Power Steering Fluid.....................................5-46
Windshield Washer Fluid................................5-47
Brakes........................................................5-48
Battery........................................................5-51
Jump Starting...............................................5-52
All-Wheel Drive..............................................5-57
Rear Axle.......................................................5-58
Four-Wheel Drive............................................5-59
Front Axle......................................................5-60
Noise Control System.....................................5-61
Tampering with Noise Control System
Prohibited.................................................5-61
Section 5 Service and Appearance Care
5-1
Page 400 of 580
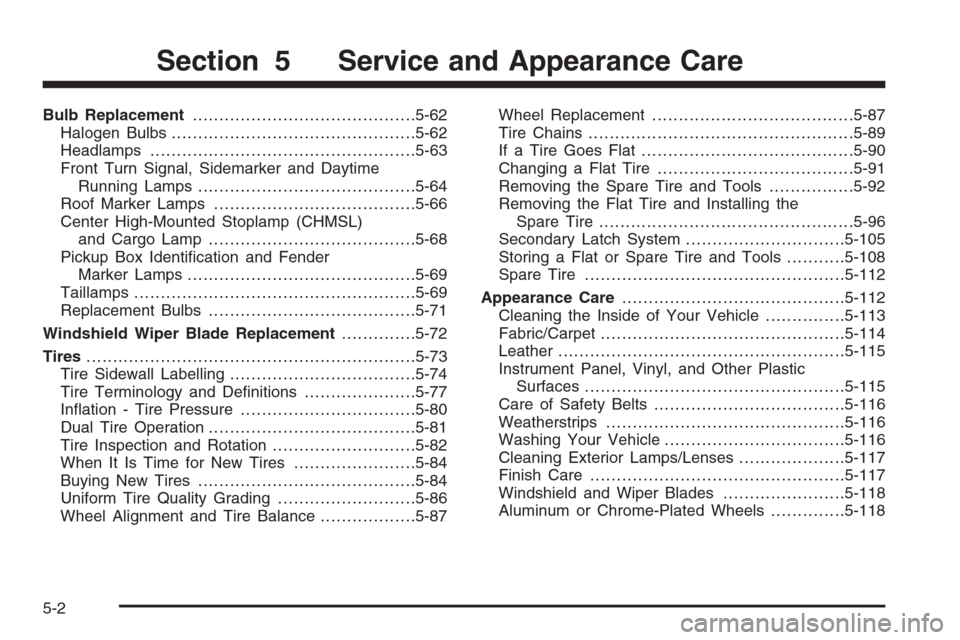
Bulb Replacement..........................................5-62
Halogen Bulbs..............................................5-62
Headlamps..................................................5-63
Front Turn Signal, Sidemarker and Daytime
Running Lamps.........................................5-64
Roof Marker Lamps......................................5-66
Center High-Mounted Stoplamp (CHMSL)
and Cargo Lamp.......................................5-68
Pickup Box Identi�cation and Fender
Marker Lamps...........................................5-69
Taillamps.....................................................5-69
Replacement Bulbs.......................................5-71
Windshield Wiper Blade Replacement..............5-72
Tires..............................................................5-73
Tire Sidewall Labelling...................................5-74
Tire Terminology and De�nitions.....................5-77
In�ation - Tire Pressure.................................5-80
Dual Tire Operation.......................................5-81
Tire Inspection and Rotation...........................5-82
When It Is Time for New Tires.......................5-84
Buying New Tires.........................................5-84
Uniform Tire Quality Grading..........................5-86
Wheel Alignment and Tire Balance..................5-87Wheel Replacement......................................5-87
Tire Chains..................................................5-89
If a Tire Goes Flat........................................5-90
Changing a Flat Tire.....................................5-91
Removing the Spare Tire and Tools................5-92
Removing the Flat Tire and Installing the
Spare Tire................................................5-96
Secondary Latch System..............................5-105
Storing a Flat or Spare Tire and Tools...........5-108
Spare Tire.................................................5-112
Appearance Care..........................................5-112
Cleaning the Inside of Your Vehicle...............5-113
Fabric/Carpet..............................................5-114
Leather......................................................5-115
Instrument Panel, Vinyl, and Other Plastic
Surfaces.................................................5-115
Care of Safety Belts....................................5-116
Weatherstrips.............................................5-116
Washing Your Vehicle..................................5-116
Cleaning Exterior Lamps/Lenses....................5-117
Finish Care................................................5-117
Windshield and Wiper Blades.......................5-118
Aluminum or Chrome-Plated Wheels..............5-118
Section 5 Service and Appearance Care
5-2