CHEVROLET SILVERADO 2006 1.G Owners Manual
Manufacturer: CHEVROLET, Model Year: 2006, Model line: SILVERADO, Model: CHEVROLET SILVERADO 2006 1.GPages: 594, PDF Size: 3.41 MB
Page 171 of 594
Reprogramming a Single Universal
Home Remote Button
To program a device to Universal Home Remote using
a Universal Home Remote button previously trained,
follow these steps:
1. Press and hold the desired Universal Home
Remote button. Do not release the button.
2. The indicator light will begin to �ash after
20 seconds. While still holding the Universal Home
Remote button, proceed with Step 2 under
“Programming Universal Home Remote” shown
earlier in this section.
For additional information on Universal Home Remote,
seeCustomer Assistance Offices on page 7-4.
Storage Areas
Glove Box
Open the glove box by pulling the bottom of the handle
upward.
Cupholder(s)
Your vehicle may have cupholders located in the front
console, or in the fold-down armrest.
Coinholder(s)
Your vehicle may have a coin holder inside the center
console storage area.
2-75
Page 172 of 594
Front Storage Area
Your vehicle may have a center armrest storage
compartment in the front bench seat.
To open it, fold down the armrest and press the latch
handle located at the front of the armrest. Then, let the
lid pop up and swing open.
The storage compartment may have a cassette/compact
disc holder.
Center Console Storage Area
Your vehicle may be equipped with a console
compartment between the bucket seats.
To open it, press the button located on the right side of
the front of the lid and swing the lid open.
Your vehicle may have a compact disc holder in the
console.
Your console may have a cupholder that swings down
for the rear seat passengers to use. The front cupholder
pulls out and swivels 180° to provide clearance
between tall beverage containers and the manual
transmission shift lever (if equipped).
Tonneau Cover
If your vehicle is equipped with a tonneau cover, follow
the directions below to remove the cover.
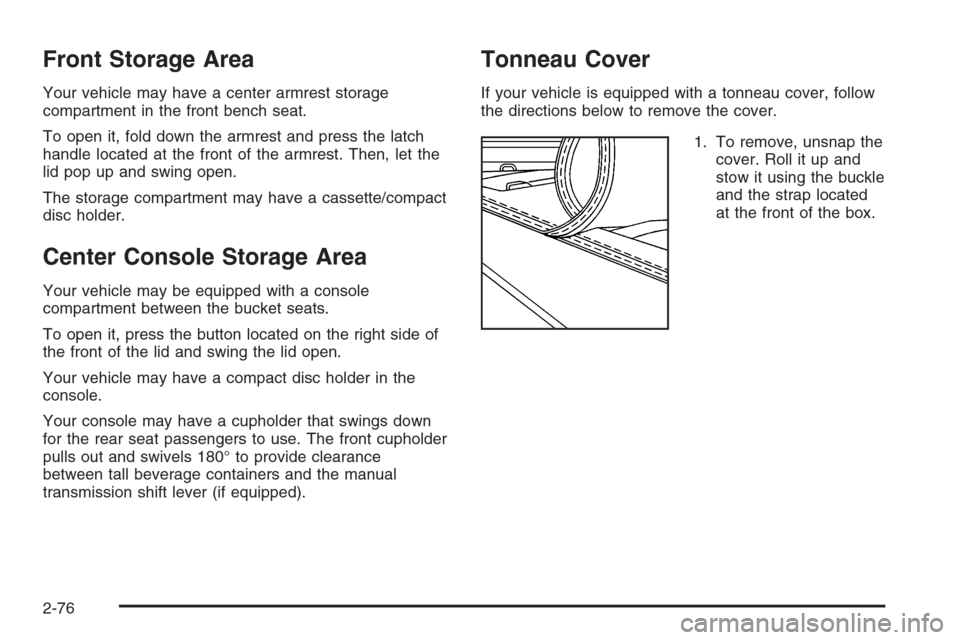
1. To remove, unsnap the
cover. Roll it up and
stow it using the buckle
and the strap located
at the front of the box.
2-76
Page 173 of 594
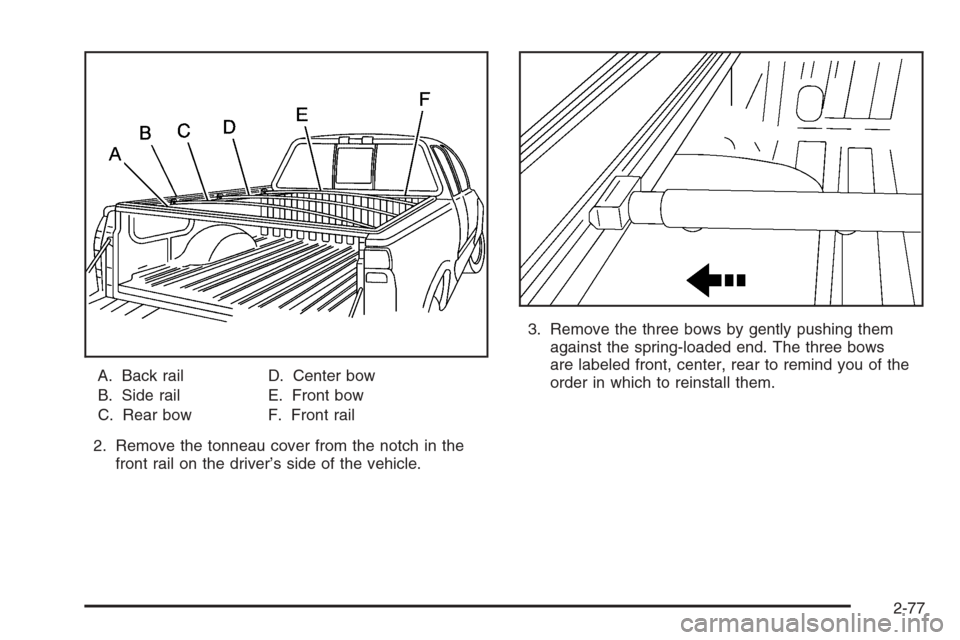
A. Back rail
B. Side rail
C. Rear bowD. Center bow
E. Front bow
F. Front rail
2. Remove the tonneau cover from the notch in the
front rail on the driver’s side of the vehicle.3. Remove the three bows by gently pushing them
against the spring-loaded end. The three bows
are labeled front, center, rear to remind you of the
order in which to reinstall them.
2-77
Page 174 of 594
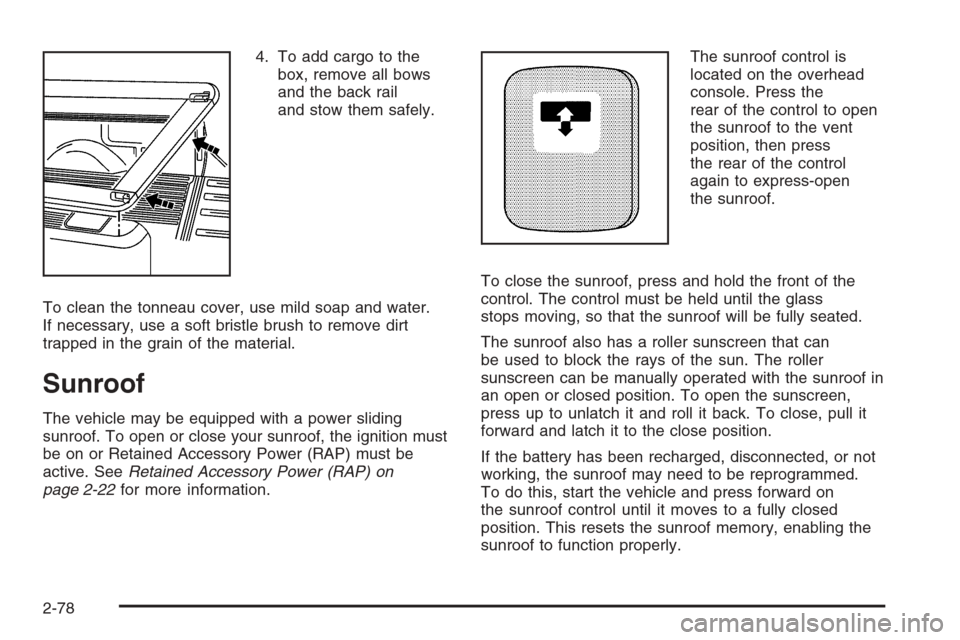
4. To add cargo to the
box, remove all bows
and the back rail
and stow them safely.
To clean the tonneau cover, use mild soap and water.
If necessary, use a soft bristle brush to remove dirt
trapped in the grain of the material.
Sunroof
The vehicle may be equipped with a power sliding
sunroof. To open or close your sunroof, the ignition must
be on or Retained Accessory Power (RAP) must be
active. SeeRetained Accessory Power (RAP) on
page 2-22for more information.The sunroof control is
located on the overhead
console. Press the
rear of the control to open
the sunroof to the vent
position, then press
the rear of the control
again to express-open
the sunroof.
To close the sunroof, press and hold the front of the
control. The control must be held until the glass
stops moving, so that the sunroof will be fully seated.
The sunroof also has a roller sunscreen that can
be used to block the rays of the sun. The roller
sunscreen can be manually operated with the sunroof in
an open or closed position. To open the sunscreen,
press up to unlatch it and roll it back. To close, pull it
forward and latch it to the close position.
If the battery has been recharged, disconnected, or not
working, the sunroof may need to be reprogrammed.
To do this, start the vehicle and press forward on
the sunroof control until it moves to a fully closed
position. This resets the sunroof memory, enabling the
sunroof to function properly.
2-78
Page 175 of 594
Vehicle Personalization
In addition to the following features, your vehicle may
also have features that can be programmed through the
Driver Information Center (DIC). SeeDIC Vehicle
Customization on page 3-64for more information.
Memory Seat
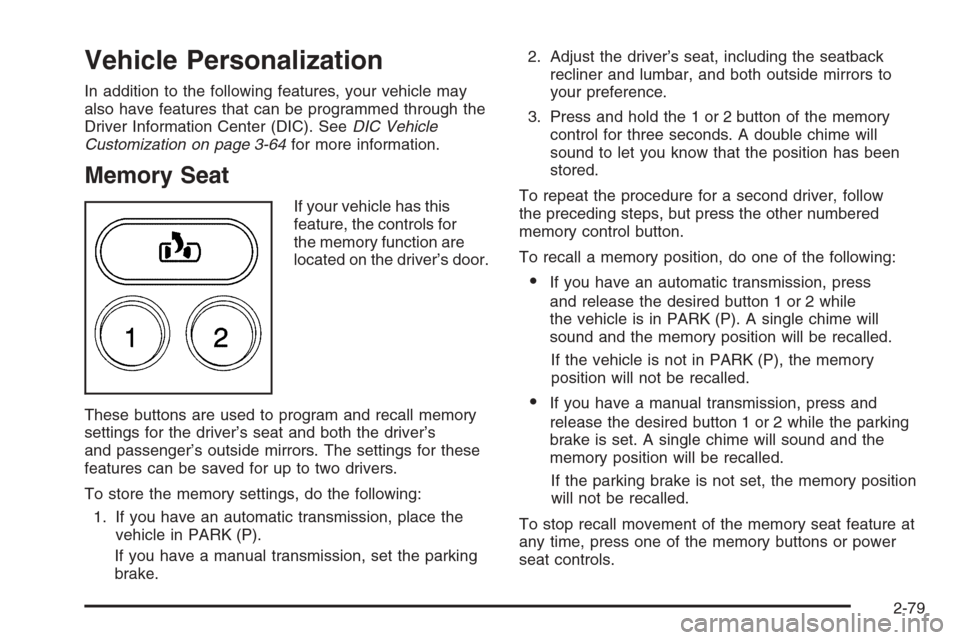
If your vehicle has this
feature, the controls for
the memory function are
located on the driver’s door.
These buttons are used to program and recall memory
settings for the driver’s seat and both the driver’s
and passenger’s outside mirrors. The settings for these
features can be saved for up to two drivers.
To store the memory settings, do the following:
1. If you have an automatic transmission, place the
vehicle in PARK (P).
If you have a manual transmission, set the parking
brake.2. Adjust the driver’s seat, including the seatback
recliner and lumbar, and both outside mirrors to
your preference.
3. Press and hold the 1 or 2 button of the memory
control for three seconds. A double chime will
sound to let you know that the position has been
stored.
To repeat the procedure for a second driver, follow
the preceding steps, but press the other numbered
memory control button.
To recall a memory position, do one of the following:
If you have an automatic transmission, press
and release the desired button 1 or 2 while
the vehicle is in PARK (P). A single chime will
sound and the memory position will be recalled.
If the vehicle is not in PARK (P), the memory
position will not be recalled.
If you have a manual transmission, press and
release the desired button 1 or 2 while the parking
brake is set. A single chime will sound and the
memory position will be recalled.
If the parking brake is not set, the memory position
will not be recalled.
To stop recall movement of the memory seat feature at
any time, press one of the memory buttons or power
seat controls.
2-79
Page 176 of 594
Easy Exit Seat
The controls for this memory function are located on the
driver’s door.
B(Easy Exit Seat):This button is used to program
and recall the desired driver’s seat position when exiting
or entering the vehicle. The seat position can be
saved for up to two drivers.
To store the seat exit position, do the following:
1. If you have an automatic transmission, place the
vehicle in PARK (P).
If you have a manual transmission, set the parking
brake.
2. Press and release the 1 or 2 button. The seat will
move to the stored memory position.
3. Adjust the seat to the desired exit position.
4. Press and hold the exit button of the memory
control for three seconds. A double chime will sound
to let you know that the position has been stored
for the selected button 1 or 2.To repeat the procedure for a second driver, follow the
preceding steps, but press the other numbered
memory control button.
To use the seat exit position, do one of the following:If you have an automatic transmission, press
and release the exit button on the memory control
while the vehicle is in PARK (P).
If you have a manual transmission, press and
release the exit button on the memory control while
the parking brake is set.
If this feature is activated in the Driver Information
Center (DIC), removing the key from the ignition
will move the seat to the exit position.
See “Easy Exit Seat” underDIC Vehicle Customization
on page 3-64for more information on activating this
feature in the DIC.
2-80
Page 177 of 594
Instrument Panel Overview...............................3-4
Hazard Warning Flashers................................3-6
Other Warning Devices...................................3-6
Horn .............................................................3-6
Tilt Wheel.....................................................3-6
Turn Signal/Multifunction Lever.........................3-7
Turn and Lane-Change Signals........................3-7
Headlamp High/Low-Beam Changer..................3-8
Flash-to-Pass.................................................3-8
Windshield Wipers..........................................3-9
Windshield Washer.........................................3-9
Cruise Control..............................................3-10
Headlamps..................................................3-13
Headlamps on Reminder................................3-14
Daytime Running Lamps (DRL).......................3-14
Automatic Headlamp System..........................3-14
Fog Lamps ..................................................3-16
Auxiliary Roof Mounted Lamp.........................3-16
Instrument Panel Brightness...........................3-17
Dome Lamps ...............................................3-17
Dome Lamp Override....................................3-17
Entry Lighting...............................................3-18Exit Lighting.................................................3-18
Front Reading Lamps....................................3-18
Cargo Lamp.................................................3-18
Accessory Power Outlet(s).............................3-18
Ashtray(s) and Cigarette Lighter......................3-19
Climate Controls............................................3-20
Climate Control System.................................3-20
Dual Climate Control System..........................3-21
Dual Automatic Climate Control System...........3-24
Outlet Adjustment.........................................3-29
Warning Lights, Gages, and Indicators............3-30
Instrument Panel Cluster................................3-31
Speedometer and Odometer...........................3-32
Trip Odometer..............................................3-32
Tachometer.................................................3-32
Safety Belt Reminder Light.............................3-33
Airbag Readiness Light..................................3-33
Airbag Off Light............................................3-34
Passenger Airbag Status Indicator...................3-36
Battery Warning Light....................................3-39
Voltmeter Gage............................................3-39
Section 3 Instrument Panel
3-1
Page 178 of 594
Up-Shift Light (Manual Transmission)...............3-40
Brake System Warning Light..........................3-41
Anti-Lock Brake System Warning Light.............3-42
Traction Off Light..........................................3-42
Engine Coolant Temperature Gage..................3-43
Transmission Temperature Gage.....................3-43
Malfunction Indicator Lamp.............................3-45
Oil Pressure Gage........................................3-47
Security Light...............................................3-48
Cruise Control Light......................................3-48
Highbeam On Light.......................................3-49
Four-Wheel-Drive Light..................................3-49
Tow/Haul Mode Light....................................3-49
Cargo Lamp Light.........................................3-49
Fuel Gage...................................................3-50
Low Fuel Warning Light.................................3-50
Driver Information Center (DIC).......................3-51
DIC Operation and Displays...........................3-52
DIC Warnings and Messages.........................3-54
DIC Vehicle Customization.............................3-64Audio System(s).............................................3-70
Setting the Time for Radios without Radio
Data Systems (RDS)..................................3-71
Setting the Time for Radios with Radio Data
Systems (RDS).........................................3-71
AM-FM Radio...............................................3-72
Radio with CD..............................................3-74
Radio with Cassette and CD..........................3-85
Radio with Six-Disc CD.................................3-99
Rear Seat Entertainment System...................3-114
Rear Seat Audio (RSA)................................3-125
Theft-Deterrent Feature................................3-126
Audio Steering Wheel Controls......................3-127
Radio Reception.........................................3-128
Care of the Cassette Tape Player.................3-128
Care of Your CDs and DVDs........................3-129
Care of the CD and DVD Player...................3-130
Fixed Mast Antenna....................................3-130
XM™ Satellite Radio Antenna System............3-130
Chime Level Adjustment...............................3-130
Section 3 Instrument Panel
3-2
Page 179 of 594
✍NOTES
3-3
Page 180 of 594
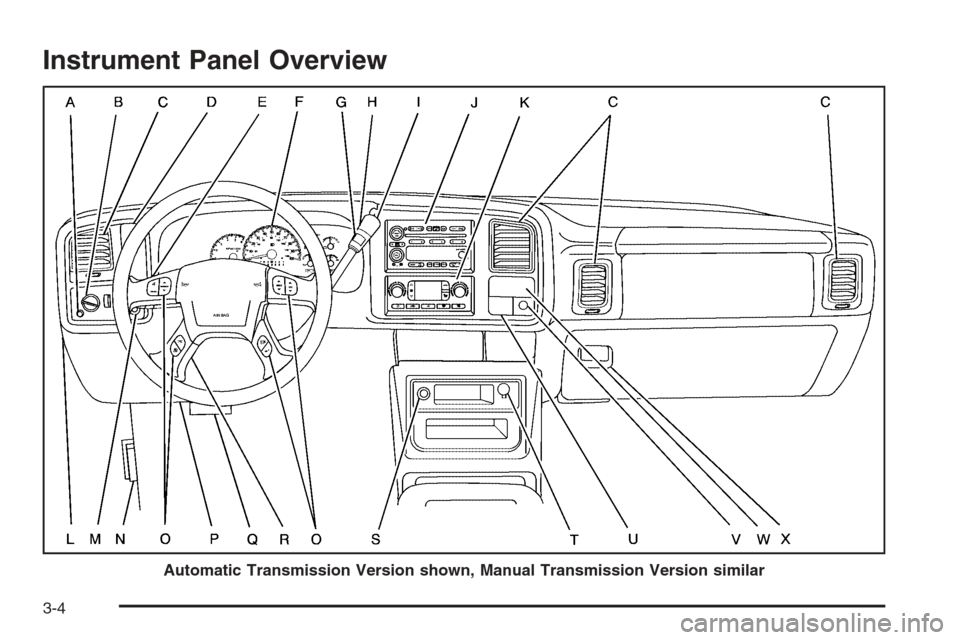
Instrument Panel Overview
Automatic Transmission Version shown, Manual Transmission Version similar
3-4