ECO mode CHEVROLET SILVERADO 2007 1.G Owners Manual
[x] Cancel search | Manufacturer: CHEVROLET, Model Year: 2007, Model line: SILVERADO, Model: CHEVROLET SILVERADO 2007 1.GPages: 684, PDF Size: 3.4 MB
Page 66 of 684
Folding an empty rear seat with the safety
belts secured may cause damage to the safety
belt or the seat. When removing the child
restraint, always remember to return the safety
belts to their normal, stowed position before
folding the rear seat.
Regular Cab Models
1. If the child restraint manufacturer recommends
that the top tether be attached, attach and
tighten the top tether to the top tether anchor,
if your vehicle has one. Refer to the child
restraint instructions and the following steps:
1.1. Pull the passenger seatback forward
by pulling the recliner handle upward to
access the top tether anchor. See
Reclining Seatbacks on page 15for
additional information.
1.2. Find the top tether anchor.
1.3. Remove the trim cover to expose the
anchor.1.4. Route, attach, and tighten the top tether
according to your child restraint
instructions and the following
instructions:
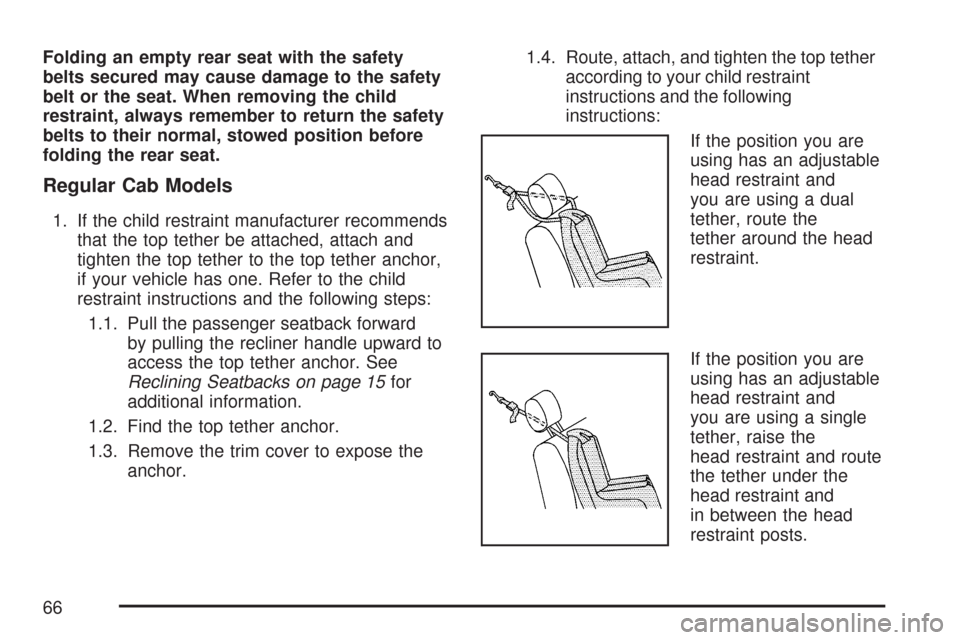
If the position you are
using has an adjustable
head restraint and
you are using a dual
tether, route the
tether around the head
restraint.
If the position you are
using has an adjustable
head restraint and
you are using a single
tether, raise the
head restraint and route
the tether under the
head restraint and
in between the head
restraint posts.
66
Page 67 of 684
2. SeeSecuring a Child Restraint in the Right
Front Seat Position (With Airbag Off Switch)
on page 72orSecuring a Child Restraint
in the Right Front Seat Position (With
Passenger Sensing System) on page 78for
instructions on installing the child restraint
using the safety belts.
3. Push and pull the child restraint in different
directions to be sure it is secure.
Crew and Extended Cab Models
1. Attach and tighten the lower attachments to
the lower anchors. If the child restraint does
not have lower attachments or the desired
seating position does not have lower anchors,
secure the child restraint with the top tether
and the safety belts. Refer to your child
restraint manufacturer instructions and the
instructions in this manual.
1.1. Find the lower anchors for the desired
seating position.
1.2. Put the child restraint on the seat.
1.3. Attach and tighten the lower
attachments on the child restraint to the
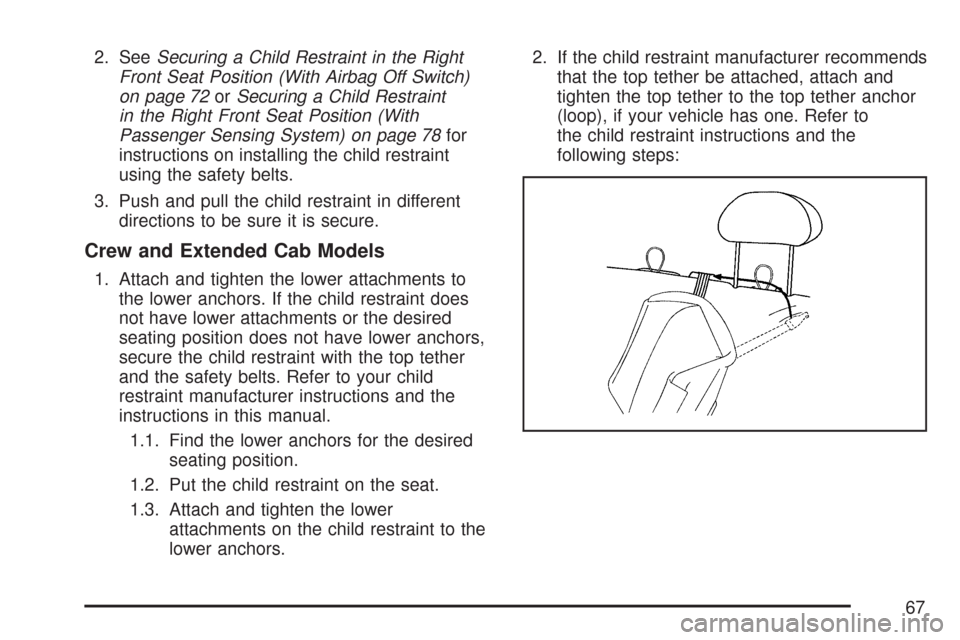
lower anchors.2. If the child restraint manufacturer recommends
that the top tether be attached, attach and
tighten the top tether to the top tether anchor
(loop), if your vehicle has one. Refer to
the child restraint instructions and the
following steps:
67
Page 140 of 684
Active Fuel Management™
Your vehicle’s V8 engine may have Active Fuel
Management™. This system allows the engine to
operate on either all or half of its cylinders,
depending on the driving conditions.
When less power is required, such as cruising at a
constant vehicle speed, the system will operate
in the half cylinder mode, allowing your vehicle to
achieve better fuel economy. When greater
power demands are required, such as accelerating
from a stop, passing, or merging onto a freeway,
the system will maintain full-cylinder operation.
Your vehicle has an Active Fuel Management™
indicator. For more information on using this
display seeDIC Operation and Displays (With DIC
Buttons) on page 270orDIC Operation and
Displays (Without DIC Buttons) on page 277.
Automatic Transmission Operation
If your vehicle is has an automatic transmission,
it has an electronic shift position indicator
within the instrument panel cluster. This display
comes on when the ignition key is turned to
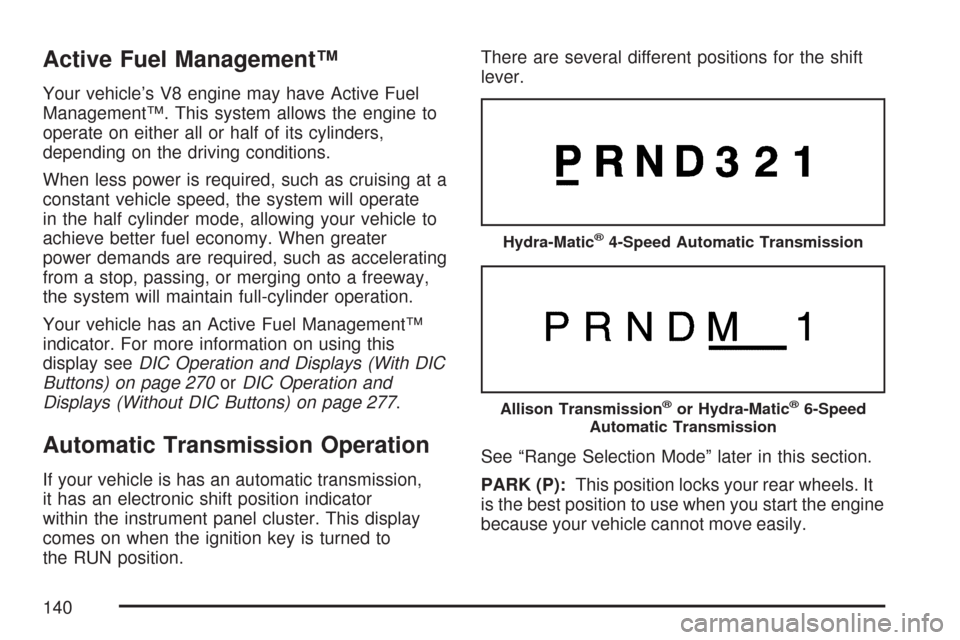
the RUN position.There are several different positions for the shift
lever.
See “Range Selection Mode” later in this section.
PARK (P):This position locks your rear wheels. It
is the best position to use when you start the engine
because your vehicle cannot move easily.
Hydra-Matic®4-Speed Automatic Transmission
Allison Transmission®or Hydra-Matic®6-Speed
Automatic Transmission
140
Page 146 of 684
Grade Braking is not available when the Range
Selection Mode is active. SeeTow/Haul Mode on
page 146
While using the Range Selection mode feature,
cruise control and the Tow/Haul mode can
be used.
Notice:Spinning the tires or holding the
vehicle in one place on a hill using only the
accelerator pedal may damage the
transmission. The repair will not be covered by
your warranty. If you are stuck, do not spin
the tires. When stopping on a hill, use the
brakes to hold the vehicle in place.
Low Traction Mode
If your vehicle has the Allison Transmission®,or
the Hydra-Matic®6-Speed Automatic
Transmission, it has a Low Traction Mode that
assist in vehicle acceleration when road conditions
are slippery, such as with ice or snow. While
the vehicle is at a stop, select the second gear
range using the Range Selection system. This will
limit torque to the wheels after it detects wheel
slip, preventing the tires from spinning.
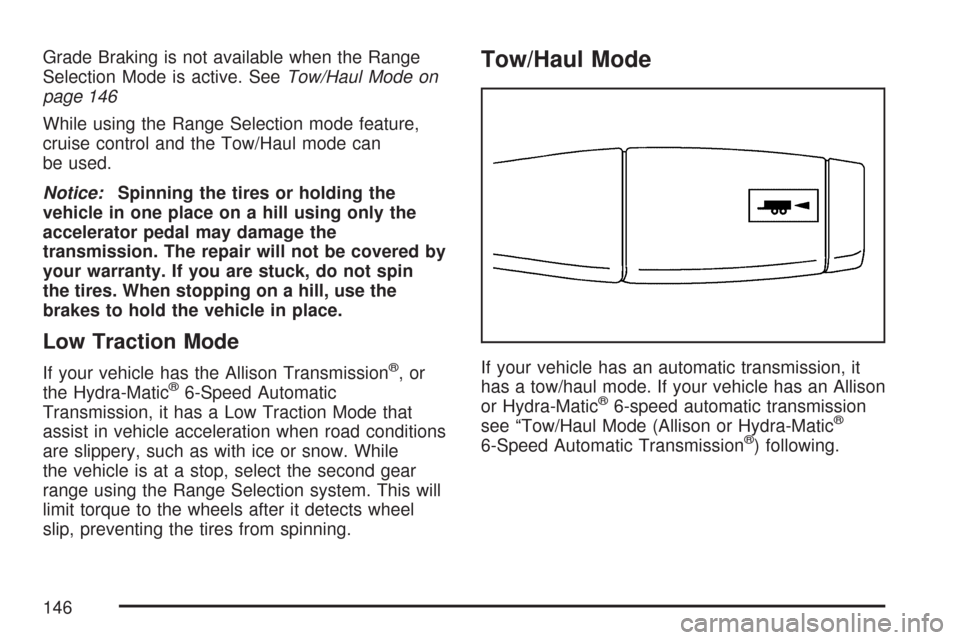
Tow/Haul Mode
If your vehicle has an automatic transmission, it
has a tow/haul mode. If your vehicle has an Allison
or Hydra-Matic
®6-speed automatic transmission
see “Tow/Haul Mode (Allison or Hydra-Matic®
6-Speed Automatic Transmission®) following.
146
Page 152 of 684
When Using the Manual Transfer Case
Shifting should be made using quick
motions. Shifting slowly may make it more
difficult to shift.
You may notice that it is harder to shift when
the vehicle is cold. After the vehicle warms
up the shifting will return to normal.
While in Four-Wheel High or Four-Wheel-Drive
Low you may experience reduced fuel
economy.
Avoid driving in Four-Wheel Drive on clean,
dry pavement. It may cause your tires to
wear faster, and make the transfer case harder
to shift and run noisier.
If the transfer case shifter is in the NEUTRAL
position and you have difficulty reaching the
selected transfer case mode, with the
engine running, shift the transmission
momentarily to drive and then back to
NEUTRAL. This will realign the gear teeth in
the transfer case and allow you to complete
the shift.
Shifting from Two-Wheel-Drive High to
Four-Wheel-Drive High
Shifts between Two-Wheel-Drive High and
Four-Wheel-Drive High can be made at
any vehicle speed.
Shift the transfer case lever in one continuous
motion into either the Four-Wheel-Drive High
or Two-Wheel-Drive High position.
In extremely cold weather, it may be
necessary to slow or stop the vehicle to shift
into Four-wheel-Drive High until your
vehicle has warmed up.
While in Four-Wheel-Drive High, your vehicle
can be driven at any posted legal speed
limit.
152
Page 156 of 684
You must wait for the Four-Wheel-Drive Low
indicator light to stop �ashing and remain on before
shifting your transmission in gear.
Notice:Shifting the transmission into gear
before the requested mode indicator light has
stopped �ashing could damage the transfer
case. To help avoid damaging your vehicle,
always wait for the mode indicator lights
to stop �ashing before shifting the
transmission into gear.
It is typical for your vehicle to exhibit signi�cant
engagement noise and bump when shifting
between Four-Wheel-Drive Low and
Four-Wheel-Drive High ranges or from NEUTRAL
with the engine running.
If the knob is turned to the Four-Wheel-Drive Low
position when your vehicle is in gear and/or
moving, the Four-Wheel-Drive Low indicator light
will �ash for 30 seconds and not complete the
shift unless your vehicle is moving less than 3 mph
(5 km/h) and the transmission is in NEUTRAL (N).
After 30 seconds the transfer case will shift to
Four-Wheel-Drive High mode.Shifting Out of Four-Wheel-Drive Low
To shift from Four-Wheel-Drive Low to
Four-Wheel-Drive High, or Two-Wheel-Drive High,
your vehicle must be stopped or moving less
than 3 mph (5 km/h) with the transmission
in NEUTRAL (N) and the ignition in RUN. The
preferred method for shifting out of
Four-Wheel-Drive Low is to have your vehicle
moving 1 to 2 mph (1.6 to 3.2 km/h). Turn the knob
to the Four-Wheel-Drive High, or Two-Wheel-Drive
High position. You must wait for the
Four-Wheel-Drive High, or Two-Wheel-Drive High
indicator light to stop �ashing and remain on
before shifting the transmission into gear.
Notice:Shifting the transmission into gear
before the requested mode indicator light has
stopped �ashing could damage the transfer
case. To help avoid damaging your vehicle,
always wait for the mode indicator lights
to stop �ashing before shifting the
transmission into gear.
It is typical for your vehicle to exhibit signi�cant
engagement noise and bump when shifting
between Four-Wheel-Drive Low and
Four-Wheel-Drive High ranges or from NEUTRAL
with the engine running.
156
Page 158 of 684
Shifting Out of NEUTRAL
To shift out of NEUTRAL do the following:
1. Set the parking brake and apply the regular
brake pedal.
2. Shift the transmission to NEUTRAL (N) and
turn the ignition to RUN with the engine off.
3. Turn the transfer case dial to
Two-Wheel-Drive High.
After the transfer case has shifted out of
NEUTRAL the NEUTRAL light will go out.
4. Release the parking brake prior to moving the
vehicle.
Notice:Shifting the transmission into gear
before the requested mode indicator light has
stopped �ashing could damage the transfer
case. To help avoid damaging your vehicle,
always wait for the mode indicator lights
to stop �ashing before shifting the
transmission into gear.
5. Start the engine and shift the transmission to
the desired position.Excessively shifting the transfer case into or out of
the different modes may cause the transfer
case to enter the shift protection mode. This will
protect the transfer case from possible damage
and will only allow the transfer case to respond to
one shift per 10 seconds. The transfer case
may stay in this mode for up to three minutes.
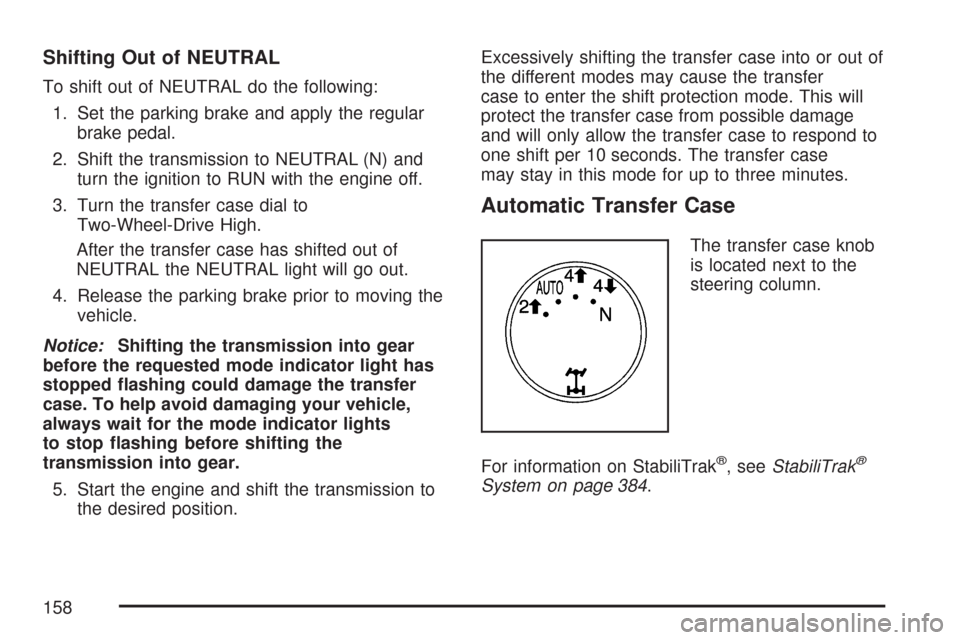
Automatic Transfer Case
The transfer case knob
is located next to the
steering column.
For information on StabiliTrak
®, seeStabiliTrak®
System on page 384.
158
Page 159 of 684
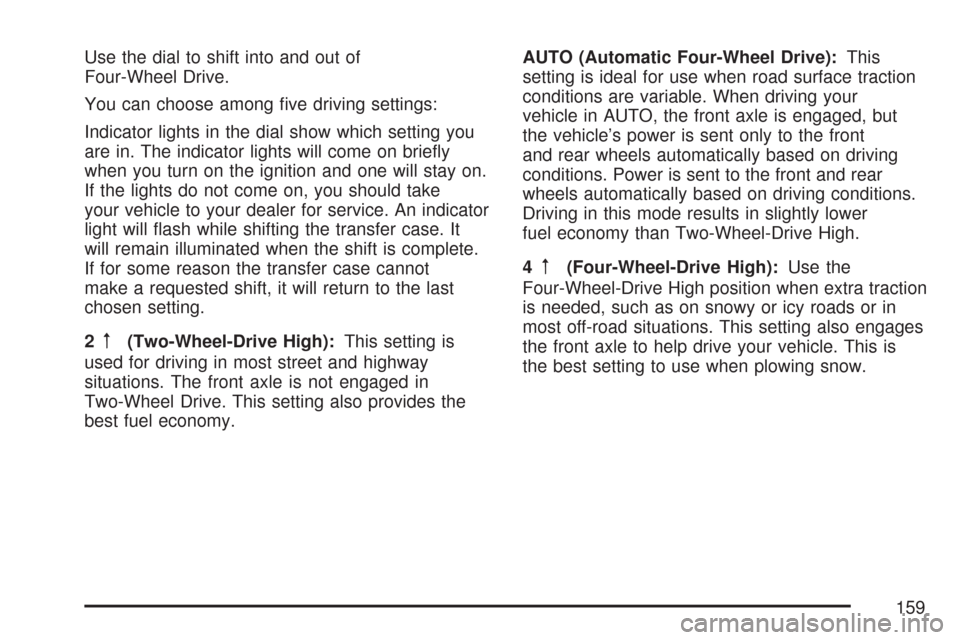
Use the dial to shift into and out of
Four-Wheel Drive.
You can choose among �ve driving settings:
Indicator lights in the dial show which setting you
are in. The indicator lights will come on brie�y
when you turn on the ignition and one will stay on.
If the lights do not come on, you should take
your vehicle to your dealer for service. An indicator
light will �ash while shifting the transfer case. It
will remain illuminated when the shift is complete.
If for some reason the transfer case cannot
make a requested shift, it will return to the last
chosen setting.
2
m(Two-Wheel-Drive High):This setting is
used for driving in most street and highway
situations. The front axle is not engaged in
Two-Wheel Drive. This setting also provides the
best fuel economy.AUTO (Automatic Four-Wheel Drive):This
setting is ideal for use when road surface traction
conditions are variable. When driving your
vehicle in AUTO, the front axle is engaged, but
the vehicle’s power is sent only to the front
and rear wheels automatically based on driving
conditions. Power is sent to the front and rear
wheels automatically based on driving conditions.
Driving in this mode results in slightly lower
fuel economy than Two-Wheel-Drive High.
4
m(Four-Wheel-Drive High):Use the
Four-Wheel-Drive High position when extra traction
is needed, such as on snowy or icy roads or in
most off-road situations. This setting also engages
the front axle to help drive your vehicle. This is
the best setting to use when plowing snow.
159
Page 161 of 684
Shifting Into Two-Wheel-Drive High
Turn the knob to the Two-Wheel-Drive High
position. This can be done at any speed, except
when shifting from Four-Wheel-Drive Low.
Shifting Into Four-Wheel-Drive Low
When Four-Wheel-Drive Low is engaged, vehicle
speed should be kept below 45 mph. Extended
high-speed operation in Four-Wheel-Drive
Low may damage or shorten the life of the
drivetrain.
To shift to the Four-Wheel-Drive Low position, the
ignition must be in RUN and the vehicle must
be stopped or moving less than 3 mph (5 km/h)
with the transmission in NEUTRAL (N). The
preferred method for shifting into Four-Wheel-Drive
Low is to have your vehicle moving 1 to 2 mph
(1.6 to 3.2 km/h). Turn the knob to the
Four-Wheel-Drive Low position. You must wait for
the Four-Wheel-Drive Low indicator light to
stop �ashing and remain on before shifting your
transmission in gear.Notice:Shifting the transmission into gear
before the requested mode indicator light has
stopped �ashing could damage the transfer
case. To help avoid damaging your vehicle,
always wait for the mode indicator lights
to stop �ashing before shifting the
transmission into gear.
It is typical for your vehicle to exhibit
signi�cant engagement noise and bump when
shifting between Four-Wheel-Drive Low and
Four-Wheel-Drive High ranges or from NEUTRAL
with the engine running.
If the knob is turned to the Four-Wheel-Drive Low
position when your vehicle is in gear and/or
moving, the Four-Wheel-Drive Low indicator light
will �ash for 30 seconds and not complete the
shift unless your vehicle is moving less than 3 mph
(5 km/h) and the transmission is in NEUTRAL (N).
After 30 seconds the transfer case will shift to
Four-Wheel-Drive High mode.
161
Page 162 of 684
Shifting Out of Four-Wheel-Drive Low
To shift from Four-Wheel-Drive Low to
Four-Wheel-Drive High, AUTO or
Two-Wheel-Drive High, your vehicle must be
stopped or moving less than 3 mph (5 km/h) with
the transmission in NEUTRAL (N) and the
ignition in RUN. The preferred method for shifting
out of Four-Wheel-Drive Low is to have your
vehicle moving 1 to 2 mph (1.6 to 3.2 km/h). Turn
the knob to the Four-Wheel-Drive High, AUTO
or Two-Wheel-Drive High position. You must wait
for the Four-Wheel-Drive High, AUTO or
Two-Wheel-Drive High indicator light to stop
�ashing and remain on before shifting your
transmission into gear.
Notice:Shifting the transmission into gear
before the requested mode indicator light has
stopped �ashing could damage the transfer
case. To help avoid damaging your vehicle,
always wait for the mode indicator lights
to stop �ashing before shifting the
transmission into gear.It is typical for your vehicle to exhibit signi�cant
engagement noise and bump when shifting
between Four-Wheel-Drive Low and
Four-Wheel-Drive High ranges or from NEUTRAL
with the engine running.
If the knob is turned to the Four-Wheel-Drive High,
AUTO, or Two-Wheel-Drive High switch position
when your vehicle is in gear and/or moving,
the Four-Wheel-Drive High, AUTO or
Two-Wheel-Drive High indicator light will �ash for
30 seconds but will not complete the shift
unless your vehicle is moving less than 3 mph
(5 km/h) and the transmission is in NEUTRAL (N).
Shifting into NEUTRAL
To shift the transfer case to NEUTRAL do the
following:
1. Make sure the vehicle is parked so that it will
not roll.
2. Set the parking brake and apply the regular
brake pedal. SeeParking Brake on page 164
for more information.
162