lock CHEVROLET SILVERADO 2007 1.G Owners Manual
[x] Cancel search | Manufacturer: CHEVROLET, Model Year: 2007, Model line: SILVERADO, Model: CHEVROLET SILVERADO 2007 1.GPages: 684, PDF Size: 3.4 MB
Page 1 of 684
Seats and Restraint Systems
....................... 7
Front Seats
.............................................. 9
Rear Seats
............................................. 20
Safety Belts
............................................ 22
Child Restraints
...................................... 46
Airbag System
........................................ 85
Restraint System Check
....................... 106
Features and Controls
.............................. 109
Keys
..................................................... 111
Doors and Locks
.................................. 120
Windows
............................................... 126
Theft-Deterrent Systems
....................... 129
Starting and Operating Your Vehicle
..... 134
Mirrors
.................................................. 171
OnStar
®System
................................... 182
Universal Home Remote System
.......... 186
Storage Areas
...................................... 198
Sunroof
................................................ 202Instrument Panel
....................................... 205
Instrument Panel Overview
................... 208
Climate Controls
................................... 236
Warning Lights, Gages, and
Indicators
.......................................... 248
Driver Information Center (DIC)
............ 269
Audio System(s)
................................... 302
Driving Your Vehicle
................................. 375
Your Driving, the Road, and Your
Vehicle
.............................................. 376
Towing
................................................. 441
Service and Appearance Care
.................. 485
Service
................................................. 488
Fuel
...................................................... 490
Checking Things Under the Hood
......... 498
Rear Axle
............................................. 540
Four-Wheel Drive
.................................. 541
Front Axle
............................................ 543
2007 Chevrolet Silverado Owner ManualM
1
Page 9 of 684
Front Seats
Manual Seats
{CAUTION:
You can lose control of the vehicle if you
try to adjust a manual driver’s seat while
the vehicle is moving. The sudden
movement could startle and confuse you,
or make you push a pedal when you do
not want to. Adjust the driver’s seat only
when the vehicle is not moving.To move a manual seat
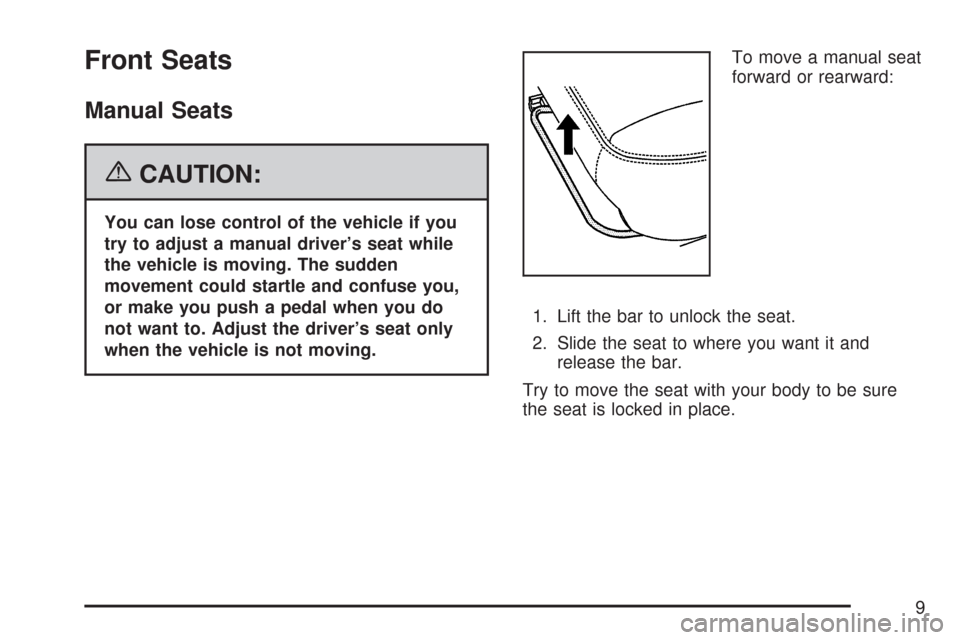
forward or rearward:
1. Lift the bar to unlock the seat.
2. Slide the seat to where you want it and
release the bar.
Try to move the seat with your body to be sure
the seat is locked in place.
9
Page 14 of 684
To stop recall movement of the memory function
at any time, press one of the power seat controls,
memory buttons, power mirror buttons, or
adjustable pedal switch.
If something has blocked the driver’s seat and/or
the adjustable pedals while recalling a memory
position, the driver’s seat and/or the adjustable
pedals recall may stop working. If this happens,
remove the obstruction and press the appropriate
control for the area that is not responding for
two seconds. Try recalling the memory position
again by pressing the appropriate memory button.
If the memory position is still not recalling, see
your dealer for service.Easy Exit Seat
The control for this feature is located on the
driver’s door panel between buttons 1 and 2.
With the vehicle in PARK (P), the driver’s seat exit
position can be recalled by pressing the exit
button. You will hear a single beep, and the
driver’s seat will move back.
If the easy exit seat feature is programmed in the
Driver Information Center (DIC), automatic
seat movement will occur when the key is removed
from the ignition. See “EASY EXIT SEAT” under
DIC Vehicle Customization (With DIC Buttons)
on page 291for more information.
The memory seat and easy exit features can also
be programmed using the DIC.
For programming information, seeDIC Vehicle
Customization (With DIC Buttons) on page 291.
14
Page 15 of 684
Reclining Seatbacks
Manual Reclining Seatbacks
{CAUTION:
You can lose control of the vehicle if you
try to adjust a manual driver’s seat while
the vehicle is moving. The sudden
movement could startle and confuse you,
or make you push a pedal when you do
not want to. Adjust the driver’s seat only
when the vehicle is not moving.
{CAUTION:
If the seatback is not locked, it could
move forward in a sudden stop or crash.
That could cause injury to the person
sitting there. Always push and pull on the
seatback to be sure it is locked.If the seats have manual reclining seatbacks, the
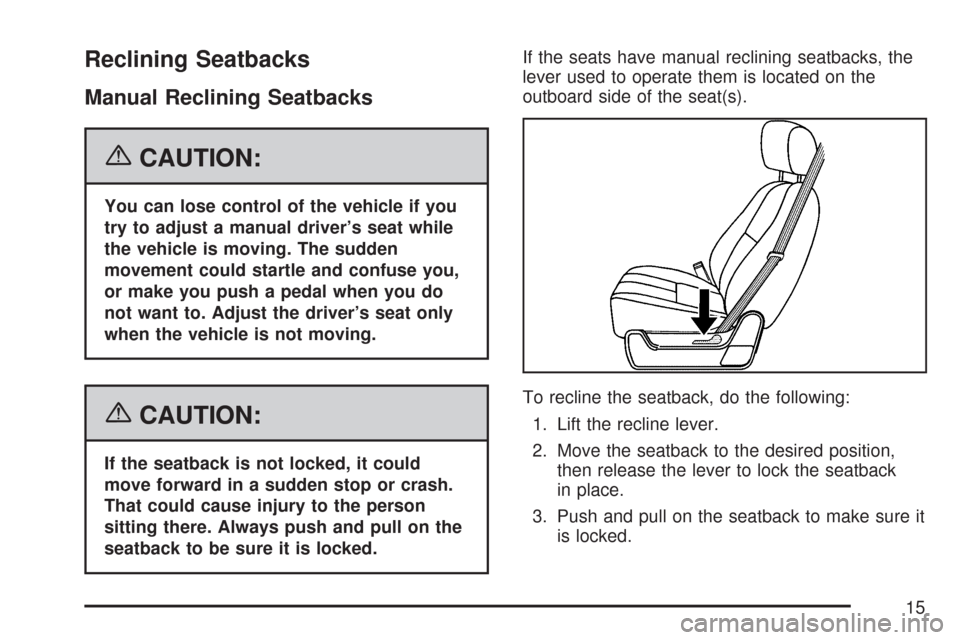
lever used to operate them is located on the
outboard side of the seat(s).
To recline the seatback, do the following:
1. Lift the recline lever.
2. Move the seatback to the desired position,
then release the lever to lock the seatback
in place.
3. Push and pull on the seatback to make sure it
is locked.
15
Page 16 of 684
To return the seatback to an upright position, do
the following:
1. Lift the lever fully without applying pressure to
the seatback and the seatback will return to
the upright position.
2. Push and pull on the seatback to make sure it
is locked.Power Reclining Seatbacks
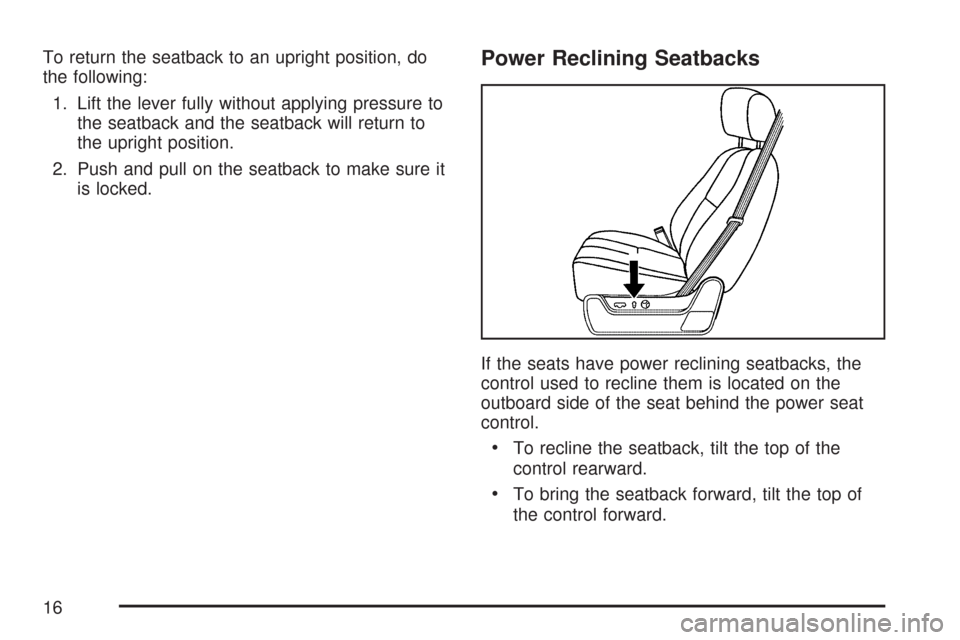
If the seats have power reclining seatbacks, the
control used to recline them is located on the
outboard side of the seat behind the power seat
control.
To recline the seatback, tilt the top of the
control rearward.
To bring the seatback forward, tilt the top of
the control forward.
16
Page 19 of 684
Seatback Latches
The front seatbacks tilt forward to allow access to
the rear of the cab.
To tilt the seatback forward, lift the lever located
on the outboard side of the seat cushion.
{CAUTION:
If the seatback is not locked, it could
move forward in a sudden stop or crash.
That could cause injury to the person
sitting there. Always push and pull on the
seatback to be sure it is locked.
To return the seatback to the upright position,
push the seatback rearward until it latches. After
returning the seatback to its upright position,
push and pull on the seatback to make sure it is
locked.
Center Seat
Your vehicle may have a front center seat. The
seatback doubles as an armrest and cupholder/
storage area for the driver and passenger when the
center seat is not used. Do not use it as a seating
position when the seatback is folded down.
For information on safety belts for this position,
seeCenter Front Passenger Position (Regular
Cab) on page 37orCenter Front Passenger
Position (Crew and Extended Cab) on page 38.
19
Page 20 of 684
Rear Seats
Rear Seat Operation (Full Bench)
Folding the Rear Seat
To fold the seat up, do the following:
Notice:Folding a rear seat with the safety
belts still fastened may cause damage to the
seat or the safety belts. Always unbuckle
the safety belts and return them to their normal
stowed position before folding a rear seat.
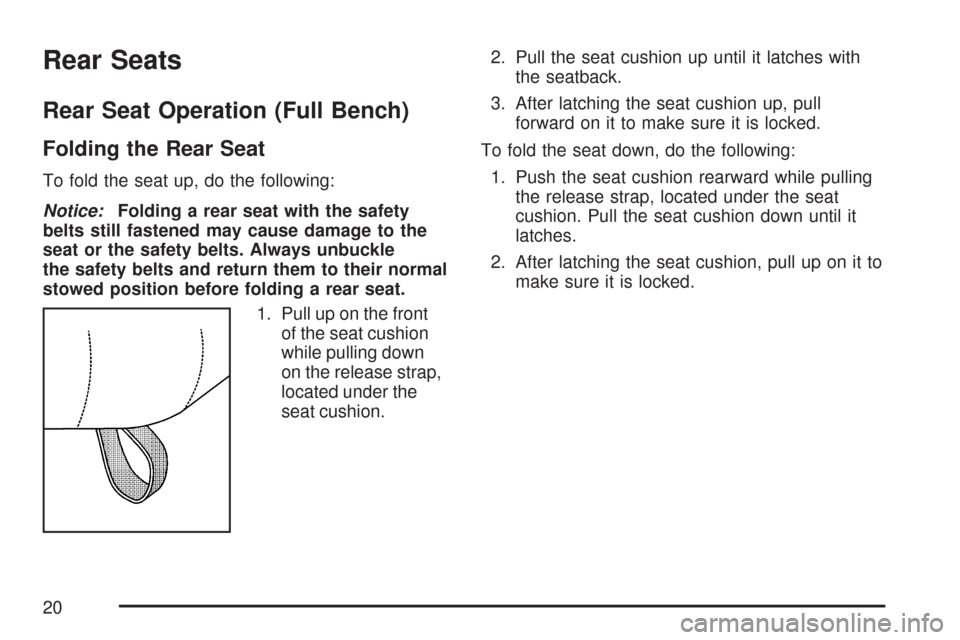
1. Pull up on the front
of the seat cushion
while pulling down
on the release strap,
located under the
seat cushion.2. Pull the seat cushion up until it latches with
the seatback.
3. After latching the seat cushion up, pull
forward on it to make sure it is locked.
To fold the seat down, do the following:
1. Push the seat cushion rearward while pulling
the release strap, located under the seat
cushion. Pull the seat cushion down until it
latches.
2. After latching the seat cushion, pull up on it to
make sure it is locked.
20
Page 28 of 684
Driver Position
Lap-Shoulder Belt
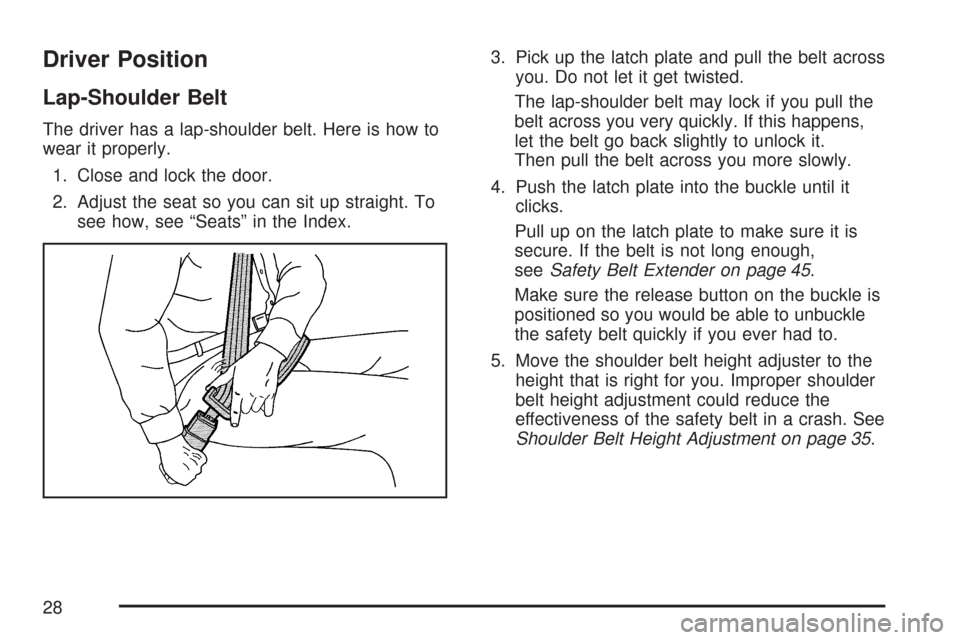
The driver has a lap-shoulder belt. Here is how to
wear it properly.
1. Close and lock the door.
2. Adjust the seat so you can sit up straight. To
see how, see “Seats” in the Index.3. Pick up the latch plate and pull the belt across
you. Do not let it get twisted.
The lap-shoulder belt may lock if you pull the
belt across you very quickly. If this happens,
let the belt go back slightly to unlock it.
Then pull the belt across you more slowly.
4. Push the latch plate into the buckle until it
clicks.
Pull up on the latch plate to make sure it is
secure. If the belt is not long enough,
seeSafety Belt Extender on page 45.
Make sure the release button on the buckle is
positioned so you would be able to unbuckle
the safety belt quickly if you ever had to.
5. Move the shoulder belt height adjuster to the
height that is right for you. Improper shoulder
belt height adjustment could reduce the
effectiveness of the safety belt in a crash. See
Shoulder Belt Height Adjustment on page 35.
28
Page 29 of 684
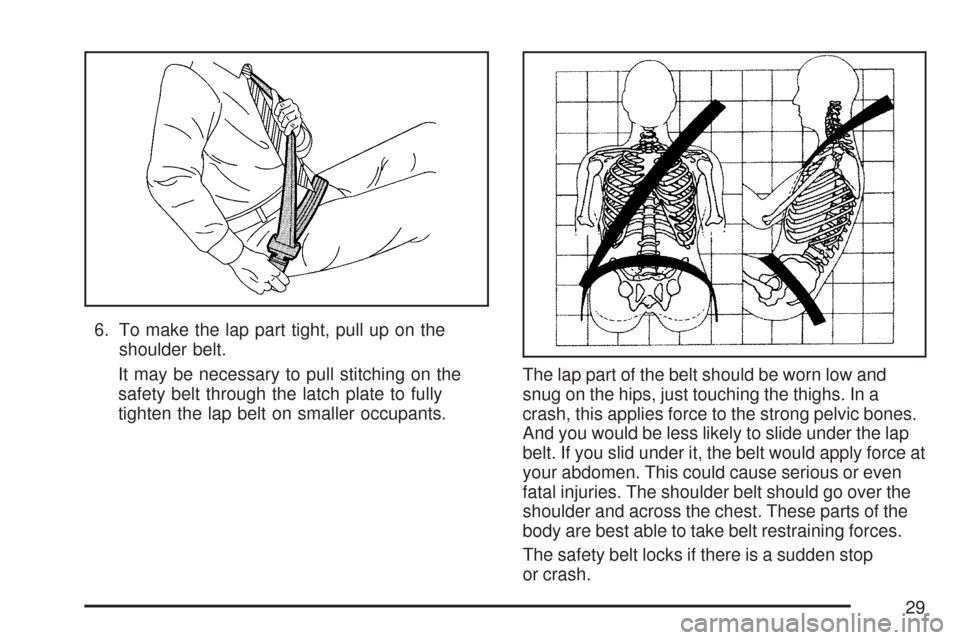
6. To make the lap part tight, pull up on the
shoulder belt.
It may be necessary to pull stitching on the
safety belt through the latch plate to fully
tighten the lap belt on smaller occupants.The lap part of the belt should be worn low and
snug on the hips, just touching the thighs. In a
crash, this applies force to the strong pelvic bones.
And you would be less likely to slide under the lap
belt. If you slid under it, the belt would apply force at
your abdomen. This could cause serious or even
fatal injuries. The shoulder belt should go over the
shoulder and across the chest. These parts of the
body are best able to take belt restraining forces.
The safety belt locks if there is a sudden stop
or crash.
29
Page 36 of 684
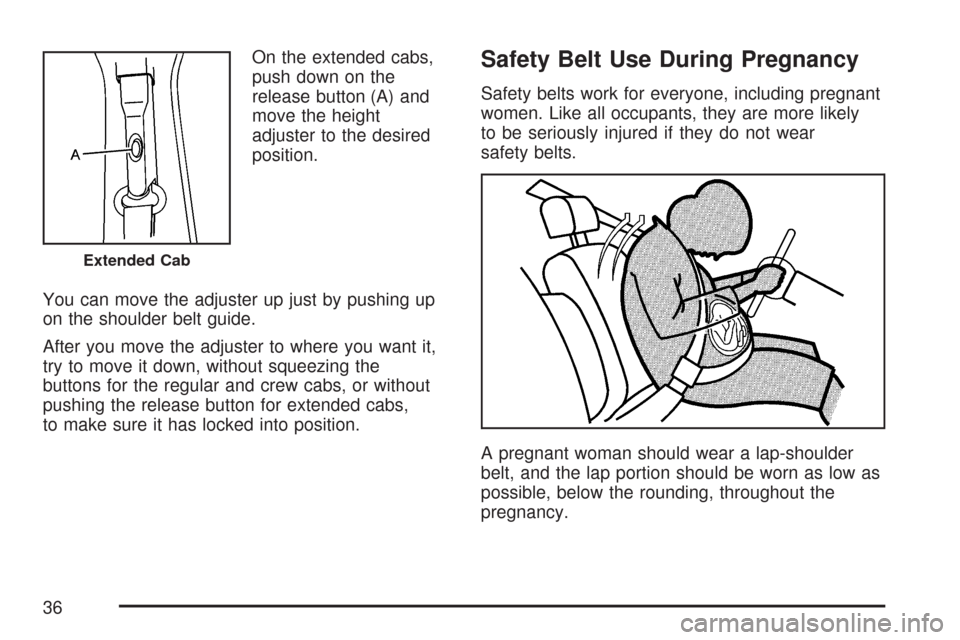
On the extended cabs,
push down on the
release button (A) and
move the height
adjuster to the desired
position.
You can move the adjuster up just by pushing up
on the shoulder belt guide.
After you move the adjuster to where you want it,
try to move it down, without squeezing the
buttons for the regular and crew cabs, or without
pushing the release button for extended cabs,
to make sure it has locked into position.Safety Belt Use During Pregnancy
Safety belts work for everyone, including pregnant
women. Like all occupants, they are more likely
to be seriously injured if they do not wear
safety belts.
A pregnant woman should wear a lap-shoulder
belt, and the lap portion should be worn as low as
possible, below the rounding, throughout the
pregnancy.
Extended Cab
36