air condition CHEVROLET SILVERADO 2010 2.G User Guide
[x] Cancel search | Manufacturer: CHEVROLET, Model Year: 2010, Model line: SILVERADO, Model: CHEVROLET SILVERADO 2010 2.GPages: 626, PDF Size: 4.8 MB
Page 126 of 626
Medical Condition. A passenger has a
medical condition which, according to his
or her physician:
.Causes the passenger airbag to pose a special
risk for the passenger; and
.Makes the potential harm from the passenger
airbag in a crash greater than the potential harm
from turning off the airbag and allowing the
passenger, even if belted, to hit the dashboard or
windshield in a crash.
{WARNING:
If the right front passenger's airbag is turned off
for a person who is not in a risk group identified
by the national government, that person will not
have the extra protection of an airbag. In a crash,
the airbag will not be able to inflate and help
protect the person sitting there. Do not turn off the
passenger's airbag unless the person sitting there
is in a risk group.
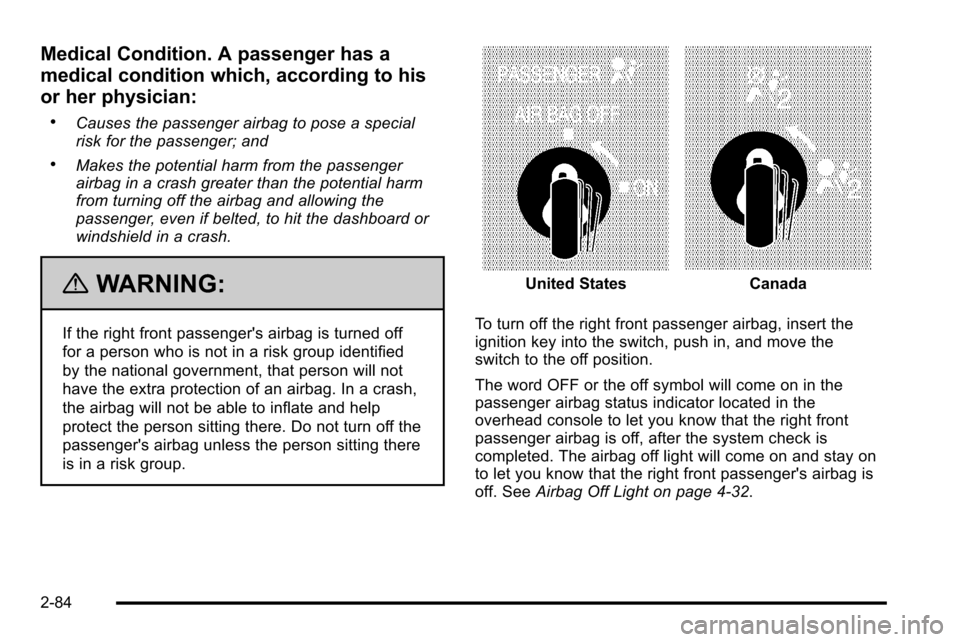
United StatesCanada
To turn off the right front passenger airbag, insert the
ignition key into the switch, push in, and move the
switch to the off position.
The word OFF or the off symbol will come on in the
passenger airbag status indicator located in the
overhead console to let you know that the right front
passenger airbag is off, after the system check is
completed. The airbag off light will come on and stay on
to let you know that the right front passenger's airbag is
off. See Airbag Off Light on page 4‑32.
2-84
Page 128 of 626
Passenger Sensing System
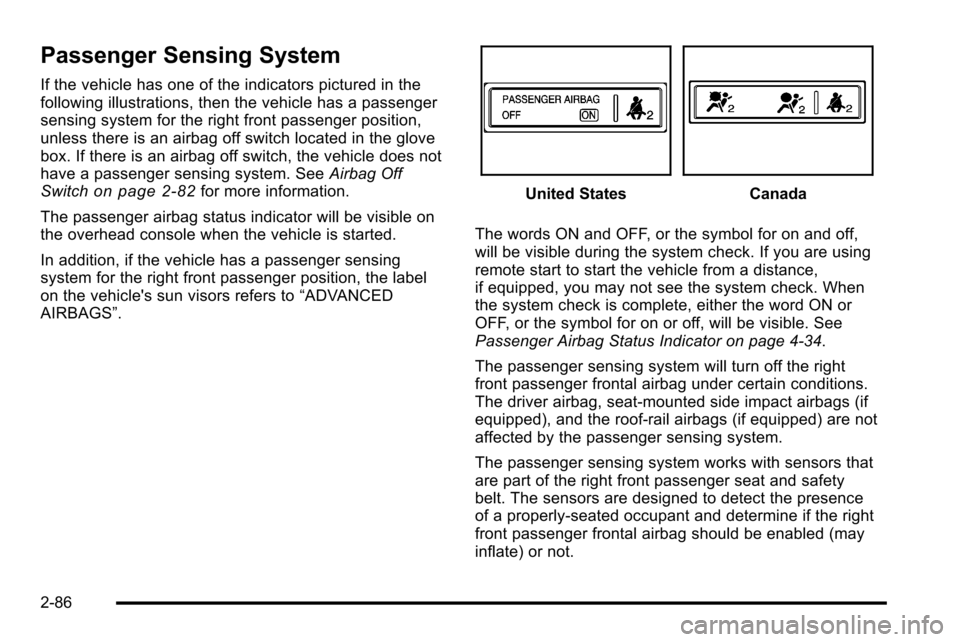
If the vehicle has one of the indicators pictured in the
following illustrations, then the vehicle has a passenger
sensing system for the right front passenger position,
unless there is an airbag off switch located in the glove
box. If there is an airbag off switch, the vehicle does not
have a passenger sensing system. SeeAirbag Off
Switch
on page 2‑82for more information.
The passenger airbag status indicator will be visible on
the overhead console when the vehicle is started.
In addition, if the vehicle has a passenger sensing
system for the right front passenger position, the label
on the vehicle's sun visors refers to “ADVANCED
AIRBAGS”.United StatesCanada
The words ON and OFF, or the symbol for on and off,
will be visible during the system check. If you are using
remote start to start the vehicle from a distance,
if equipped, you may not see the system check. When
the system check is complete, either the word ON or
OFF, or the symbol for on or off, will be visible. See
Passenger Airbag Status Indicator on page 4‑34.
The passenger sensing system will turn off the right
front passenger frontal airbag under certain conditions.
The driver airbag, seat‐mounted side impact airbags (if
equipped), and the roof-rail airbags (if equipped) are not
affected by the passenger sensing system.
The passenger sensing system works with sensors that
are part of the right front passenger seat and safety
belt. The sensors are designed to detect the presence
of a properly-seated occupant and determine if the right
front passenger frontal airbag should be enabled (may
inflate) or not.
2-86
Page 135 of 626
deployment of the passenger airbag(s) or prevent
the passenger sensing system from properly turning
off the passenger airbag(s). SeePassenger Sensing
System on page 2‑86.
If you have any questions about this, you should
contact Customer Assistance before you modify
your vehicle. The phone numbers and addresses for
Customer Assistance are in Step Two of the
Customer Satisfaction Procedure in this manual.
See Customer Satisfaction Procedure on page 8‑2.
If the vehicle has rollover roof-rail airbags, see
Different Size Tires and Wheels
on page 6‑85for
additional important information.
Q: What if I added a snow plow? Will it keep the airbags from working properly?
A: We have designed our airbag systems to work
properly under a wide range of conditions, including
snow plowing with vehicles that have the optional
Snow Plow Prep Package (RPO VYU). But do not
change or defeat the snow plow's “tripping
mechanism.” If you do, it can damage your snow
plow and your vehicle, and it may cause an airbag
inflation. Q: Because I have a disability, I have to get my
vehicle modified. How can I find out whether this
will affect my airbag system?
A: If you have questions, call Customer Assistance.
The phone numbers and addresses for Customer
Assistance are in Step Two of the Customer
Satisfaction Procedure in this manual. See
Customer Satisfaction Procedure on page 8‑2.
In addition, your dealer and the service manual have
information about the location of the airbag sensors,
sensing and diagnostic module and airbag wiring.
2-93
Page 145 of 626
Remote Vehicle Start
Your vehicle may have a remote starting feature. This
feature allows you to start the engine from outside of
the vehicle. It may also start up the vehicle's heating or
air conditioning systems and rear window defogger.
Normal operation of the system will return after the key
is turned to the ON/RUN position.
If your vehicle has an automatic climate control system,
the climate control system will default to a heating or
cooling mode depending on the outside temperatures.
If your vehicle does not have an automatic climate
control system, the system will turn on at the setting the
vehicle was set to when the vehicle was last turned off.
During a remote start, if your vehicle has an automatic
climate control system and heated seats, the heated
seats will turn on during colder outside temperatures
and will shut off when the key is turned to ON/RUN.
If your vehicle does not have an automatic climate
control system, during remote start, you will need to
manually turn the heated seats on and off. SeeHeated
Seats
on page 2‑8for additional information.
Laws in some communities may restrict the use of
remote starters. For example, some laws may require a
person using the remote start to have the vehicle in
view when doing so. Check local regulations for any
requirements on remote starting of vehicles. Do not use the remote start feature if your vehicle is low
on fuel. Your vehicle may run out of fuel.
If your vehicle has the remote start feature, the RKE
transmitter functions will have an increased range of
operation. However, the range may be less while the
vehicle is running.
There are other conditions which can affect the
performance of the transmitter, see
Remote Keyless
Entry (RKE) System
on page 3‑4for additional
information.
/ (Remote Start): This button will be on the RKE
transmitter if you have remote start.
To start the vehicle using the remote start feature:
1. Aim the transmitter at the vehicle.
2. Press and release the transmitter's lock button. The vehicle's doors will lock. Immediately press
and hold the transmitter's remote start button until
the turn signal lights flash. If you cannot see the
vehicle's lights, press and hold the remote start
button for two to four seconds. Pressing the remote
start button again after the vehicle has started will
turn the engine off.
When the vehicle starts, the parking lamps will turn
on and remain on while the vehicle is running.
If the vehicle is left running it will automatically shut
off after 10 minutes unless a time extension has
been done.
3-7
Page 168 of 626
N (Neutral):In this position, the engine does not
connect with the wheels. To restart when you are
already moving, use N (Neutral) only. Also, use
N (Neutral) when the vehicle is being towed.
{WARNING:
Shifting into a drive gear while the engine is
running at high speed is dangerous. Unless your
foot is firmly on the brake pedal, the vehicle could
move very rapidly. You could lose control and hit
people or objects. Do not shift into a drive gear
while the engine is running at high speed.
Notice: Shifting out of P (Park) or N (Neutral) with
the engine running at high speed may damage the
transmission. The repairs would not be covered by
the vehicle warranty. Be sure the engine is not
running at high speed when shifting the vehicle. D (Drive):
This position is for normal driving. It provides
the best fuel economy. If you need more power for
passing, and you are:
.Going less than about 35 mph (55 km/h), push the
accelerator pedal about halfway down.
.Going about 35 mph (55 km/h) or more, push the
accelerator all the way down.
By doing this, the vehicle shifts down to the next
gear and has more power.
D (Drive) can be used when towing a trailer, carrying a
heavy load, driving on steep hills, or for off-road driving.
You might want to shift the transmission to a lower gear
selection if the transmission shifts too often.
Downshifting the transmission in slippery road
conditions could result in skidding. See Skidding under
Loss of Control on page 5‑10.
3-30
Page 171 of 626
To use this feature, do the following:1. Move the shift lever to M (Manual Mode).
2. Press the plus/minus buttons, located on the steering column shift lever, to select the desired
range of gears for current driving conditions.
When M (Manual Mode) is selected a number displays
next to the M, indicating the current gear.
This number is the highest gear that can be used.
However, the vehicle can automatically shift to lower
gears as it adjusts to driving conditions. This means
that all gears below that number are available. When
5 (Fifth) is selected, 1 (First) through 5 (Fifth) gears are
automatically shifted by the vehicle, but 6 (Sixth) cannot
be used until the plus/minus button located on the
steering column lever is used to change to the gear.
Grade Braking is not available when Range Selection
Mode is active. See Tow/Haul Mode on page 3‑34.
While using Range Selection Mode, cruise control and
the Tow/Haul mode can be used. Notice:
Spinning the tires or holding the vehicle in
one place on a hill using only the accelerator pedal
may damage the transmission. The repair will not be
covered by the vehicle warranty. If you are stuck, do
not spin the tires. When stopping on a hill, use the
brakes to hold the vehicle in place.
Low Traction Mode
If your vehicle has the Allison Transmission®, or the
Hydra-Matic®6-Speed Automatic Transmission, it has a
Low Traction Mode that can assist in vehicle
acceleration when road conditions are slippery, such as
with ice or snow. While the vehicle is at a stop, select
the second gear range using Range Selection Mode.
This will limit torque to the wheels after it detects wheel
slip, preventing the tires from spinning.
3-33
Page 197 of 626
Park Tilt Mirrors
If the vehicle has the memory package, the passenger
and/or driver mirror tilts to a preselected position when
the vehicle is in R (Reverse). This feature lets the driver
view the curb when parallel parking. The mirror(s) return
to the original position when the vehicle is shifted out of
R (Reverse), or the ignition is turned off or to
OFF/LOCK.
Turn this feature on or off through the Driver Information
Center (DIC). SeeDIC Vehicle Customization (With DIC
Buttons)
on page 4‑73for more information.
Outside Convex Mirror
{WARNING:
A convex mirror can make things, like other
vehicles, look farther away than they really are.
If you cut too sharply into the right lane, you could
hit a vehicle on the right. Check the inside mirror
or glance over your shoulder before changing
lanes.
The passenger side mirror is convex shaped. A convex
mirror's surface is curved so more can be seen from the
driver seat.
Outside Heated Mirrors
For vehicles with heated mirrors:
<(Rear Window Defogger): Press to heat the
mirrors. If the vehicle has a towing mirror, only the
upper glass of the mirror is heated. The lower convex
part of the towing mirror is not heated.
Depending on the vehicle's features, see “Rear Window
Defogger” under,Climate Control System (With Air
Conditioning)
on page 4‑18or Climate Control System
(With Heater Only)on page 4‑21or Dual Automatic
Climate Control Systemon page 4‑22for more
information.
3-59
Page 200 of 626
When the System Does Not Seem to
Work Properly
If the URPA system will not activate due to a temporary
condition, the messages PARK ASSIST OFF or PARK
ASST BLOCKED SEE OWNERS MANUAL will be
displayed on the DIC.
SERVICE PARK ASSIST:If this message occurs, take
the vehicle to your dealer to repair the system.
PARK ASSIST OFF: This message occurs if the driver
disables the system.
PARK ASST BLOCKED SEE OWNERS MANUAL:
This message can occur under the following conditions:
.The ultrasonic sensors are not clean. Keep the
vehicle's rear bumper free of mud, dirt, snow, ice
and slush. For cleaning instructions, see Washing
Your Vehicle on page 6‑113.
.The park assist sensors are covered by frost or
ice. Frost or ice can form around and behind the
sensors and may not always be seen; this can
occur after washing the vehicle in cold weather.
The message may not clear until the frost or ice
has melted.
.A trailer was attached to the vehicle, or a bicycle or
an object was hanging out of the tailgate during the
last drive cycle. Once the attached object is
removed and the tailgate is raised, URPA will
return to normal operation.
.A tow bar is attached to the vehicle.
.The vehicle's bumper is damaged. Take the vehicle
to your dealer to repair the system.
.Other conditions may affect system performance,
such as vibrations from a jackhammer or the
compression of air brakes on a very large truck.
If the system is still disabled, after driving forward at
least 40 km/h (25 mph), take the vehicle to your dealer.
3-62
Page 219 of 626
Section 4 Instrument Panel
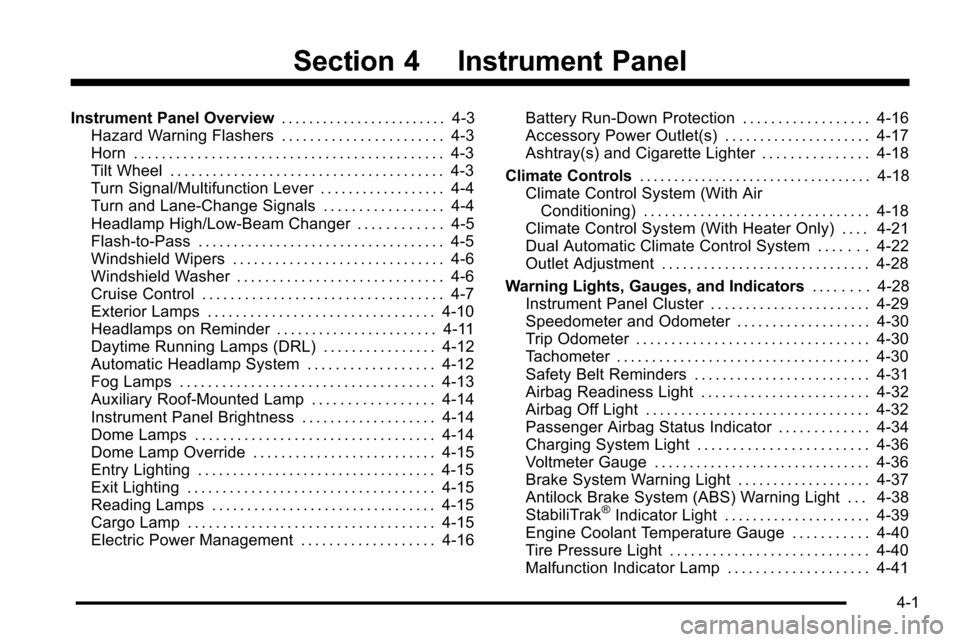
Instrument Panel Overview. . . . . . . . . . . . . . . . . . . . . . . .4-3
Hazard Warning Flashers . . . . . . . . . . . . . . . . . . . . . . . 4-3
Horn . . . . . . . . . . . . . . . . . . . . . . . . . . . . . . . . . . . . . . . . . . . . 4-3
Tilt Wheel . . . . . . . . . . . . . . . . . . . . . . . . . . . . . . . . . . . . . . . 4-3
Turn Signal/Multifunction Lever . . . . . . . . . . . . . . . . . . 4-4
Turn and Lane-Change Signals . . . . . . . . . . . . . . . . . 4-4
Headlamp High/Low-Beam Changer . . . . . . . . . . . . 4-5
Flash-to-Pass . . . . . . . . . . . . . . . . . . . . . . . . . . . . . . . . . . . 4-5
Windshield Wipers . . . . . . . . . . . . . . . . . . . . . . . . . . . . . . 4-6
Windshield Washer . . . . . . . . . . . . . . . . . . . . . . . . . . . . . 4-6
Cruise Control . . . . . . . . . . . . . . . . . . . . . . . . . . . . . . . . . . 4-7
Exterior Lamps . . . . . . . . . . . . . . . . . . . . . . . . . . . . . . . . 4-10
Headlamps on Reminder . . . . . . . . . . . . . . . . . . . . . . . 4-11
Daytime Running Lamps (DRL) . . . . . . . . . . . . . . . . 4-12
Automatic Headlamp System . . . . . . . . . . . . . . . . . . 4-12
Fog Lamps . . . . . . . . . . . . . . . . . . . . . . . . . . . . . . . . . . . . 4-13
Auxiliary Roof-Mounted Lamp . . . . . . . . . . . . . . . . . 4-14
Instrument Panel Brightness . . . . . . . . . . . . . . . . . . . 4-14
Dome Lamps . . . . . . . . . . . . . . . . . . . . . . . . . . . . . . . . . . 4-14
Dome Lamp Override . . . . . . . . . . . . . . . . . . . . . . . . . . 4-15
Entry Lighting . . . . . . . . . . . . . . . . . . . . . . . . . . . . . . . . . . 4-15
Exit Lighting . . . . . . . . . . . . . . . . . . . . . . . . . . . . . . . . . . . 4-15
Reading Lamps . . . . . . . . . . . . . . . . . . . . . . . . . . . . . . . . 4-15
Cargo Lamp . . . . . . . . . . . . . . . . . . . . . . . . . . . . . . . . . . . 4-15
Electric Power Management . . . . . . . . . . . . . . . . . . . 4-16 Battery Run-Down Protection . . . . . . . . . . . . . . . . . . 4-16
Accessory Power Outlet(s) . . . . . . . . . . . . . . . . . . . . . 4-17
Ashtray(s) and Cigarette Lighter . . . . . . . . . . . . . . . 4-18
Climate Controls . . . . . . . . . . . . . . . . . . . . . . . . . . . . . . . . . . 4-18
Climate Control System (With Air
Conditioning) . . . . . . . . . . . . . . . . . . . . . . . . . . . . . . . . 4-18
Climate Control System (With Heater Only) . . . . 4-21
Dual Automatic Climate Control System . . . . . . . 4-22
Outlet Adjustment . . . . . . . . . . . . . . . . . . . . . . . . . . . . . . 4-28
Warning Lights, Gauges, and Indicators . . . . . . . .4-28
Instrument Panel Cluster . . . . . . . . . . . . . . . . . . . . . . . 4-29
Speedometer and Odometer . . . . . . . . . . . . . . . . . . . 4-30
Trip Odometer . . . . . . . . . . . . . . . . . . . . . . . . . . . . . . . . . 4-30
Tachometer . . . . . . . . . . . . . . . . . . . . . . . . . . . . . . . . . . . . 4-30
Safety Belt Reminders . . . . . . . . . . . . . . . . . . . . . . . . . 4-31
Airbag Readiness Light . . . . . . . . . . . . . . . . . . . . . . . . 4-32
Airbag Off Light . . . . . . . . . . . . . . . . . . . . . . . . . . . . . . . . 4-32
Passenger Airbag Status Indicator . . . . . . . . . . . . . 4-34
Charging System Light . . . . . . . . . . . . . . . . . . . . . . . . 4-36
Voltmeter Gauge . . . . . . . . . . . . . . . . . . . . . . . . . . . . . . . 4-36
Brake System Warning Light . . . . . . . . . . . . . . . . . . . 4-37
Antilock Brake System (ABS) Warning Light . . . 4-38
StabiliTrak
®Indicator Light . . . . . . . . . . . . . . . . . . . . . 4-39
Engine Coolant Temperature Gauge . . . . . . . . . . . 4-40
Tire Pressure Light . . . . . . . . . . . . . . . . . . . . . . . . . . . . 4-40
Malfunction Indicator Lamp . . . . . . . . . . . . . . . . . . . . 4-41
4-1
Page 236 of 626
Ashtray(s) and Cigarette Lighter
The vehicle may have a front ashtray located near the
center of the instrument panel. Pull on the door to open
it. The ashtray may have a cigarette lighter.
Notice:If papers, pins, or other flammable items are
put in the ashtray, hot cigarettes or other smoking
materials could ignite them and possibly damage
the vehicle. Never put flammable items in the
ashtray.
To remove the ashtray, open the door and pull the
ashtray bin toward you. To replace the ashtray, insert
the ashtray bin inside the ashtray door and press down
until it engages. To use the cigarette lighter, push it in
all the way, and let go. When it is ready for use, the
lighter pops back out.
Notice: Holding a cigarette lighter in while it is
heating does not let the lighter back away from the
heating element when it is hot. Damage from
overheating can occur to the lighter or heating
element, or a fuse could be blown. Do not hold a
cigarette lighter in while it is heating.
Climate Controls
Climate Control System (With Air
Conditioning)
With this system the heating, cooling, and ventilation
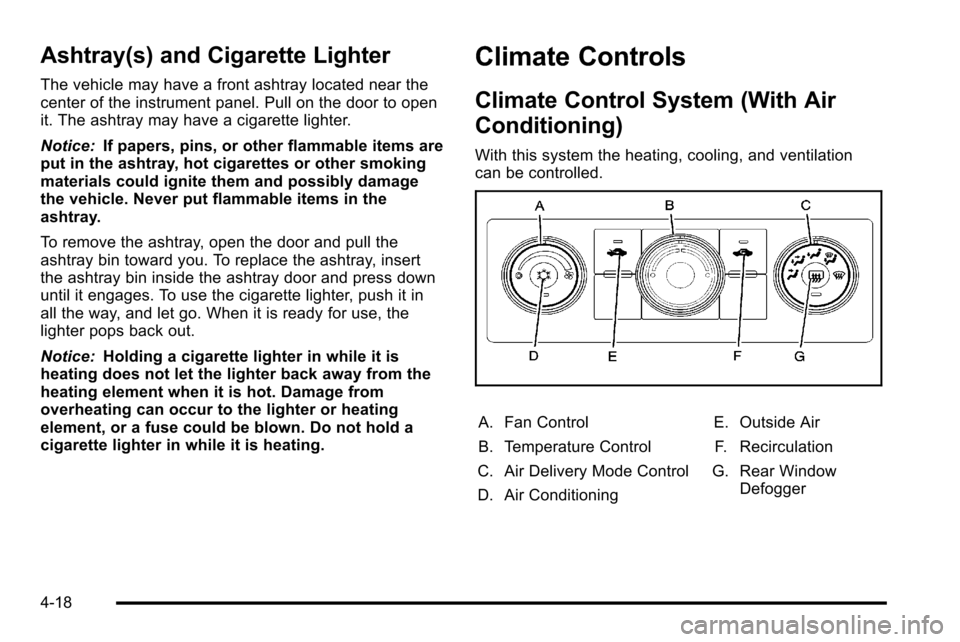
can be controlled.
A. Fan Control
B. Temperature Control
C. Air Delivery Mode Control
D. Air Conditioning E. Outside Air
F. Recirculation
G. Rear Window Defogger
4-18