parking brake CHEVROLET SILVERADO 2016 3.G Owner's Guide
[x] Cancel search | Manufacturer: CHEVROLET, Model Year: 2016, Model line: SILVERADO, Model: CHEVROLET SILVERADO 2016 3.GPages: 533, PDF Size: 8.17 MB
Page 394 of 533
Chevrolet Silverado Owner Manual (GMNA-Localizing-U.S./Canada/Mexico-
9159338) - 2016 - crc - 10/21/15
Vehicle Care 393
Starter Switch Check
{Warning
When you are doing this
inspection, the vehicle could
move suddenly. If the vehicle
moves, you or others could be
injured.
1. Before starting this check, be sure there is enough room
around the vehicle.
2. Apply both the parking brake and the regular brake.
Do not use the accelerator
pedal, and be ready to turn off
the engine immediately if it
starts.
3. For automatic transmission vehicles, try to start the engine
in each gear. The vehicle
should start only in P (Park) or
N (Neutral). If the vehicle starts
in any other position, contact
your dealer for service. For manual transmission
vehicles, put the shift lever in
Neutral, push the clutch pedal
down halfway, and try to start
the engine. The vehicle should
start only when the clutch
pedal is pushed down all the
way to the floor. If the vehicle
starts when the clutch pedal is
not pushed all the way down,
contact your dealer for service.
Automatic Transmission
Shift Lock Control
Function Check
{Warning
When you are doing this
inspection, the vehicle could
move suddenly. If the vehicle
moves, you or others could be
injured.
1. Before starting this check, be sure there is enough room
around the vehicle. It should be
parked on a level surface. 2. Apply the parking brake. Be
ready to apply the regular
brake immediately if the vehicle
begins to move.
3. With the engine off, turn the ignition on, but do not start the
engine. Without applying the
regular brake, try to move the
shift lever out of P (Park) with
normal effort. If the shift lever
moves out of P (Park), contact
your dealer for service.
Ignition Transmission
Lock Check
While parked, and with the parking
brake set, try to turn the ignition to
LOCK/OFF in each shift lever
position.
.For automatic transmission
vehicles, the ignition should turn
to LOCK/OFF only when the
shift lever is in P (Park).
. For manual transmission
vehicles, the ignition should turn
to LOCK/OFF only when you
press the key release button.
Page 395 of 533
Chevrolet Silverado Owner Manual (GMNA-Localizing-U.S./Canada/Mexico-
9159338) - 2016 - crc - 10/21/15
394 Vehicle Care
On all vehicles, the ignition key
should come out only in LOCK/OFF.
Contact your dealer if service is
required.
Park Brake and P (Park)
Mechanism Check
{Warning
When you are doing this check,
the vehicle could begin to move.
You or others could be injured
and property could be damaged.
Make sure there is room in front
of the vehicle in case it begins to
roll. Be ready to apply the regular
brake at once should the vehicle
begin to move.
Park on a fairly steep hill, with the
vehicle facing downhill. Keeping
your foot on the regular brake, set
the parking brake.
. To check the parking brake's
holding ability: With the engine
running and the transmission in
N (Neutral), slowly remove foot pressure from the regular brake
pedal. Do this until the vehicle is
held by the parking brake only.
. To check the P (Park)
mechanism's holding ability:
With the engine running, shift to
P (Park). Then release the
parking brake followed by the
regular brake.
Contact your dealer if service is
required.
Wiper Blade Replacement
Windshield wiper blades should be
inspected for wear or cracking.
Replacement blades come in
different types and are removed in
different ways. For proper
windshield wiper blade length and
type, see Maintenance
Replacement Parts 0474.
Caution
Allowing the wiper arm to touch
the windshield when no wiper
blade is installed could damage
(Continued)
Caution (Continued)
the windshield. Any damage that
occurs would not be covered by
the vehicle warranty. Do not allow
the wiper arm to touch the
windshield.
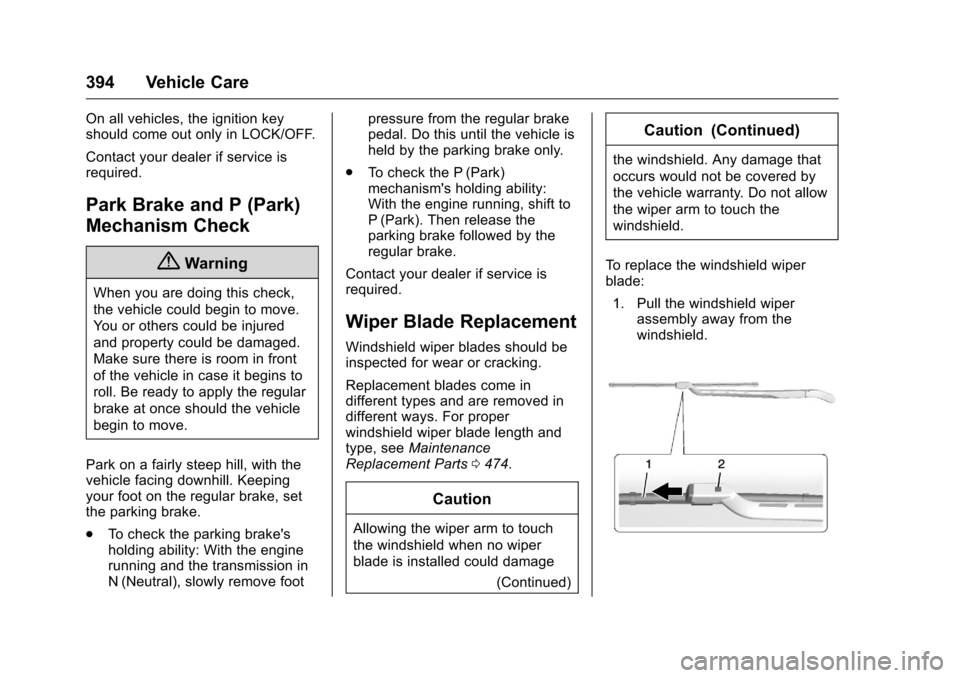
To replace the windshield wiper
blade: 1. Pull the windshield wiper assembly away from the
windshield.
Page 402 of 533
Chevrolet Silverado Owner Manual (GMNA-Localizing-U.S./Canada/Mexico-
9159338) - 2016 - crc - 10/21/15
Vehicle Care 401
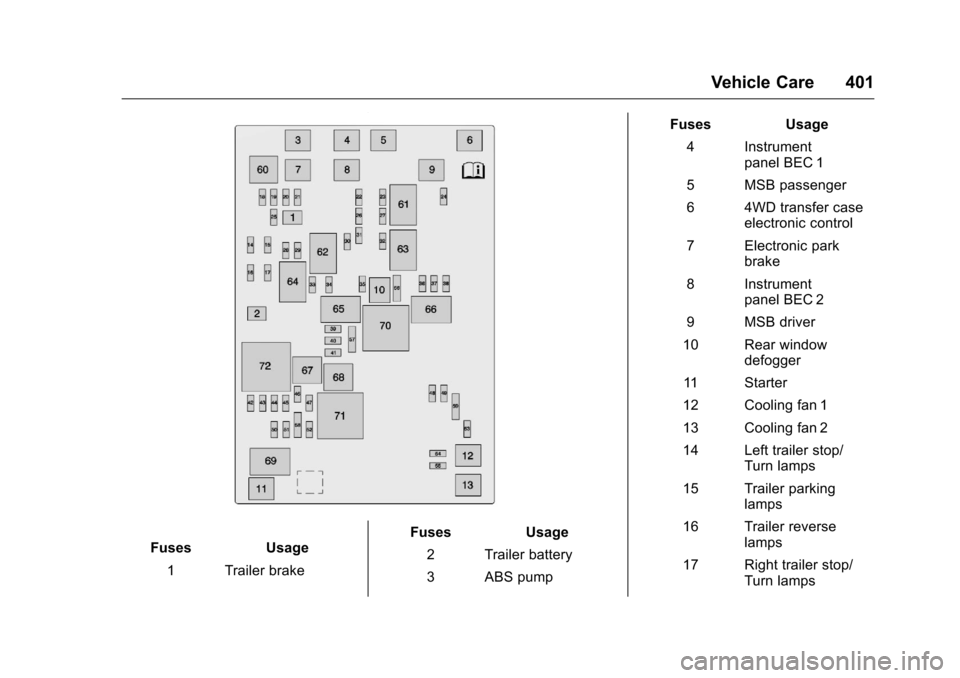
FusesUsage
1 Trailer brake Fuses
Usage
2 Trailer battery
3 ABS pump Fuses
Usage
4 Instrument panel BEC 1
5 MSB passenger
6 4WD transfer case electronic control
7 Electronic park brake
8 Instrument panel BEC 2
9 MSB driver
10 Rear window defogger
11 Starter
12 Cooling fan 1
13 Cooling fan 2
14 Left trailer stop/ Turn lamps
15 Trailer parking lamps
16 Trailer reverse lamps
17 Right trailer stop/ Turn lamps
Page 422 of 533
Chevrolet Silverado Owner Manual (GMNA-Localizing-U.S./Canada/Mexico-
9159338) - 2016 - crc - 10/21/15
Vehicle Care 421
The TPMS sensor matching
process is:1. Set the parking brake.
2. Turn the ignition to ON/RUN with the engine off.
3. Uplevel DIC Only: Make sure the Tire Pressure info page
option is turned on. The info
pages on the DIC can be
turned on and off through the
Settings menu. See Driver
Information Center (DIC) (Base
Level) 0150 orDriver
Information Center (DIC)
(Uplevel) 0152.
4. If the vehicle has an uplevel DIC, use the DIC controls on
the right side of the steering
wheel to scroll to the Tire
Pressure screen under the DIC
info page.
If the vehicle has a base level
DIC, use the trip odometer
reset stem to scroll to the Tire
Pressure screen. 5. If the vehicle has an uplevel
DIC, press and hold the
V
(Set/Reset) button located in
the center of the DIC controls.
If the vehicle has a base level
DIC, press and hold the trip
odometer reset stem for about
five seconds. A message
asking if the process should
begin should appear. Select
yes and press the trip
odometer reset stem to confirm
the selection.
The horn sounds twice to
signal the receiver is in relearn
mode and the TIRE
LEARNING ACTIVE message
displays on the DIC screen.
6. Start with the driver side front tire.
7. Place the relearn tool against the tire sidewall, near the valve
stem. Then press the button to
activate the TPMS sensor.
A horn chirp confirms that the
sensor identification code has
been matched to this tire and
wheel position. 8. Proceed to the passenger side
front tire, and repeat the
procedure in Step 7.
9. Proceed to the passenger side rear tire, and repeat the
procedure in Step 7.
10. Proceed to the driver side rear tire, and repeat the procedure
in Step 7. The horn sounds two
times to indicate the sensor
identification code has been
matched to the driver side rear
tire, and the TPMS sensor
matching process is no longer
active. The TIRE LEARNING
ACTIVE message on the DIC
display screen goes off.
11. Turn the ignition switch to LOCK/OFF.
12. Set all four tires to the recommended air pressure
level as indicated on the Tire
and Loading Information label.
Page 426 of 533
Chevrolet Silverado Owner Manual (GMNA-Localizing-U.S./Canada/Mexico-
9159338) - 2016 - crc - 10/21/15
Vehicle Care 425
treadwear indicators. SeeTire
Inspection 0422 andTire Rotation
0 422 for additional information.
The rubber in tires ages over time.
This also applies to the spare tire,
if the vehicle has one, even if it is
never used. Multiple factors
including temperatures, loading
conditions, and inflation pressure
maintenance affect how fast aging
takes place. GM recommends that
tires, including the spare if
equipped, be replaced after six
years, regardless of tread wear. The
tire manufacture date is the last four
digits of the DOT Tire Identification
Number (TIN) which is molded into
one side of the tire sidewall. The
first two digits represent the week
(01-52) and the last two digits, the
year. For example, the third week of
the year 2010 would have a
four-digit DOT date of 0310.
Vehicle Storage
Tires age when stored normally
mounted on a parked vehicle. Park
a vehicle that will be stored for at
least a month in a cool, dry, clean
area away from direct sunlight to slow aging. This area should be free
of grease, gasoline, or other
substances that can deteriorate
rubber.
Parking for an extended period can
cause flat spots on the tires that
may result in vibrations while
driving. When storing a vehicle for
at least a month, remove the tires or
raise the vehicle to reduce the
weight from the tires.
Buying New Tires
GM has developed and matched
specific tires for the vehicle. The
original equipment tires installed
were designed to meet General
Motors Tire Performance Criteria
Specification (TPC Spec)
system rating. When
replacement tires are needed,
GM strongly recommends
buying tires with the same TPC
Spec rating.
GM's exclusive TPC Spec
system considers over a dozen
critical specifications that impact
the overall performance of the
vehicle, including brake system
performance, ride and handling,
traction control, and tire
pressure monitoring
performance. GM's TPC Spec
number is molded onto the tire's
sidewall near the tire size. If the
tires have an all-season tread
design, the TPC Spec number
will be followed by MS for mud
and snow. See
Tire Sidewall
Labeling 0409 for additional
information.
GM recommends replacing worn
tires in complete sets of four (six
for dual rear wheels). Uniform
tread depth on all tires will help
to maintain the performance of
the vehicle. Braking and
handling performance may be
adversely affected if all the tires
are not replaced at the same
time. If proper rotation and
maintenance have been done,
all four tires (six for dual rear
wheels) should wear out at
about the same time.
Page 432 of 533
Chevrolet Silverado Owner Manual (GMNA-Localizing-U.S./Canada/Mexico-
9159338) - 2016 - crc - 10/21/15
Vehicle Care 431
If a Tire Goes Flat
It is unusual for a tire to blowout
while driving, especially if the tires
are maintained properly. If air goes
out of a tire, it is much more likely to
leak out slowly. But if there ever is a
blowout, here are a few tips about
what to expect and what to do:
If a front tire fails, the flat tire
creates a drag that pulls the vehicle
toward that side. Take your foot off
the accelerator pedal and grip the
steering wheel firmly. Steer to
maintain lane position, and then
gently brake to a stop, well off the
road, if possible.
A rear blowout, particularly on a
curve, acts much like a skid and
may require the same correction as
used in a skid. Stop pressing the
accelerator pedal and steer to
straighten the vehicle. It may be
very bumpy and noisy. Gently brake
to a stop, well off the road,
if possible.{Warning
Driving on a flat tire will cause
permanent damage to the tire.
Re-inflating a tire after it has been
driven on while severely
underinflated or flat may cause a
blowout and a serious crash.
Never attempt to re-inflate a tire
that has been driven on while
severely underinflated or flat.
Have your dealer or an authorized
tire service center repair or
replace the flat tire as soon as
possible.
{Warning
Lifting a vehicle and getting under
it to do maintenance or repairs is
dangerous without the
appropriate safety equipment and
training. If a jack is provided with
the vehicle, it is designed only for
changing a flat tire. If it is used for
anything else, you or others could(Continued)
Warning (Continued)
be badly injured or killed if the
vehicle slips off the jack. If a jack
is provided with the vehicle, only
use it for changing a flat tire.
If a tire goes flat, avoid further tire
and wheel damage by driving slowly
to a level place, well off the road,
if possible. Turn on the hazard
warning flashers. See Hazard
Warning Flashers 0182.
{Warning
Changing a tire can be
dangerous. The vehicle can slip
off the jack and roll over or fall
causing injury or death. Find a
level place to change the tire. To
help prevent the vehicle from
moving:
1. Set the parking brake firmly. (Continued)
Page 444 of 533
Chevrolet Silverado Owner Manual (GMNA-Localizing-U.S./Canada/Mexico-
9159338) - 2016 - crc - 10/21/15
Vehicle Care 443
Warning (Continued)
the State of California to cause
cancer.WASH HANDS AFTER
HANDLING.
See California Proposition
65 Warning 0361.
{Warning
Batteries can hurt you. They can
be dangerous because:
. They contain acid that can
burn you.
. They contain gas that can
explode or ignite.
. They contain enough
electricity to burn you.
If you do not follow these steps
exactly, some or all of these
things can hurt you.
Caution
Ignoring these steps could result
in costly damage to the vehicle
that would not be covered by the
vehicle warranty. Trying to start
the vehicle by pushing or pulling it
will not work, and it could damage
the vehicle.
1. Check the other vehicle. It must have a 12-volt battery
with a negative ground system.
Caution
If the other vehicle does not have
a 12-volt system with a negative
ground, both vehicles can be
damaged. Only use a vehicle that
has a 12-volt system with a
negative ground for jump starting.
2. If you have a vehicle with a diesel engine with two
batteries, you should know
before you begin that,
especially in cold weather, you may not be able to get enough
power from a single battery in
another vehicle to start your
diesel engine. If your vehicle
has more than one battery,
using the battery that is closer
to the starter will reduce
electrical resistance. This is
located on the passenger side,
in the rear of the engine
compartment.
3. Get the vehicles close enough so the jumper cables can
reach, but be sure the vehicles
are not touching each other.
If they are, it could cause an
unwanted ground connection.
You would not be able to start
your vehicle, and the bad
grounding could damage the
electrical systems.
To avoid the possibility of the
vehicles rolling, set the parking
brake firmly on both vehicles
involved in the jump start
procedure. Put the automatic
transmission in P (Park) or a
manual transmission in Neutral
before setting the parking
brake. If you have a
Page 449 of 533
Chevrolet Silverado Owner Manual (GMNA-Localizing-U.S./Canada/Mexico-
9159338) - 2016 - crc - 10/21/15
448 Vehicle Care
Four-Wheel-Drive Vehicles
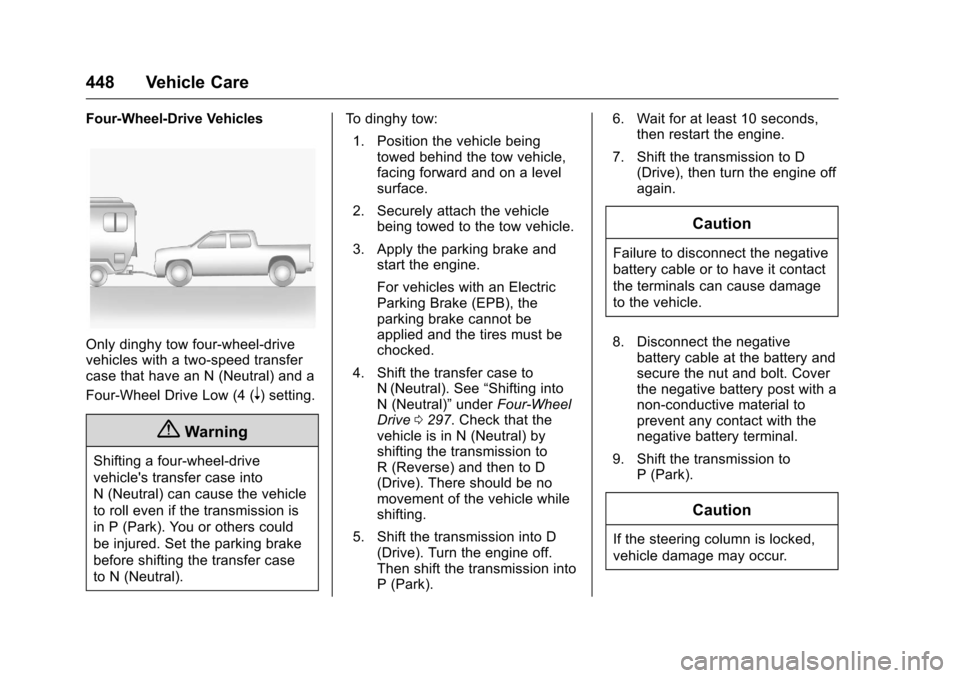
Only dinghy tow four-wheel-drive
vehicles with a two-speed transfer
case that have an N (Neutral) and a
Four-Wheel Drive Low (4 (
n) setting.
{Warning
Shifting a four-wheel-drive
vehicle's transfer case into
N (Neutral) can cause the vehicle
to roll even if the transmission is
in P (Park). You or others could
be injured. Set the parking brake
before shifting the transfer case
to N (Neutral).To dinghy tow:
1. Position the vehicle being towed behind the tow vehicle,
facing forward and on a level
surface.
2. Securely attach the vehicle being towed to the tow vehicle.
3. Apply the parking brake and start the engine.
For vehicles with an Electric
Parking Brake (EPB), the
parking brake cannot be
applied and the tires must be
chocked.
4. Shift the transfer case to N (Neutral). See “Shifting into
N (Neutral)” underFour-Wheel
Drive 0297. Check that the
vehicle is in N (Neutral) by
shifting the transmission to
R (Reverse) and then to D
(Drive). There should be no
movement of the vehicle while
shifting.
5. Shift the transmission into D (Drive). Turn the engine off.
Then shift the transmission into
P (Park). 6. Wait for at least 10 seconds,
then restart the engine.
7. Shift the transmission to D (Drive), then turn the engine off
again.
Caution
Failure to disconnect the negative
battery cable or to have it contact
the terminals can cause damage
to the vehicle.
8. Disconnect the negative battery cable at the battery and
secure the nut and bolt. Cover
the negative battery post with a
non-conductive material to
prevent any contact with the
negative battery terminal.
9. Shift the transmission to P (Park).
Caution
If the steering column is locked,
vehicle damage may occur.
Page 450 of 533
Chevrolet Silverado Owner Manual (GMNA-Localizing-U.S./Canada/Mexico-
9159338) - 2016 - crc - 10/21/15
Vehicle Care 449
10. Move the steering wheel tomake sure the steering column
is unlocked.
11. With a foot on the brake pedal, release the parking brake.
Keep the ignition key in the
towed vehicle in ACC/
ACCESSORY to prevent the
steering column from locking.
Disconnecting the Towed Vehicle
Before disconnecting the towed
vehicle: 1. Park on a level surface.
2. Set the parking brake, then shift the transmission to
P (Park), and move the ignition
key to OFF.
3. Connect the battery.
4. Apply the brake pedal.
5. Turn the ignition to ON/RUN with the engine off. Shift the
transfer case out of N (Neutral)
to Two-Wheel Drive High. See
“Shifting out of N (Neutral)”
under Four-Wheel Drive 0297. See your dealer if the transfer
case cannot be shifted out of
N (Neutral).
6. Check that the vehicle is in Two-Wheel Drive High by
shifting the transmission to
R (Reverse) and then to D
(Drive). There should be
movement of the vehicle while
shifting.
7. Shift the transmission to P (Park) and turn off the
ignition.
8. Disconnect the vehicle from the tow vehicle.
9. Release the parking brake.
10. Reset any lost presets.
The outside temperature
display will default to 0 °C (32 °
F) but will reset with normal
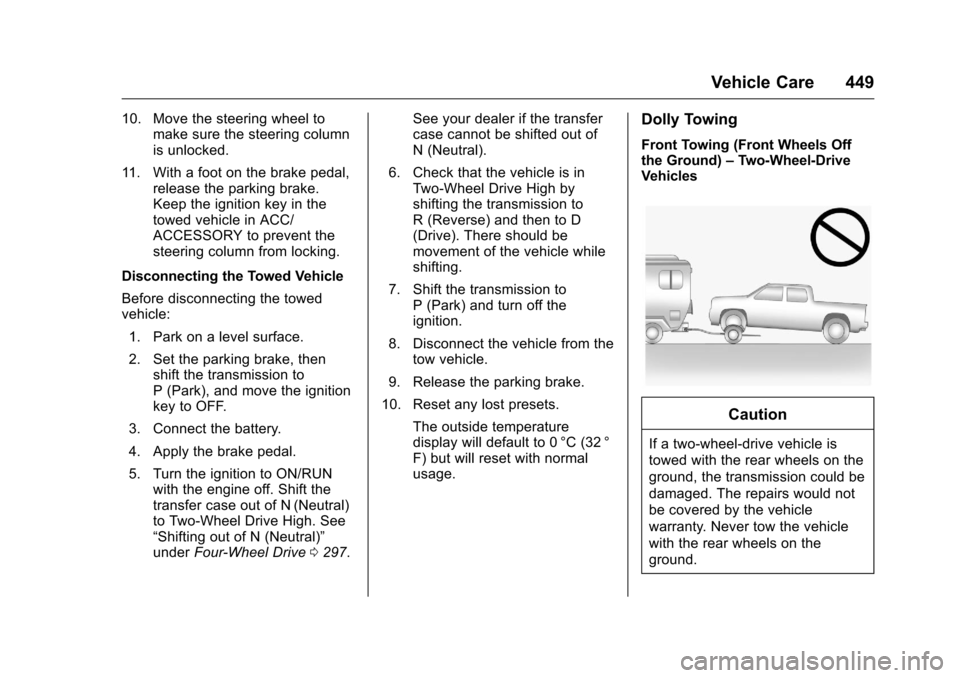
usage.Dolly Towing
Front Towing (Front Wheels Off
the Ground) –Two-Wheel-Drive
Vehicles
Caution
If a two-wheel-drive vehicle is
towed with the rear wheels on the
ground, the transmission could be
damaged. The repairs would not
be covered by the vehicle
warranty. Never tow the vehicle
with the rear wheels on the
ground.
Page 451 of 533
Chevrolet Silverado Owner Manual (GMNA-Localizing-U.S./Canada/Mexico-
9159338) - 2016 - crc - 10/21/15
450 Vehicle Care
Two-wheel-drive vehicles should not
be towed with the rear wheels on
the ground. Two-wheel-drive
transmissions have no provisions
for internal lubrication while being
towed.
To dolly tow a two-wheel-drive
vehicle, the vehicle must be towed
with the rear wheels on the dolly.
See“Rear Towing (Rear Wheels Off
the Ground)” later in this section.
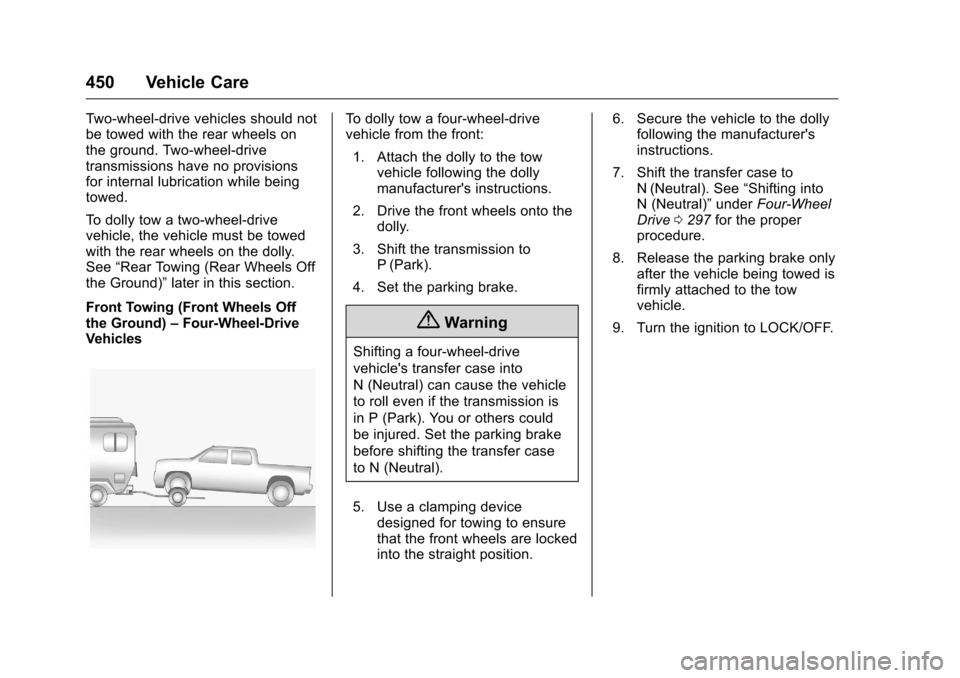
Front Towing (Front Wheels Off
the Ground) –Four-Wheel-Drive
VehiclesTo dolly tow a four-wheel-drive
vehicle from the front:
1. Attach the dolly to the tow vehicle following the dolly
manufacturer's instructions.
2. Drive the front wheels onto the dolly.
3. Shift the transmission to P (Park).
4. Set the parking brake.
{Warning
Shifting a four-wheel-drive
vehicle's transfer case into
N (Neutral) can cause the vehicle
to roll even if the transmission is
in P (Park). You or others could
be injured. Set the parking brake
before shifting the transfer case
to N (Neutral).
5. Use a clamping device designed for towing to ensure
that the front wheels are locked
into the straight position. 6. Secure the vehicle to the dolly
following the manufacturer's
instructions.
7. Shift the transfer case to N (Neutral). See “Shifting into
N (Neutral)” underFour-Wheel
Drive 0297 for the proper
procedure.
8. Release the parking brake only after the vehicle being towed is
firmly attached to the tow
vehicle.
9. Turn the ignition to LOCK/OFF.