automatic CHEVROLET SILVERADO 2500 2018 Service Manual
[x] Cancel search | Manufacturer: CHEVROLET, Model Year: 2018, Model line: SILVERADO 2500, Model: CHEVROLET SILVERADO 2500 2018Pages: 489, PDF Size: 6.81 MB
Page 175 of 489
Chevrolet Silverado LD 1500 and Silverado 2500/3500 Owner Manual (GMNA-
Localizing-U.S./Canada-12162993) - 2019 - crc - 4/4/18
174 Lighting
Flash-to-Pass
This feature lets you use the
high-beam headlamps to signal a
driver in front of you that you want
to pass. It works even if the
headlamps are in the automatic
position.
To use it, pull the turn signal lever
toward you, then release it.
If the headlamps are in the
automatic position or on low beam,
the high-beam headlamps will turn
on. Depending on the type of
headlamp, they will either turn off
after a short duration or stay on as
long as you hold the lever toward
you. The high-beam indicator on the
instrument cluster will come on.
Release the lever to return to
normal operation.
Daytime Running
Lamps (DRL)
DRL can make it easier for others to
see the front of the vehicle during
the day. Fully functional DRL are
required on all vehicles first sold in
Canada.
The DRL system comes on when
the following conditions are met:
.The ignition is on.
. The exterior lamp control is
in AUTO.
. The transmission is not in
P (Park).
. The light sensor determines it is
daytime.
When the DRL system is on, only
the DRL are on. The taillamps,
sidemarker lamps, instrument panel
lights, and other lamps will not
be on.
When it begins to get dark, the
automatic headlamp system
switches from DRL to the
headlamps. To turn off the DRL, turn the exterior
lamp control to
Oand then release.
For vehicles first sold in Canada, off
will only work when the vehicle is
parked.
Automatic Headlamp
System
When the exterior lamp control is
set to AUTO and it is dark enough
outside, the headlamps come on
automatically.
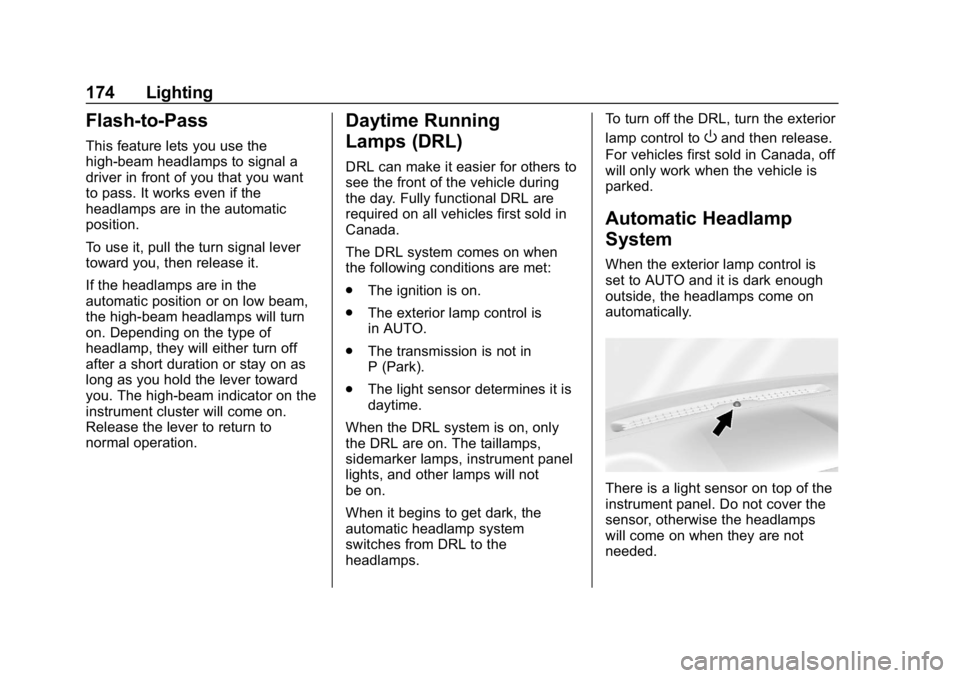
There is a light sensor on top of the
instrument panel. Do not cover the
sensor, otherwise the headlamps
will come on when they are not
needed.
Page 176 of 489
Chevrolet Silverado LD 1500 and Silverado 2500/3500 Owner Manual (GMNA-
Localizing-U.S./Canada-12162993) - 2019 - crc - 4/4/18
Lighting 175
The system may also turn on the
headlamps when driving through a
parking garage or tunnel.
If the vehicle is started in a dark
garage, the automatic headlamp
system comes on immediately. If it
is light outside when the vehicle
leaves the garage, there is a slight
delay before the automatic
headlamp system changes to the
DRL. During that delay, the
instrument cluster may not be as
bright as usual. Make sure the
instrument panel brightness control
is in the full bright position. See
Instrument Panel Illumination
Control0178.
When it is bright enough outside,
the headlamps will turn off or may
change to Daytime Running
Lamps (DRL).
The automatic headlamp system
turns off when the exterior lamp
control is turned to
Oor the ignition
is off.
Lights On with Wipers
If the windshield wipers are
activated in daylight with the engine
on, and the exterior lamp control is
in AUTO, the headlamps, parking
lamps, and other exterior lamps
come on. The transition time for the
lamps coming on varies based on
wiper speed. When the wipers are
not operating, these lamps turn off.
Move the exterior lamp control to
O
or;to disable this feature.
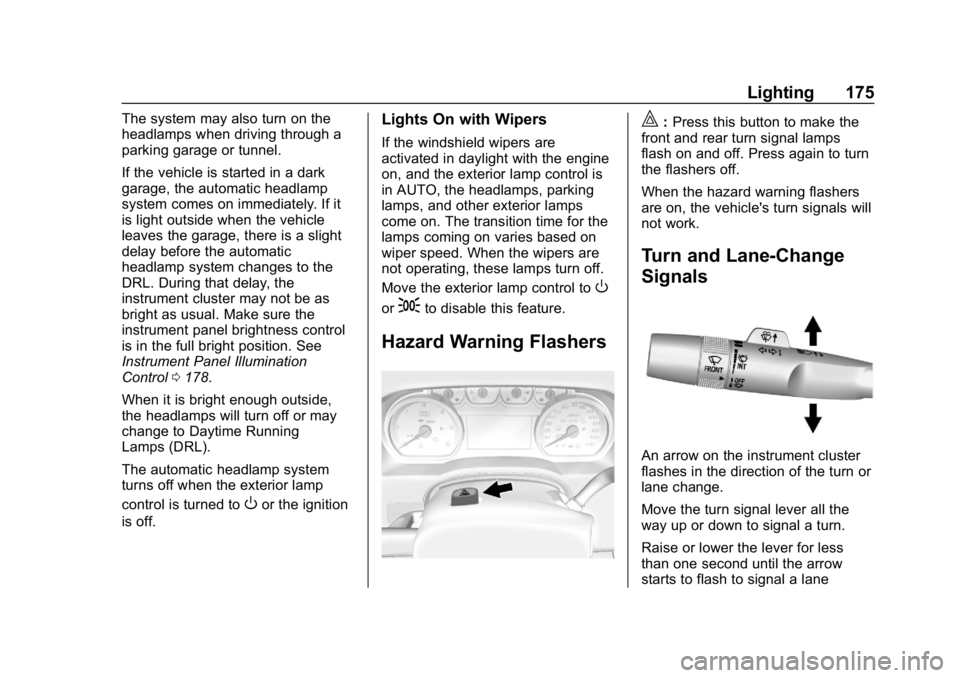
Hazard Warning Flashers
|: Press this button to make the
front and rear turn signal lamps
flash on and off. Press again to turn
the flashers off.
When the hazard warning flashers
are on, the vehicle's turn signals will
not work.
Turn and Lane-Change
Signals
An arrow on the instrument cluster
flashes in the direction of the turn or
lane change.
Move the turn signal lever all the
way up or down to signal a turn.
Raise or lower the lever for less
than one second until the arrow
starts to flash to signal a lane
Page 177 of 489
Chevrolet Silverado LD 1500 and Silverado 2500/3500 Owner Manual (GMNA-
Localizing-U.S./Canada-12162993) - 2019 - crc - 4/4/18
176 Lighting
change. This causes the turn
signals to automatically flash three
times. It will flash six times if Tow/
Haul Mode is active. Holding the
turn signal lever for more than
one second will cause the turn
signals to flash until the lever is
released.
The lever returns to its starting
position whenever it is released.
If after signaling a turn or a lane
change the arrows flash rapidly or
do not come on, a signal bulb could
be burned out. If equipped with LED
turn signals, see your dealer.
Replace any burned out bulbs. If a
bulb is not burned out, check the
fuse. SeeFuses and Circuit
Breakers 0362.
Turn Signal On Chime
If the turn signal is left on for more
than 1.2 km (0.75 mi), a chime
sounds at each flash of the turn
signal. The message TURN
SIGNAL ON will also appear in the
Driver Information Center (DIC). To turn the chime and message off,
move the turn signal lever to the off
position.
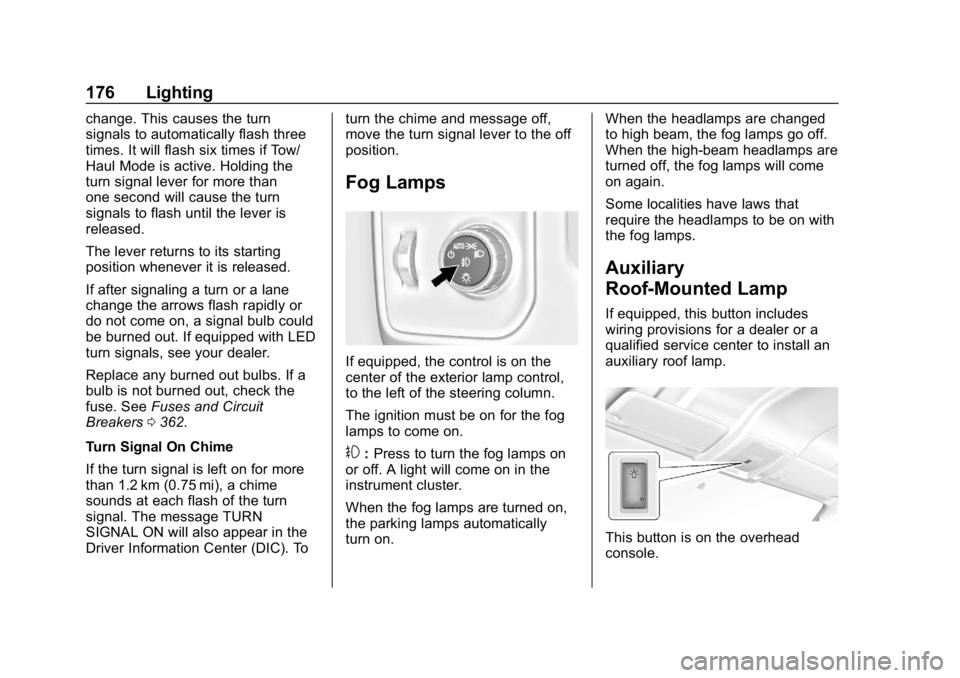
Fog Lamps
If equipped, the control is on the
center of the exterior lamp control,
to the left of the steering column.
The ignition must be on for the fog
lamps to come on.
#:
Press to turn the fog lamps on
or off. A light will come on in the
instrument cluster.
When the fog lamps are turned on,
the parking lamps automatically
turn on. When the headlamps are changed
to high beam, the fog lamps go off.
When the high-beam headlamps are
turned off, the fog lamps will come
on again.
Some localities have laws that
require the headlamps to be on with
the fog lamps.
Auxiliary
Roof-Mounted Lamp
If equipped, this button includes
wiring provisions for a dealer or a
qualified service center to install an
auxiliary roof lamp.
This button is on the overhead
console.
Page 179 of 489
Chevrolet Silverado LD 1500 and Silverado 2500/3500 Owner Manual (GMNA-
Localizing-U.S./Canada-12162993) - 2019 - crc - 4/4/18
178 Lighting
Interior Lighting
Instrument Panel
Illumination Control
This feature controls the brightness
of the steering wheel and instrument
panel lights. The instrument panel
illumination control is next to the
exterior lamp control.
D:Move the thumbwheel up or
down to brighten or dim the lights.
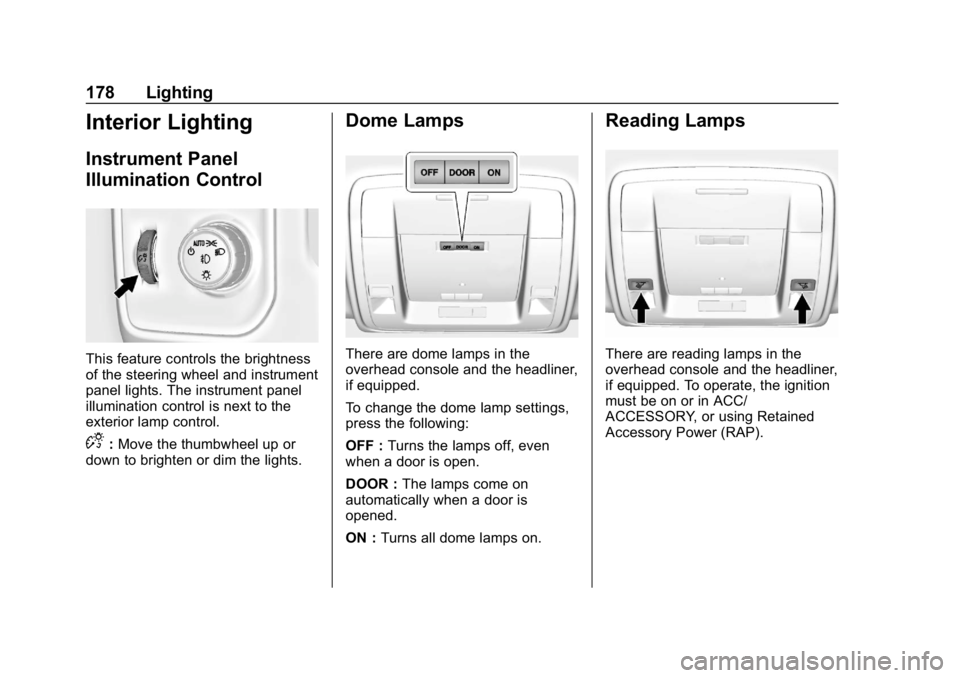
Dome Lamps
There are dome lamps in the
overhead console and the headliner,
if equipped.
To change the dome lamp settings,
press the following:
OFF : Turns the lamps off, even
when a door is open.
DOOR : The lamps come on
automatically when a door is
opened.
ON : Turns all dome lamps on.
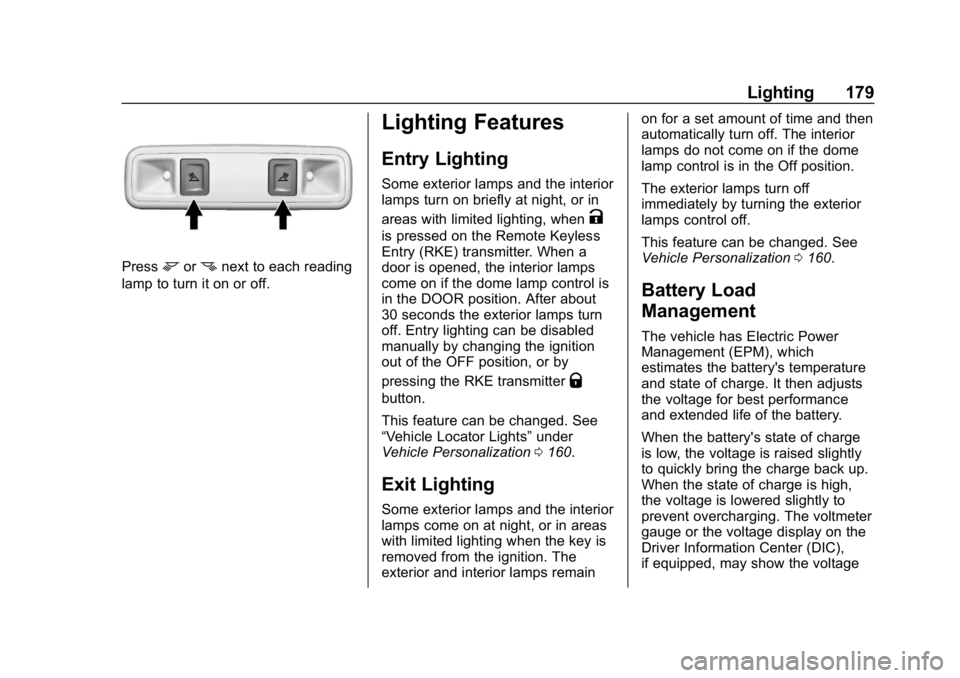
Reading Lamps
There are reading lamps in the
overhead console and the headliner,
if equipped. To operate, the ignition
must be on or in ACC/
ACCESSORY, or using Retained
Accessory Power (RAP).
Page 180 of 489
Chevrolet Silverado LD 1500 and Silverado 2500/3500 Owner Manual (GMNA-
Localizing-U.S./Canada-12162993) - 2019 - crc - 4/4/18
Lighting 179
Pressmornnext to each reading
lamp to turn it on or off.
Lighting Features
Entry Lighting
Some exterior lamps and the interior
lamps turn on briefly at night, or in
areas with limited lighting, when
K
is pressed on the Remote Keyless
Entry (RKE) transmitter. When a
door is opened, the interior lamps
come on if the dome lamp control is
in the DOOR position. After about
30 seconds the exterior lamps turn
off. Entry lighting can be disabled
manually by changing the ignition
out of the OFF position, or by
pressing the RKE transmitter
Q
button.
This feature can be changed. See
“Vehicle Locator Lights” under
Vehicle Personalization 0160.
Exit Lighting
Some exterior lamps and the interior
lamps come on at night, or in areas
with limited lighting when the key is
removed from the ignition. The
exterior and interior lamps remain on for a set amount of time and then
automatically turn off. The interior
lamps do not come on if the dome
lamp control is in the Off position.
The exterior lamps turn off
immediately by turning the exterior
lamps control off.
This feature can be changed. See
Vehicle Personalization
0160.
Battery Load
Management
The vehicle has Electric Power
Management (EPM), which
estimates the battery's temperature
and state of charge. It then adjusts
the voltage for best performance
and extended life of the battery.
When the battery's state of charge
is low, the voltage is raised slightly
to quickly bring the charge back up.
When the state of charge is high,
the voltage is lowered slightly to
prevent overcharging. The voltmeter
gauge or the voltage display on the
Driver Information Center (DIC),
if equipped, may show the voltage
Page 185 of 489
Chevrolet Silverado LD 1500 and Silverado 2500/3500 Owner Manual (GMNA-
Localizing-U.S./Canada-12162993) - 2019 - crc - 4/4/18
184 Infotainment System
4.6
.Radio: Press and release to
go to the next station or
channel. Press and hold to
fast seek the next strongest
station or channel.
. USB/Bluetooth Music/
Pictures: Press and hold to
go to the next content.
Press and hold to fast
forward.
5.
#
. Press and release to
access the phone screen,
answer an incoming call,
or access the device home
screen. Press and hold to
access Press to Talk.
Home Page
Touchscreen Buttons
Touchscreen buttons show on the
screen when available. When a
function is unavailable, the button
may gray out. When a function is
selected, the button may highlight.
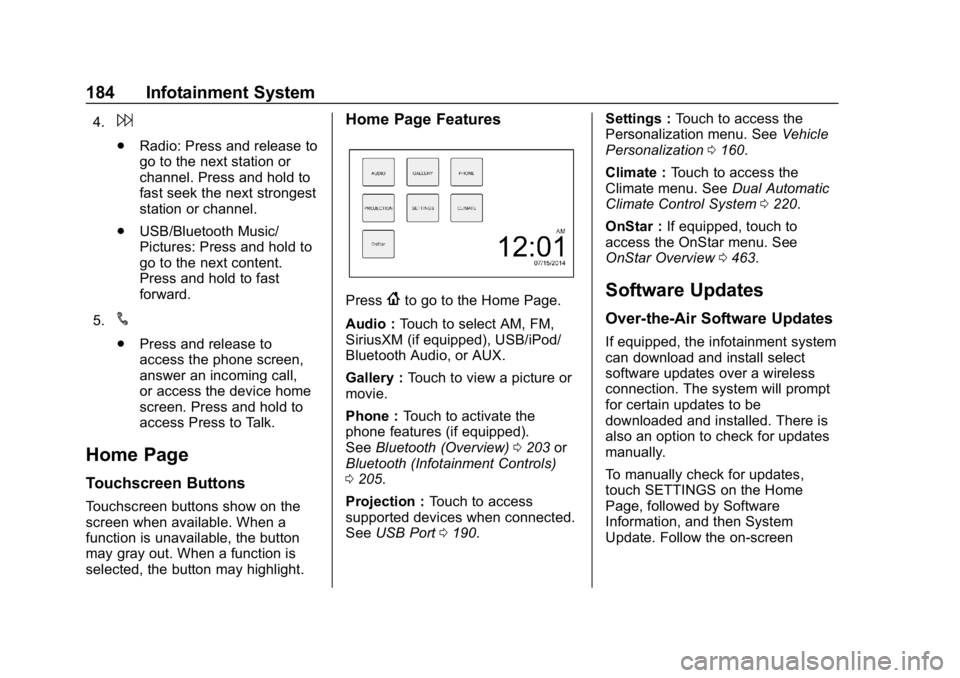
Home Page Features
Press{to go to the Home Page.
Audio : Touch to select AM, FM,
SiriusXM (if equipped), USB/iPod/
Bluetooth Audio, or AUX.
Gallery : Touch to view a picture or
movie.
Phone : Touch to activate the
phone features (if equipped).
See Bluetooth (Overview) 0203 or
Bluetooth (Infotainment Controls)
0 205.
Projection : Touch to access
supported devices when connected.
See USB Port 0190. Settings :
Touch to access the
Personalization menu. See Vehicle
Personalization 0160.
Climate : Touch to access the
Climate menu. See Dual Automatic
Climate Control System 0220.
OnStar : If equipped, touch to
access the OnStar menu. See
OnStar Overview 0463.Software Updates
Over-the-Air Software Updates
If equipped, the infotainment system
can download and install select
software updates over a wireless
connection. The system will prompt
for certain updates to be
downloaded and installed. There is
also an option to check for updates
manually.
To manually check for updates,
touch SETTINGS on the Home
Page, followed by Software
Information, and then System
Update. Follow the on-screen
Page 186 of 489
Chevrolet Silverado LD 1500 and Silverado 2500/3500 Owner Manual (GMNA-
Localizing-U.S./Canada-12162993) - 2019 - crc - 4/4/18
Infotainment System 185
prompts. Steps for downloading and
installing updates may vary by
vehicle.
Downloading Over-the-Air vehicle
software updates requires Internet
connectivity, which can be accessed
through the vehicle’s built-in OnStar
4G LTE connection, if equipped and
active. If required, data plans are
provided by a third party. Optionally,
a secure Wi-Fi hotspot such as a
compatible mobile device hotspot,
home hotspot or public hotspot can
be used. Applicable data rates may
apply.
To connect the infotainment system
to a secured mobile device hotspot,
home hotspot, or a public hotspot,
touch SETTINGS on the Home
Page, followed by Wi-Fi, and then
Manage Wi-Fi Networks. Select the
appropriate Wi-Fi network, and
follow the on-screen prompts.
Download speeds may vary.
On most compatible mobile devices,
activation of the Wi-Fi hotspot is in
the Settings menu under Mobile
Network Sharing, Personal Hotspot,
Mobile Hotspot or similar. Availability of Over-the-Air vehicle
software updates varies by vehicle
and country. For more information
on this feature, see
my.chevrolet.com/learn for US/
Canada.Radio
AM-FM Radio
Playing the Radio
Audio Source Menu
{:
Press to go to the Home Page.
O:Press to turn on, mute,
or unmute the system. Press and
hold to turn off the system.
Selecting a Band
Press{, then touch AUDIO,
Source, then select AM, FM,
or SXM, if equipped. The last station
that was playing starts playing
again.
System Settings
Auto Volume
This feature automatically adjusts
the radio volume to compensate for
road and wind noise.
The level of volume compensation
can be selected, or the feature can
be turned off.
Page 187 of 489
Chevrolet Silverado LD 1500 and Silverado 2500/3500 Owner Manual (GMNA-
Localizing-U.S./Canada-12162993) - 2019 - crc - 4/4/18
186 Infotainment System
1. Touch MENU from a sourcescreen.
2. Select Auto Volume.
3. Select the desired setting.
4. Touch
3to go back to the
source screen.
Tone Settings
The tone settings can be set for
each radio band and each audio
player source.
Preset Tone Settings
. Touch MENU.
. Touch Tone Settings.
. Select a preset tone setting.
. Bass, Midrange, or Treble:
Touch −or +.
. Fader or Balance: Adjust the
front/rear or left/right speakers
by dragging the dot in the
vehicle image on the screen.
Custom Tone Settings
. Touch MENU.
. Touch Tone Settings. .
Touch Custom.
. Bass, Midrange, or Treble:
Touch −or +.
. Fader or Balance: Adjust the
front/rear or left/right speakers
by dragging the dot in the
vehicle image on the screen.
Touch
3to go back to the source
screen.
Selecting an Auxiliary Device
Connect the auxiliary device to the
AUX input terminal. Play will begin
when the system has finished
reading the information on the
device.
If the AUX device is already
connected, press
{, AUDIO,
Source, then select the device.
Selecting a Station
Seek Tuning
If the radio station is not known:
Press
7or6to automatically
search for available radio stations. Manual Tuning
Continue touching
toruto
manually change the radio station.
Direct Tune
From the AM or FM menu:
. Touch Tune.
. Enter the station number.
. Touch Go or
toruto go to
the previous or next station.
Favorite
. Touch
SorTto scroll through
the favorites.
. Touch on the station to select it.
Station List
. From the AM or FM menu,
touch MENU.
. Select Station List.
. Touch
QorRto scroll through
the list. Touch the station to
select it.
Page 190 of 489
Chevrolet Silverado LD 1500 and Silverado 2500/3500 Owner Manual (GMNA-
Localizing-U.S./Canada-12162993) - 2019 - crc - 4/4/18
Infotainment System 189
accessory power outlet. If there is
interference or static, unplug the
item from the accessory power
outlet.
FM
FM signals only reach about 16 to
65 km (10 to 40 mi). Although the
radio has a built-in electronic circuit
that automatically works to reduce
interference, some static can occur,
especially around tall buildings or
hills, causing the sound to fade in
and out.
AM
The range for most AM stations is
greater than for FM, especially at
night. The longer range can cause
station frequencies to interfere with
each other. Static can also occur
when things like storms and power
lines interfere with radio reception.
When this happens, try reducing the
treble on the radio.
SiriusXM Satellite Radio
Service
If equipped, SiriusXM Satellite
Radio Service provides digital radio
reception. Tall buildings or hills can
interfere with satellite radio signals,
causing the sound to fade in and
out. In addition, traveling or standing
under heavy foliage, bridges,
garages, or tunnels may cause loss
of the SiriusXM signal for a period
of time.
Cell Phone Usage
Cell phone usage, such as making
or receiving phone calls, charging,
or just having the phone on may
cause static interference in the
radio. Unplug the phone or turn it off
if this happens.
Fixed Mast Antenna
The fixed mast antenna will go
through most car washes as long as
it is securely attached. If the
antenna becomes slightly bent,
straighten it out by hand. If it is
badly bent, replace it.Occasionally check that the antenna
is tight at the base. If tightening is
required, protect the paint from
damage.
Multi-Band Antenna
The multi-band antenna is on the
roof of the vehicle. The antenna is
used for OnStar, the SiriusXM
Satellite Radio Service System, and
GPS (Global Positioning System),
if the vehicle has these features.
Keep the antenna clear of
obstructions for clear reception.
If the vehicle has a sunroof, and it is
open, reception can also be
affected.
Items on the roof of the vehicle can
interfere with the performance of the
radio system and OnStar (if
equipped). Make sure the
multi-band antenna is not
obstructed.
Page 191 of 489
Chevrolet Silverado LD 1500 and Silverado 2500/3500 Owner Manual (GMNA-
Localizing-U.S./Canada-12162993) - 2019 - crc - 4/4/18
190 Infotainment System
Audio Players
Avoiding Untrusted Media
Devices
When using media devices such as
CDs, DVDs, Blu-ray Discs, SD
cards, USB devices, and mobile
devices, consider the source.
Untrusted media devices could
contain files that affect system
operation or performance. Avoid use
if the content or origin cannot be
trusted.
USB Port
Using the USB Port
The infotainment system can play
music by connecting an auxiliary
device to the USB port.
USB Support
If equipped, there may be USB
ports in the center stack below the
climate controls, in the center
console storage, and at the rear of
the center console. All ports use the
USB 2.0 standard.USB Supported Devices
.
USB flash drives
. Portable USB hard drives
Not all iPods and USB drives are
compatible with the USB port.
Make sure the iPod has the latest
firmware from Apple for proper
operation. iPod firmware can be
updated using the latest iTunes
application. See www.apple.com/
itunes.
For help with identifying your iPod,
go to www.apple.com/support.
The USB port can play both lower
and upper case .mp3, .wma, .ogg,
and .wav files stored on a USB
storage device.
Supported Apple Devices
To view supported devices in U.S.,
see my.chevrolet.com\learn.
To view supported devices in
Canada, see
www.chevroletowner.ca. USB Supported File and Folder
Structure
The infotainment system supports:
.
FAT16.
. FAT32.
. exFAT.
Connecting a USB Storage
Device or iPod/iPhone
To connect a USB storage device,
connect the device to the USB port.
To connect an iPod/iPhone, connect
one end of the device’ s cable to the
iPod/iPhone and the other end to
the USB port.
The iPod/iPhone charges while it is
connected to the vehicle if the
ignition is on or in ACC/
ACCESSORY. See Ignition
Positions 0247. When the vehicle is
turned off, the iPod/iPhone
automatically powers off and will not
charge or draw power from the
vehicle's battery.
For more information on USB
usage, see “Audio System
Information” following.