Bed CHEVROLET SILVERADO 2500 2020 Owners Manual
[x] Cancel search | Manufacturer: CHEVROLET, Model Year: 2020, Model line: SILVERADO 2500, Model: CHEVROLET SILVERADO 2500 2020Pages: 500, PDF Size: 9.71 MB
Page 35 of 500
Chevrolet Silverado Owner Manual (GMNA-Localizing-U.S./Canada/Mexico-
13337620) - 2020 - CRC - 4/2/19
34 Keys, Doors, and Windows
Tailgate Step
{Warning
To avoid personal injury, keep
hands away from the hinges
when operating the tailgate step.
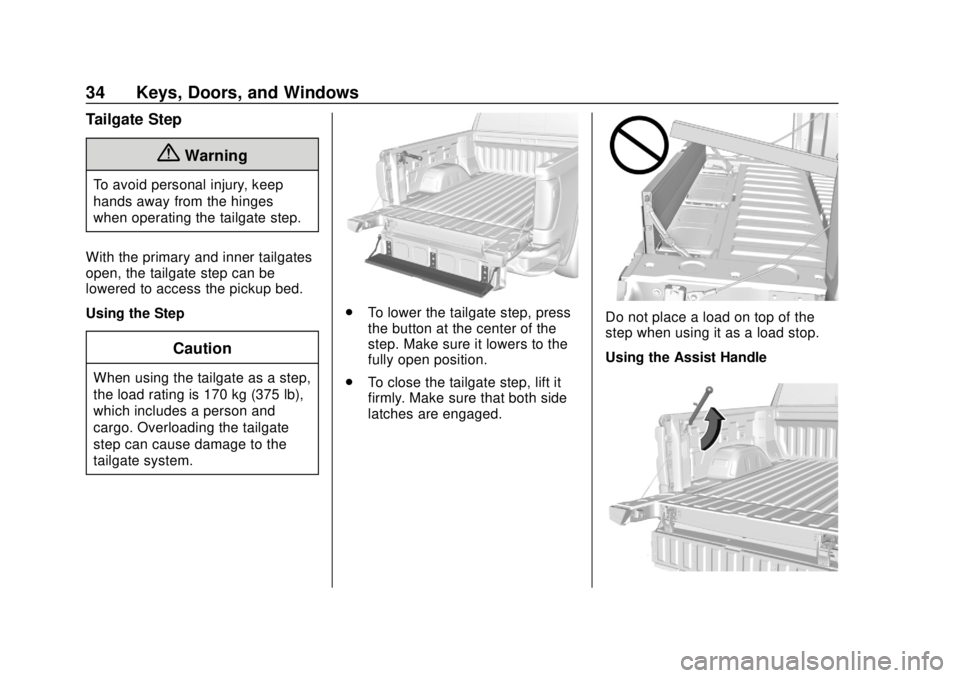
With the primary and inner tailgates
open, the tailgate step can be
lowered to access the pickup bed.
Using the Step
Caution
When using the tailgate as a step,
the load rating is 170 kg (375 lb),
which includes a person and
cargo. Overloading the tailgate
step can cause damage to the
tailgate system.
. To lower the tailgate step, press
the button at the center of the
step. Make sure it lowers to the
fully open position.
. To close the tailgate step, lift it
firmly. Make sure that both side
latches are engaged.Do not place a load on top of the
step when using it as a load stop.
Using the Assist Handle
Page 102 of 500
Chevrolet Silverado Owner Manual (GMNA-Localizing-U.S./Canada/Mexico-
13337620) - 2020 - CRC - 4/2/19
Seats and Restraints 101
LATCH anchor weight limits
described at the beginning of
this section, and the following
steps:
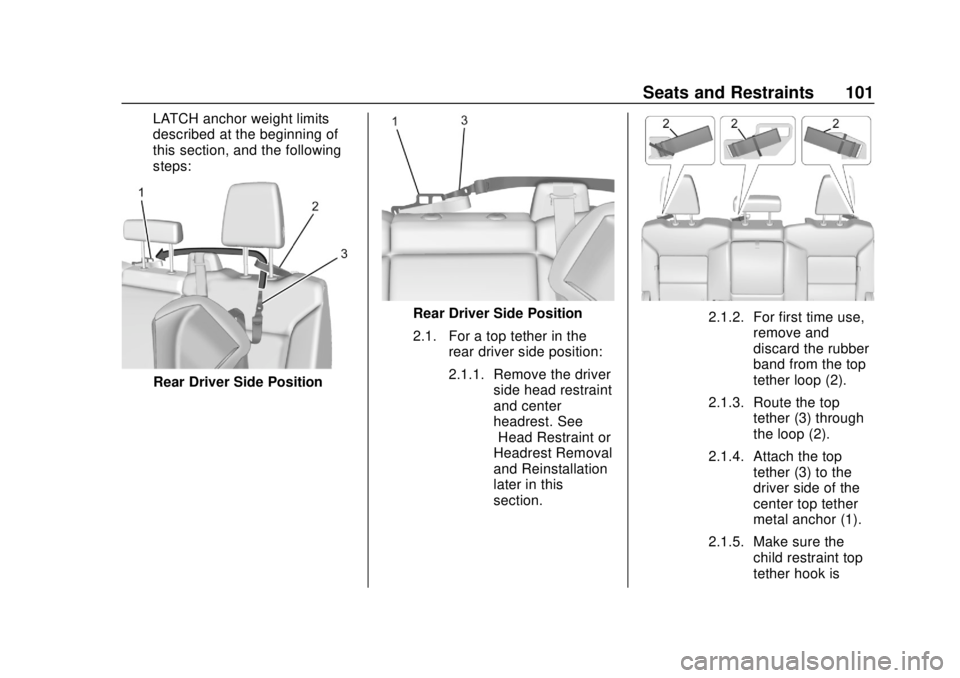
Rear Driver Side Position
Rear Driver Side Position
2.1. For a top tether in the rear driver side position:
2.1.1. Remove the driver side head restraint
and center
headrest. See
“Head Restraint or
Headrest Removal
and Reinstallation”
later in this
section.2.1.2. For first time use,remove and
discard the rubber
band from the top
tether loop (2).
2.1.3. Route the top tether (3) through
the loop (2).
2.1.4. Attach the top tether (3) to the
driver side of the
center top tether
metal anchor (1).
2.1.5. Make sure the child restraint top
tether hook is
Page 117 of 500
Chevrolet Silverado Owner Manual (GMNA-Localizing-U.S./Canada/Mexico-
13337620) - 2020 - CRC - 4/2/19
116 Storage
Additional Storage
Features
Cargo Tie-Downs
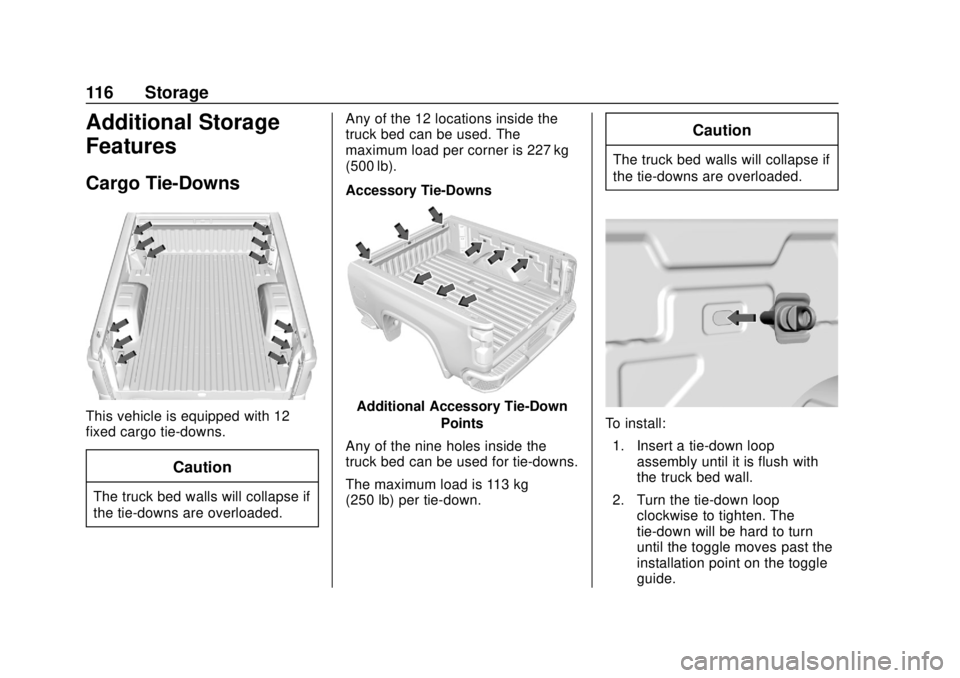
This vehicle is equipped with 12
fixed cargo tie-downs.
Caution
The truck bed walls will collapse if
the tie-downs are overloaded.Any of the 12 locations inside the
truck bed can be used. The
maximum load per corner is 227 kg
(500 lb).
Accessory Tie-Downs
Additional Accessory Tie-Down
Points
Any of the nine holes inside the
truck bed can be used for tie-downs.
The maximum load is 113 kg
(250 lb) per tie-down.
Caution
The truck bed walls will collapse if
the tie-downs are overloaded.
To install: 1. Insert a tie-down loop assembly until it is flush with
the truck bed wall.
2. Turn the tie-down loop clockwise to tighten. The
tie-down will be hard to turn
until the toggle moves past the
installation point on the toggle
guide.
Page 118 of 500

Chevrolet Silverado Owner Manual (GMNA-Localizing-U.S./Canada/Mexico-
13337620) - 2020 - CRC - 4/2/19
Storage 117
3. Fasten the tie-down firmly byhand only. Do not use tools.
To remove: 1. Remove the tie-down loop completely by turning
counterclockwise while holding
the backing plate against the
truck bed wall.
2. Pull the backing plate away from the truck bed wall until a
click is heard. This locks the
toggle into position on the
toggle guide.
3. Push the backing plate against the truck bed wall. This allows
the toggle nut to spin.
4. Remove the backing plate, toggle guide, and toggle nut
from the truck bed wall
completely.
5. Reinstall the tie-down loop through the backing plate
into the toggle nut for reuse.
Page 124 of 500
Chevrolet Silverado Owner Manual (GMNA-Localizing-U.S./Canada/Mexico-
13337620) - 2020 - CRC - 4/2/19
Instruments and Controls 123
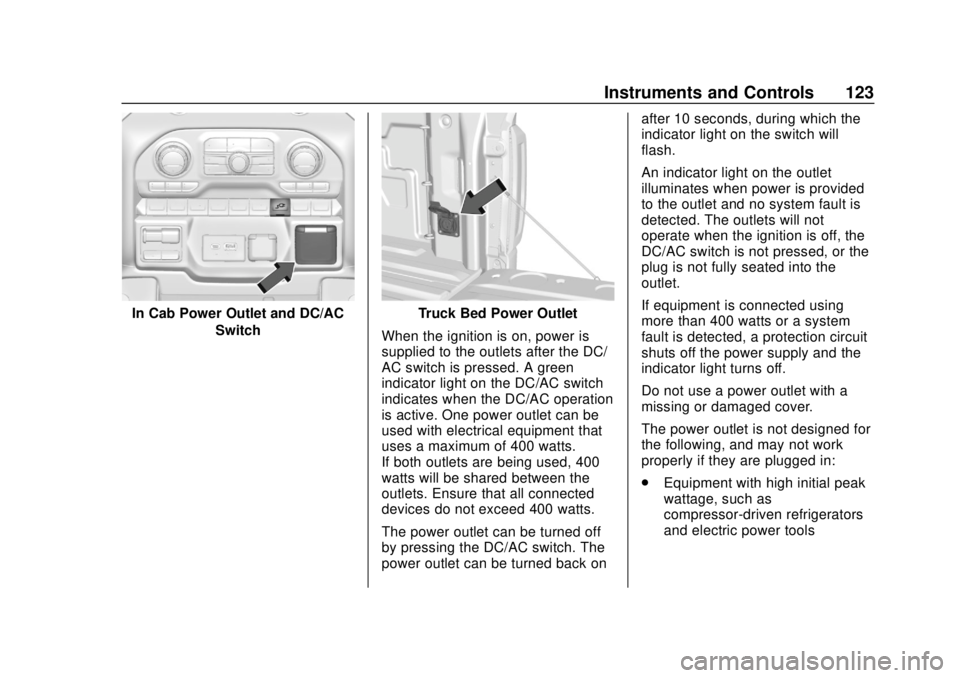
In Cab Power Outlet and DC/ACSwitchTruck Bed Power Outlet
When the ignition is on, power is
supplied to the outlets after the DC/
AC switch is pressed. A green
indicator light on the DC/AC switch
indicates when the DC/AC operation
is active. One power outlet can be
used with electrical equipment that
uses a maximum of 400 watts.
If both outlets are being used, 400
watts will be shared between the
outlets. Ensure that all connected
devices do not exceed 400 watts.
The power outlet can be turned off
by pressing the DC/AC switch. The
power outlet can be turned back on after 10 seconds, during which the
indicator light on the switch will
flash.
An indicator light on the outlet
illuminates when power is provided
to the outlet and no system fault is
detected. The outlets will not
operate when the ignition is off, the
DC/AC switch is not pressed, or the
plug is not fully seated into the
outlet.
If equipment is connected using
more than 400 watts or a system
fault is detected, a protection circuit
shuts off the power supply and the
indicator light turns off.
Do not use a power outlet with a
missing or damaged cover.
The power outlet is not designed for
the following, and may not work
properly if they are plugged in:
.
Equipment with high initial peak
wattage, such as
compressor-driven refrigerators
and electric power tools
Page 173 of 500
Chevrolet Silverado Owner Manual (GMNA-Localizing-U.S./Canada/Mexico-
13337620) - 2020 - CRC - 4/2/19
172 Lighting
For information on roof-mounted
emergency lamp installation, see
www.gmupfitter.com or contact your
dealer.
If the vehicle has this button, the
vehicle may have the snow plow
prep package. SeeAdd-On
Electrical Equipment 0322.
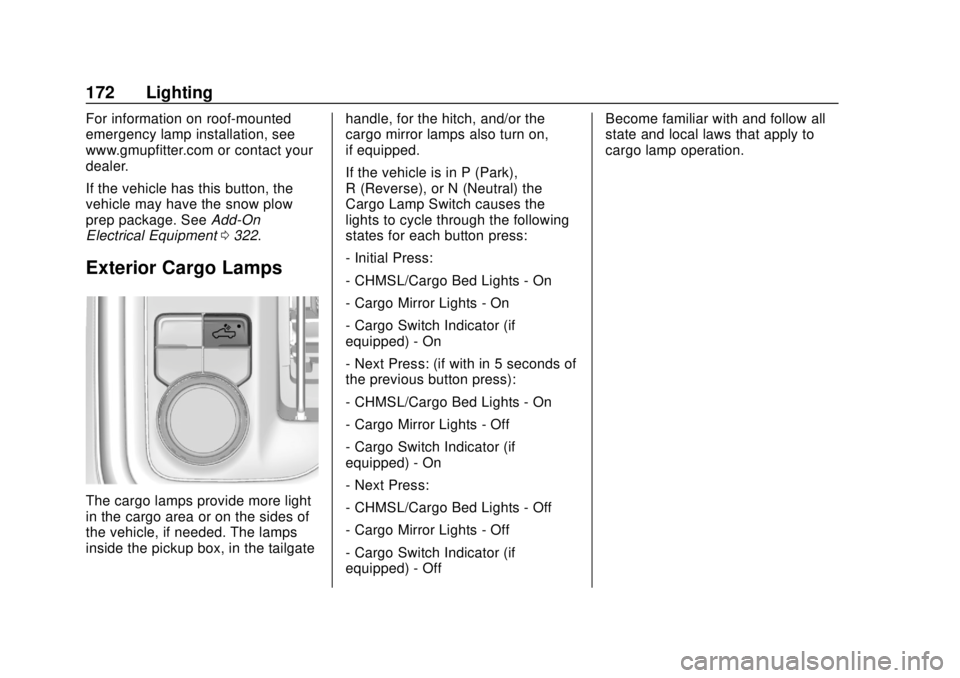
Exterior Cargo Lamps
The cargo lamps provide more light
in the cargo area or on the sides of
the vehicle, if needed. The lamps
inside the pickup box, in the tailgate handle, for the hitch, and/or the
cargo mirror lamps also turn on,
if equipped.
If the vehicle is in P (Park),
R (Reverse), or N (Neutral) the
Cargo Lamp Switch causes the
lights to cycle through the following
states for each button press:
- Initial Press:
- CHMSL/Cargo Bed Lights - On
- Cargo Mirror Lights - On
- Cargo Switch Indicator (if
equipped) - On
- Next Press: (if with in 5 seconds of
the previous button press):
- CHMSL/Cargo Bed Lights - On
- Cargo Mirror Lights - Off
- Cargo Switch Indicator (if
equipped) - On
- Next Press:
- CHMSL/Cargo Bed Lights - Off
- Cargo Mirror Lights - Off
- Cargo Switch Indicator (if
equipped) - OffBecome familiar with and follow all
state and local laws that apply to
cargo lamp operation.
Page 190 of 500
Chevrolet Silverado Owner Manual (GMNA-Localizing-U.S./Canada/Mexico-
13337620) - 2020 - CRC - 4/11/19
Driving and Operating 189
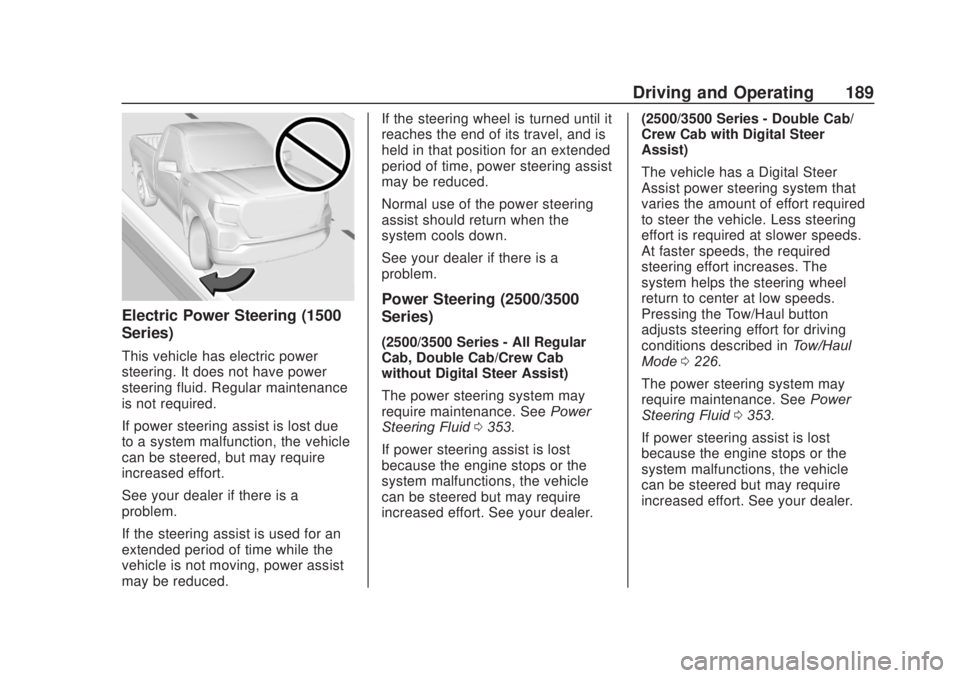
Electric Power Steering (1500
Series)
This vehicle has electric power
steering. It does not have power
steering fluid. Regular maintenance
is not required.
If power steering assist is lost due
to a system malfunction, the vehicle
can be steered, but may require
increased effort.
See your dealer if there is a
problem.
If the steering assist is used for an
extended period of time while the
vehicle is not moving, power assist
may be reduced.If the steering wheel is turned until it
reaches the end of its travel, and is
held in that position for an extended
period of time, power steering assist
may be reduced.
Normal use of the power steering
assist should return when the
system cools down.
See your dealer if there is a
problem.
Power Steering (2500/3500
Series)
(2500/3500 Series - All Regular
Cab, Double Cab/Crew Cab
without Digital Steer Assist)
The power steering system may
require maintenance. See
Power
Steering Fluid 0353.
If power steering assist is lost
because the engine stops or the
system malfunctions, the vehicle
can be steered but may require
increased effort. See your dealer. (2500/3500 Series - Double Cab/
Crew Cab with Digital Steer
Assist)
The vehicle has a Digital Steer
Assist power steering system that
varies the amount of effort required
to steer the vehicle. Less steering
effort is required at slower speeds.
At faster speeds, the required
steering effort increases. The
system helps the steering wheel
return to center at low speeds.
Pressing the Tow/Haul button
adjusts steering effort for driving
conditions described in
Tow/Haul
Mode 0226.
The power steering system may
require maintenance. See Power
Steering Fluid 0353.
If power steering assist is lost
because the engine stops or the
system malfunctions, the vehicle
can be steered but may require
increased effort. See your dealer.
Page 205 of 500
Chevrolet Silverado Owner Manual (GMNA-Localizing-U.S./Canada/Mexico-
13337620) - 2020 - CRC - 4/11/19
204 Driving and Operating
{Warning
In the case of a sudden stop
or collision, things carried in
the bed of your truck could
shift forward and come into
the passenger area, injuring
you and others. If you put
things in the bed of your truck,
you should make sure they
are properly secured.
Caution
Overloading the vehicle may
cause damage. Repairs would not
be covered by the vehicle
warranty. Do not overload the
vehicle.
Using heavier suspension
components to get added
durability might not change the
weight ratings. Ask your dealer
to help load the vehicle the
right way.
{Warning
Things you put inside the
vehicle can strike and injure
people in a sudden stop or
turn, or in a crash.
.Put things in the cargo
area of the vehicle. Try to
spread the weight evenly.
.Never stack heavier
things, like suitcases,
inside the vehicle so that
some of them are above
the tops of the seats.
.Do not leave an
unsecured child restraint
in the vehicle.
.When you carry
something inside the
vehicle, secure it
whenever you can.
.Do not leave a seat
folded down unless you
need to. There is also important loading
information for off-road driving in
this manual. See
“Loading the
Vehicle for Off-Road Driving“
under Off-Road Driving 0191.
Two-Tiered Loading
Depending on the model of the
pickup, an upper load platform
can be created by positioning
three or four 5 cm (2 in) by
15 cm (6 in) wooden planks
across the width of the pickup
box. The planks must be
inserted in the pickup box
depressions.
When using this upper load
platform, be sure the load is
securely tied down to prevent it
from shifting. The load's center
of gravity should be positioned
in a zone over the rear axle. The
zone is located in the area
between the front of each wheel
well and the rear of each wheel
Page 252 of 500
Chevrolet Silverado Owner Manual (GMNA-Localizing-U.S./Canada/Mexico-
13337620) - 2020 - CRC - 4/11/19
Driving and Operating 251
Approaching and Following a
Vehicle
The vehicle ahead indicator is in the
instrument cluster. It only displays
when a vehicle is detected in your
vehicle’s path moving in the same
direction. If this symbol is not
displaying, ACC will not respond to
or brake for vehicles ahead.
ACC automatically slows the vehicle
down and adjusts vehicle speed to
follow a detected vehicle ahead at
the selected following gap. The
vehicle speed increases or
decreases to follow a detected
vehicle in front of your vehicle when
that vehicle is traveling slower than
your vehicle set speed. It may apply
limited braking, if necessary. When
braking is active, the brake lamps
will come on. The automatic brakingmay feel or sound different than if
the brakes were applied manually.
This is normal.
Stationary or Very Slow-Moving
Objects
{Warning
ACC may not detect and react to
stopped or slow-moving vehicles
ahead of you. For example, the
system may not brake for a
vehicle it has never detected
moving. This can occur in
stop-and-go traffic or when a
vehicle suddenly appears due to
a vehicle ahead changing lanes.
Your vehicle may not stop and
could cause a crash. Use caution
when using ACC. Your complete
attention is always required while
driving and you should be ready
to take action and apply the
brakes.
Irregular Objects Affecting ACC
ACC may have difficulty detecting
the following objects: .
Vehicles in front of your vehicle
that have a rear aspect that is
low, small, or irregular
. An empty truck or trailer that has
no cargo in the cargo bed
. Vehicles with cargo extending
from the back end
. Non-standard shaped vehicles,
such as vehicle transport,
vehicles with a side car fitted,
or horse carriages
. Vehicles that are low to the road
surface
. Objects that are close to the
front of your vehicle
. Vehicles on which extremely
heavy cargo is loaded in the
cargo area or rear seat
Page 263 of 500

Chevrolet Silverado Owner Manual (GMNA-Localizing-U.S./Canada/Mexico-
13337620) - 2020 - CRC - 4/11/19
262 Driving and Operating
Assists with connecting to a
trailer by providing a
zoomed-in view of the hitch
to help align the vehicle’s
hitch ball with the trailer
coupler, or to monitor the
trailer connection. To select,
touch Hitch View on the
infotainment display when a
camera view is active. To
access this view when in a
forward gear above 12 km/h
(8 mph), touch CAMERA on
the infotainment display
and touch the Cargo Bed
View icon. The view will
close after 8 seconds and
can be closed early by
touching X. Shifting into
P (Park) while in this view
will automatically engage
the Electric Parking
Brake (EPB).
9. Bed View
Provides a view of the truck
bed and the area behind
the vehicle to assist in
cargo or hitch monitoring or
hitching to a fifth wheel orgooseneck trailer. To select,
touch Bed View on the
infotainment display when a
camera view is active. To
access this view when in a
forward gear above 12 km/h
(8 mph), touch CAMERA on
the infotainment display
and touch the Bed View
icon. The view will close
after 8 seconds and can be
closed early by touching X.
10. Transparent Trailer View
Provides a view that allows
the driver to virtually
“see
through” the trailer. The
feature is available when a
compatible trailer is
connected and a profile is
configured and selected via
the Trailering App. See
Trailering App 0310. The
feature requires user
installation of an accessory
trailer camera on the rear
exterior surface of the
trailer per the accessory
trailer camera installation
instructions (see your dealer for accessory trailer
camera(s) and information).
To select, touch
Transparent Trailer View on
the infotainment display
when a camera view is
active. To access this view
when in a forward gear
above 12 km/h (8 mph),
touch CAMERA on the
infotainment display and
touch the Transparent
Trailer View icon. Touch X
to exit.
When the system is
calibrated and the trailer
position is known, one of
three views will be shown;
Transparent Trailer View,
Left Transparent Trailer
View or Right Transparent
Trailer View. The
Transparent Trailer View is
shown when the position of
the trailer is relatively
straight behind the vehicle.
The Left or Right
Transparent Trailer View is
shown when the position of
the trailer is too far to the