transmission CHEVROLET SILVERADO 2500 2020 Owners Manual
[x] Cancel search | Manufacturer: CHEVROLET, Model Year: 2020, Model line: SILVERADO 2500, Model: CHEVROLET SILVERADO 2500 2020Pages: 500, PDF Size: 9.71 MB
Page 7 of 500

Chevrolet Silverado Owner Manual (GMNA-Localizing-U.S./Canada/Mexico-
13337620) - 2020 - CRC - 4/2/19
6 Introduction
1. Tow/Haul Mode (On SomeModels). See Driver Mode
Control 0238.
Automatic Transfer Case
Control (If Equipped). See
Four-Wheel Drive 0227.
Driver Mode Control 0238 (If
Equipped).
2. Air Vents 0182.
3. Turn Signal Lever. See Turn
and Lane-Change Signals
0 170.
Windshield Wiper/Washer
0 120.
4. Head-Up Display (HUD) 0152
(If Equipped).
5. Instrument Cluster 0127.
6. Shift Lever. See Automatic
Transmission 0221.
Range Selection Mode. See
Manual Mode 0224.
7. Light Sensor. See Automatic
Headlamp System 0168.
8. Infotainment 0176. 9.
Climate Control Systems 0177
(If Equipped).
Dual Automatic Climate Control
System 0179 (If Equipped).
10. Heated and Ventilated Front
Seats 061 (If Equipped).
11.
XPark Assist Switch (If
Equipped). See Assistance
Systems for Parking or Backing
0 257.
gTraction Control/Electronic
Stability Control 0235.
|Hazard Warning Flashers
0 169.
ALane Keep Assist (LKA)
(1500 Series) 0278 (If
Equipped).
@Lane Departure Warning
(LDW) (2500/3500 Series)
0 277 (If Equipped).
5Hill Descent Control Switch
(If Equipped). See Hill Descent
Control (HDC) 0237.
jPower Assist Steps 036 (If
Equipped).
5Power Release Tailgate
(If Equipped). See Tailgate
0 28.
DC/AC Switch. See Power
Outlets 0122.
hAuto Stop Disable Switch
(If Equipped). See Stop/Start
System 0213.
LExpress Window Down
Button (If Equipped). See
Power Windows 049.
Tow/Haul Mode 0226 (On
Some Models).
12. Power Outlet (Alternating Current) (If Equipped). See
Power Outlets 0122.
13. Power Outlets 0122.
14. USB Port. See the infotainment manual.
15. Wireless Charging 0124 (If
Equipped).
Page 27 of 500
Chevrolet Silverado Owner Manual (GMNA-Localizing-U.S./Canada/Mexico-
13337620) - 2020 - CRC - 4/2/19
26 Keys, Doors, and Windows
Free-Turning Locks
The door key lock cylinder turns
freely when either the wrong key is
used, or the correct key is not fully
inserted. The free-turning door lock
feature prevents the lock from being
forced open. To reset the lock, turn
it to the vertical position with the
correct key fully inserted. Remove
the key and insert it again. If this
does not reset the lock, turn the key
halfway around in the cylinder and
repeat the reset procedure.
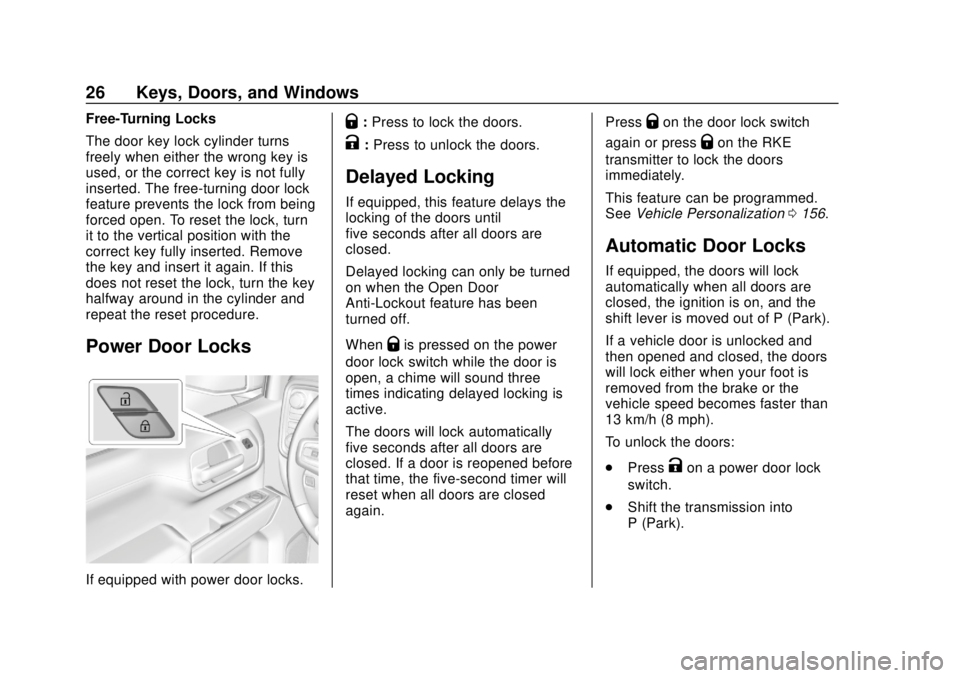
Power Door Locks
If equipped with power door locks.
Q:Press to lock the doors.
K:Press to unlock the doors.
Delayed Locking
If equipped, this feature delays the
locking of the doors until
five seconds after all doors are
closed.
Delayed locking can only be turned
on when the Open Door
Anti-Lockout feature has been
turned off.
When
Qis pressed on the power
door lock switch while the door is
open, a chime will sound three
times indicating delayed locking is
active.
The doors will lock automatically
five seconds after all doors are
closed. If a door is reopened before
that time, the five-second timer will
reset when all doors are closed
again. Press
Qon the door lock switch
again or press
Qon the RKE
transmitter to lock the doors
immediately.
This feature can be programmed.
See Vehicle Personalization 0156.
Automatic Door Locks
If equipped, the doors will lock
automatically when all doors are
closed, the ignition is on, and the
shift lever is moved out of P (Park).
If a vehicle door is unlocked and
then opened and closed, the doors
will lock either when your foot is
removed from the brake or the
vehicle speed becomes faster than
13 km/h (8 mph).
To unlock the doors:
.
Press
Kon a power door lock
switch.
. Shift the transmission into
P (Park).
Page 139 of 500
Chevrolet Silverado Owner Manual (GMNA-Localizing-U.S./Canada/Mexico-
13337620) - 2020 - CRC - 4/2/19
138 Instruments and Controls
When this light comes on, or is
flashing, the Driver Information
Center (DIC) also displays a
message.
If a short distance must be driven
with the light on, be sure to turn off
all accessories, such as the radio
and air conditioner.
Malfunction Indicator
Lamp (Check Engine
Light)
This light is part of the vehicle’s
emission control on-board
diagnostic system. If this light is on
while the engine is running, a
malfunction has been detected and
the vehicle may require service. The
light should come on to show that it
is working when the ignition is on
and the engine is not running. See
Ignition Positions (Keyless Access)
0208 or
Ignition Positions (Key Access)
0 210.
Malfunctions are often indicated by
the system before any problem is
noticeable. Being aware of the light
and seeking service promptly when
it comes on may prevent damage.
Caution
If the vehicle is driven continually
with this light on, the emission
control system may not work as
well, the fuel economy may be
lower, and the vehicle may not
run smoothly. This could lead to
costly repairs that might not be
covered by the vehicle warranty.
Caution
Modifications to the engine,
transmission, exhaust, intake,
or fuel system, or the use of
replacement tires that do not
meet the original tire
specifications, can cause this light
to come on. This could lead to
costly repairs not covered by the
vehicle warranty. This could also
affect the vehicle’s ability to pass
an Emissions Inspection/
Maintenance test. See
Accessories and Modifications
0329.
If the light is flashing : A
malfunction has been detected that
could damage the emission control
system and increase vehicle
emissions. Diagnosis and service
may be required.
To help prevent damage, reduce
vehicle speed and avoid hard
accelerations and uphill grades.
Page 153 of 500
Chevrolet Silverado Owner Manual (GMNA-Localizing-U.S./Canada/Mexico-
13337620) - 2020 - CRC - 4/2/19
152 Instruments and Controls
Transmission Fluid
Temperature :Shows the
temperature of the automatic
transmission fluid in either degrees
Celsius (°C) or degrees
Fahrenheit (°F).
Trailer Brake : On vehicles with the
Integrated Trailer Brake Control
(ITBC) system, the trailer brake
display appears in the DIC.
TRAILER GAIN shows the trailer
gain setting. This setting can be
adjusted from 0.0 to 10.0 with either
a trailer connected or disconnected.
TRAILER OUTPUT shows the
power output to the trailer any time
a trailer with electric brakes is
connected. Output is displayed as a
bar graph. Dotted lines may appear
in the OUTPUT display if a trailer is
not connected.
Off Road : Displays vehicle pitch
and roll information, road wheel
angle, and four-wheel drive (4WD)
status. Follow Distance :
If equipped, the
current follow time to the vehicle
ahead is displayed as a time value
on this page.
Driver Assistance : If equipped,
shows information for Lane Keep
Assist (LKA) and Forward Collision
Alert (FCA).
Info Page Options : Scroll to
choose which info pages appear on
the DIC. Press the thumbwheel to
select or deselect.
Blank Page : Shows no
information.
Head-Up Display (HUD)
{Warning
If the HUD image is too bright or
too high in your field of view, it
may take you more time to see
things you need to see when it is
dark outside. Be sure to keep the
HUD image dim and placed low in
your field of view. If equipped with HUD, some
information about the operation of
the vehicle is projected onto the
windshield. The image is projected
through the HUD lens on top of the
instrument panel. The information
appears as an image focused out
toward the front of the vehicle.
Caution
If you try to use the HUD image
as a parking aid, you may
misjudge the distance and
damage your vehicle. Do not use
the HUD image as a parking aid.
The HUD information can be
displayed in various languages. The
speedometer reading and other
numerical values can be displayed
in either English or metric units.
The language selection is changed
through the radio, and the units of
measurement is changed through
the instrument cluster. See
“Settings” in the infotainment
manual and “Options”under
Instrument Cluster 0127.
Page 157 of 500
Chevrolet Silverado Owner Manual (GMNA-Localizing-U.S./Canada/Mexico-
13337620) - 2020 - CRC - 4/2/19
156 Instruments and Controls
.Vehicle Security
. Brakes
. Steering
. Ride Control Systems
. Driver Assistance Systems
. Cruise Control
. Lighting and Bulb Replacement
. Wiper/Washer Systems
. Doors and Windows
. Seat Belts
. Airbag Systems
. Engine and Transmission
. Tire Pressure
. Battery
Engine Power Messages
ENGINE POWER IS REDUCED
This message displays when the
vehicle's propulsion power is
reduced. A reduction in propulsion
power can affect the vehicle's ability
to accelerate. If this message is on,
but there is no observed reduction in performance, proceed to your
destination. The performance may
be reduced the next time the vehicle
is driven. The vehicle may be driven
while this message is on, but
maximum acceleration and speed
may be reduced. Anytime this
message stays on, or displays
repeatedly, the vehicle should be
taken to your dealer for service as
soon as possible.
Under certain operating conditions,
propulsion will be disabled. Try
restarting after the vehicle has been
off for 30 seconds.
Vehicle Speed Messages
SPEED LIMITED TO XXX KM/
H (MPH)
This message shows that the
vehicle speed has been limited to
the speed displayed. The limited
speed is a protection for various
propulsion and vehicle systems,
such as lubrication, thermal, brakes,
suspension, Teen Driver if
equipped, or tires.
Vehicle
Personalization
The following are all possible
vehicle personalization features.
Depending on the vehicle, some
may not be available.
For System, Apps, and Personal
features and functions, see
“Settings”
in the infotainment
manual.
To access the vehicle
personalization menu:
1. Touch the Settings icon on the Home Page of the infotainment
display.
2. Touch Vehicle to display a list of available options.
3. Touch to select the desired feature setting.
4. Touch
9orRto turn a feature
off or on.
5. Touch
zto go to the top level
of the Settings menu.
Page 163 of 500
Chevrolet Silverado Owner Manual (GMNA-Localizing-U.S./Canada/Mexico-
13337620) - 2020 - CRC - 4/2/19
162 Instruments and Controls
Make sure the hand-held transmitter
has a new battery for quick and
accurate transmission of the
radio-frequency signal.
Programming the Universal
Remote System
For questions or programming help,
see www.homelink.com/gm or call
1-800-355-3515. For calls placed
outside the U.S., Canada, or Puerto
Rico, international rates will apply
and may differ based on landline or
mobile phone.
Programming involves
time-sensitive actions, and may time
out causing the procedure to be
repeated.
To program up to three devices:1. Hold the end of the hand-held transmitter about 3 to 8 cm (1
to 3 in) away from the
Universal Remote system
buttons with the indicator light
in view. The hand-held
transmitter was supplied by the
manufacturer of the garage
door opener receiver. 2. At the same time, press and
hold both the hand-held
transmitter button and one of
the three Universal Remote
system buttons to be used to
operate the garage door. Do
not release either button until
the indicator light goes from a
slow to a rapid flashing light.
Then release both buttons.
Some garage door openers
may require substitution of
Step 2 with the procedure
under “Radio Signals for Some
Gate Operators” later in this
section.
3. Press and hold the newly programmed Universal Remote
system button for five seconds
while watching the indicator
light and garage door
activation.
.If the indicator light stays on
continuously or the garage
door moves when the
button is pressed, then
programming is complete.
There is no need to
complete Steps 4–6. .
If the indicator light does
not come on or the garage
door does not move, a
second button press may
be required. For a second
time, press and hold the
newly programmed button
for five seconds. If the light
stays on or the garage door
moves, programming is
complete.
. If the indicator light blinks
rapidly for two seconds,
then changes to a solid light
and the garage door does
not move, continue with
programming Steps 4–6.
Page 164 of 500
Chevrolet Silverado Owner Manual (GMNA-Localizing-U.S./Canada/Mexico-
13337620) - 2020 - CRC - 4/2/19
Instruments and Controls 163
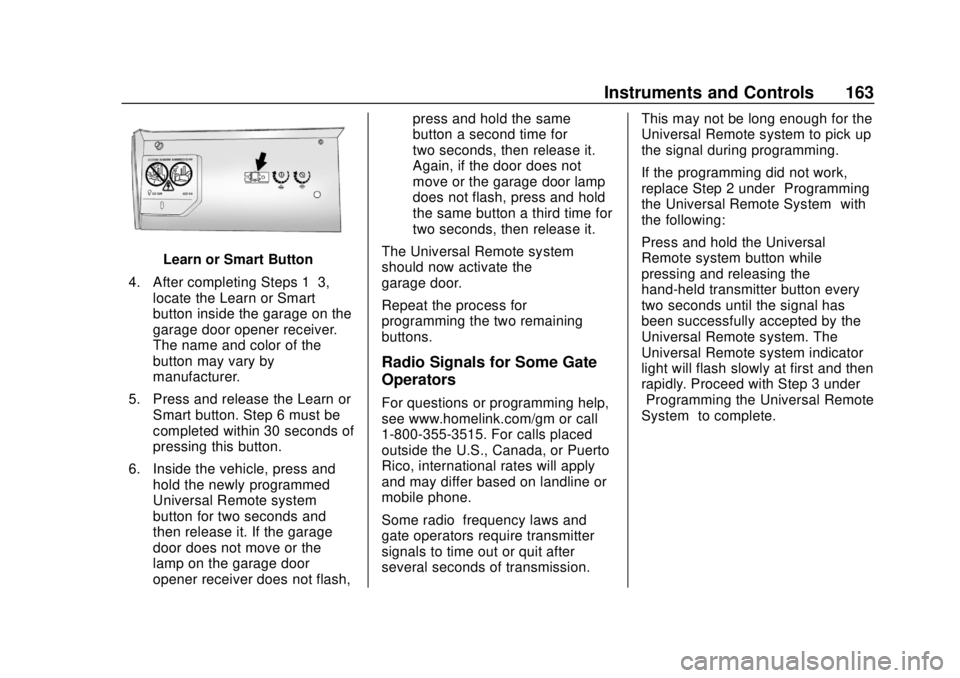
Learn or Smart Button
4. After completing Steps 1–3, locate the Learn or Smart
button inside the garage on the
garage door opener receiver.
The name and color of the
button may vary by
manufacturer.
5. Press and release the Learn or Smart button. Step 6 must be
completed within 30 seconds of
pressing this button.
6. Inside the vehicle, press and hold the newly programmed
Universal Remote system
button for two seconds and
then release it. If the garage
door does not move or the
lamp on the garage door
opener receiver does not flash, press and hold the same
button a second time for
two seconds, then release it.
Again, if the door does not
move or the garage door lamp
does not flash, press and hold
the same button a third time for
two seconds, then release it.
The Universal Remote system
should now activate the
garage door.
Repeat the process for
programming the two remaining
buttons.
Radio Signals for Some Gate
Operators
For questions or programming help,
see www.homelink.com/gm or call
1-800-355-3515. For calls placed
outside the U.S., Canada, or Puerto
Rico, international rates will apply
and may differ based on landline or
mobile phone.
Some radio–frequency laws and
gate operators require transmitter
signals to time out or quit after
several seconds of transmission. This may not be long enough for the
Universal Remote system to pick up
the signal during programming.
If the programming did not work,
replace Step 2 under
“Programming
the Universal Remote System” with
the following:
Press and hold the Universal
Remote system button while
pressing and releasing the
hand-held transmitter button every
two seconds until the signal has
been successfully accepted by the
Universal Remote system. The
Universal Remote system indicator
light will flash slowly at first and then
rapidly. Proceed with Step 3 under
“Programming the Universal Remote
System” to complete.
Page 169 of 500
Chevrolet Silverado Owner Manual (GMNA-Localizing-U.S./Canada/Mexico-
13337620) - 2020 - CRC - 4/2/19
168 Lighting
When the high-beam headlamps are
on, this indicator light on the
instrument cluster will also be on.
Flash-to-Pass
This feature lets you use the
high-beam headlamps to signal a
driver in front of you that you want
to pass. It works even if the
headlamps are in the automatic
position.
To use it, pull the turn signal lever
toward you, then release it.
If the headlamps are in the
automatic position or on low beam,
the high-beam headlamps will turn
on. Depending on the type of
headlamp, they will either turn off
after a short duration or stay on as
long as you hold the lever toward
you. The high-beam indicator on theinstrument cluster will come on.
Release the lever to return to
normal operation.
Daytime Running
Lamps (DRL)
DRL can make it easier for others to
see the front of the vehicle during
the day. Fully functional DRL are
required on all vehicles first sold in
Canada.
The DRL system comes on when
the following conditions are met:
.
The ignition is on.
. The exterior lamp control is
in AUTO.
. The transmission is not in
P (Park).
. The light sensor determines it is
daytime.
When the DRL system is on, only
the DRL are on. The taillamps,
sidemarker lamps, instrument panel
lights, and other lamps will not
be on. When it begins to get dark, the
automatic headlamp system
switches from DRL to the
headlamps.
To turn off the DRL, turn the exterior
lamp control to
Oand then release.
For vehicles first sold in Canada, off
will only work when the vehicle is
parked.
Automatic Headlamp
System
When the exterior lamp control is
set to AUTO and it is dark enough
outside, the headlamps come on
automatically.
Page 186 of 500
Chevrolet Silverado Owner Manual (GMNA-Localizing-U.S./Canada/Mexico-
13337620) - 2020 - CRC - 4/11/19
Driving and Operating 185
Driving and
Operating
Driving Information
Driving for Better FuelEconomy . . . . . . . . . . . . . . . . . . . . 186
Distracted Driving . . . . . . . . . . . . 187
Defensive Driving . . . . . . . . . . . . . 187
Drunk Driving . . . . . . . . . . . . . . . . . 188
Control of a Vehicle . . . . . . . . . . . 188
Braking . . . . . . . . . . . . . . . . . . . . . . . 188
Steering . . . . . . . . . . . . . . . . . . . . . . 188
Off-Road Recovery . . . . . . . . . . . 190
Loss of Control . . . . . . . . . . . . . . . 190
Off-Road Driving . . . . . . . . . . . . . 191
Driving on Wet Roads . . . . . . . . 196
Hill and Mountain Roads . . . . . 197
Winter Driving . . . . . . . . . . . . . . . . 197
If the Vehicle Is Stuck . . . . . . . . 199
Vehicle Load Limits . . . . . . . . . . . 200
Truck-Camper Loading Information . . . . . . . . . . . . . . . . . . 206
Starting and Operating
New Vehicle Break-In . . . . . . . . . 208
Ignition Positions (KeylessAccess) . . . . . . . . . . . . . . . . . . . . . 208 Ignition Positions (Key
Access) . . . . . . . . . . . . . . . . . . . . . 210
Starting the Engine . . . . . . . . . . . 212
Stop/Start System . . . . . . . . . . . . 213
Engine Heater . . . . . . . . . . . . . . . . 215
Retained Accessory Power (RAP) . . . . . . . . . . . . . . . . 216
Shifting Into Park . . . . . . . . . . . . . 217
Shifting out of Park . . . . . . . . . . . 218
Parking over Things That Burn . . . . . . . . . . . . . . . . . . . 219
Active Fuel Management . . . . . 219
Extended Parking . . . . . . . . . . . . 219
Engine Exhaust
Engine Exhaust . . . . . . . . . . . . . . 220
Running the Vehicle While Parked . . . . . . . . . . . . . . . . . . . . . . 220
Automatic Transmission
Automatic Transmission . . . . . . 221
Manual Mode . . . . . . . . . . . . . . . . . 224
Tow/Haul Mode . . . . . . . . . . . . . . . 226
Drive Systems
Four-Wheel Drive . . . . . . . . . . . . . 227
Brakes
Electric Brake Boost . . . . . . . . . . 232
Antilock BrakeSystem (ABS) . . . . . . . . . . . . . . . 232
Electric Parking Brake . . . . . . . . 233 Brake Assist . . . . . . . . . . . . . . . . . . 234
Hill Start Assist (HSA) . . . . . . . . 235
Ride Control Systems
Traction Control/Electronic
Stability Control . . . . . . . . . . . . . 235
Hill Descent Control (HDC) . . . 237
Driver Mode Control . . . . . . . . . . 238
Limited-Slip Differential . . . . . . . 243
Locking Rear Axle . . . . . . . . . . . . 243
Cruise Control
Cruise Control . . . . . . . . . . . . . . . . 243
Adaptive Cruise Control (1500 Series) . . . . . . . . . . . . . . . . . . . . . . 246
Driver Assistance Systems
Driver Assistance Systems . . . 256
Assistance Systems forParking or Backing . . . . . . . . . . 257
Assistance Systems for Driving . . . . . . . . . . . . . . . . . . . . . . 268
Forward Collision Alert (FCA) System . . . . . . . . . . . . . . . . . . . . . . 268
Automatic Emergency Braking (AEB) . . . . . . . . . . . . . . . 271
Front Pedestrian Braking (FPB) System (1500
Series) . . . . . . . . . . . . . . . . . . . . . . 272
Side Blind Zone Alert (SBZA) . . . . . . . . . . . . . . . . 274
Page 194 of 500
Chevrolet Silverado Owner Manual (GMNA-Localizing-U.S./Canada/Mexico-
13337620) - 2020 - CRC - 4/11/19
Driving and Operating 193
Warning (Continued)
cause a rollover. You could be
injured or killed. Do not drive on
steep hills.
Before driving on a hill, assess the
steepness, traction, and
obstructions. If the terrain ahead
cannot be seen, get out of the
vehicle and walk the hill before
driving further.
When driving on hills:
. Use a low gear and keep a firm
grip on the steering wheel.
. Maintain a slow speed.
. When possible, drive straight up
or down the hill.
. Slow down when approaching
the top of the hill.
. Use headlamps even during the
day to make the vehicle more
visible.
{Warning
Driving to the top of a hill at high
speed can cause a crash. There
could be a drop-off, embankment,
cliff, or even another vehicle. You
could be seriously injured or
killed. As you near the top of a
hill, slow down and stay alert.
. Never go downhill forward or
backward with either the
transmission or transfer case in
N (Neutral). The brakes could
overheat and you could lose
control.
{Warning
If the vehicle has the two-speed
automatic transfer case, shifting
the transfer case to N (Neutral)
can cause your vehicle to roll
even if the transmission is in
P (Park). This is because the
N (Neutral) position on the
(Continued)
Warning (Continued)
transfer case overrides the
transmission. You or someone
else could be injured. If leaving
the vehicle, set the parking brake
and shift the transmission to
P (Park). Shift the transfer case to
any position but N (Neutral).
. When driving down a hill, keep
the vehicle headed straight
down. Use a low gear because
the engine will work with the
brakes to slow the vehicle and
help keep the vehicle under
control.
{Warning
Heavy braking when going down
a hill can cause your brakes to
overheat and fade. This could
cause loss of control and you or
others could be injured or killed.
Apply the brakes lightly when
(Continued)