maintenance CHEVROLET SILVERADO EV 2024 Owner's Manual
[x] Cancel search | Manufacturer: CHEVROLET, Model Year: 2024, Model line: SILVERADO EV, Model: CHEVROLET SILVERADO EV 2024Pages: 429, PDF Size: 8.98 MB
Page 322 of 429
Chevrolet Silverado EV Owner Manual (GMNA-Localizing-U.S./Canada-
16702912) - 2024 - CRC - 1/17/23
Driving and Operating 321
Conversions and Add-Ons
Add-On Electrical Equipment
{Warning
The Data Link Connector (DLC) is used for
vehicle service and Emission Inspection/
Maintenance testing. SeeService Vehicle
Soon Light (Propulsion System Failure)
0 115. A device connected to the DLC —
such as an aftermarket fleet or
driver-behavior tracking device —may
interfere with vehicle systems. This could
affect vehicle operation and cause a
crash. Such devices may also access
information stored in the vehicle’s
systems.
Caution
Some electrical equipment can damage
the vehicle or cause components to not
work and would not be covered by the
vehicle warranty. Always check with your
dealer before adding electrical equipment. Add-on equipment can drain the vehicle's
12-volt battery, even if the vehicle is not
operating.
When adding electrical equipment, it should
only be connected using the accessory
power outlets. The maximum power that
can be supplied by one accessory power
outlet or spread across all three is 200 watts
or 15 amps. Exceeding 200 watts or 15 amps
may cause erratic vehicle operation.
The vehicle has an airbag system. Before
attempting to add anything electrical to the
vehicle, see
Servicing the Airbag-Equipped
Vehicle 068 and
Adding Equipment to the Airbag-Equipped
Vehicle 068.
Auxiliary Switches
On-screen auxiliary switches, if equipped, are
quick-touch icons that appear within the
infotainment system, giving you easy access
to some of the features of certain
aftermarket accessories installed on the
vehicle (off-road lighting, light bars, etc.). To access the on-screen auxiliary switches,
select Controls > Aux Switches. Six on-screen
auxiliary switches are available.
Use of the on-screen switches requires
installation of an auxiliary switch interface
module, which is mounted under the hood.
See your dealer for purchase and installation
of the necessary components. When an
aftermarket accessory is installed onto the
vehicle, it should be hard-wired to the
auxiliary switch interface module to the
numbered connection that corresponds with
the numbered on-screen auxiliary switch.
See
Accessories and Modifications 0324.
If you touch an on-screen auxiliary switch
but the auxiliary switch interface module is
not installed or has no accessory wired at
that connection, a message “No accessory
connected to this switch” displays.
Customizing the On-Screen Auxiliary
Switches
After a purchased accessory is installed,
create a text label for the corresponding
on-screen auxiliary switch and choose an
icon to represent the installed accessory.
1. While the vehicle is in P (Park), touch the Controls icon on the infotainment
home page.
Page 326 of 429
Chevrolet Silverado EV Owner Manual (GMNA-Localizing-U.S./Canada-
16702912) - 2024 - CRC - 1/13/23
Vehicle Care 325
Warning (Continued)
High voltage components are identified
by labels. Do not remove, open, take
apart, or modify these components. High
voltage cable or wiring has orange
covering. Do not probe, tamper with, cut,
or modify high voltage cable or wiring.
{Warning
Unexpected wheel motion and/or
direction when one or more wheels are
off the ground for service work may
result in injury. The vehicle may:
.Allow the wheels to rotate
unexpectedly in either direction
regardless of mode selection.
.Allow the wheels to rotate in reaction
to attempts to rotate the tire(s)
manually.
.Resist attempts to rotate the wheels
manually.(Continued)
Warning (Continued)
Before lifting the vehicle to do your own
service work, turn the vehicle off or place
the vehicle in the Service Mode. To place
the vehicle in Service Mode, see “Service
Mode” underPower Modes 0197.
{Warning
It can be dangerous to work on your
vehicle if you do not have the proper
knowledge, service manual, tools,
or parts. Always follow owner’s manual
procedures and consult the service
manual for your vehicle before doing any
service work.
If doing some of your own service work, use
the proper service manual. It tells you much
more about how to service the vehicle than
this manual can. To order the proper service
manual, see Publication Ordering
Information 0404. This vehicle has an airbag system. Before
attempting to do your own service work,
see
Servicing the Airbag-Equipped Vehicle
0 68.
Keep a record with all parts receipts and list
the mileage and the date of any service
work performed. See Maintenance Records
0 393.
Underhood Compartment
Overview
There are several items you should check
periodically located under the hood.
For instructions on opening the hood, see
Hood 019.
{Warning
You or others could be injured if caught
in the path of the power hood. Make
sure there is no one in the way of the
hood as it is opening and closing.
Page 328 of 429
Chevrolet Silverado EV Owner Manual (GMNA-Localizing-U.S./Canada-
16702912) - 2024 - CRC - 1/13/23
Vehicle Care 327
1. Battery (Under Cover). SeeBattery -
North America 0330.
2. Underhood Compartment Fuse Block (Under Cover). Underhood Compartment
Fuse Block 0337.
3. Coolant Surge Tank and Pressure Cap (Under Cover). See Cooling System0327.
4. Brake Fluid Reservoir (Under Cover). See Brake Fluid 0329.
5. Windshield Washer Fluid Reservoir. See Washer Fluid 0328.
Cooling System
It is not necessary to regularly check coolant
unless a leak is suspected or an unusual
noise is heard. A coolant loss could indicate
a problem. Have it inspected and repaired
by your dealer.
The following explains the cooling system
and how to check coolant level.
During vehicle operation and also during
charging, the high voltage battery cells in
the vehicle are kept within a normal
operating temperature range. If the
temperature rises above this temperature, the battery cooling system turns on the air
conditioning compressor and cools the
coolant until the correct temperature is
reached. If the temperature falls below this
temperature, a high voltage heater, located
outside the battery on a cradle, heats the
coolant until the correct temperature is
reached.
Checking Coolant
The coolant needs to be replaced at the
appropriate interval. See
Maintenance
Schedule 0389.
The coolant reservoir is in the underhood
compartment. See Underhood Compartment
Overview 0325.
To access the coolant reservoir under the
hood, the right side access cover needs to
be removed. 1. Park on a level surface and turn the vehicle off.
2. Open the hood. See Hood019.
3. Turn the three bolts three quarter turn
and remove the right side access cover.
Page 330 of 429
Chevrolet Silverado EV Owner Manual (GMNA-Localizing-U.S./Canada-
16702912) - 2024 - CRC - 1/13/23
Vehicle Care 329
Caution
Continuing to drive with worn-out brake
linings could result in costly brake
repairs.
Some driving conditions or climates can
cause a brake squeal when the brakes are
first applied, clearing up following several
applications. This does not mean something
is wrong with the brakes.
Properly torqued wheel nuts are necessary
to help prevent brake pulsation. When tires
are rotated, inspect brake linings for wear
and evenly tighten wheel nuts in the proper
sequence to torque specifications. See
Capacities and Specifications 0395.
Brake pads should be replaced as complete
axle sets.
Brake Pedal Travel
See your dealer if the brake pedal does not
return to normal height, or if there is a
rapid increase in pedal travel. This could be
a sign that brake service may be required.
Replacing Brake System Parts
Always replace brake system parts with
new, approved replacement parts. If this is
not done, the brakes may not work
properly. The braking performance can
change in many ways if the wrong brake
parts are installed or if parts are improperly
installed.
Brake Fluid
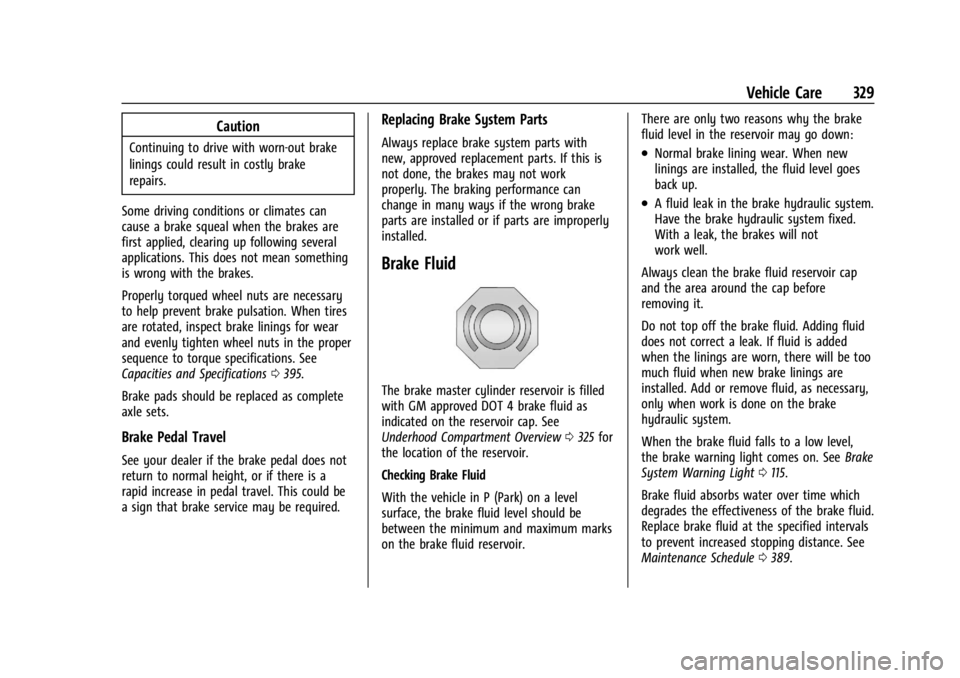
The brake master cylinder reservoir is filled
with GM approved DOT 4 brake fluid as
indicated on the reservoir cap. See
Underhood Compartment Overview 0325 for
the location of the reservoir.
Checking Brake Fluid
With the vehicle in P (Park) on a level
surface, the brake fluid level should be
between the minimum and maximum marks
on the brake fluid reservoir. There are only two reasons why the brake
fluid level in the reservoir may go down:
.Normal brake lining wear. When new
linings are installed, the fluid level goes
back up.
.A fluid leak in the brake hydraulic system.
Have the brake hydraulic system fixed.
With a leak, the brakes will not
work well.
Always clean the brake fluid reservoir cap
and the area around the cap before
removing it.
Do not top off the brake fluid. Adding fluid
does not correct a leak. If fluid is added
when the linings are worn, there will be too
much fluid when new brake linings are
installed. Add or remove fluid, as necessary,
only when work is done on the brake
hydraulic system.
When the brake fluid falls to a low level,
the brake warning light comes on. See Brake
System Warning Light 0115.
Brake fluid absorbs water over time which
degrades the effectiveness of the brake fluid.
Replace brake fluid at the specified intervals
to prevent increased stopping distance. See
Maintenance Schedule 0389.
Page 331 of 429
Chevrolet Silverado EV Owner Manual (GMNA-Localizing-U.S./Canada-
16702912) - 2024 - CRC - 1/13/23
330 Vehicle Care
What to Add
Use only GM approved DOT 4 brake fluid
from a clean, sealed container. See
Recommended Fluids and Lubricants0392.
{Warning
The wrong or contaminated brake fluid
could result in damage to the brake
system. This could result in the loss of
braking leading to a possible injury.
Always use the proper GM approved
brake fluid.
Caution
If brake fluid is spilled on the vehicle's
painted surfaces, the paint finish can be
damaged. Immediately wash off any
painted surface.
Battery - North America
This vehicle has a high voltage battery and
a standard 12-volt battery.
See your dealer if either the 12-volt or high
voltage battery needs service.
12-Volt Battery
The original equipment battery is
maintenance free. Do not remove the cap
and do not add fluid.
Do not disconnect the 12-volt battery during
storage.
Refer to the replacement number shown on
the original battery label when a new 12-volt
battery is needed. The vehicle has an
Absorbent Glass Mat (AGM) 12-volt battery.
Installation of a standard 12-volt battery will
result in reduced 12-volt battery life.
Some 12-volt chargers have an AGM battery
setting. This setting limits the charge
voltage to 14.8 volts and helps extend the
battery life. If available, use the AGM
setting when charging the battery.
{Warning
WARNING: Battery posts, terminals and
related accessories can expose you to
chemicals including lead and lead
compounds, which are known to the
State of California to cause cancer and
birth defects or other reproductive harm.
(Continued)
Warning (Continued)
Wash hands after handling. For more
information go to
www.P65Warnings.ca.gov.
See California Proposition 65 Warning 01.
High Voltage Battery
Only a trained service technician should
inspect, test, or replace the high voltage
battery. The dealer has information on how
to recycle the high voltage battery. There
is also information available at
https://www.recyclemybattery.com.
{Warning
Damage to the high voltage battery or
high voltage system can create a risk of
electric shock, overheating, or fire.
If the vehicle is damaged from a
moderate to severe crash, flood, fire,
or other event, the vehicle should be
inspected as soon as possible. Until the
vehicle has been inspected, store it
outside at least 15 m (50 ft) from any
(Continued)
Page 333 of 429
Chevrolet Silverado EV Owner Manual (GMNA-Localizing-U.S./Canada-
16702912) - 2024 - CRC - 1/13/23
332 Vehicle Care
before storing. The vehicle will stop
maintenance of the 12-volt battery if the
high voltage battery state of charge gets
too low.
When storing the vehicle on a long-term
basis:
‐Keep the high voltage battery state of
charge at 30%.
‐ Attach an AGM/VRLA compatible battery
tender or trickle charger to the 12-volt
battery.
‐ Keep the remote key more than 3 m
(10 ft) away from the vehicle.
12-volt Battery
{Warning
Batteries have acid that can burn you and
gas that can explode. You can be badly
hurt if you are not careful. Always wear
eye protection. See Jump Starting - North
America 0375 for tips on working around
a battery without getting hurt.
Do not disconnect the 12-volt battery during
storage. A trickle charger may be attached to the
12-volt battery terminals or trickle charge
from the underhood remote positive (+) and
negative (–) terminals. See
Jump Starting -
North America 0375 for location of these
terminals.
Caution
The vehicle is equipped with an AGM/
VRLA 12-volt battery, which can be
damaged by using the incorrect type of
trickle charger. An AGM/VRLA-compatible
charger must be used, with the
appropriate setting selected. Follow the
trickle charger manufacturer instructions.
With a trickle charger connected to the
12-volt battery, the vehicle will still monitor
the 12-volt battery daily, but it will not use
energy from the high voltage battery for
maintenance.
High Voltage Battery
After extended storage, it is possible that
the vehicle may not operate. If this happens,
the high voltage battery may need to be
plugged in and charged.
Noise Control System (RST Only)
NOISE EMISSIONS WARRANTY
General Motors LLC, warrants to the first
person who purchases this vehicle for
purposes other than resale and to each
subsequent purchaser that this vehicle as
manufactured by General Motors LLC, was
designed, built and equipped to conform at
the time it left General Motors LLC’s control
with all applicable U.S. EPA Noise Control
Regulations. This warranty covers this
vehicle as designed, built and equipped by
General Motors LLC, and is not limited to
any particular part, component or system of
the vehicle manufactured by General Motors
LLC. Defects in design, assembly or in any
part, component or system of the vehicle as
manufactured by General Motors LLC, which,
at the time it left General Motors LLC’s
control, caused noise emissions to exceed
Federal standards, are covered by this
warranty for the life of the vehicle.
Page 334 of 429
Chevrolet Silverado EV Owner Manual (GMNA-Localizing-U.S./Canada-
16702912) - 2024 - CRC - 1/13/23
Vehicle Care 333
TAMPERING WITH NOISE CONTROL
SYSTEM PROHIBITED
Federal law prohibits the following acts or
the causing thereof:1. The removal or rendering inoperative by any person, other than for purposes of
maintenance, repair, or replacement, of
any device or element of design
incorporated into any new vehicle for
the purpose of noise control prior to its
sale or delivery to the ultimate purchaser
or while it is in use; or
2. the use of the vehicle after such device or element of design has been removed
or rendered inoperative by any person.
Among those acts presumed to constitute
tampering are the acts listed below.
Insulation:
Removal of the noise shields or any
undercab insulation.
Fan and Drive:
Removal of fan clutch or rendering clutch
inoperative.
Removal of fan shroud. External Sound System:
Modification of the vehicle’s external sound
system.
Wiper Blade Replacement
Windshield wiper blades should be replaced
periodically. See the
Maintenance Schedule
0 389.
Replacement blades come in different types
and are removed in different ways. For
proper type and length, see Maintenance
Replacement Parts 0392.
Caution
Allowing the wiper arm to touch the
windshield when no wiper blade is
installed could damage the windshield.
Any damage that occurs would not be
covered by the vehicle warranty. Do not
allow the wiper arm to touch the
windshield.
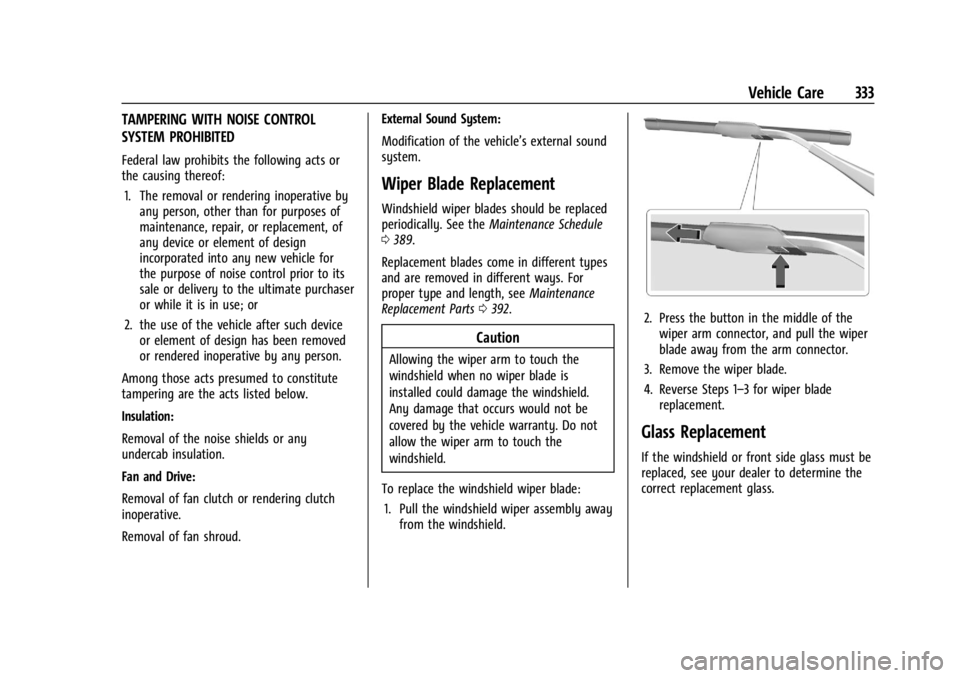
To replace the windshield wiper blade: 1. Pull the windshield wiper assembly away from the windshield.
2. Press the button in the middle of thewiper arm connector, and pull the wiper
blade away from the arm connector.
3. Remove the wiper blade.
4. Reverse Steps 1–3 for wiper blade replacement.
Glass Replacement
If the windshield or front side glass must be
replaced, see your dealer to determine the
correct replacement glass.
Page 335 of 429
Chevrolet Silverado EV Owner Manual (GMNA-Localizing-U.S./Canada-
16702912) - 2024 - CRC - 1/13/23
334 Vehicle Care
Windshield Replacement
Driver Assistance Systems
If the windshield needs to be replaced and
the vehicle is equipped with a front camera
sensor for the Driver Assistance Systems, a
GM replacement windshield is
recommended. The replacement windshield
must be installed according to GM
specifications for proper alignment. If it is
not, these systems may not work properly,
they may display messages, or they may
not work at all. See your dealer for proper
windshield replacement.
Gas Strut(s)
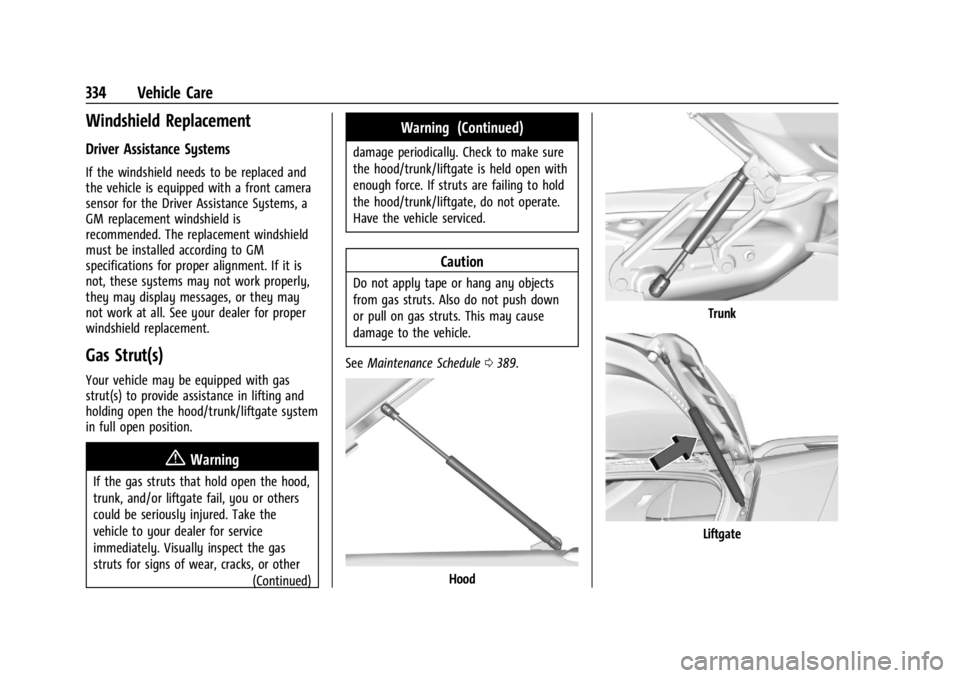
Your vehicle may be equipped with gas
strut(s) to provide assistance in lifting and
holding open the hood/trunk/liftgate system
in full open position.
{Warning
If the gas struts that hold open the hood,
trunk, and/or liftgate fail, you or others
could be seriously injured. Take the
vehicle to your dealer for service
immediately. Visually inspect the gas
struts for signs of wear, cracks, or other(Continued)
Warning (Continued)
damage periodically. Check to make sure
the hood/trunk/liftgate is held open with
enough force. If struts are failing to hold
the hood/trunk/liftgate, do not operate.
Have the vehicle serviced.
Caution
Do not apply tape or hang any objects
from gas struts. Also do not push down
or pull on gas struts. This may cause
damage to the vehicle.
See Maintenance Schedule 0389.
Hood
Trunk
Liftgate
Page 352 of 429
Chevrolet Silverado EV Owner Manual (GMNA-Localizing-U.S./Canada-
16702912) - 2024 - CRC - 1/13/23
Vehicle Care 351
Warning (Continued)
are in excellent condition, and are set to
the correct cold tire inflation pressure for
the vehicle load.
Tire Pressure Monitor System
The Tire Pressure Monitor System (TPMS)
uses radio and sensor technology to check
tire pressure levels. The TPMS sensors
monitor the air pressure in your tires and
transmit tire pressure readings to a receiver
located in the vehicle.
Each tire, including the spare (if provided),
should be checked monthly when cold and
inflated to the inflation pressure
recommended by the vehicle manufacturer
on the vehicle placard or tire inflation
pressure label. (If your vehicle has tires of a
different size than the size indicated on the
vehicle placard or tire inflation pressure
label, you should determine the proper tire
inflation pressure for those tires.)
As an added safety feature, your vehicle has
been equipped with a tire pressure
monitoring system (TPMS) that illuminates a
low tire pressure telltale when one or more
of your tires is significantly under-inflated.Accordingly, when the low tire pressure
telltale illuminates, you should stop and
check your tires as soon as possible, and
inflate them to the proper pressure. Driving
on a significantly under-inflated tire causes
the tire to overheat and can lead to tire
failure. Under-inflation also reduces energy
efficiency and tire tread life, and may affect
the vehicle's handling and stopping ability.
Please note that the TPMS is not a
substitute for proper tire maintenance, and
it is the driver's responsibility to maintain
correct tire pressure, even if under-inflation
has not reached the level to trigger
illumination of the TPMS low tire pressure
telltale.
Your vehicle has also been equipped with a
TPMS malfunction indicator to indicate when
the system is not operating properly. The
TPMS malfunction indicator is combined
with the low tire pressure telltale. When the
system detects a malfunction, the telltale
will flash for approximately one minute and
then remain continuously illuminated. This
sequence will continue upon subsequent
vehicle start-ups as long as the malfunction
exists.
When the malfunction indicator is
illuminated, the system may not be able to
detect or signal low tire pressure as
intended. TPMS malfunctions may occur for
a variety of reasons, including the
installation of replacement or alternate tires
or wheels on the vehicle that prevent the
TPMS from functioning properly. Always
check the TPMS malfunction telltale after
replacing one or more tires or wheels on
your vehicle to ensure that the replacement
or alternate tires and wheels allow the
TPMS to continue to function properly.
See
Tire Pressure Monitor Operation 0351.
See Radio Frequency Statement 0404.
Tire Pressure Monitor Operation
This vehicle may have a Tire Pressure
Monitor System (TPMS). The TPMS is
designed to warn the driver when a low tire
pressure condition exists. TPMS sensors are
mounted onto each tire and wheel
assembly, excluding the spare tire and
wheel assembly. The TPMS sensors monitor
the air pressure in the tires and transmit the
tire pressure readings to a receiver located
in the vehicle.
Page 353 of 429
Chevrolet Silverado EV Owner Manual (GMNA-Localizing-U.S./Canada-
16702912) - 2024 - CRC - 1/13/23
352 Vehicle Care
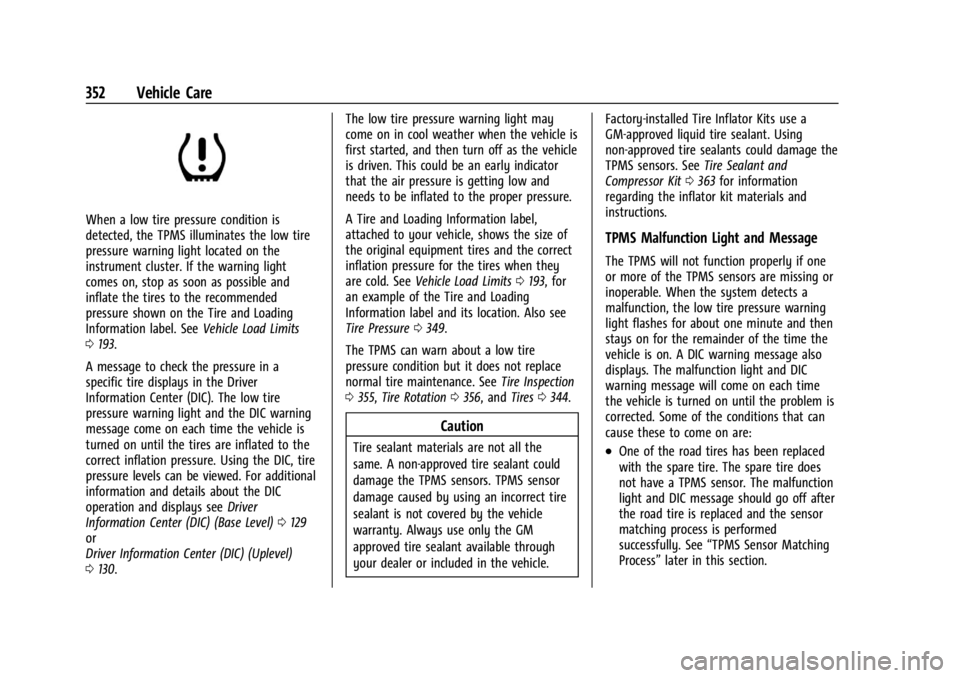
When a low tire pressure condition is
detected, the TPMS illuminates the low tire
pressure warning light located on the
instrument cluster. If the warning light
comes on, stop as soon as possible and
inflate the tires to the recommended
pressure shown on the Tire and Loading
Information label. SeeVehicle Load Limits
0 193.
A message to check the pressure in a
specific tire displays in the Driver
Information Center (DIC). The low tire
pressure warning light and the DIC warning
message come on each time the vehicle is
turned on until the tires are inflated to the
correct inflation pressure. Using the DIC, tire
pressure levels can be viewed. For additional
information and details about the DIC
operation and displays see Driver
Information Center (DIC) (Base Level) 0129
or
Driver Information Center (DIC) (Uplevel)
0 130. The low tire pressure warning light may
come on in cool weather when the vehicle is
first started, and then turn off as the vehicle
is driven. This could be an early indicator
that the air pressure is getting low and
needs to be inflated to the proper pressure.
A Tire and Loading Information label,
attached to your vehicle, shows the size of
the original equipment tires and the correct
inflation pressure for the tires when they
are cold. See
Vehicle Load Limits 0193, for
an example of the Tire and Loading
Information label and its location. Also see
Tire Pressure 0349.
The TPMS can warn about a low tire
pressure condition but it does not replace
normal tire maintenance. See Tire Inspection
0 355, Tire Rotation 0356, and Tires0344.
Caution
Tire sealant materials are not all the
same. A non-approved tire sealant could
damage the TPMS sensors. TPMS sensor
damage caused by using an incorrect tire
sealant is not covered by the vehicle
warranty. Always use only the GM
approved tire sealant available through
your dealer or included in the vehicle. Factory-installed Tire Inflator Kits use a
GM-approved liquid tire sealant. Using
non-approved tire sealants could damage the
TPMS sensors. See
Tire Sealant and
Compressor Kit 0363 for information
regarding the inflator kit materials and
instructions.
TPMS Malfunction Light and Message
The TPMS will not function properly if one
or more of the TPMS sensors are missing or
inoperable. When the system detects a
malfunction, the low tire pressure warning
light flashes for about one minute and then
stays on for the remainder of the time the
vehicle is on. A DIC warning message also
displays. The malfunction light and DIC
warning message will come on each time
the vehicle is turned on until the problem is
corrected. Some of the conditions that can
cause these to come on are:
.One of the road tires has been replaced
with the spare tire. The spare tire does
not have a TPMS sensor. The malfunction
light and DIC message should go off after
the road tire is replaced and the sensor
matching process is performed
successfully. See “TPMS Sensor Matching
Process” later in this section.