seat adjustment CHEVROLET SPARK 2014 3.G Owners Manual
[x] Cancel search | Manufacturer: CHEVROLET, Model Year: 2014, Model line: SPARK, Model: CHEVROLET SPARK 2014 3.GPages: 362, PDF Size: 4.94 MB
Page 7 of 362
Black plate (1,1)Chevrolet Spark Owner Manual (GMNA-Localizing-U.S./Canada-5853490) -
2014 - crc - 9/3/13
In Brief 1-1
In Brief
Instrument Panel
Instrument Panel . . . . . . . . . . . . . . 1-2
Initial Drive Information
Initial Drive Information . . . . . . . . 1-3
Remote Keyless Entry (RKE)System . . . . . . . . . . . . . . . . . . . . . . 1-3
Door Locks . . . . . . . . . . . . . . . . . . . 1-4
Liftgate . . . . . . . . . . . . . . . . . . . . . . . . 1-5
Windows . . . . . . . . . . . . . . . . . . . . . . 1-6
Seat Adjustment . . . . . . . . . . . . . . 1-6
Second Row Seats . . . . . . . . . . . 1-7
Head Restraint Adjustment . . . . 1-7
Safety Belts . . . . . . . . . . . . . . . . . . . 1-7
Passenger Sensing System . . . 1-8
Mirror Adjustment . . . . . . . . . . . . . 1-8
Steering Wheel Adjustment . . . 1-9
Interior Lighting . . . . . . . . . . . . . . . 1-9
Exterior Lighting . . . . . . . . . . . . . 1-10
Windshield Wiper/Washer . . . . 1-10
Climate Controls . . . . . . . . . . . . . 1-11
Vehicle Features
Radio(s) . . . . . . . . . . . . . . . . . . . . . 1-11
Satellite Radio . . . . . . . . . . . . . . . 1-11
Portable Audio Devices . . . . . . 1-12 Bluetooth
®. . . . . . . . . . . . . . . . . . . 1-12
Steering Wheel Controls . . . . . 1-12
Cruise Control . . . . . . . . . . . . . . . 1-13
Driver Information Center (DIC) . . . . . . . . . . . . . . . 1-13
Power Outlets . . . . . . . . . . . . . . . 1-14
Performance and Maintenance
Traction Control/Electronic Stability Control . . . . . . . . . . . . 1-14
Tire Pressure Monitor . . . . . . . . 1-15
Engine Oil Life System . . . . . . 1-15
Driving for Better Fuel Economy . . . . . . . . . . . . . . . . . . . 1-15
Roadside Assistance Program . . . . . . . . . . . . . . . . . . . . 1-16
OnStar
®. . . . . . . . . . . . . . . . . . . . . 1-16
Page 9 of 362
Black plate (3,1)Chevrolet Spark Owner Manual (GMNA-Localizing-U.S./Canada-5853490) -
2014 - crc - 9/3/13
In Brief 1-3
1.Air Vents on page 8-3.
2. Exterior Lamp Controls on
page 6-1.
3. Horn on page 5-2.
4. Instrument Cluster on page 5-8.
5. Windshield Wiper/Washer on
page 5-3.
6. Infotainment on page 7-1.
7. Information Display.
8. Hazard Warning Flashers on
page 6-3.
9. Instrument Panel Illumination
Control on page 6-5.
Power Mirrors on page 2-12 (If
Equipped).
10. Hood Release. See Hood on
page 10-4.
11. Data Link Connector (DLC) (Out of View). See Malfunction
Indicator Lamp on page 5-12.
12. Instrument Panel Fuse Block
on page 10-33. 13.
Cruise Control on page 9-29 (If
Equipped).
14. Steering Wheel Adjustment on
page 5-2.
15. Steering Wheel Controls on
page 5-2 (If Equipped).
16. Heated Front Seats on
page 3-6 (If Equipped).
17. Shift Lever. See Automatic
Transmission on page 9-21 (If
Equipped) or Manual
Transmission on page 9-23 (If
Equipped).
18. USB Port (If Equipped). See Auxiliary Devices on
page 7-17.
19. Climate Control Systems on
page 8-1.
20. Traction Control/Electronic
Stability Control on page 9-27.Initial Drive
Information
This section provides a brief
overview about some of the
important features that may or may
not be on your specific vehicle.
For more detailed information, refer
to each of the features which can be
found later in this owner manual.
Remote Keyless Entry
(RKE) System
For vehicles with the RKE
transmitter, it may work up to 60 m
(195 ft) away from the vehicle.
Page 12 of 362
Black plate (6,1)Chevrolet Spark Owner Manual (GMNA-Localizing-U.S./Canada-5853490) -
2014 - crc - 9/3/13
1-6 In Brief
Windows
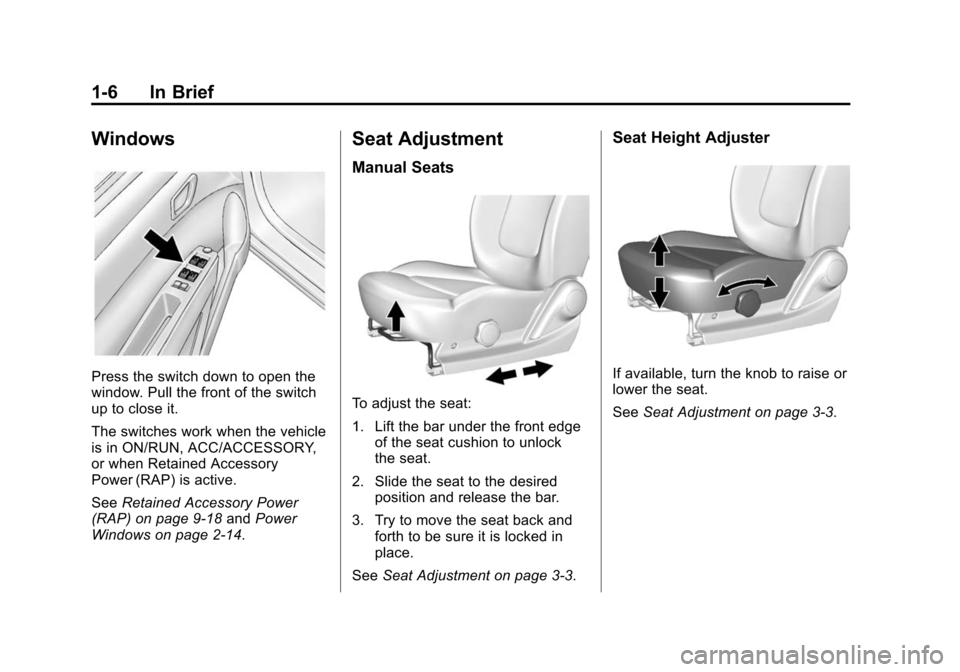
Press the switch down to open the
window. Pull the front of the switch
up to close it.
The switches work when the vehicle
is in ON/RUN, ACC/ACCESSORY,
or when Retained Accessory
Power (RAP) is active.
SeeRetained Accessory Power
(RAP) on page 9-18 andPower
Windows on page 2-14.
Seat Adjustment
Manual Seats
To adjust the seat:
1. Lift the bar under the front edge of the seat cushion to unlock
the seat.
2. Slide the seat to the desired position and release the bar.
3. Try to move the seat back and forth to be sure it is locked in
place.
See Seat Adjustment on page 3-3.
Seat Height Adjuster
If available, turn the knob to raise or
lower the seat.
SeeSeat Adjustment on page 3-3.
Page 13 of 362
Black plate (7,1)Chevrolet Spark Owner Manual (GMNA-Localizing-U.S./Canada-5853490) -
2014 - crc - 9/3/13
In Brief 1-7
Reclining Seatbacks
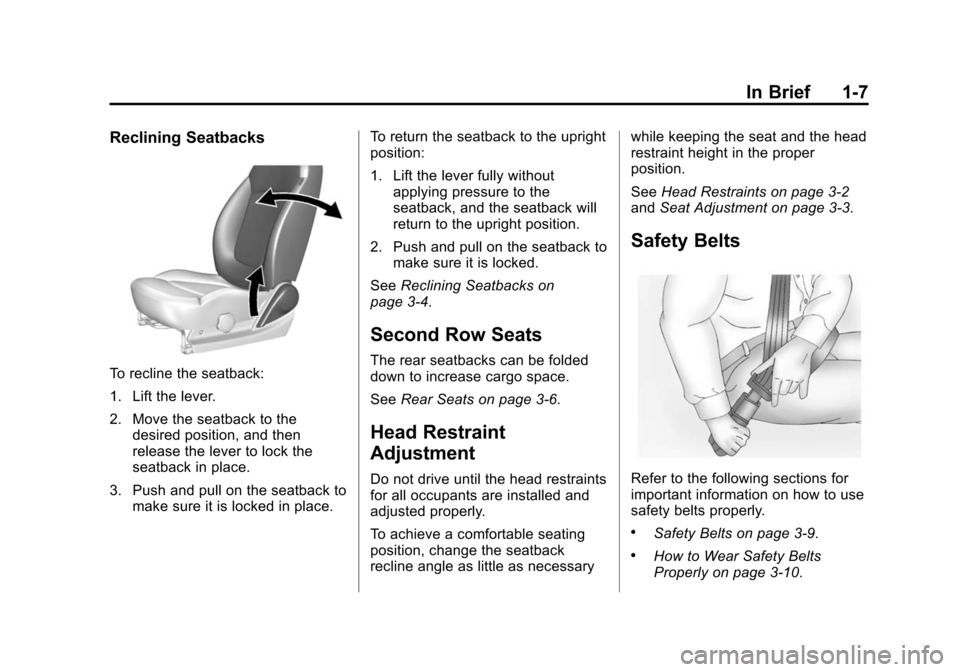
To recline the seatback:
1. Lift the lever.
2. Move the seatback to thedesired position, and then
release the lever to lock the
seatback in place.
3. Push and pull on the seatback to make sure it is locked in place. To return the seatback to the upright
position:
1. Lift the lever fully without
applying pressure to the
seatback, and the seatback will
return to the upright position.
2. Push and pull on the seatback to make sure it is locked.
See Reclining Seatbacks on
page 3-4.
Second Row Seats
The rear seatbacks can be folded
down to increase cargo space.
See Rear Seats on page 3-6.
Head Restraint
Adjustment
Do not drive until the head restraints
for all occupants are installed and
adjusted properly.
To achieve a comfortable seating
position, change the seatback
recline angle as little as necessary while keeping the seat and the head
restraint height in the proper
position.
See
Head Restraints on page 3-2
and Seat Adjustment on page 3-3.
Safety Belts
Refer to the following sections for
important information on how to use
safety belts properly.
.Safety Belts on page 3-9.
.How to Wear Safety Belts
Properly on page 3-10.
Page 39 of 362
Black plate (1,1)Chevrolet Spark Owner Manual (GMNA-Localizing-U.S./Canada-5853490) -
2014 - crc - 9/3/13
Seats and Restraints 3-1
Seats and
Restraints
Head Restraints
Head Restraints . . . . . . . . . . . . . . . 3-2
Front Seats
Seat Adjustment . . . . . . . . . . . . . . 3-3
Reclining Seatbacks . . . . . . . . . . 3-4
Front Seat Armrest . . . . . . . . . . . . 3-5
Heated Front Seats . . . . . . . . . . . 3-6
Rear Seats
Rear Seats . . . . . . . . . . . . . . . . . . . . 3-6
Safety Belts
Safety Belts . . . . . . . . . . . . . . . . . . . 3-9
How to Wear Safety BeltsProperly . . . . . . . . . . . . . . . . . . . . 3-10
Lap-Shoulder Belt . . . . . . . . . . . . 3-11
Safety Belt Use During Pregnancy . . . . . . . . . . . . . . . . . . 3-15 Safety Belt Extender . . . . . . . . . 3-16
Safety System Check . . . . . . . . 3-16
Safety Belt Care . . . . . . . . . . . . . 3-16
Replacing Safety Belt System
Parts after a Crash . . . . . . . . . 3-16
Airbag System
Airbag System . . . . . . . . . . . . . . . 3-17
Where Are the Airbags? . . . . . 3-19
When Should an Airbag
Inflate? . . . . . . . . . . . . . . . . . . . . . 3-21
What Makes an Airbag Inflate? . . . . . . . . . . . . . . . . . . . . . 3-22
How Does an Airbag Restrain? . . . . . . . . . . . . . . . . . . . 3-22
What Will You See after an Airbag Inflates? . . . . . . . . . . . . 3-23
Passenger Sensing System . . . . . . . . . . . . . . . . . . . . . 3-24
Servicing the Airbag-Equipped Vehicle . . . . . . . . . . . . . . . . . . . . . 3-28 Adding Equipment to the
Airbag-Equipped Vehicle . . . 3-29
Airbag System Check . . . . . . . . 3-30
Replacing Airbag System Parts after a Crash . . . . . . . . . 3-30
Child Restraints
Older Children . . . . . . . . . . . . . . . 3-31
Infants and Young
Children . . . . . . . . . . . . . . . . . . . . 3-33
Child Restraint Systems . . . . . 3-35
Where to Put the Restraint . . . 3-37
Lower Anchors and Tethers for Children (LATCH
System) . . . . . . . . . . . . . . . . . . . . 3-38
Replacing LATCH System Parts After a Crash . . . . . . . . . 3-45
Securing Child Restraints (Front Passenger Seat) . . . . 3-45
Securing Child Restraints (Rear Seat) . . . . . . . . . . . . . . . . . 3-48
Page 41 of 362
Black plate (3,1)Chevrolet Spark Owner Manual (GMNA-Localizing-U.S./Canada-5853490) -
2014 - crc - 9/3/13
Seats and Restraints 3-3
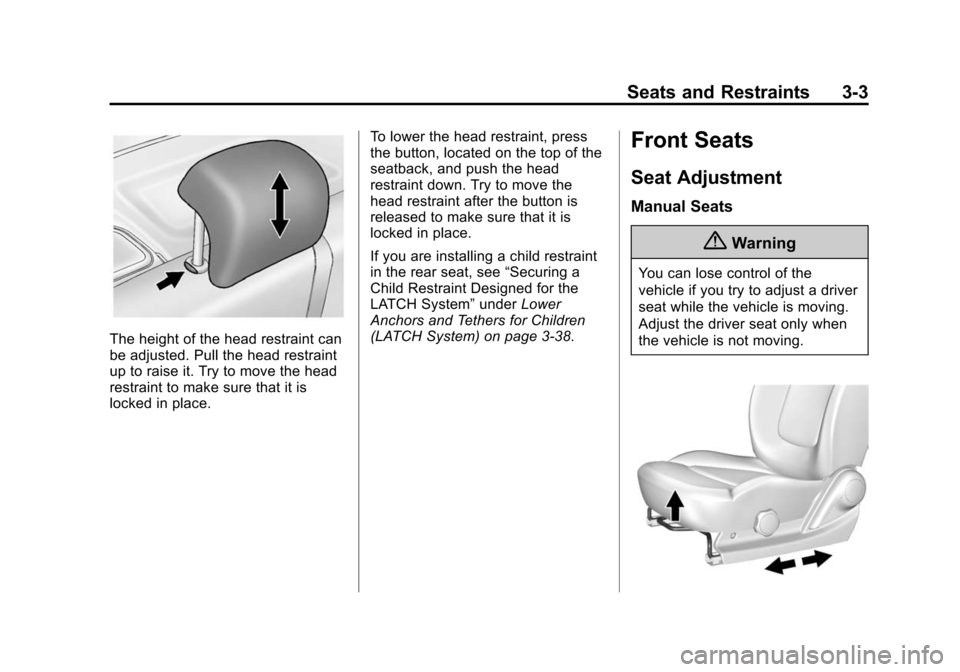
The height of the head restraint can
be adjusted. Pull the head restraint
up to raise it. Try to move the head
restraint to make sure that it is
locked in place.To lower the head restraint, press
the button, located on the top of the
seatback, and push the head
restraint down. Try to move the
head restraint after the button is
released to make sure that it is
locked in place.
If you are installing a child restraint
in the rear seat, see
“Securing a
Child Restraint Designed for the
LATCH System” underLower
Anchors and Tethers for Children
(LATCH System) on page 3-38.
Front Seats
Seat Adjustment
Manual Seats
{Warning
You can lose control of the
vehicle if you try to adjust a driver
seat while the vehicle is moving.
Adjust the driver seat only when
the vehicle is not moving.
Page 45 of 362
Black plate (7,1)Chevrolet Spark Owner Manual (GMNA-Localizing-U.S./Canada-5853490) -
2014 - crc - 9/3/13
Seats and Restraints 3-7
2. Slide the front seats forward andplace the front seatbacks in the
upright position. See Seat
Adjustment on page 3-3 and
Reclining Seatbacks on
page 3-4.
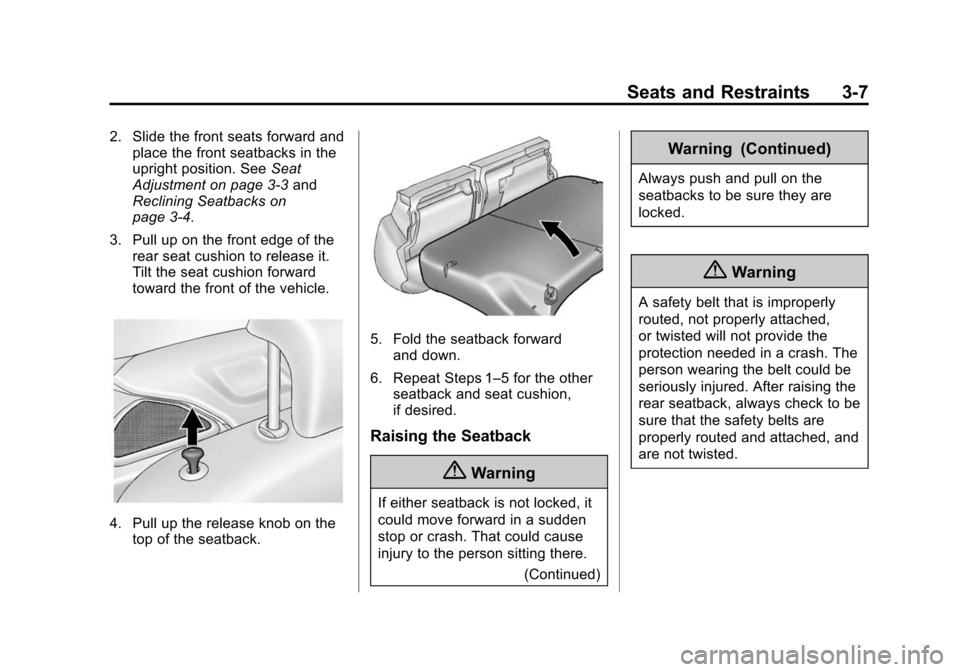
3. Pull up on the front edge of the rear seat cushion to release it.
Tilt the seat cushion forward
toward the front of the vehicle.
4. Pull up the release knob on thetop of the seatback.
5. Fold the seatback forward
and down.
6. Repeat Steps 1–5 for the other seatback and seat cushion,
if desired.
Raising the Seatback
{Warning
If either seatback is not locked, it
could move forward in a sudden
stop or crash. That could cause
injury to the person sitting there.
(Continued)
Warning (Continued)
Always push and pull on the
seatbacks to be sure they are
locked.
{Warning
A safety belt that is improperly
routed, not properly attached,
or twisted will not provide the
protection needed in a crash. The
person wearing the belt could be
seriously injured. After raising the
rear seatback, always check to be
sure that the safety belts are
properly routed and attached, and
are not twisted.
Page 51 of 362
Black plate (13,1)Chevrolet Spark Owner Manual (GMNA-Localizing-U.S./Canada-5853490) -
2014 - crc - 9/3/13
Seats and Restraints 3-13
Adjust the height so the shoulder
portion of the belt is on the shoulder
and not falling off of it. The belt
should be close to, but not
contacting, the neck. Improper
shoulder belt height adjustment
could reduce the effectiveness of
the safety belt in a crash. SeeHow
to Wear Safety Belts Properly on
page 3-10.
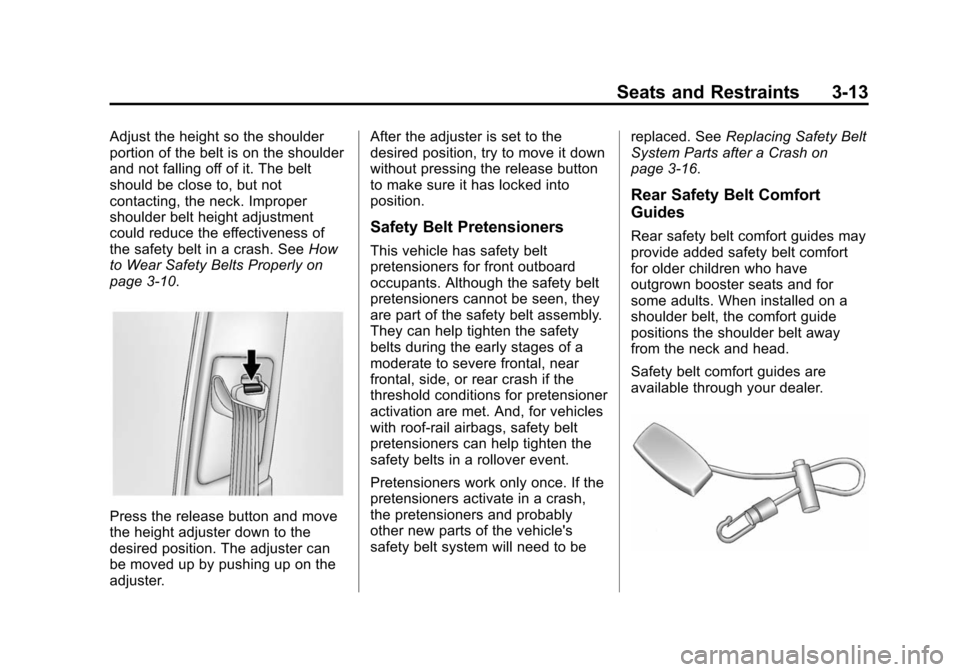
Press the release button and move
the height adjuster down to the
desired position. The adjuster can
be moved up by pushing up on the
adjuster. After the adjuster is set to the
desired position, try to move it down
without pressing the release button
to make sure it has locked into
position.
Safety Belt Pretensioners
This vehicle has safety belt
pretensioners for front outboard
occupants. Although the safety belt
pretensioners cannot be seen, they
are part of the safety belt assembly.
They can help tighten the safety
belts during the early stages of a
moderate to severe frontal, near
frontal, side, or rear crash if the
threshold conditions for pretensioner
activation are met. And, for vehicles
with roof-rail airbags, safety belt
pretensioners can help tighten the
safety belts in a rollover event.
Pretensioners work only once. If the
pretensioners activate in a crash,
the pretensioners and probably
other new parts of the vehicle's
safety belt system will need to be
replaced. See
Replacing Safety Belt
System Parts after a Crash on
page 3-16.
Rear Safety Belt Comfort
Guides
Rear safety belt comfort guides may
provide added safety belt comfort
for older children who have
outgrown booster seats and for
some adults. When installed on a
shoulder belt, the comfort guide
positions the shoulder belt away
from the neck and head.
Safety belt comfort guides are
available through your dealer.
Page 53 of 362
Black plate (15,1)Chevrolet Spark Owner Manual (GMNA-Localizing-U.S./Canada-5853490) -
2014 - crc - 9/3/13
Seats and Restraints 3-15
Improper comfort guide
adjustment could reduce the
effectiveness of the safety belt in
a crash.
{Warning
A safety belt that is not properly
worn may not provide the
protection needed in a crash. The
person wearing the belt could be
seriously injured. The shoulder
belt should go over the shoulder
and across the chest. These parts
of the body are best able to take
belt restraining forces.
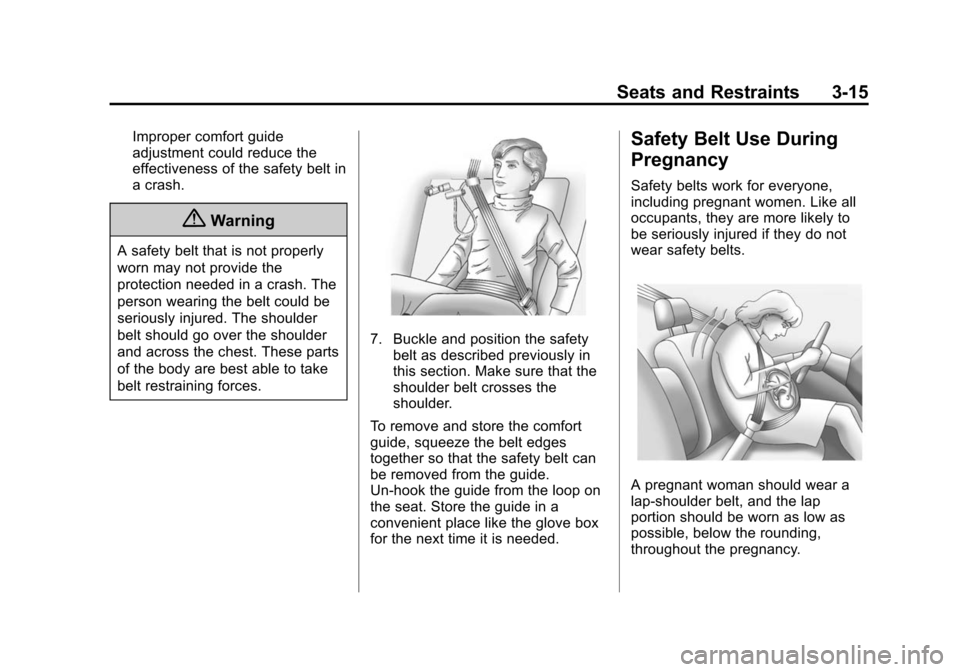
7. Buckle and position the safetybelt as described previously in
this section. Make sure that the
shoulder belt crosses the
shoulder.
To remove and store the comfort
guide, squeeze the belt edges
together so that the safety belt can
be removed from the guide.
Un-hook the guide from the loop on
the seat. Store the guide in a
convenient place like the glove box
for the next time it is needed.
Safety Belt Use During
Pregnancy
Safety belts work for everyone,
including pregnant women. Like all
occupants, they are more likely to
be seriously injured if they do not
wear safety belts.
A pregnant woman should wear a
lap-shoulder belt, and the lap
portion should be worn as low as
possible, below the rounding,
throughout the pregnancy.
Page 80 of 362
Black plate (42,1)Chevrolet Spark Owner Manual (GMNA-Localizing-U.S./Canada-5853490) -
2014 - crc - 9/3/13
3-42 Seats and Restraints
If you need to secure more than one
child restraint in the rear seat, see
Where to Put the Restraint on
page 3-37.
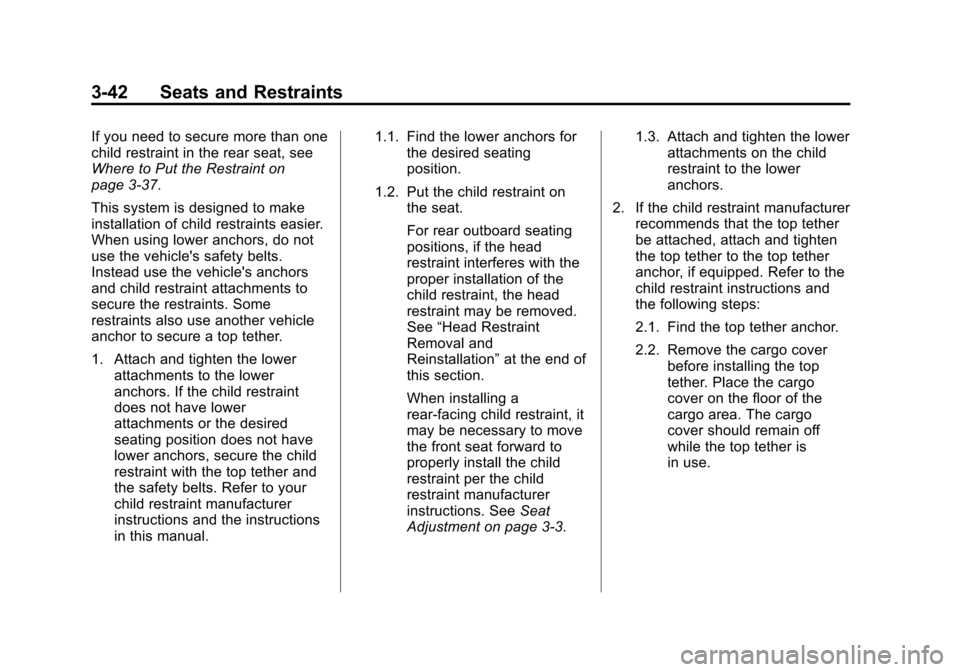
This system is designed to make
installation of child restraints easier.
When using lower anchors, do not
use the vehicle's safety belts.
Instead use the vehicle's anchors
and child restraint attachments to
secure the restraints. Some
restraints also use another vehicle
anchor to secure a top tether.
1. Attach and tighten the lowerattachments to the lower
anchors. If the child restraint
does not have lower
attachments or the desired
seating position does not have
lower anchors, secure the child
restraint with the top tether and
the safety belts. Refer to your
child restraint manufacturer
instructions and the instructions
in this manual. 1.1. Find the lower anchors for
the desired seating
position.
1.2. Put the child restraint on the seat.
For rear outboard seating
positions, if the head
restraint interferes with the
proper installation of the
child restraint, the head
restraint may be removed.
See“Head Restraint
Removal and
Reinstallation” at the end of
this section.
When installing a
rear-facing child restraint, it
may be necessary to move
the front seat forward to
properly install the child
restraint per the child
restraint manufacturer
instructions. See Seat
Adjustment on page 3-3. 1.3. Attach and tighten the lower
attachments on the child
restraint to the lower
anchors.
2. If the child restraint manufacturer recommends that the top tether
be attached, attach and tighten
the top tether to the top tether
anchor, if equipped. Refer to the
child restraint instructions and
the following steps:
2.1. Find the top tether anchor.
2.2. Remove the cargo cover
before installing the top
tether. Place the cargo
cover on the floor of the
cargo area. The cargo
cover should remain off
while the top tether is
in use.