display CHEVROLET SPARK 2017 4.G Owners Manual
[x] Cancel search | Manufacturer: CHEVROLET, Model Year: 2017, Model line: SPARK, Model: CHEVROLET SPARK 2017 4.GPages: 331, PDF Size: 5.56 MB
Page 8 of 331

Chevrolet Spark Owner Manual (GMNA-Localizing-U.S./Canada-9956101) -
2017 - crc - 4/25/16
In Brief 7
1.Air Vents 0162.
2. Exterior Lamp Controls 0129.
Instrument Panel Illumination
Control 0133.
3. Turn and Lane-Change
Signals 0132.
Driver Information Center (DIC)
Controls. See Driver
Information Center (DIC) 0112.
4. Instrument Cluster 098.
Driver Information Center (DIC)
Display. See Driver Information
Center (DIC) 0112.
5. Windshield Wiper/Washer 094.
Rear Window Wiper/
Washer 095.
6. Hazard Warning
Flashers 0131.
7. Light Sensor. See Automatic
Headlamp System 0130.
8. Infotainment 0135.
9. Power Outlets 096.
10. Climate Control
Systems 0160. 11.
Heated Front Seats 050
(If Equipped).
12. Shift Lever. See Automatic
Transmission 0185
(If Equipped) or Manual
Transmission 0187
(If Equipped).
13. Parking Brake 0189.
14. Auxiliary Devices 0149
(If Equipped).
15. Ignition Positions (Key Access)
0176 orIgnition Positions
(Keyless Access) 0177.
16. Steering Wheel Controls 093
(If Equipped).
17. Horn 094.
18. Steering Wheel
Adjustment 093.
19. Cruise Control 0193
(If Equipped).
Forward Collision Alert (FCA)
System 0198 (If Equipped).
20. Traction Control/Electronic
Stability Control 0191.
Lane Departure Warning
(LDW) 0200 (If Equipped). 21.
Instrument Panel Fuse
Block 0238.
22. Hood Release. See Hood 0210.
23. Data Link Connector (DLC) (Out of View). See Malfunction
Indicator Lamp (Check Engine
Light) 0103.
Page 19 of 331

Chevrolet Spark Owner Manual (GMNA-Localizing-U.S./Canada-9956101) -
2017 - crc - 4/25/16
18 In Brief
Driver Information
Center (DIC)
The DIC display is in the instrument
cluster. It shows the status of many
vehicle systems. On some models,
the trip odometer reset stem is used
to operate the DIC. On other
models, the controls for the DIC are
on the turn signal lever.
1.SET/CLR: Press to set or clear
the menu item displayed.
2.
w/x: Use to scroll through
the menus.
3. MENU: Press to display the
DIC menus. This button is also
used to return to or exit the last
screen displayed on the DIC.
See Driver Information Center
(DIC) 0112.
Forward Collision Alert
(FCA) System
If equipped, FCA may help avoid or
reduce the harm caused by
front-end crashes. FCA provides a
green indicator,
V, when a vehicle
is detected ahead. This indicator
displays amber if you follow a
vehicle much too closely. When
approaching a vehicle ahead too
quickly, FCA provides a red flashing
alert on the windshield and rapidly
beeps.
See Forward Collision Alert (FCA)
System 0198.
Lane Departure
Warning (LDW)
If equipped, LDW may help avoid
unintentional lane departures at
speeds of 56 km/h (35 mph) or
greater. LDW uses a camera sensor
to detect the lane markings. The
LDW light,
@, is green if a lane
marking is detected. If the vehicle
departs the lane without using a turn signal in that direction, the light will
change to amber and flash. In
addition, beeps will sound.
See
Lane Departure Warning
(LDW) 0200.
Rear Vision
Camera (RVC)
If equipped, RVC displays a view of
the area behind the vehicle, on the
infotainment display, when the
vehicle is shifted into R (Reverse).
See Rear Vision Camera
(RVC) 0195.
Parking Assist
If equipped, Rear Parking Assist
(RPA) uses sensors on the rear
bumper to assist with parking and
avoiding objects while in
R (Reverse). It operates at speeds
less than 8 km/h (5 mph) and uses
audible beeps to provide distance
and system information.
Keep the sensors on the vehicle's
rear bumper clean to ensure proper
operation.
Page 20 of 331
Chevrolet Spark Owner Manual (GMNA-Localizing-U.S./Canada-9956101) -
2017 - crc - 4/25/16
In Brief 19
SeeParking Assist 0197.
Power Outlets
The accessory power outlets can be
used to plug in electrical equipment,
such as a cell phone or MP3 player.
The vehicle has an accessory
power outlet on the center stack.
See Power Outlets 096.
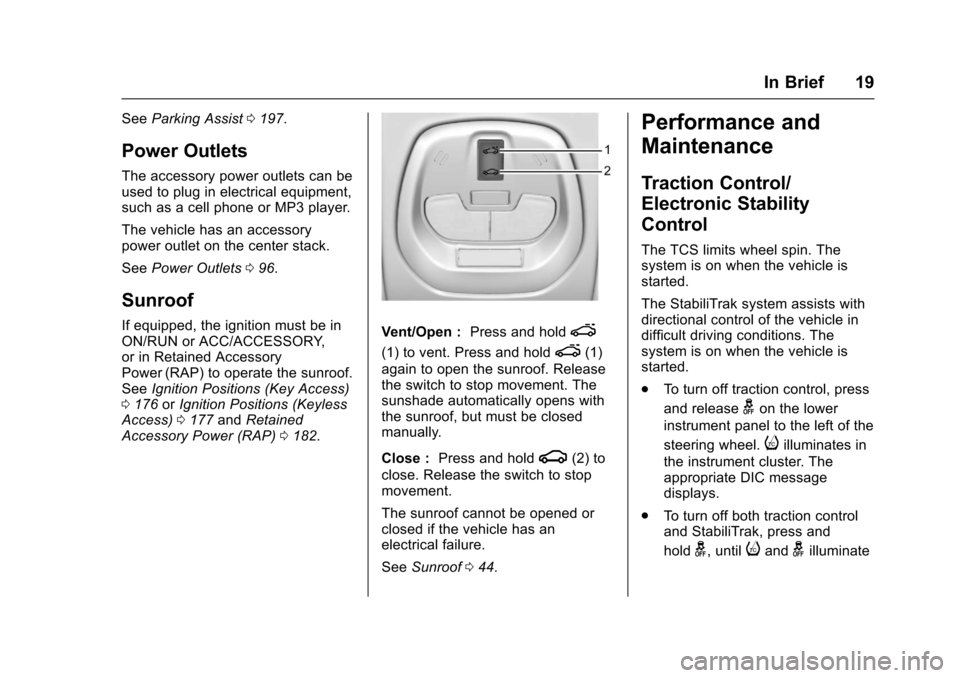
Sunroof
If equipped, the ignition must be in
ON/RUN or ACC/ACCESSORY,
or in Retained Accessory
Power (RAP) to operate the sunroof.
See Ignition Positions (Key Access)
0 176 orIgnition Positions (Keyless
Access) 0177 andRetained
Accessory Power (RAP) 0182.Vent/Open : Press and holde
(1) to vent. Press and holde(1)
again to open the sunroof. Release
the switch to stop movement. The
sunshade automatically opens with
the sunroof, but must be closed
manually.
Close : Press and hold
g(2) to
close. Release the switch to stop
movement.
The sunroof cannot be opened or
closed if the vehicle has an
electrical failure.
See Sunroof 044.
Performance and
Maintenance
Traction Control/
Electronic Stability
Control
The TCS limits wheel spin. The
system is on when the vehicle is
started.
The StabiliTrak system assists with
directional control of the vehicle in
difficult driving conditions. The
system is on when the vehicle is
started.
.
To turn off traction control, press
and release
gon the lower
instrument panel to the left of the
steering wheel.
iilluminates in
the instrument cluster. The
appropriate DIC message
displays.
. To turn off both traction control
and StabiliTrak, press and
hold
g, untiliandgilluminate
Page 21 of 331
Chevrolet Spark Owner Manual (GMNA-Localizing-U.S./Canada-9956101) -
2017 - crc - 4/25/16
20 In Brief
in the instrument cluster. The
appropriate DIC message
displays.
. Press
gagain to turn on both
systems.
iandggo off in the
instrument cluster. The
appropriate DIC message
displays.
See Traction Control/Electronic
Stability Control 0191.
Tire Pressure Monitor
This vehicle may have a Tire
Pressure Monitor System (TPMS).
The low tire pressure warning light
alerts to a significant loss in
pressure of one of the vehicle's
tires. If the warning light comes on,
stop as soon as possible and inflate
the tires to the recommended
pressure shown on the Tire and Loading Information label. See
Vehicle Load Limits
0172. The
warning light will remain on until the
tire pressure is corrected.
The low tire pressure warning light
may come on in cool weather when
the vehicle is first started, and then
turn off as the vehicle is driven. This
may be an early indicator that the
tire pressures are getting low and
the tires need to be inflated to the
proper pressure.
The TPMS does not replace normal
monthly tire maintenance. Maintain
the correct tire pressures.
See Tire Pressure Monitor
System 0248.
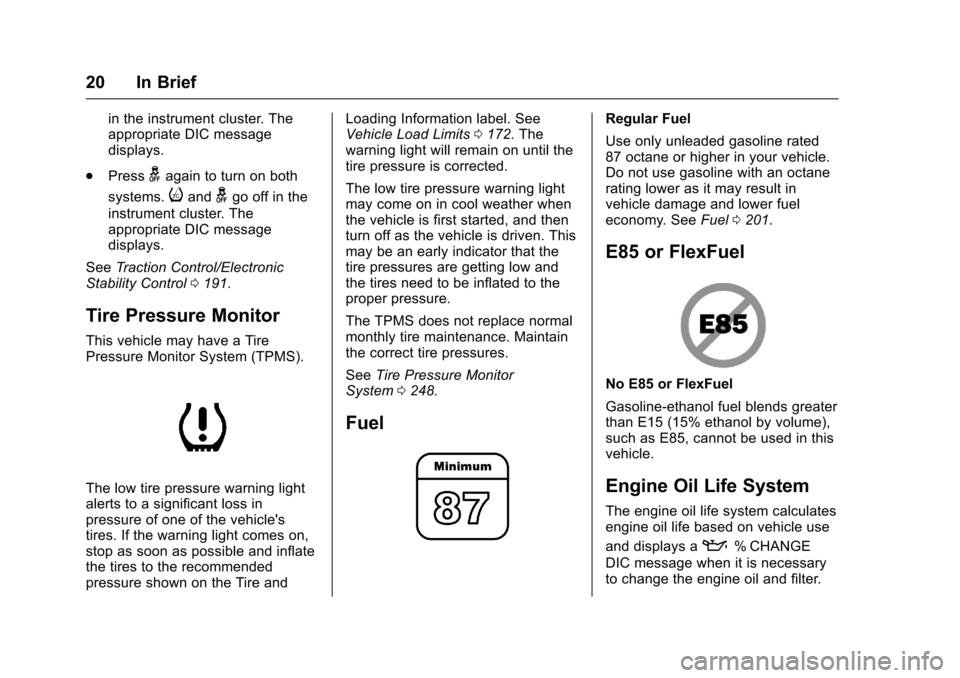
Fuel
Regular Fuel
Use only unleaded gasoline rated
87 octane or higher in your vehicle.
Do not use gasoline with an octane
rating lower as it may result in
vehicle damage and lower fuel
economy. See Fuel0201.
E85 or FlexFuel
No E85 or FlexFuel
Gasoline-ethanol fuel blends greater
than E15 (15% ethanol by volume),
such as E85, cannot be used in this
vehicle.
Engine Oil Life System
The engine oil life system calculates
engine oil life based on vehicle use
and displays a
:% CHANGE
DIC message when it is necessary
to change the engine oil and filter.
Page 22 of 331
Chevrolet Spark Owner Manual (GMNA-Localizing-U.S./Canada-9956101) -
2017 - crc - 4/25/16
In Brief 21
The oil life system should be reset
to 100% only following an oil
change.
Base Level Cluster1. Press the MENU button to show Remaining Oil Life on the
display. This display shows an
estimate of the oil’s remaining
useful life. If 99% is displayed,
that means that 99% of the
current oil life remains.
2. To reset the engine oil life system, press the SET/CLR
button while the oil life display
is active. After a few seconds,
the oil life will be reset to
100%. Be careful not to reset
the oil life display accidentally
at any time other than after the
oil is changed. It cannot be
reset accurately.
If the
:% CHANGE message in
the DIC comes back on when the
vehicle is started, the engine oil life
system has not reset. Repeat the
procedure. Uplevel Cluster
1. Turn the ignition to ON/RUN with the engine off.
2. Press the DIC MENU button on the turn signal lever to enter
the Vehicle Information Menu.
Use the thumbwheel to scroll
through the menu items until
you reach REMAINING
OIL LIFE.
3. Press the SET/CLR button to reset the oil life at 100%.
4. Turn the ignition to LOCK/OFF.
The oil life system can also be reset
as follows: 1. Turn the ignition to ON/RUN with the engine off.
2. Fully press and release the accelerator pedal three times
within five seconds.
See Engine Oil Life System 0215.
Driving for Better Fuel
Economy
Driving habits can affect fuel
mileage. Here are some driving tips
to get the best fuel economy
possible.
.
Avoid fast starts and accelerate
smoothly.
. Brake gradually and avoid
abrupt stops.
. Avoid idling the engine for long
periods of time.
. When road and weather
conditions are appropriate, use
cruise control.
. Always follow posted speed
limits or drive more slowly when
conditions require.
. Keep vehicle tires properly
inflated.
. Combine several trips into a
single trip.
. Replace the vehicle's tires with
the same TPC Spec number
molded into the tire's sidewall
near the size.
Page 32 of 331
Chevrolet Spark Owner Manual (GMNA-Localizing-U.S./Canada-9956101) -
2017 - crc - 4/25/16
Keys, Doors, and Windows 31
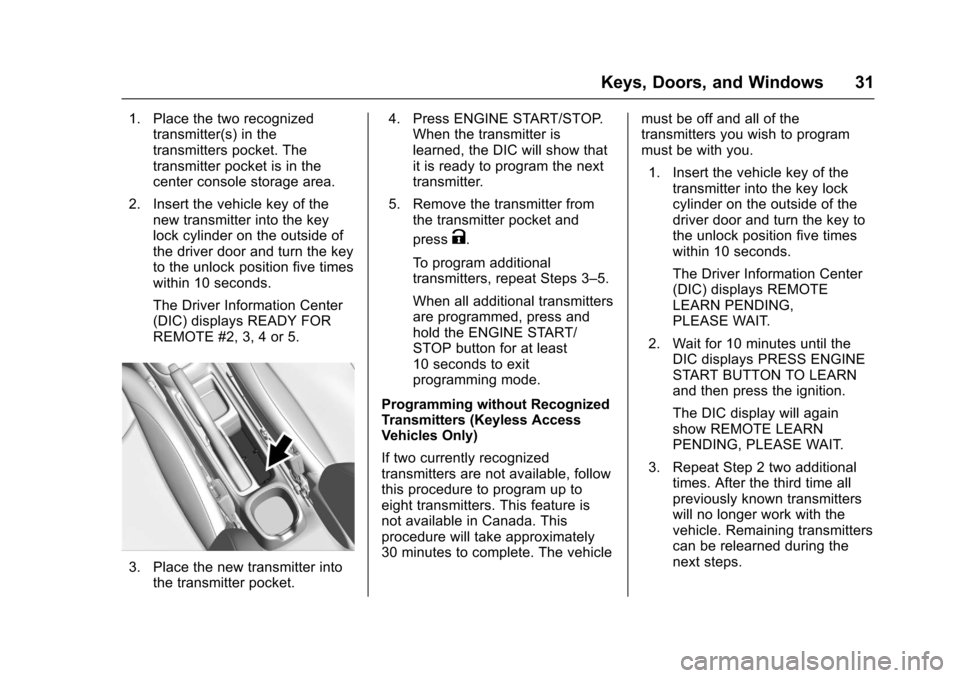
1. Place the two recognizedtransmitter(s) in the
transmitters pocket. The
transmitter pocket is in the
center console storage area.
2. Insert the vehicle key of the new transmitter into the key
lock cylinder on the outside of
the driver door and turn the key
to the unlock position five times
within 10 seconds.
The Driver Information Center
(DIC) displays READY FOR
REMOTE #2, 3, 4 or 5.
3. Place the new transmitter intothe transmitter pocket. 4. Press ENGINE START/STOP.
When the transmitter is
learned, the DIC will show that
it is ready to program the next
transmitter.
5. Remove the transmitter from the transmitter pocket and
press
K.
To program additional
transmitters, repeat Steps 3–5.
When all additional transmitters
are programmed, press and
hold the ENGINE START/
STOP button for at least
10 seconds to exit
programming mode.
Programming without Recognized
Transmitters (Keyless Access
Vehicles Only)
If two currently recognized
transmitters are not available, follow
this procedure to program up to
eight transmitters. This feature is
not available in Canada. This
procedure will take approximately
30 minutes to complete. The vehicle must be off and all of the
transmitters you wish to program
must be with you.
1. Insert the vehicle key of the transmitter into the key lock
cylinder on the outside of the
driver door and turn the key to
the unlock position five times
within 10 seconds.
The Driver Information Center
(DIC) displays REMOTE
LEARN PENDING,
PLEASE WAIT.
2. Wait for 10 minutes until the DIC displays PRESS ENGINE
START BUTTON TO LEARN
and then press the ignition.
The DIC display will again
show REMOTE LEARN
PENDING, PLEASE WAIT.
3. Repeat Step 2 two additional times. After the third time all
previously known transmitters
will no longer work with the
vehicle. Remaining transmitters
can be relearned during the
next steps.
Page 33 of 331
Chevrolet Spark Owner Manual (GMNA-Localizing-U.S./Canada-9956101) -
2017 - crc - 4/25/16
32 Keys, Doors, and Windows
The DIC display should now
show READY FOR REMOTE
# 1.
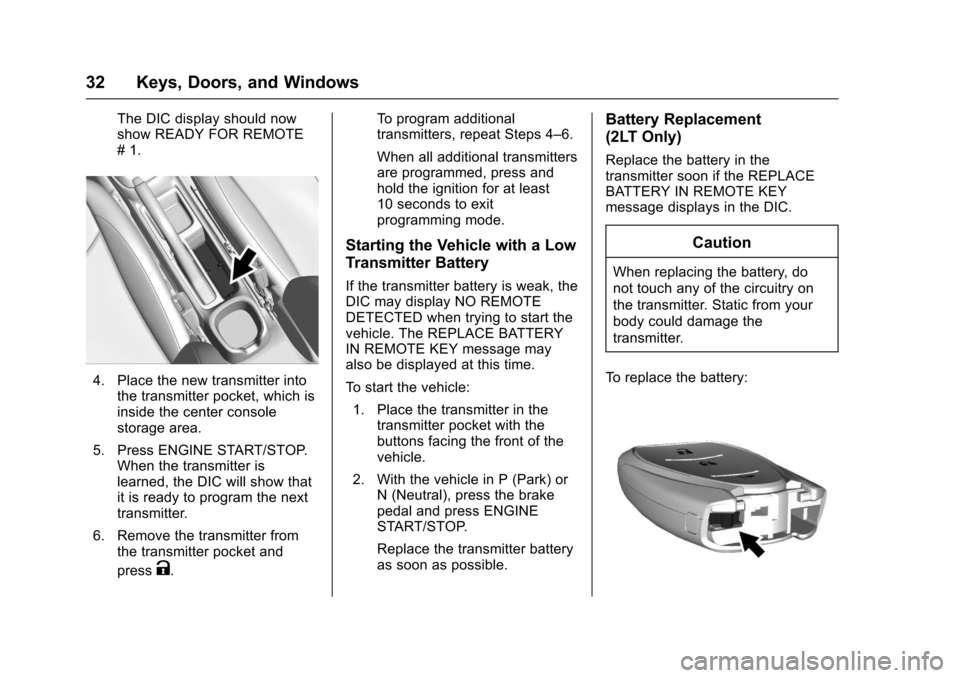
4. Place the new transmitter intothe transmitter pocket, which is
inside the center console
storage area.
5. Press ENGINE START/STOP. When the transmitter is
learned, the DIC will show that
it is ready to program the next
transmitter.
6. Remove the transmitter from the transmitter pocket and
press
K. To program additional
transmitters, repeat Steps 4–6.
When all additional transmitters
are programmed, press and
hold the ignition for at least
10 seconds to exit
programming mode.
Starting the Vehicle with a Low
Transmitter Battery
If the transmitter battery is weak, the
DIC may display NO REMOTE
DETECTED when trying to start the
vehicle. The REPLACE BATTERY
IN REMOTE KEY message may
also be displayed at this time.
To start the vehicle:
1. Place the transmitter in the transmitter pocket with the
buttons facing the front of the
vehicle.
2. With the vehicle in P (Park) or N (Neutral), press the brake
pedal and press ENGINE
START/STOP.
Replace the transmitter battery
as soon as possible.
Battery Replacement
(2LT Only)
Replace the battery in the
transmitter soon if the REPLACE
BATTERY IN REMOTE KEY
message displays in the DIC.
Caution
When replacing the battery, do
not touch any of the circuitry on
the transmitter. Static from your
body could damage the
transmitter.
To replace the battery:
Page 93 of 331
Chevrolet Spark Owner Manual (GMNA-Localizing-U.S./Canada-9956101) -
2017 - crc - 4/25/16
92 Instruments and Controls
Instruments and
Controls
Controls
Steering Wheel Adjustment . . . . 93
Steering Wheel Controls . . . . . . . 93
Horn . . . . . . . . . . . . . . . . . . . . . . . . . . . 94
Windshield Wiper/Washer . . . . . . 94
Rear Window Wiper/Washer . . . 95
Compass . . . . . . . . . . . . . . . . . . . . . . 95
Clock . . . . . . . . . . . . . . . . . . . . . . . . . . 96
Power Outlets . . . . . . . . . . . . . . . . . 96
Warning Lights, Gauges, and
Indicators
Warning Lights, Gauges, andIndicators . . . . . . . . . . . . . . . . . . . . 97
Instrument Cluster . . . . . . . . . . . . . 98
Speedometer . . . . . . . . . . . . . . . . . 100
Odometer . . . . . . . . . . . . . . . . . . . . . 100
Trip Odometer . . . . . . . . . . . . . . . . 100
Tachometer . . . . . . . . . . . . . . . . . . . 100
Fuel Gauge . . . . . . . . . . . . . . . . . . . 100
Safety Belt Reminders . . . . . . . . 101
Airbag Readiness Light . . . . . . . 101
Passenger Airbag Status Indicator . . . . . . . . . . . . . . . . . . . . 102
Charging System Light . . . . . . . 103 Malfunction Indicator Lamp
(Check Engine Light) . . . . . . . . 103
Service Vehicle Soon Light . . . 105
Owner Manual Indicator . . . . . . 105
Brake System Warning Light . . . . . . . . . . . . . . . . . . . . . . . . 105
Antilock Brake System (ABS) Warning Light . . . . . . . . . . . . . . . 106
Operate Pedal Light . . . . . . . . . . 106
Up-Shift Light . . . . . . . . . . . . . . . . . 106
Power Steering Warning Light . . . . . . . . . . . . . . . . . . . . . . . . 106
Lane Departure Warning (LDW) Light . . . . . . . . . . . . . . . . . 107
Vehicle Ahead Indicator . . . . . . 107
Ultrasonic Parking Sensor Light . . . . . . . . . . . . . . . . . . . . . . . . 107
Traction Off Light . . . . . . . . . . . . . 107
StabiliTrak®OFF Light . . . . . . . . 108
Traction Control System (TCS)/ StabiliTrak
®Light . . . . . . . . . . . 108
Engine Coolant Temperature Warning Light . . . . . . . . . . . . . . . 108
Tire Pressure Light . . . . . . . . . . . 109
Engine Oil Pressure Light . . . . 109
Low Fuel Warning Light . . . . . . . 110
Immobilizer Light . . . . . . . . . . . . . 110
Reduced Engine Power Light . . . . . . . . . . . . . . . . . . . . . . . . 110
High-Beam On Light . . . . . . . . . . 111
Front Fog Lamp Light . . . . . . . . . 111 Lamps On Reminder . . . . . . . . . . 111
Cruise Control Light . . . . . . . . . . . 111
Door Ajar Light . . . . . . . . . . . . . . . . 111
Information Displays
Driver Information
Center (DIC) . . . . . . . . . . . . . . . . 112
Vehicle Messages
Vehicle Messages (BaseLevel) . . . . . . . . . . . . . . . . . . . . . . . 116
Vehicle Messages (Uplevel) . . . . . . . . . . . . . . . . . . . . 117
Battery Voltage and Charging Messages . . . . . . . . . . . . . . . . . . . 118
Brake System Messages . . . . . 118
Compass Messages . . . . . . . . . . 118
Cruise Control Messages . . . . . 118
Door Ajar Messages . . . . . . . . . . 118
Engine Cooling System Messages . . . . . . . . . . . . . . . . . . . 119
Engine Oil Messages . . . . . . . . . 119
Engine Power Messages . . . . . 120
Fuel System Messages . . . . . . . 120
Key and Lock Messages . . . . . 120
Lamp Messages . . . . . . . . . . . . . . 121
Object Detection System Messages . . . . . . . . . . . . . . . . . . . 121
Ride Control System
Messages . . . . . . . . . . . . . . . . . . . 122
Security Messages . . . . . . . . . . . 122
Page 96 of 331
Chevrolet Spark Owner Manual (GMNA-Localizing-U.S./Canada-9956101) -
2017 - crc - 4/25/16
Instruments and Controls 95
Clear snow and ice from the wiper
blades before using them. If frozen
to the windshield, carefully loosen or
thaw them. Damaged wiper blades
should be replaced. SeeWiper
Blade Replacement 0228.
Heavy snow or ice can overload the
wiper motor. A circuit breaker will
stop the motor until it cools down.
Rear Window Wiper/
Washer
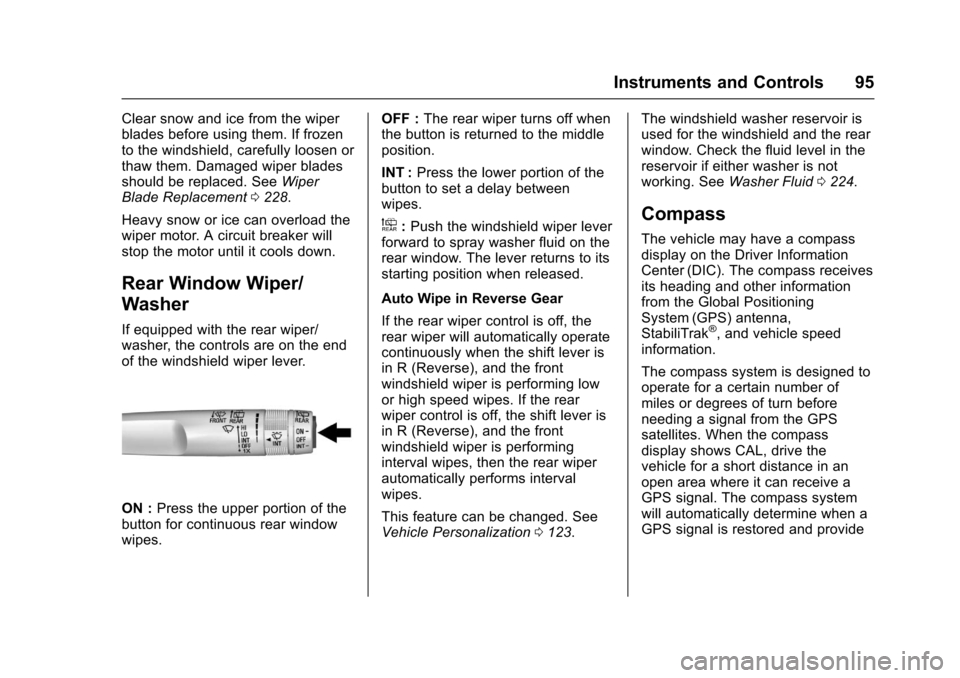
If equipped with the rear wiper/
washer, the controls are on the end
of the windshield wiper lever.
ON : Press the upper portion of the
button for continuous rear window
wipes. OFF :
The rear wiper turns off when
the button is returned to the middle
position.
INT : Press the lower portion of the
button to set a delay between
wipes.
a: Push the windshield wiper lever
forward to spray washer fluid on the
rear window. The lever returns to its
starting position when released.
Auto Wipe in Reverse Gear
If the rear wiper control is off, the
rear wiper will automatically operate
continuously when the shift lever is
in R (Reverse), and the front
windshield wiper is performing low
or high speed wipes. If the rear
wiper control is off, the shift lever is
in R (Reverse), and the front
windshield wiper is performing
interval wipes, then the rear wiper
automatically performs interval
wipes.
This feature can be changed. See
Vehicle Personalization 0123. The windshield washer reservoir is
used for the windshield and the rear
window. Check the fluid level in the
reservoir if either washer is not
working. See
Washer Fluid 0224.Compass
The vehicle may have a compass
display on the Driver Information
Center (DIC). The compass receives
its heading and other information
from the Global Positioning
System (GPS) antenna,
StabiliTrak
®, and vehicle speed
information.
The compass system is designed to
operate for a certain number of
miles or degrees of turn before
needing a signal from the GPS
satellites. When the compass
display shows CAL, drive the
vehicle for a short distance in an
open area where it can receive a
GPS signal. The compass system
will automatically determine when a
GPS signal is restored and provide
Page 97 of 331
Chevrolet Spark Owner Manual (GMNA-Localizing-U.S./Canada-9956101) -
2017 - crc - 4/25/16
96 Instruments and Controls
a heading again. SeeCompass
Messages 0118 for the messages
that may be displayed for the
compass.
Clock
The infotainment system controls
are used to access the time and
date settings through the menu
system. See Operation0138 on
how to use the menu system.
Setting the Time and Date
When Auto Set is enabled, the time
cannot be manually set.
1. Press
{, then touch Settings.
2. Touch Time and Date, then Set Time or Set Date.
3. Touch + or −to adjust the
value.
4. Touch
RorQto adjust AM or
PM for 12 hour format.
5. Touch
0.
Auto Set
1. Press{, then touch Settings. 2. Touch Time and Date, then
Auto Set.
3. Select from the available selections.
4. Touch
0.
Setting the 12/24 Hour Format
1. Press{, then touch Settings.
2. Touch Time and Date, then select 12h or 24h format.
3. Touch
0.
Setting the Month and Day
Format
1. Press{, then touch Settings.
2. Touch Time and Date, then Set Date Format.
3. Select DD/MM/YYYY (day/ month/year), MM/DD/YYYY
(month/day/year), or YYYY/
MM/DD (year/month/day)
format.
4. Touch
0.
Power Outlets
The accessory power outlets can be
used to plug in electrical equipment,
such as a cell phone or MP3 player.
The vehicle has an accessory
power outlet on the center stack.
Open the cover to access and
replace when not in use.
{Warning
Power is always supplied to the
outlets. Do not leave electrical
equipment plugged in when the
vehicle is not in use because the
vehicle could catch fire and cause
injury or death.
Caution
Leaving electrical equipment
plugged in for an extended period
of time while the vehicle is off will
drain the battery. Always unplug
electrical equipment when not in (Continued)