tailgate CHEVROLET SUBURBAN 1994 Owners Manual
[x] Cancel search | Manufacturer: CHEVROLET, Model Year: 1994, Model line: SUBURBAN, Model: CHEVROLET SUBURBAN 1994Pages: 385, PDF Size: 19.88 MB
Page 56 of 385
Features & Controls
Section
L
r
1
Here you can learn about the many standard and optional features on your
vehicle. and information on starting. shifting and braking
. Also explained
are
the instrument panel and the warning systems that tell you if everything
is working properly-and what to do if you have a problem .
For explanation of vehicle symbols. refer to “Vehicle Symbols” in the
Introduction .
Keys ..................................................... 2-3
DoorLocks
................................................ 2-5
Your Doors and How They Work .... .................... 2-7 ..
................................................ Side Doors 2-7
Tailgate. Tailgate Glass and Rear
Doors ... ... ............... 2-8
Tailgate
........................... ...................... 2-8
PanelDoors
............................................... 2-9
Theft
.................................................... 2-10
New Vehicle Break-In
...................................... 2-11
Ignition Switch
.................................... . 2-12
Starting Your Gasoline Engine ......................... . 2-13
Driving Through Deep Standing Water
......................... 2-15
Starting Your Diesel Engine
................................. 2-16
Automatic Transmission .................................... 2-21
Five-Speed Manual Transmission
............................. 2-24
LockingRearAxle ......................................... 2-26
Parking Brake .................................... . . 2-26
2-1
ProCarManuals.com
Page 63 of 385
Tailgate Glass, Tailgate and Rear Doors
into your vehicle. You can't see or smell CO. It can cause
unconsciousness
and even death.
into your ve :le. See "Comfort Controls'' in the Fdex. &
tailgate, or rear doors: I
Tailgate Glass and Tailgate
If your vehicle has a tailgate, you must raise the rear glass before lowering
the tailgate.
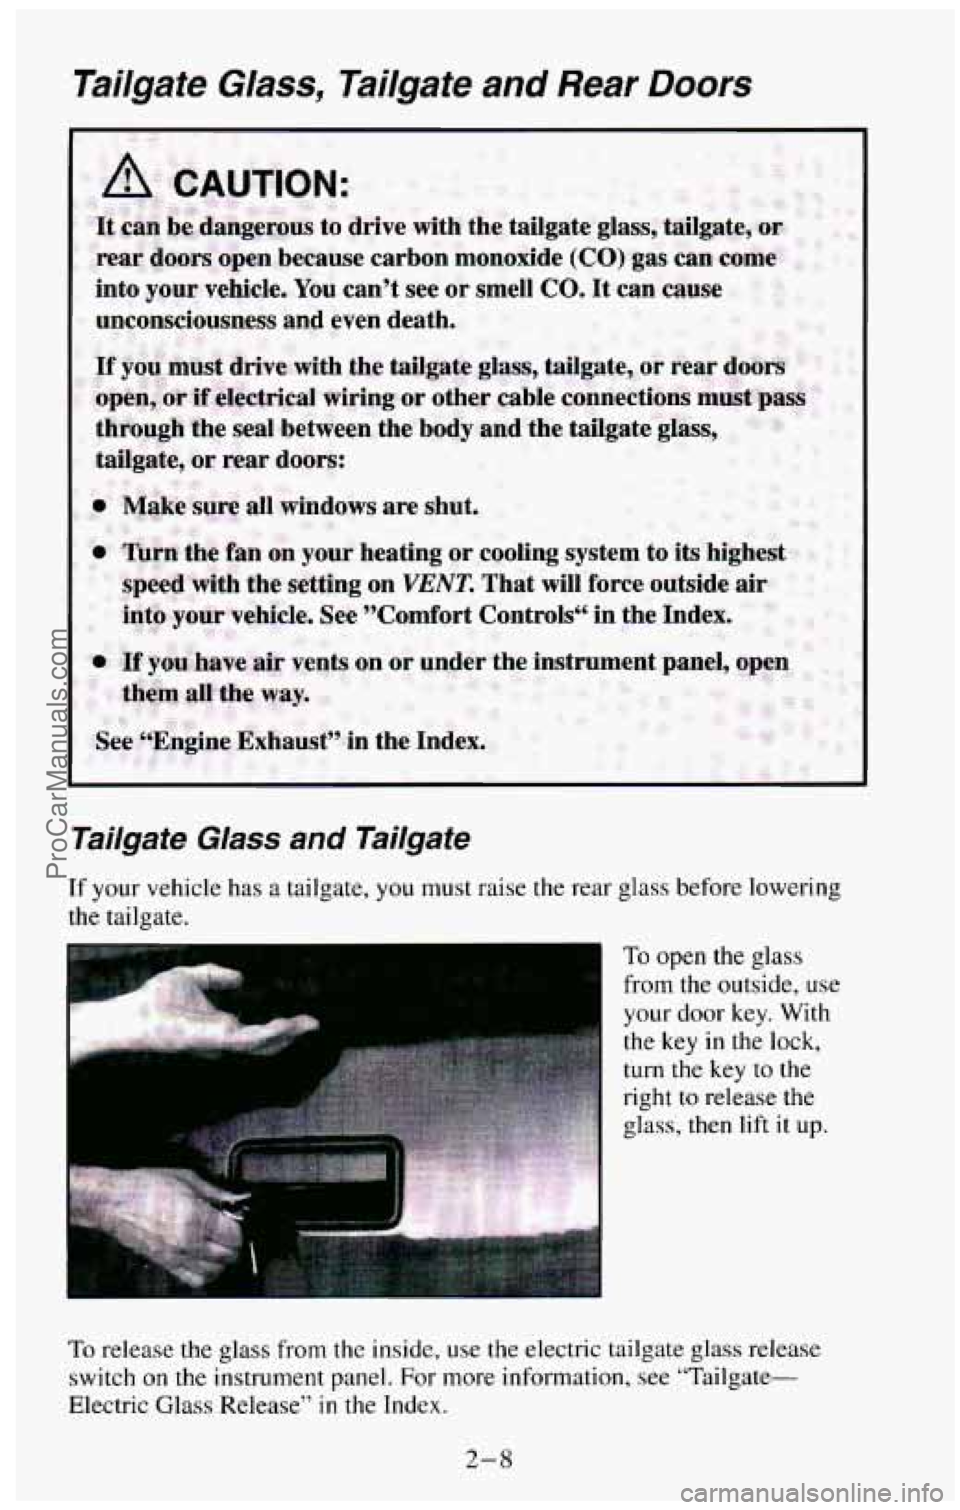
To open the glass
from the outside, use
your door key. With
the
key in the lock,
turn the key to the
To release the glass from the inside, use the electric tailgate glass release
switch
on the instrument panel. For more information, see ''Tailgate-
Electric Glass Release"
in the Index.
2-8
ProCarManuals.com
Page 64 of 385
Open the tailgate by lifting up on the handle while pulling the tailgate
toward you.
Close the tailgate before closing the rear glass. After closing, make sure the
tailgate
is securely latched by pulling it toward you. After closing the rear
glass, pull up
on its handle to make sure it is locked.
Panel Doors
To open the rear panel doors on the wagon model, you must open the right
door first.
If the door is locked, insert your door key in the lock and turn it
to the left to unlock it.
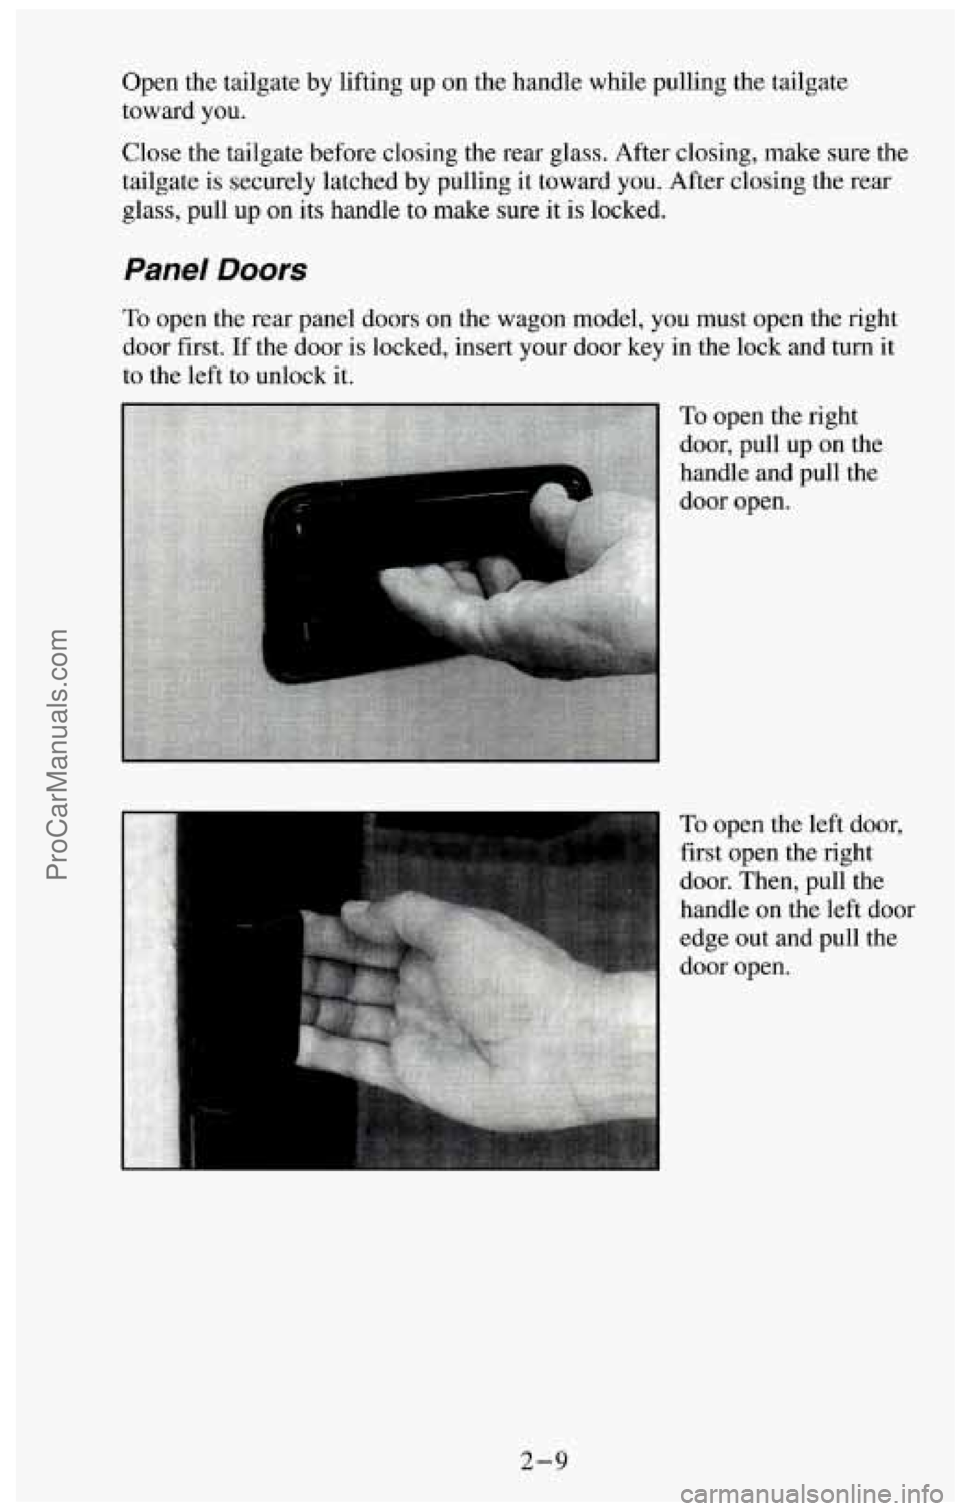
To open the right
door, pull up on the
handle and pull the
door open.
To open the left door,
first open the right
door.
Then, pull the
handle on the left door
edge out and pull the
door
open.
2-9
ProCarManuals.com
Page 91 of 385
Hectric Tailgate Glass Release
Before operating your electric tailgate glass release, see the caution under
“Tailgate Glass, Tailgate and Rear Doors” in this section.
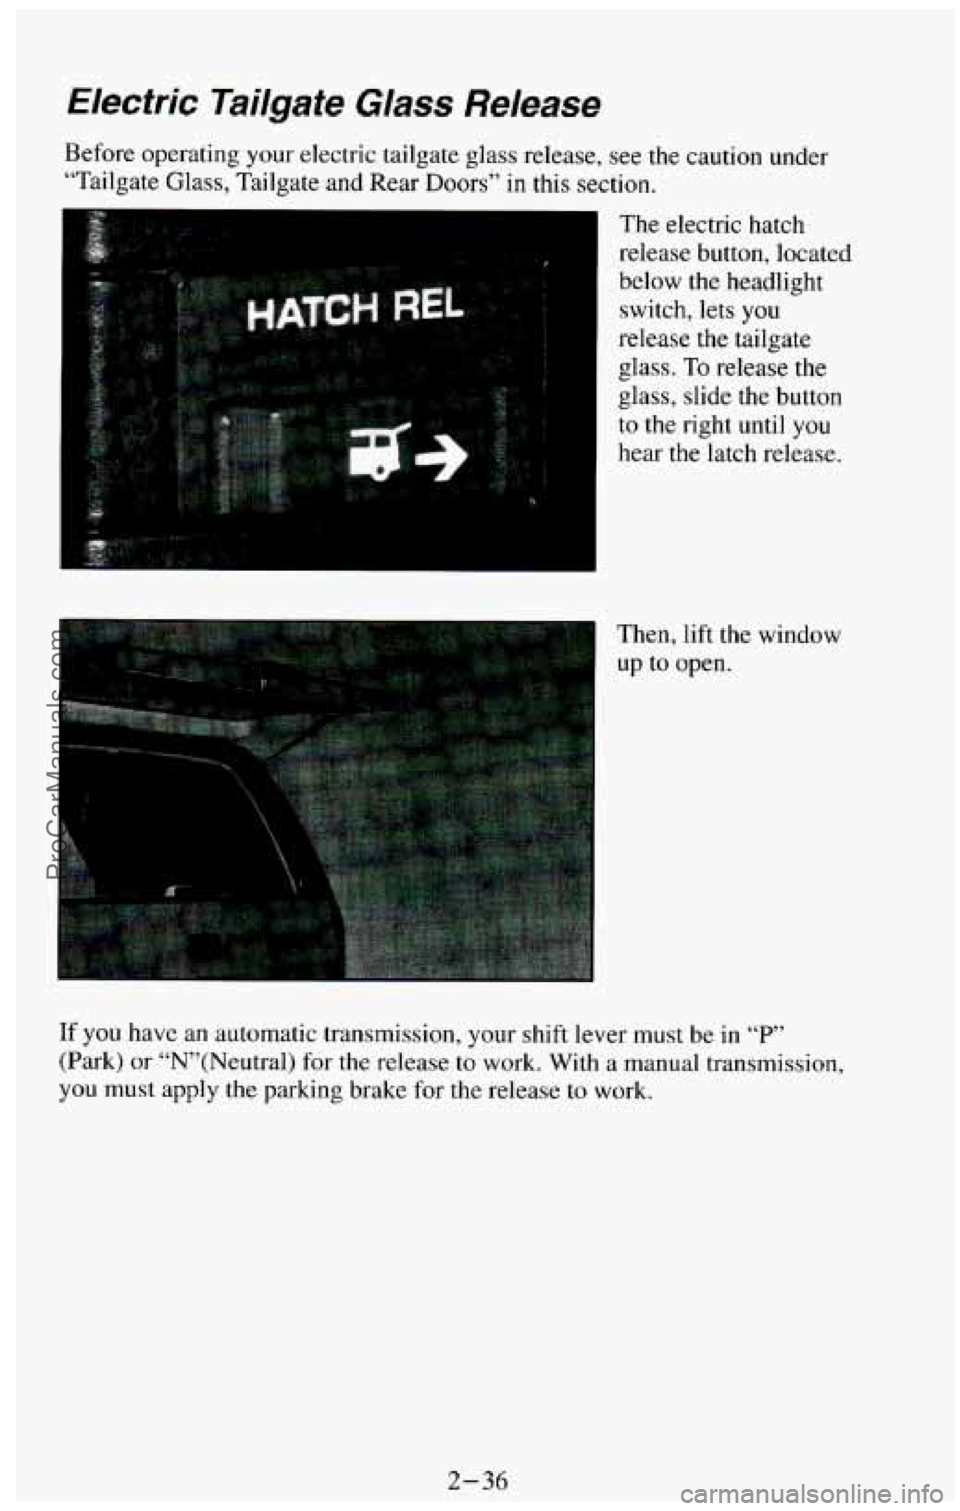
The electric hatch
release button, located
below the headlight switch, lets you
release the tailgate
glass.
To release the
glass, slide the button
to the right until
you
hear the latch release.
Then, lift
the window
up
to open.
If you have an automatic transmission, your shift lever must be in “P’
(Park) or “N”(Neutra1) for the release to work. With a manual transmission,
you
must apply the parking brake for the release to work.
2-36
ProCarManuals.com
Page 104 of 385
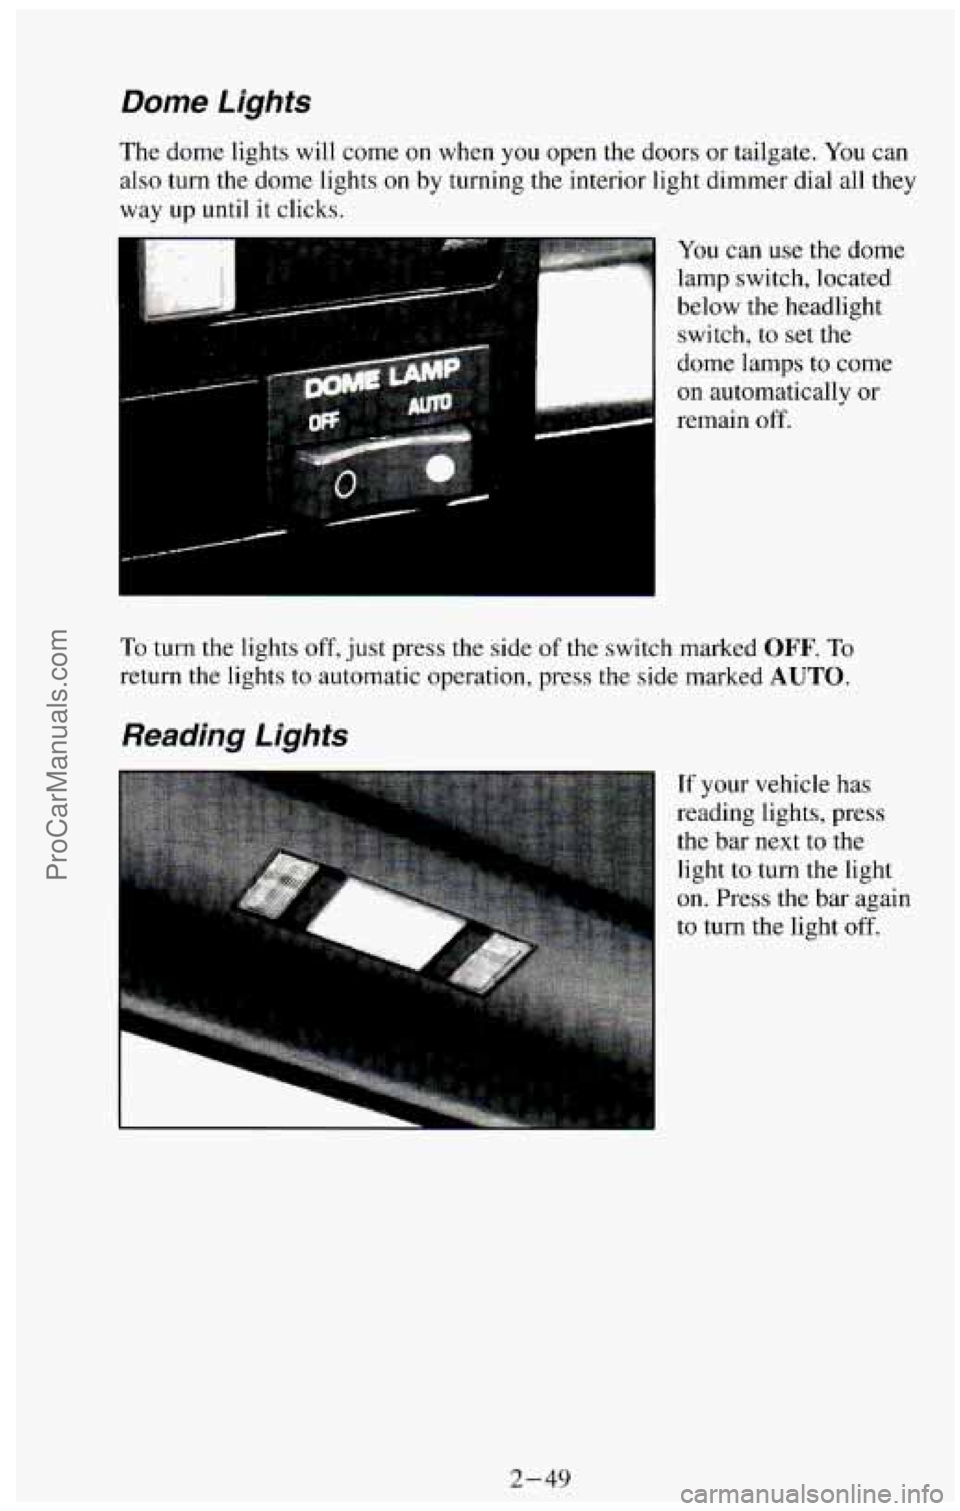
Dome Lights
The dome lights will come on when you open the doors or tailgate. You can
also turn the dome lights
on by turning the interior light dimmer dial all they
way up
until it clicks.
You can use the dome
lamp switch, located
below
the headlight
switch, to set the
dome lamps to come
on automatically or
remain off.
To turn the lights off, just press the side of the switch marked OFF. To
return the lights to automatic operation, press the side marked AUTO.
Reading Lighfs
If your vehicle has
reading lights, press
the bar next to the
light to turn the light
on. Press the bar again
to turn the light off.
2-49
ProCarManuals.com
Page 294 of 385
Your maintenance schedule will tell you how often to lubricate these items.
See “Recommended Fluids and Lubricants” in the Index for the proper
lubricant to use.
Lock Cylinders
To be sure your locks operate properly, they must be lubricated. Your
vehicle’s maintenance schedule will tell you how often to lubricate them.
See “Recommended Fluids and Lubricants” in the Index for the proper
lubricant to use.
You should not use penetrating oils because they could wash out the factory
installed lubricant and cause the lock to bind. De-icers which contain
alcohol could
also wash away the lubricant, so be sure to lubricate the lock
after using a de-icer of this type.
Tailgate Handle
The tailgate handle pivot points on your vehicle should be lubricated to keep
it working smoothly.
Your maintenance schedule will tell you how often to lubricate the handle.
See “Recommended Fluids and Lubricants” in the Index for the proper
lubricant to use.
Battery
Every new GM vehicle has a Delco Freedom@ battery. You never have to
add water to one of these. When it’s time for a new battery, we recommend
a Delco Freedom@ battery. Get one that has the catalog number shown on
the original battery’s label.
Vehicle Storage
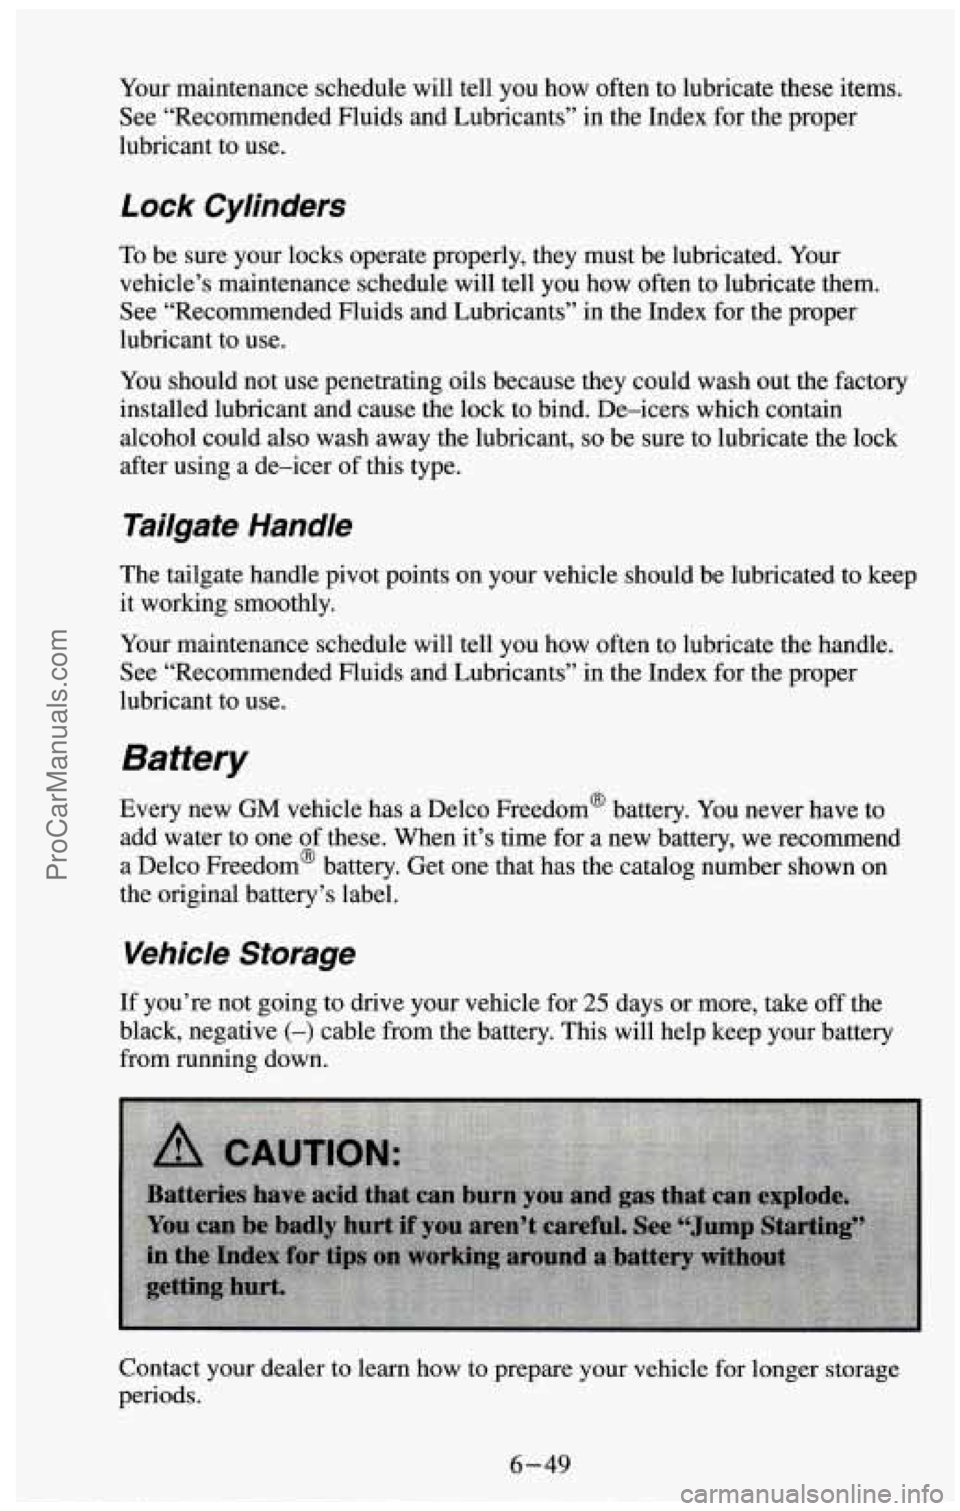
If you’re not going to drive your vehicle for 25 days or more, take off the
black, negative
(-) cable from the battery. This will help keep your battery
from running down.
Contact your dealer to learn how to prepare your vehicle for longer storage
periods.
ProCarManuals.com
Page 300 of 385
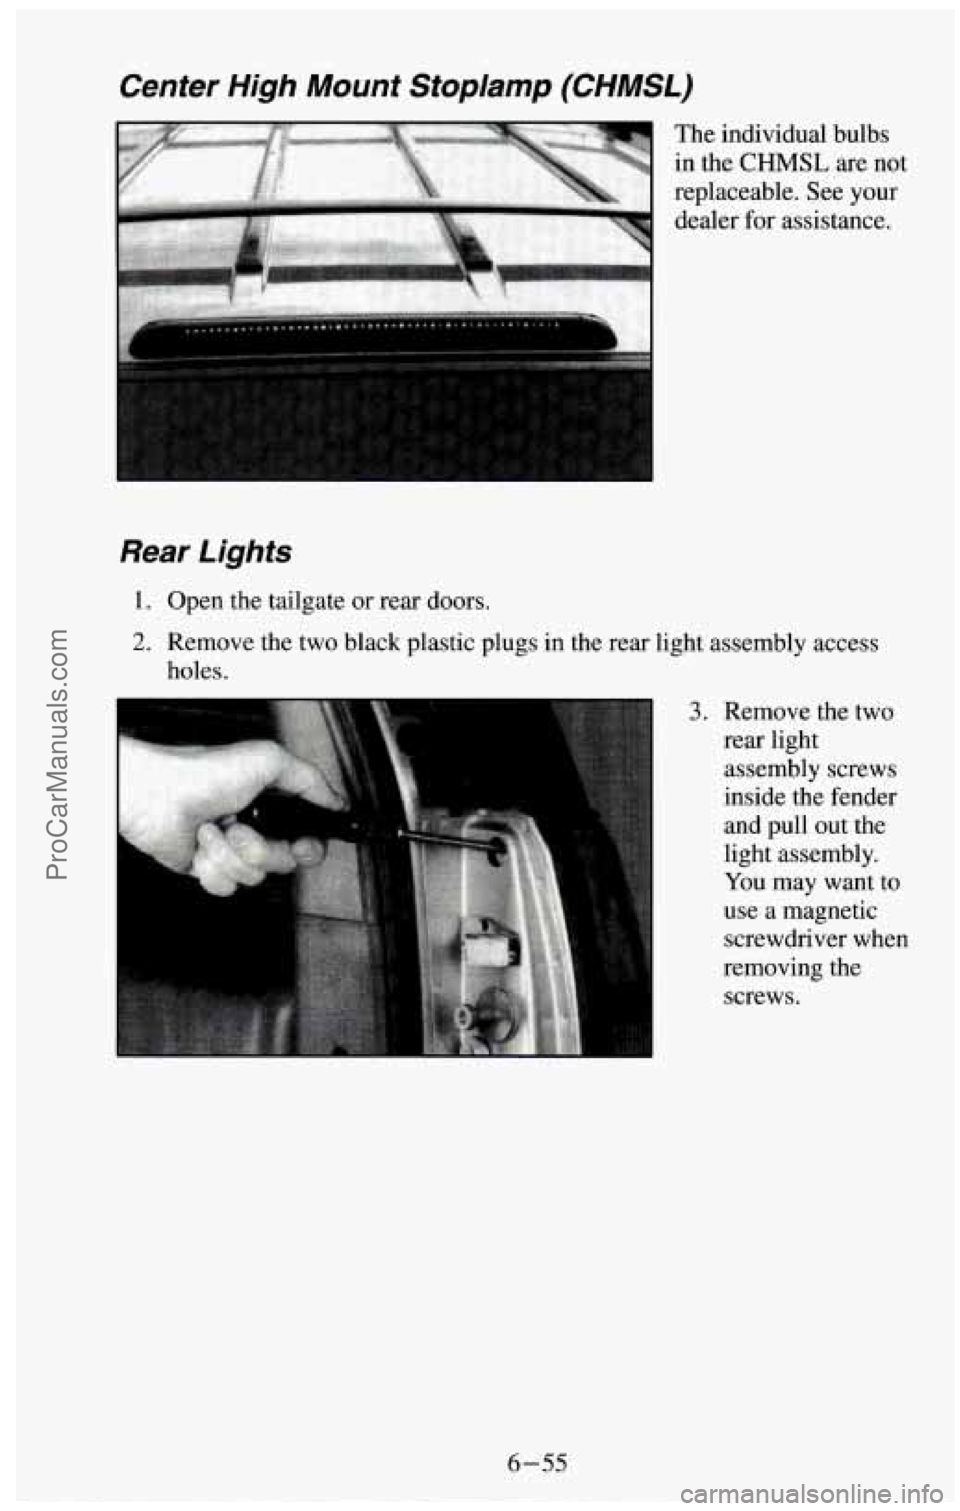
Center High Mount Stop/amp (CHMSL)
“,Gar-& ... “B 3 The individual bulbs
in the
CHMSL are not
replaceable. See your
dealer for assistance.
Rear Lights
1. Open the tailgate or rear doors.
2. Remove the two black plastic plugs in the rear light
holes.
I 3.
assembly access
Remove the two
rear light
assembly screws
inside the fender
and pull out the
light assembly. You may want to
use a magnetic
screwdriver when
removing the
screws.
6-55
ProCarManuals.com
Page 301 of 385
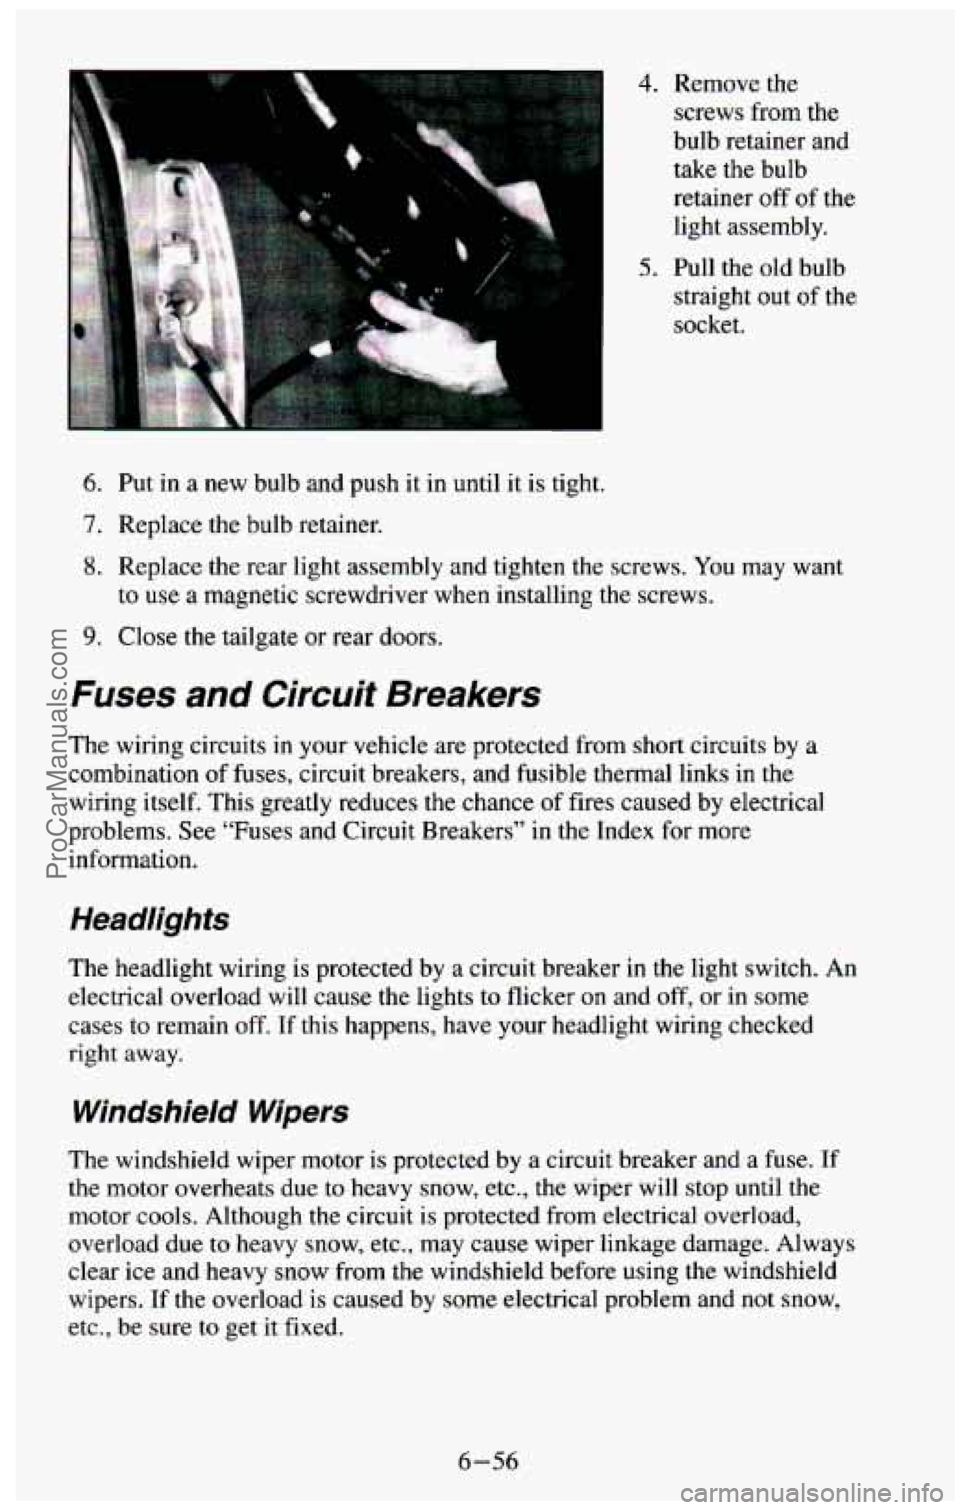
4. Remove the
screws from the
bulb retainer and
take the bulb
retainer
off of the
light assembly.
5. Pull the old bulb
straight out
of the
socket.
6. Put in a new bulb and push it in until it is tight.
7. Replace the bulb retainer.
8. Replace the rear light assembly and tighten the screws. You may want
to use
a magnetic screwdriver when installing the screws.
9. Close the tailgate or rear doors.
Fuses and Circuit Breakers
The wiring circuits in your vehicle are protected from short circuits by a
combination
of fuses, circuit breakers, and fusible thermal links in the
wiring itself. This greatly reduces the chance of fires caused by electrical
problems. See “Fuses and Circuit Breakers” in the Index for more
information.
The headlight wiring is protected by
a circuit breaker in the light switch. An
electrical overload
will cause the lights to flicker on and off, or in some
cases to remain off.
If this happens, have your headlight wiring checked
right away.
Windshield Wipers
The windshield wiper motor is protected by a circuit breaker and a fuse. If
the motor overheats due to heavy snow, etc., the wiper will stop until the
motor cools. Although
the circuit is protected from electrical overload,
overload due to heavy snow, etc., may cause wiper linkage damage. Always
clear ice and heavy snow from the windshield before using the windshield
wipers.
If the overload is caused by some electrical problem and not snow,
etc., be sure to get it fixed.
6-56
ProCarManuals.com
Page 357 of 385
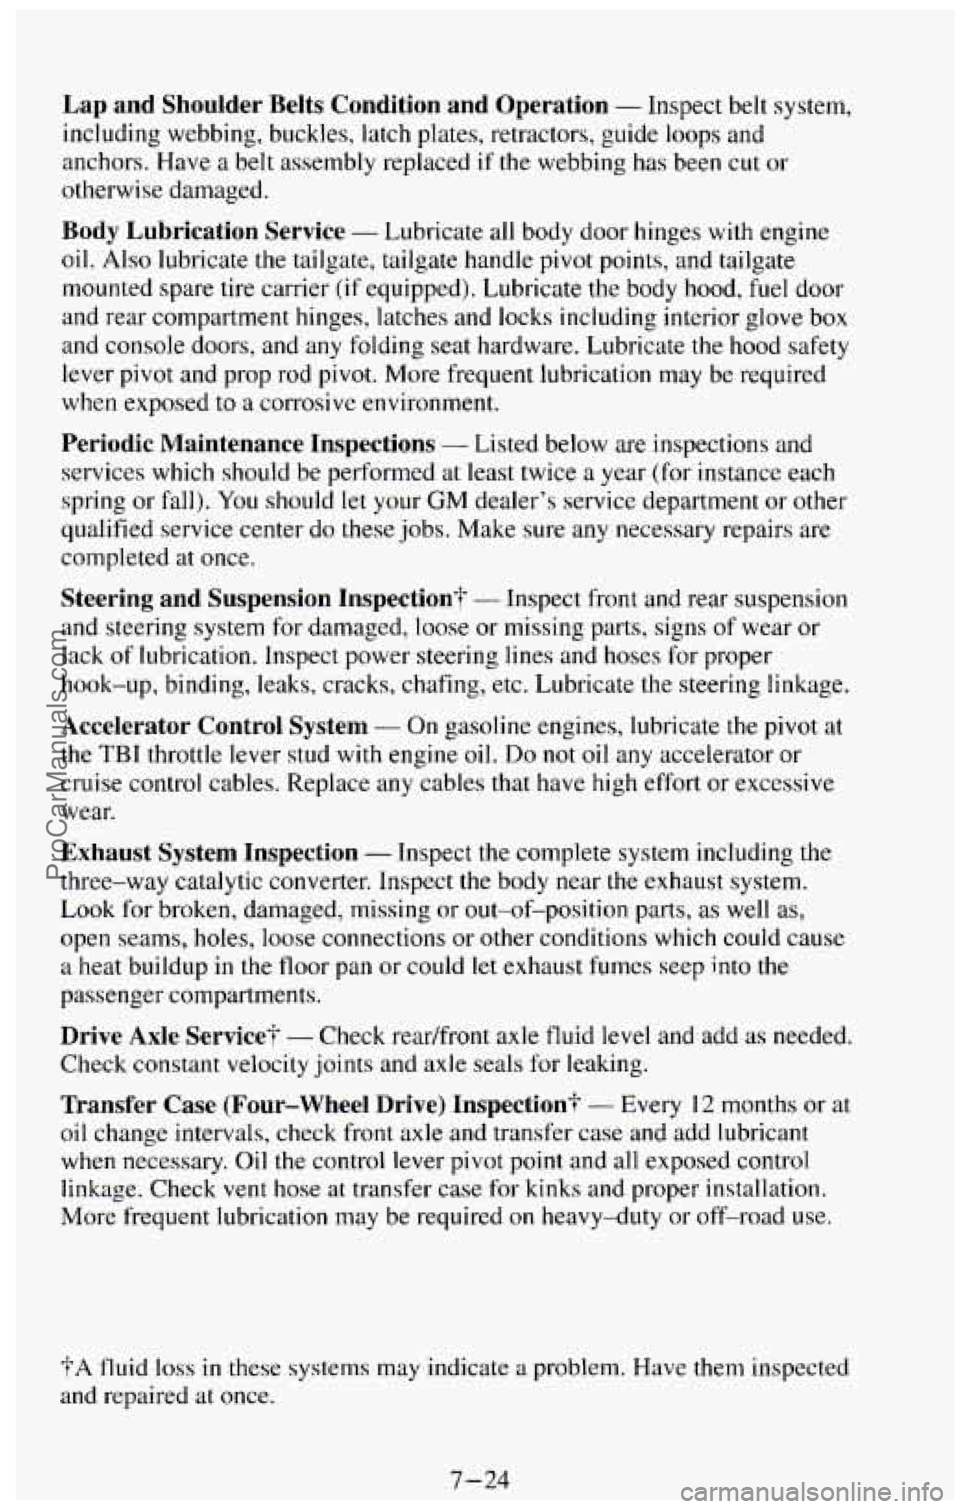
Lap and Shoulder Belts Condition and Operation - Inspect belt system,
including webbing, buckles, latch plates, retractors, guide loops\
and
anchors. Have
a belt assembly replaced if the webbing has been cut or
otherwise damaged.
Body Lubrication Service - Lubricate all body door hinges with engine
oil.
Also lubricate the tailgate, tailgate handle pivot points, and tailgate
mounted spare tire carrier (if equipped). Lubricate the body hood,
fuel door
and rear compartment hinges, latches and locks including interior glove box
and console doors, and any folding seat hardware. Lubricate the hood safety
lever pivot and prop rod pivot. More frequent lubrication may be required
when exposed to
a corrosive environment.
Periodic Maintenance Inspections - Listed below are inspections and
services which should be performed at least twice
a year (for instance each
spring or fall). You should let your
GM dealer’s service department or other
qualified service center do
these jobs. Make sure any necessary repairs are
completed at once.
Steering and Suspension Inspection? - Inspect front and rear suspension
and steering system for damaged, loose or missing parts, signs
of wear or
lack of lubrication. Inspect power steering lines and hoses for proper
hook-up, binding, leaks, cracks, chafing, etc. Lubricate the steering linkage.
Accelerator Control System - On gasoline engines, lubricate the pivot at
the
TBI throttle lever stud with engine oil. Do not oil any accelerator or
cruise control cables. Replace any cables that have high effort or excessive
wear.
Exhaust System Inspection - Inspect the complete system including the
three-way catalytic converter. Inspect the body near
the exhaust system.
Look for broken, damaged, missing or out-of-position parts,
as well as,
open seams, holes, loose connections or other conditions which could cause
a heat buildup
in the floor pan or could let exhaust fumes seep into the
passenger compartments.
Drive Axle Service? - Check readfront axle tluid level and add as needed,
Check constant velocity joints and axle seals for leaking.
Transfer Case (Four-wheel Drive) Inspection+ - Every 12 months or at
oil change intervals, check front axle and transfer case and add lubricant
when necessary. Oil the control lever pivot point and all exposed control
linkage. Check
vent hose at transfer case for kinks and proper installation.
More frequent lubrication may be required on heavy-duty or off-road use.
?A fluid loss in these systems may indicate a problem. Have them inspected
and repaired at once.
7-24
ProCarManuals.com
Page 359 of 385
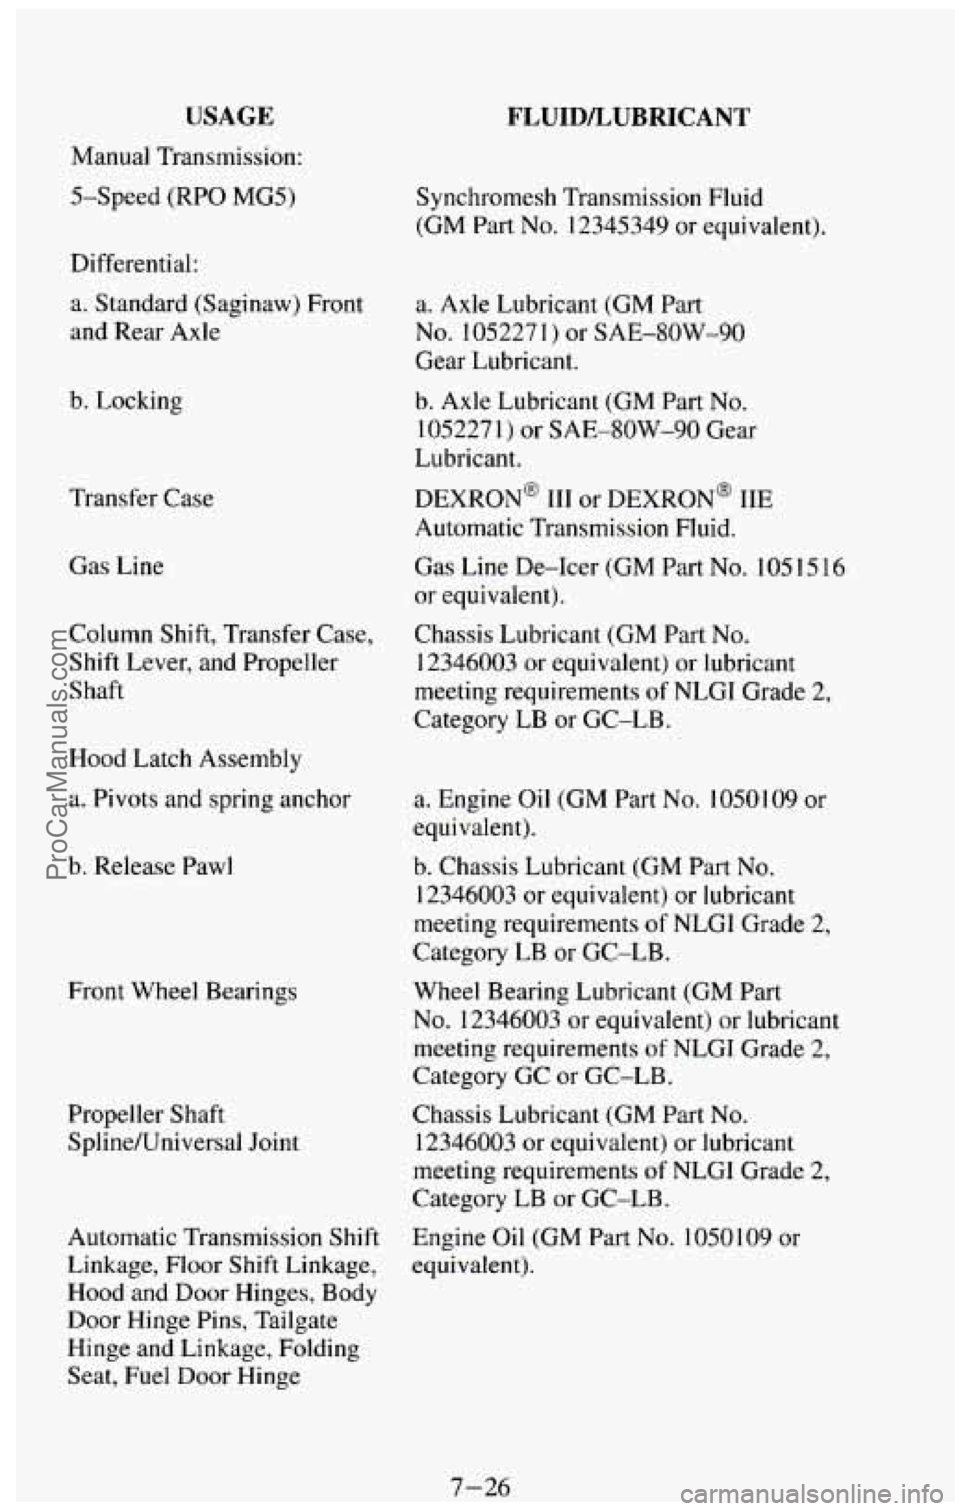
USAGE
Manual Transmission:
5-Speed
(RPO MG5)
Differential:
a. Standard (Saginaw) Front
and Rear Axle
b. Locking
Transfer Case
Gas Line
FLUIDLLUBRICANT
Synchromesh Transmission Fluid
(GM Part
No. I2345349 or equivalent).
a. Axle Lubricant (GM Part
No. 105227
I ) or SAE-80W-90
Gear Lubricant.
b. Axle Lubricant (GM Part
No.
1052271) or SAE-SOW-90 Gear
Lubricant.
DEXRON~ 111 or DEXRON~ IIE
Automatic Transmission Fluid.
Gas Line De-Icer (GM Part
No. 105 15 16
or equivalent).
Column Shift, Transfer Case,
Chassis Lubricant (GM Part
No.
Shift Lever, and Propeller
12346003 or equivalent) or lubricant
Shaft meeting requirements
of NLGI Grade 2,
Category LB or GC-LB.
Hood Latch Assembly
a. Pivots and spring anchor
b. Release Pawl
Front Wheel Bearings
Propeller Shaft
Spline/Universal Joint a.
Engine Oil (GM Part
No. 1050109 or
equivalent).
b. Chassis Lubricant (GM Part
No.
12346003 or equivalent) or lubricant
meeting requirements of NLGI Grade 2,
Category LB or GC-LB.
Wheel Bearing Lubricant (GM Part
No. 12346003 or equivalent) or lubricant
meeting requirements
of NLGI Grade 2,
Category GC
or GC-LB.
Chassis Lubricant (GM Part
No.
12346003 or equivalent) or lubricant
meeting requirements
of NLGI Grade 2,
Category LB or GC-LB.
Automatic Transmission Shift Engine
Oil (GM Part No. 1050109 or
Linkage, Floor Shift Linkage, equivalent).
Hood and
Door Hinges, Body
Door Hinge Pins, Tailgate
Hinge and Linkage, Folding
Seat, Fuel Door Hinge
7-26 ProCarManuals.com