brake light CHEVROLET SUBURBAN 1995 Owners Manual
[x] Cancel search | Manufacturer: CHEVROLET, Model Year: 1995, Model line: SUBURBAN, Model: CHEVROLET SUBURBAN 1995Pages: 486, PDF Size: 26.58 MB
Page 13 of 486
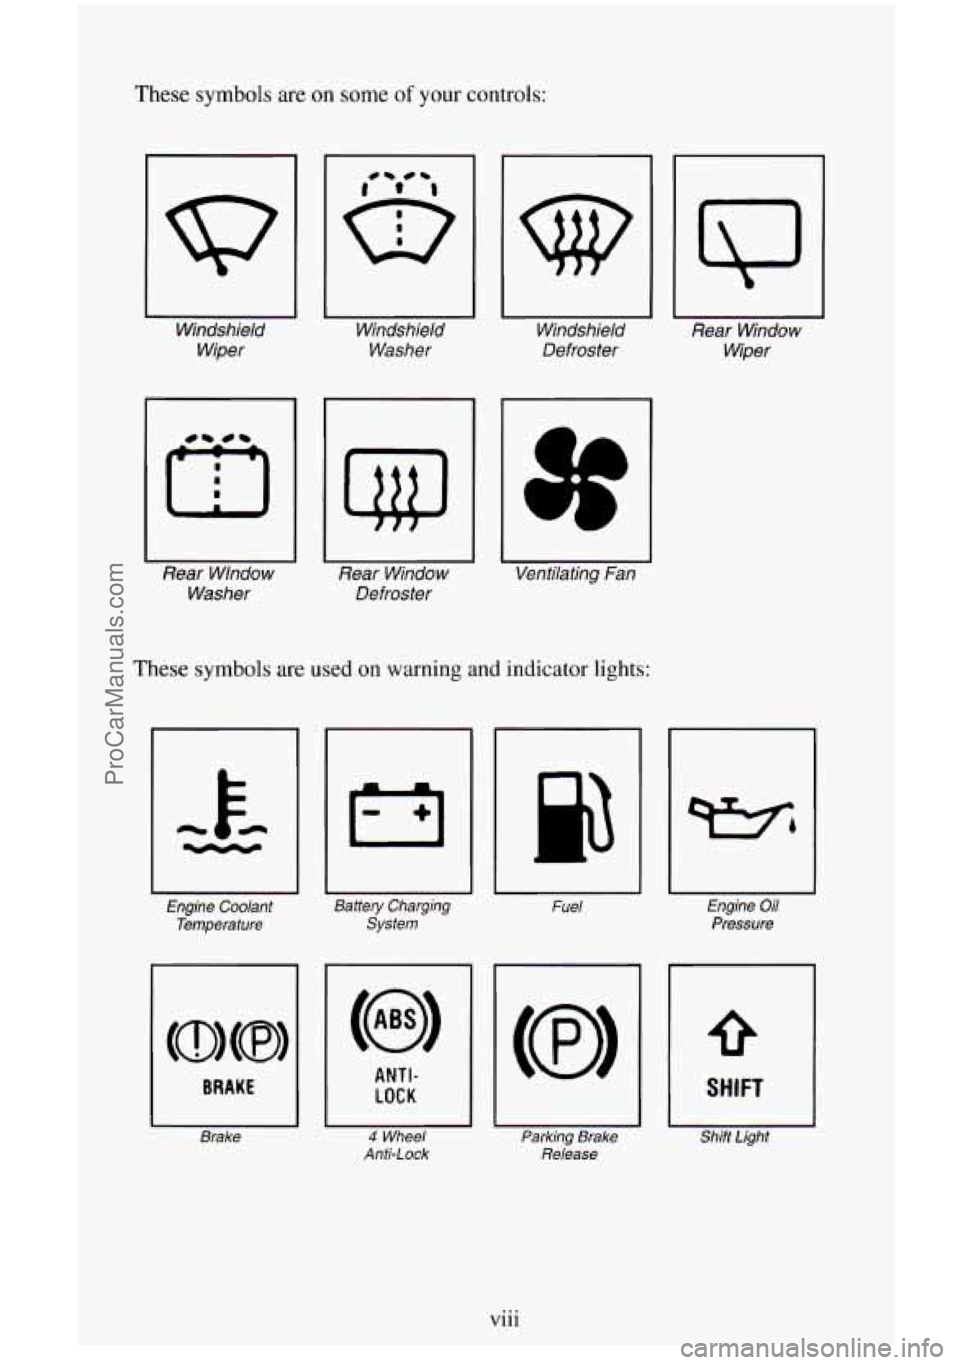
These symbols are on some of your controls:
I
Windshield
Wiper Windshield
Washer
Rear Wlndow Washer
I
Rear Window
Defroster
w
I
Windshield
Defroster
U
Ventilating Fan
These symbols are used on warning and indicator lights:
I -k 4cccy
Engine Coolant
Temperature
BRAKE
I Brake
I I
Battery Charging
System
ANTI-
I LOCK
I I 4 Wheel
Anti-Lock
Fuel
Parking Brake Release
I\J
Rear Window
Wiper
Engine Oil
Pressure
SHIFT
Shift Light
viii
. ~ .. ProCarManuals.com
Page 78 of 486
Parking at Night
Park in a lighted spot, close all windows and lock your vehicle. Remember
to keep your valuables out
of sight. Put them in a storage area, or take them
with
you.
Parking Lots
If you park in a lot where someone will be watching your vehicle, it’s best
to lock it up and take your keys. But what if you have to leave your ignition
key? What if you have
to leave something valuable in your vehicle‘?
0 Put your valuables in a storage area, like your glove box.
Lock all the doors except the driver’s.
New Vehicle “Break-ln”
NOTICE:
Your modern vehicle doesn’t need an elaborate “break-in.” But
it will perform better in the long run if you follow these
guidelines:
0 Keep your speed at 55 mph (88 km/h) or less for the first 500
miles (SO4 km).
Don’t drive at any one speed - fast or slow - for the first
500 miles (804 km). Don’t make full-throttle starts.
Avoid making hard stops for the first 200 miles (322 km) or
so. During this time your new brake linings aren’t yet broken
in. Hard stops with new linings can mean premature wear and
earlier replacement. Follow this “breaking-in” guideline
every time you get new brake linings.
Don’t tow a trailer during “break-in.” See “Towing a Trailer”
in the Index for more information.
2-1 3
ProCarManuals.com
Page 91 of 486
0
0
0
0
THIRD GEAR (3), FOURTH GEAR (4) and FIFTH GEAR (5) -
Shift into THIRD GEAR (3), FOURTH GEAR (4) and FIFTH GEAR
(5) the same way you do for SECOND GEAR (2). Slowly let up on the
clutch pedal
as you press the accelerator pedal.
To Stop - Let up on the accelerator pedal and press the brake pedal.
Just before the vehicle stops, press the clutch pedal and the brake pedal,
and shift to NEUTRAL
(N).
NEUTRAL (N) - Use this position when you start or idle your
engine.
REVERSE (R) - To back up, first press down the clutch pedal. Wait
about
5 seconds for the internal parts to stop spinning and then, shift
into REVERSE (R). Let up on the clutch pedal slowly while pressing
the accelerator pedal.
NOTICE:
Shift to REVERSE (R) only after your vehicle is stopped.
Shifting to REVERSE
(R) while your vehicle is moving could
damage your transmission.
Also, use REVERSE (R), along with the parking brake, when turning
off your engine and parking your vehicle.
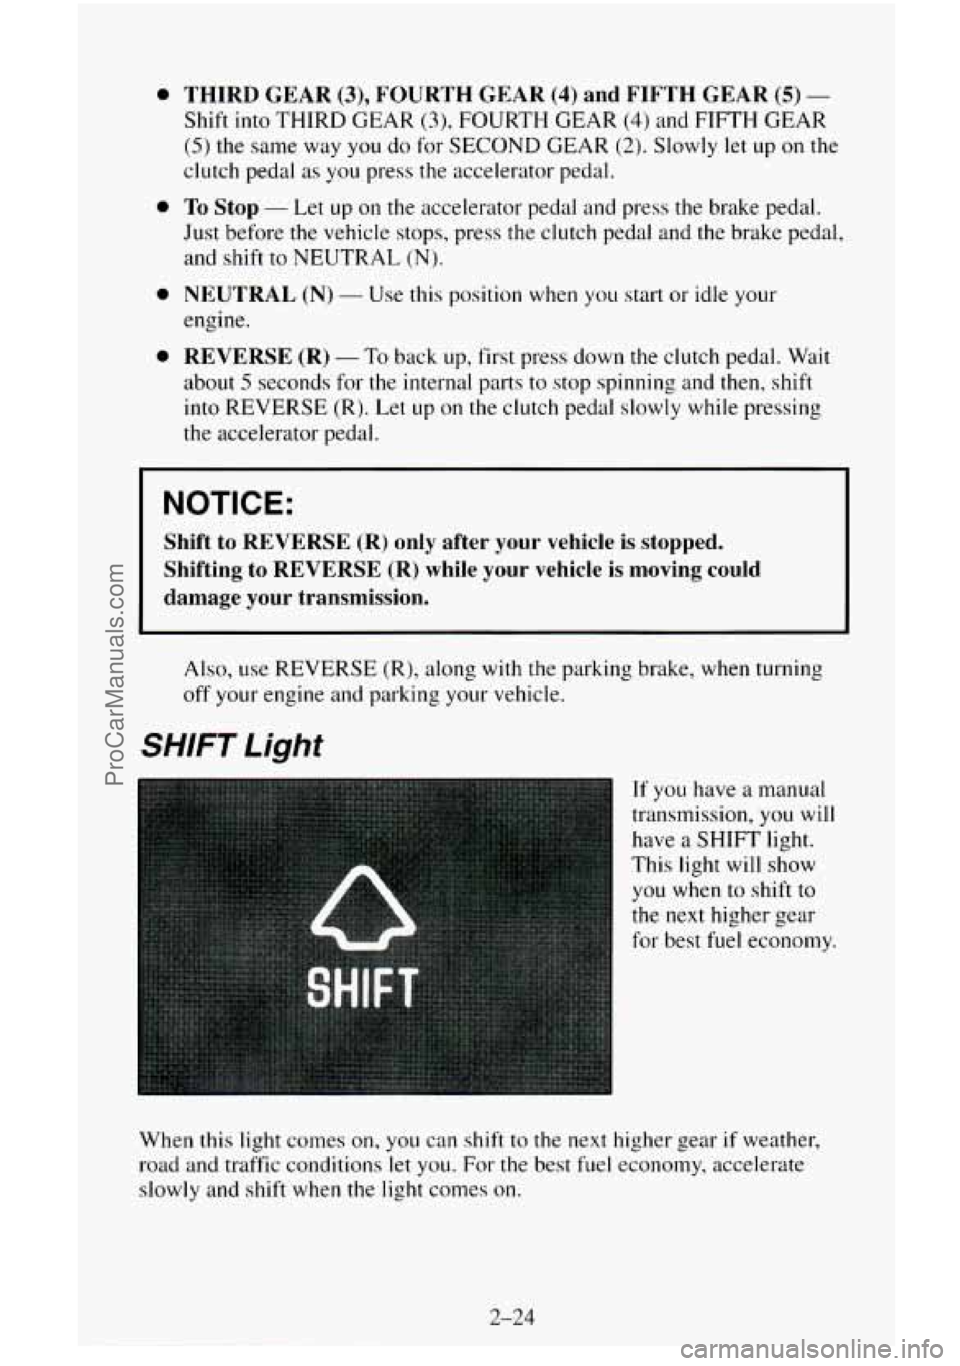
SHIFT Light
If you have a manual
transmission, you will
have a
SHIFT light.
This light will show
you when to shift to
the
next higher gear
for best fuel economy.
When
this light comes on, you can shift to the next higher gear if weather,
road and traffic conditions let you.
For the best fuel economy, accelerate
slowly and shift when the light comes on.
2-24
ProCarManuals.com
Page 93 of 486
Parking Brake
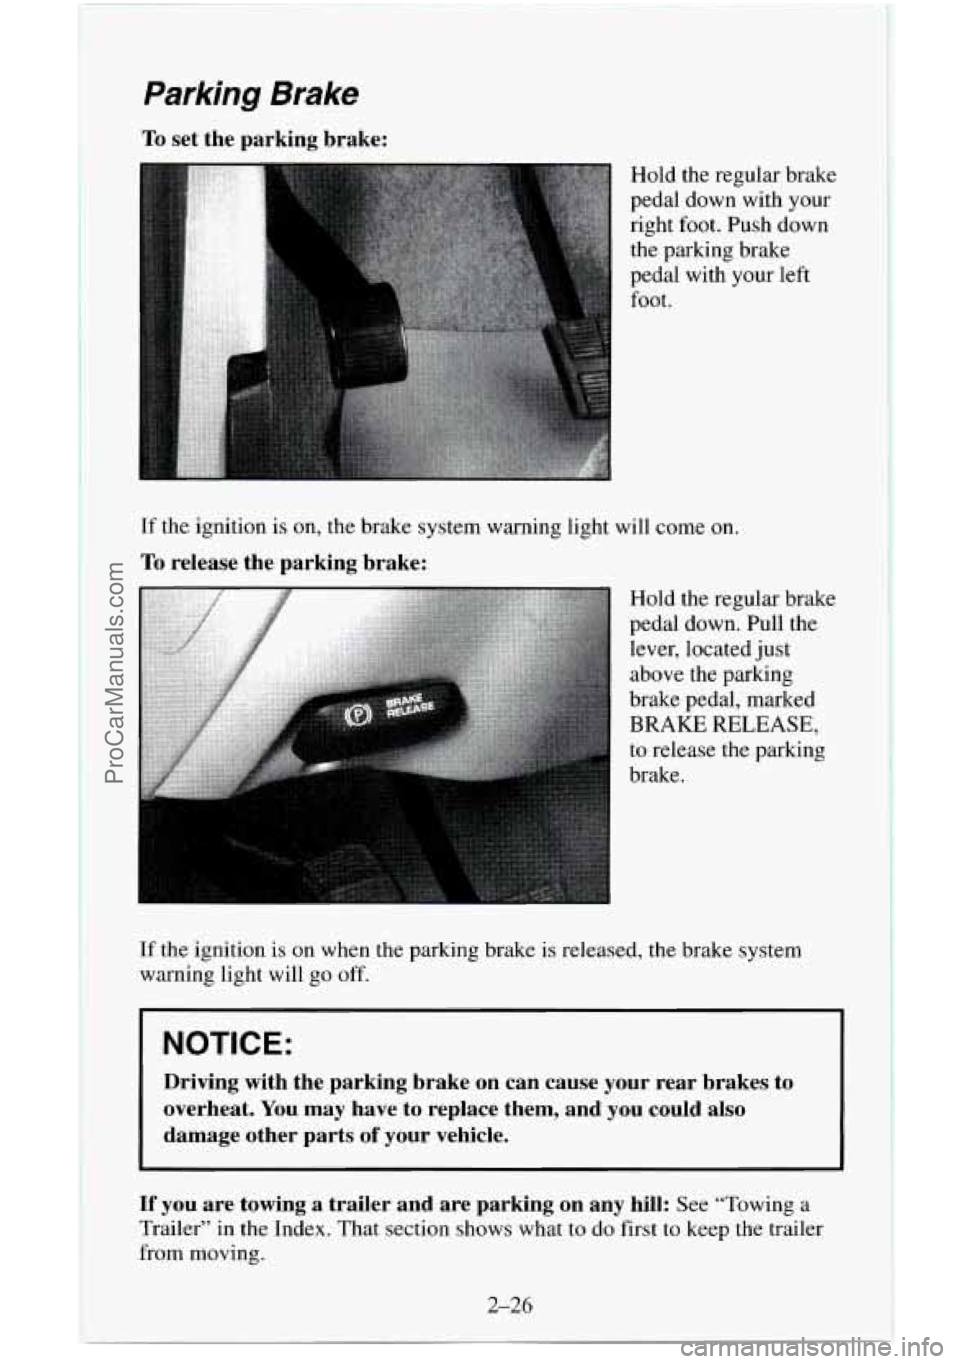
To set the parking brake:
Hold the regular brake
pedal down with your
right foot. Push down
the parking brake
pedal with your left
foot.
If the ignition is on, the brake system warning light will come on.
To release the parking brake:
Hold the regular brake
pedal down. Pull the
lever, located just
above the parking
brake pedal, marked
BRAKE RELEASE,
to release the parking
brake.
If the ignition is on when the parking brake is released, the brake system
warning light will
go off.
I NOTICE:
Driving with the parking brake on can cause your rear brakes to
overheat. You may have to replace them, and you could also
damage other parts
of your vehicle.
If you are towing a trailer and are parking on any hill: See “Towing a
Trailer” in the Index. That section shows what to do first to keep the trailer
from moving.
2-26
I I
ProCarManuals.com
Page 114 of 486
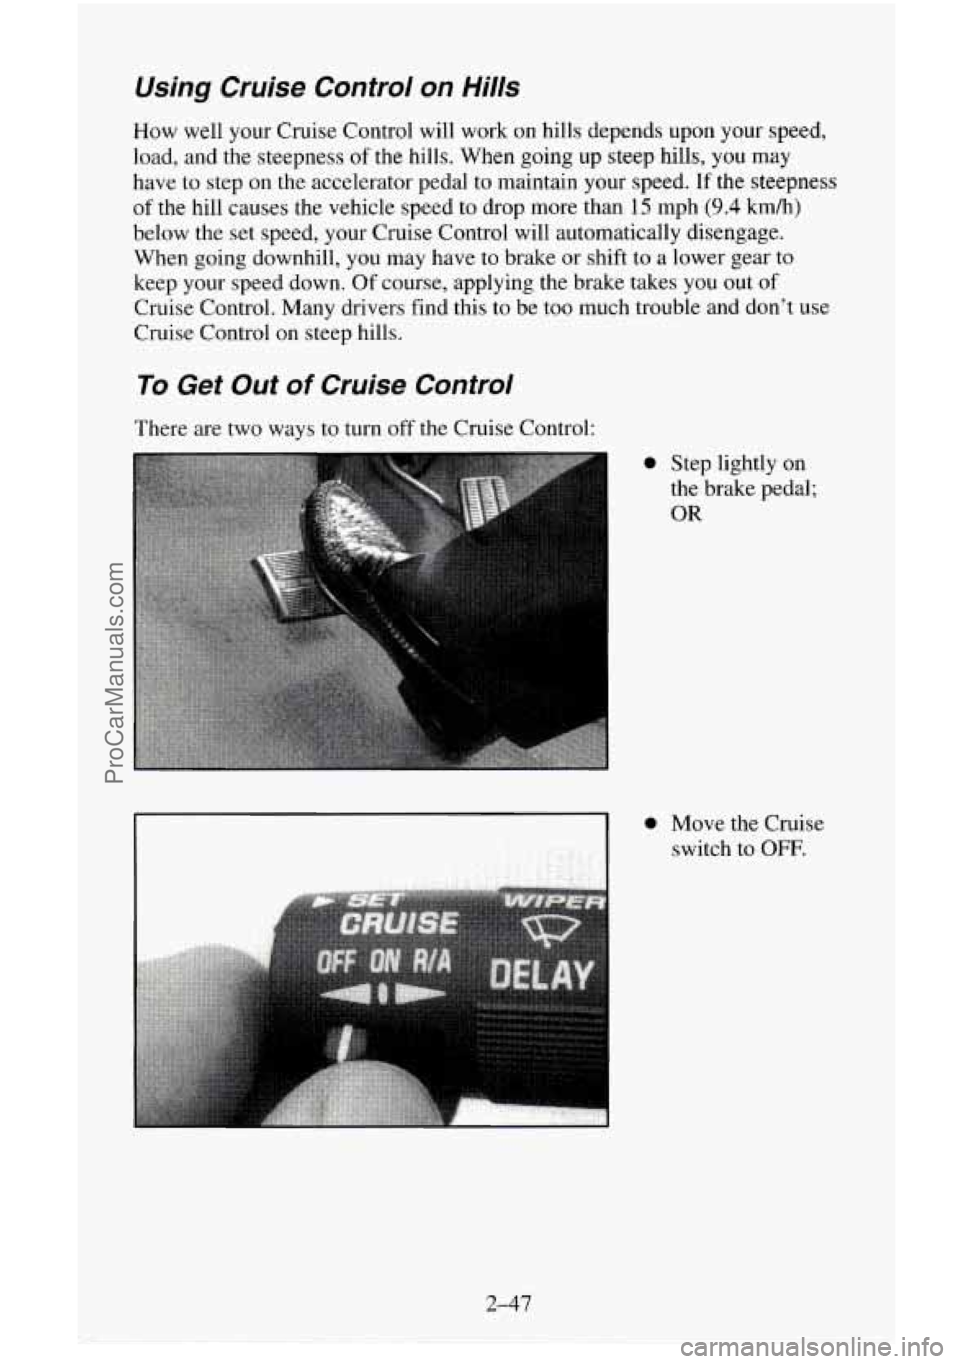
Using Cruise Control on Hills
How well your Cruise Control will work on hills depends upon your speed,
load, and the steepness
of the hills. When going up steep hills, you may
have
to step on the accelerator pedal to maintain your speed. If the steepness
of the hill causes the vehicle speed to drop more than 15 mph (9.4 km/h)
below the set speed, your Cruise Control will automatically disengage.
When going downhill, you may have to brake or shift to
a lower gear to
keep your speed down. Of course, applying the brake takes you out
of
Cruise Control. Many drivers find this to be too much trouble and don’t use
Cruise Control on steep hills.
To Get Out of Cruise Control
There are two ways to turn off the Cruise Control:
0 Step lightly on
the brake pedal;
OR
2-47
ProCarManuals.com
Page 116 of 486
Headlamps-On Reminder
A buzzer will sound when your headlamps are turned on and your ignition is
in OFF, LOCK or ACC. If you need to use your headlamps when the ignition
switch is
in OFF, LOCK or ACC, the buzzer can be turned off by turning the
thumb wheel next to the park/headlamp switch
all the way down.
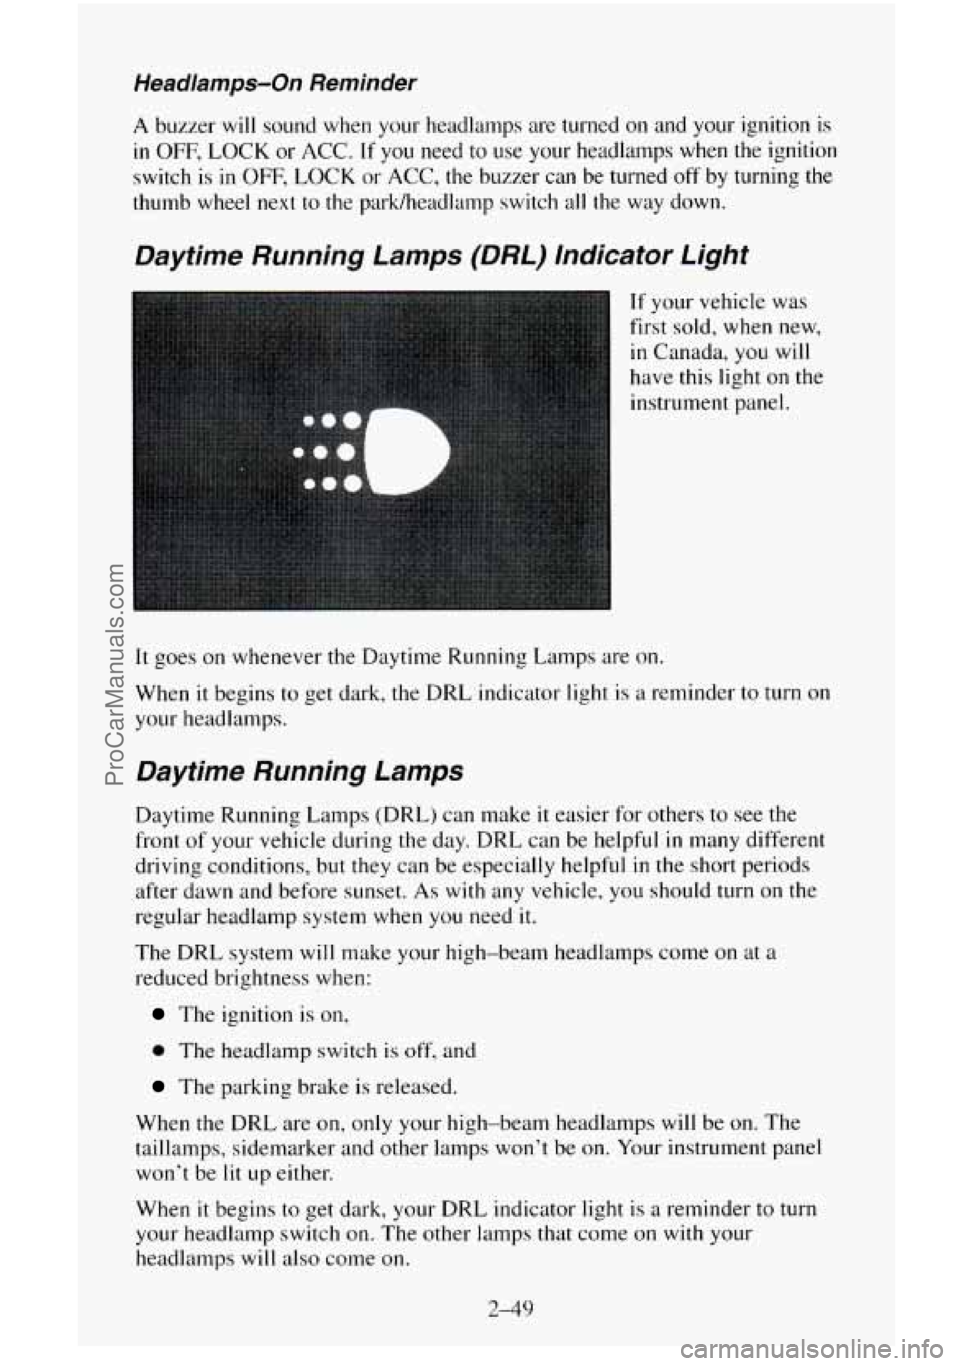
Daytime Running Lamps (DRL) Indicator Light
If your vehicle was
first sold, when new,
in Canada, you will
have this light on the
instrument panel.
It goes on whenever the Daytime Running Lamps are on.
When it begins to get dark,
the DRL indicator light is a reminder to turn on
your headlamps.
Daytime Running Lamps
Daytime Running Lamps (DRL) can make it easier for others to see the
front
of your vehicle during the day. DRL can be helpful in many different
driving conditions, but they can be especially helpful
in the short periods
after dawn and before sunset. As
with any vehicle, you should turn on the
regular headlamp system when you need it.
The DRL system will make your high-beam headlamps come
on at a
reduced brightness when:
The ignition is on,
0 The headlamp switch is off, and
The parking brake is released.
When the DRL are on, only your high-beam headlamps will be on. The
taillamps, sidemarker and other lamps won’t be
on. Your instrument panel
won’t be
lit up either.
When
it begins to get dark, your DRL indicator light is a reminder to turn
your headlamp switch on. The other lamps that come on with your
headlamps will also come on.
2-49
ProCarManuals.com
Page 134 of 486
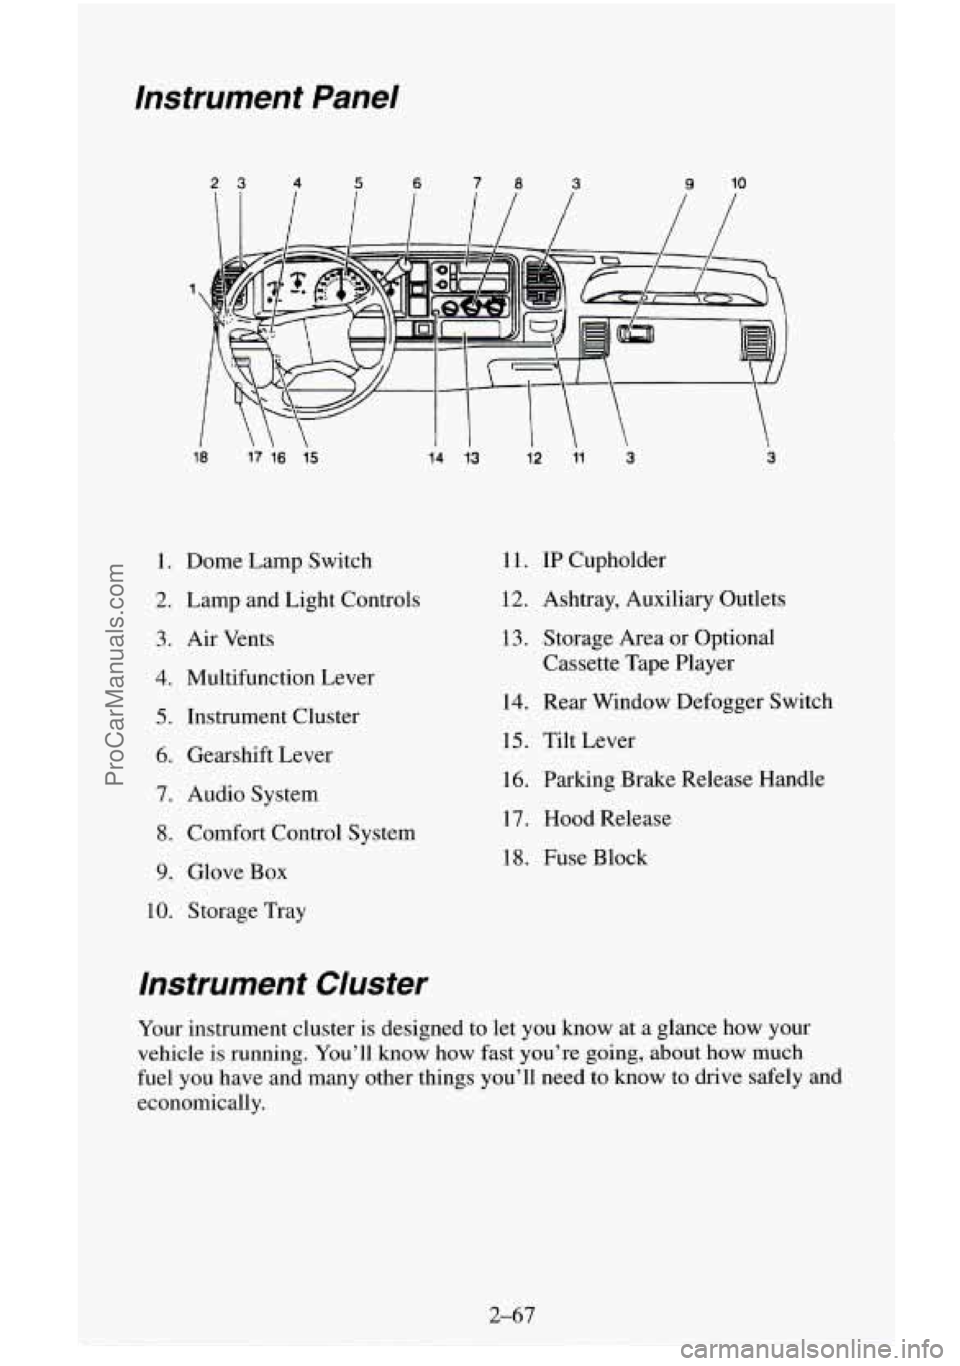
Instrument Panel
23 4 5 6 78 3 9 10
18
17 16 15
1. Dome Lamp Switch
2. Lamp and Light Controls
3. Air Vents
4. Multifunction Lever
5. Instrument Cluster
6. Gearshift Lever
7. Audio System
8. Comfort Control System
9. Glove Box
10. Storage Tray
14 13 12 11 3 3
1 1. IP Cupholder
12. Ashtray, Auxiliary Outlets
13. Storage Area or Optional
Cassette Tape Player
14. Rear Window Defogger Switch
15. Tilt Lever
16. Parking Brake Release Handle
17. Hood Release
18. Fuse Block
Instrument Cluster
Your instrument cluster is designed to let you know at a glance how your
vehicle
is running. You’ll know how fast you’re going, about how much
fuel you have and many other things you’ll need to know to drive safely and
economically.
2-67
ProCarManuals.com
Page 138 of 486
You will see this light flash for a few seconds when you turn your ignition
to RUN or START. Then the light should go out. This means the system is
ready.
If the air bag readiness light doesn’t come on when you start your vehicle,
or stays
on, or comes on when you are driving, your air bag system may not
work properly. Have your vehicle serviced right away.
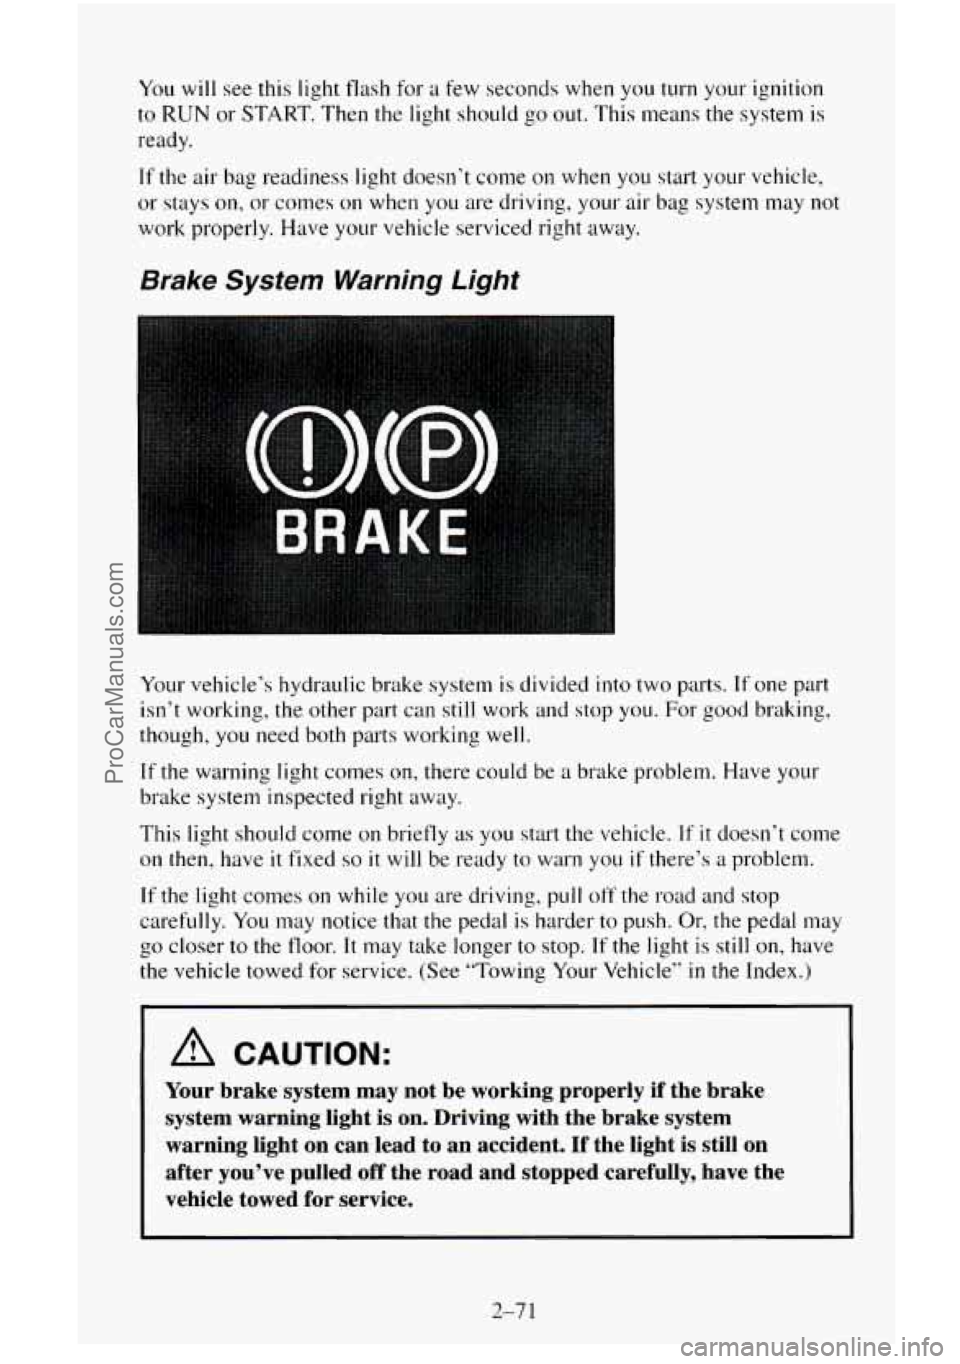
Brake System Warning Light
Your vehicle’s hydraulic brake system is divided into two parts. If one part
isn’t working, the other part can still
work and stop you. For good braking,
though, you need both parts working well.
If the warning light comes on, there could be a brake problem. Have your
brake system inspected right away.
This light should come on briefly as
you start the vehicle. If it doesn’t come
on then, have it fixed so it will be ready to warn you if there’s a problem.
If the light comes on while you are driving, pull off the road and stop
carefully. You may notice that the pedal is harder
to push. Or, the pedal may
go closer
to the floor. It may take longer to stop. If the light is still on, have
the vehicle towed
for service. (See “Towing Your Vehicle” in the Index.)
~~
A CAUTION:
Your brake system may not be working properly if the brake
system warning light is
on. Driving with the brake system
warning light on can lead to an accident. If the light is still on
after you’ve pulled
off the road and stopped carefully, have the
vehicle towed for service.
2-7 1
ProCarManuals.com
Page 139 of 486
The brake system warning light will also come on when you set your
parking brake, and it will stay on if your parking brake doesn’t release fully.
If it stays on after your parking brake is fully released, it means you have a
brake problem.
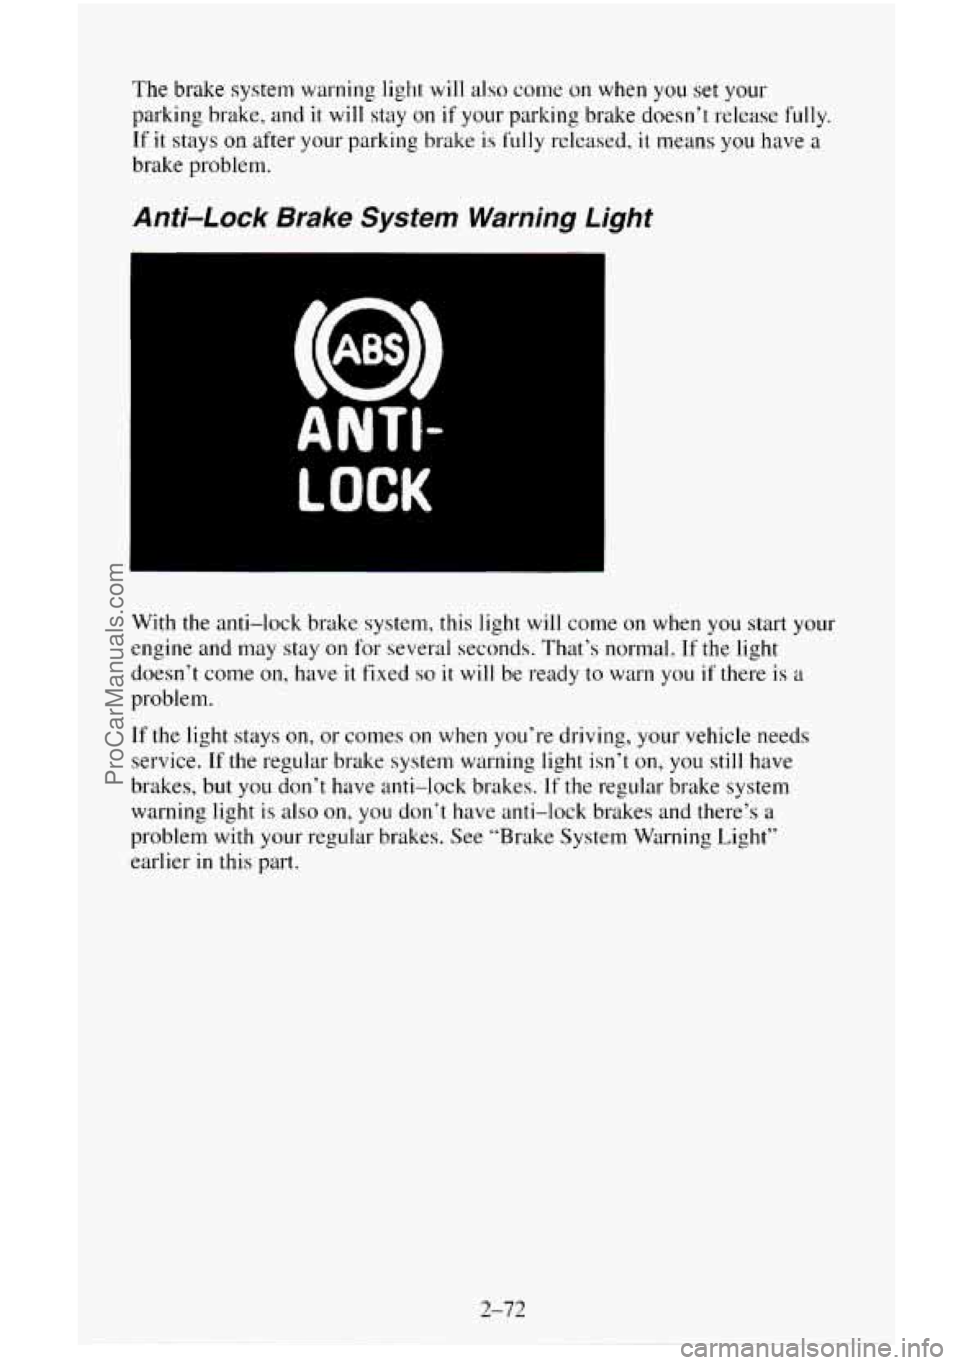
Anti4 ock Brake System Warning Light
ANTI-
LOCK
With the anti-lock brake system, this light will come on when you start your
engine and may stay on for several seconds. That’s normal.
If the light
doesn’t come on, have
it fixed so it will be ready to warn you if there is a
problem.
If the light stays on, or comes on when you’re driving, your vehicle needs
service.
If the regular brake system warning light isn’t on, you still have
brakes, but
you don’t have anti-lock brakes. If the regular brake system
warning light
is also on, you don’t have anti-lock brakes and there’s a
problem with your regular brakes. See “Brake System Warning Light”
earlier
in this part.
2-72
.~
ProCarManuals.com
Page 193 of 486
0
0
0
0
0
0
0
Do not get too close to the vehicle you want to pass while you’re
awaiting an opportunity. For
one thing, following too closely reduces
your area of
vision, especially if you’re following a larger vehicle.
Also,
you won’t have adequate space if the vehicle ahead suddenly
slows or stops. Keep back a reasonable distance.
When it looks like
a chance to pass is coming up, start to accelerate but
stay in the right lane and don’t get too close. Time your move
so you
will be increasing speed as the time comes to move into the other lane.
If the way
is clear to pass, you will have a “running start” that more
than makes up for the distance
you would lose by dropping back. And
if something happens to cause you to cancel your pass, you need only
slow down and drop back again and wait for another opportunity.
If other cars are lined up
to pass a slow vehicle, wait your turn. But
take care that someone isn’t trying to pass
you as you pull out to pass
the slow vehicle. Remember
to glance over your shoulder and check
the blind spot.
Check your mirrors, glance over your shoulder, and start your left lane
change signal before moving
out of the right lane to pass. When you
are far enough ahead
of the passed vehicle to see its front in your inside
mirror, activate your right lane change signal and move back
into the
right lane. (Remember that if your right outside mirror is convex, the
vehicle
you just passed may seem to be farther away from you than it
really is.)
Try not to pass more
than one vehicle at a time on two-lane roads.
Reconsider before passing
the next vehicle.
Don’t overtake a slowly moving vehicle
too rapidly. Even though the
brake lights are not flashing, it may be slowing down or starting to turn.
If you’re being passed, make it easy for the following driver to get
ahead of
you. Perhaps you can ease a little to the right.
Loss of Control
Let’s review what driving experts say about what happens when the three
control systems (brakes, steering and acceleration) don’t have enough
friction where
the tires meet the road to do what the driver has asked.
In any emergency, don’t give up. Keep trying
to steer and constantly seek an
escape route or area of less danger.
Skidding
In a skid, a driver can lose control of the vehicle. Defensive drivers avoid
most skids by taking reasonable care suited
to existing conditions, and by
not “overdriving” those conditions. But skids are always possible.
4-10
ProCarManuals.com