center console CHEVROLET SUBURBAN 2009 Owners Manual
[x] Cancel search | Manufacturer: CHEVROLET, Model Year: 2009, Model line: SUBURBAN, Model: CHEVROLET SUBURBAN 2009Pages: 578, PDF Size: 3.04 MB
Page 108 of 578
Outside Automatic Dimming Mirror..................2-54
Park Tilt Mirrors............................................2-55
Outside Convex Mirror...................................2-55
Outside Heated Mirrors..................................2-55
Object Detection Systems...............................2-56
Ultrasonic Rear Parking Assist (URPA)............2-56
Side Blind Zone Alert (SBZA).........................2-58
Rear Vision Camera (RVC)............................2-62
OnStar
®System.............................................2-68
Universal Home Remote System......................2-71
Universal Home Remote System Operation
(With Three Round LED)............................2-72Storage Areas................................................2-78
Glove Box...................................................2-78
Cupholders..................................................2-78
Center Console Storage.................................2-79
Luggage Carrier...........................................2-79
Rear Storage Area........................................2-80
Rear Seat Armrest........................................2-80
Cargo Cover................................................2-80
Sunroof.........................................................2-81
Section 2 Features and Controls
2-2
Page 124 of 578
Manual Operation of Power Liftgate
To change the liftgate to manual operation, press the
switch on the overhead console to the OFF position.
With the power liftgate disabled and all of the doors
unlocked, the liftgate can be manually opened and
closed.
To open the liftgate, press the touchpad on the handle
on the outside of the liftgate, and lift the gate open.
To close the liftgate, use the pull cup to lower the liftgate
and close. The liftgate latch will power close. Always
close the liftgate before driving.
If the RKE button or the power close button on the liftgate
is pressed while power operation is disabled, the lights
will �ash three times, but the liftgate will not move.
It is not recommended that you drive with the liftgate
open, however, if you must drive with the liftgate open,
the liftgate should be set to manual operation by
pressing the OFF switch on the center console.
The liftgate has an electric latch. If the battery is
disconnected or has low voltage, the liftgate will not
open. The liftgate will resume operation when the battery
is reconnected and charged.
If the battery is properly connected with adequate
voltage, the switch is not disabled, and the liftgate still will
not function, your vehicle should be taken to a dealer/
retailer for service.
Power Assist Steps
Your vehicle may have power assist steps.
The power assist steps automatically extend from
beneath the vehicle on the side in which the door has
been opened. Once the door is closed, the assist steps
automatically move back under the vehicle after a
brief delay. The vehicle must not be moving for the
assist steps to extend or retract.
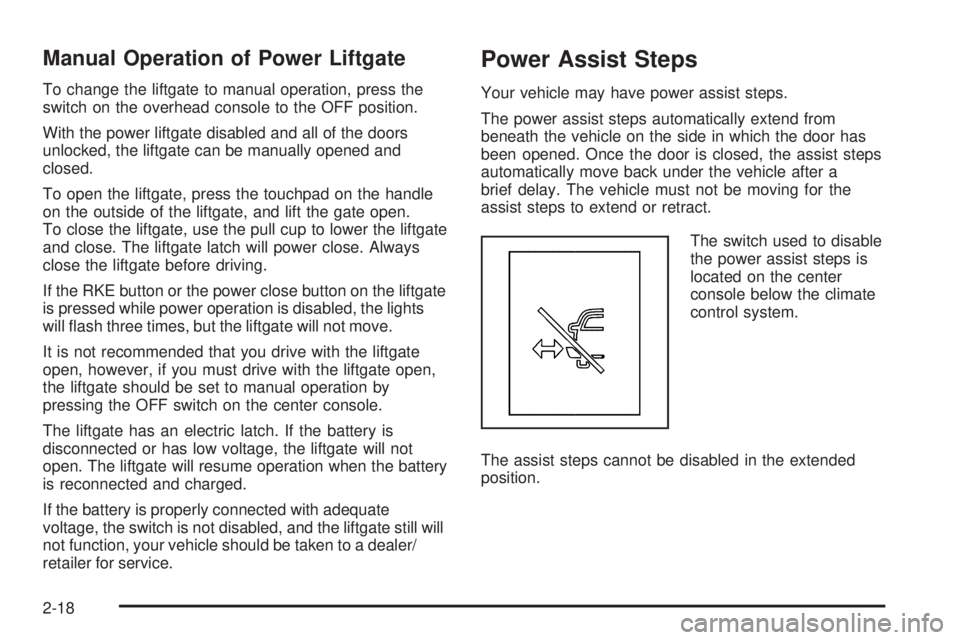
The switch used to disable
the power assist steps is
located on the center
console below the climate
control system.
The assist steps cannot be disabled in the extended
position.
2-18
Page 185 of 578
Center Console Storage
For vehicles with a console compartment, it is located
between the bucket seats.
Press the button and lift the lid to access the console
compartment.
A cupholder located in the rear of the console, swings
down for the rear seat passenger to use.
Luggage Carrier
Notice:Loading cargo on the luggage carrier that
weighs more than 200 lbs (91 kg) or hangs over the
rear or sides of the vehicle can damage the vehicle.
Load cargo so that it rests on the slats as far forward
as possible and against the side rails, making sure to
fasten it securely.
For vehicles with a luggage carrier, items can be loaded
on top of the vehicle.
The luggage carrier has siderails attached to the roof.
It can also have crossrails which can be moved
back and forth to help secure cargo. Tie the load
to the siderails or siderail supports.
Do not exceed the maximum vehicle capacity when
loading the vehicle. For more information on vehicle
capacity and loading, seeLoading the Vehicle on
page 4-33.
Make sure the cargo is properly loaded.To prevent damage or loss of cargo while driving,
periodically stop and check to make sure cargo is still
securely fastened.
If small heavy objects are placed on the roof, cut a
piece of 3/8 inch plywood to �t inside the crossrails
and siderails to spread the load. Tie the plywood
to the siderail supports.
Tie the load and secure it to the crossrails or the
siderail supports. Use the crossrails only to keep
the load from sliding. To move a crossrail, lift
the release lever up, on both sides of the rail.
Then slide the crossrail to the desired position
balancing the force side to side. Press the release
lever down on both sides of the rail, down to
tighten it. Try to slide the crossrail back and forth
slightly to make sure it is tight.
To carry long items, move the crossrails as far apart
as possible. Tie the load to the crossrails and the
siderails or siderail supports. Also tie the load to the
bumpers, but do not tie the load so tightly that the
crossrails or siderails are damaged.
After moving a crossrail, be sure it is securely locked
into the siderail.
A Center High-Mounted Stoplamp (CHMSL) is located
above the rear window glass.
Make sure items loaded on the roof of the vehicle do
not block or damage the CHMSL.
2-79
Page 206 of 578
Auxiliary Roof-Mounted Lamp
If the vehicle has this feature, this button includes wiring
provisions for a dealer or a quali�ed service center to
install an auxiliary roof lamp.
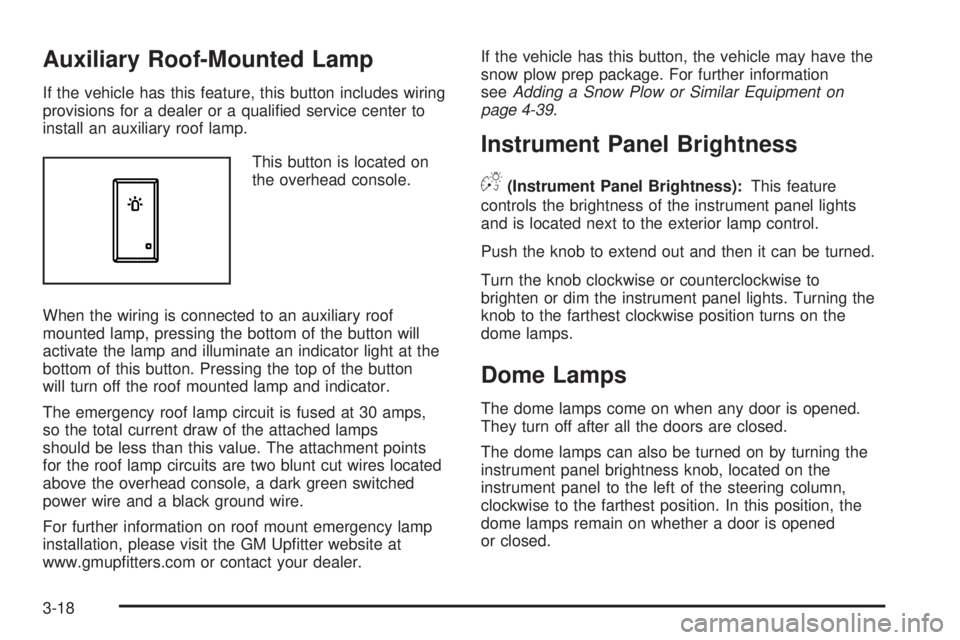
This button is located on
the overhead console.
When the wiring is connected to an auxiliary roof
mounted lamp, pressing the bottom of the button will
activate the lamp and illuminate an indicator light at the
bottom of this button. Pressing the top of the button
will turn off the roof mounted lamp and indicator.
The emergency roof lamp circuit is fused at 30 amps,
so the total current draw of the attached lamps
should be less than this value. The attachment points
for the roof lamp circuits are two blunt cut wires located
above the overhead console, a dark green switched
power wire and a black ground wire.
For further information on roof mount emergency lamp
installation, please visit the GM Up�tter website at
www.gmup�tters.com or contact your dealer.If the vehicle has this button, the vehicle may have the
snow plow prep package. For further information
seeAdding a Snow Plow or Similar Equipment on
page 4-39.
Instrument Panel Brightness
D(Instrument Panel Brightness):This feature
controls the brightness of the instrument panel lights
and is located next to the exterior lamp control.
Push the knob to extend out and then it can be turned.
Turn the knob clockwise or counterclockwise to
brighten or dim the instrument panel lights. Turning the
knob to the farthest clockwise position turns on the
dome lamps.
Dome Lamps
The dome lamps come on when any door is opened.
They turn off after all the doors are closed.
The dome lamps can also be turned on by turning the
instrument panel brightness knob, located on the
instrument panel to the left of the steering column,
clockwise to the farthest position. In this position, the
dome lamps remain on whether a door is opened
or closed.
3-18
Page 207 of 578
Dome Lamp Override
The dome lamp override button is located next to the
exterior lamps control.
k(Dome Off):Press the button in and the dome
lamps remain off when a door is opened. Press
the button again to return it to the extended position so
that the dome lamps come on when a door is opened.
Entry Lighting
The vehicle has an illuminated entry feature.
When the doors are opened, the dome lamps will come
on if the dome override button is in the extended
position. If the dome override button is pressed in, the
lamps will not come on.
Exit Lighting
The interior lamps come on when the key is removed
from the ignition. They turn off automatically in
20 seconds. The lights do not come on if the dome
override button is pressed in.
Reading Lamps
For vehicles with reading lamps they are located on the
overhead console.
To turn on the reading lamps, press the button located
next to each lamp. To turn them off, press the button
again.
The vehicle may also have reading lamps in other
locations. To turn the lamps on or off, press the button
located next to the lamp.
The lamps are �xed and cannot be adjusted.
Electric Power Management
The vehicle has Electric Power Management (EPM) that
estimates the battery’s temperature and state of
charge. It then adjusts the voltage for best performance
and extended life of the battery.
When the battery’s state of charge is low, the voltage is
raised slightly to quickly bring the charge back up. When
the state of charge is high, the voltage is lowered slightly
to prevent overcharging. If the vehicle has a voltmeter
gage or a voltage display on the Driver Information
Center (DIC), you may see the voltage move up or down.
This is normal. If there is a problem, an alert will be
displayed.
3-19
Page 208 of 578
The battery can be discharged at idle if the electrical
loads are very high. This is true for all vehicles. This is
because the generator (alternator) may not be spinning
fast enough at idle to produce all the power that is
needed for very high electrical loads.
A high electrical load occurs when several of the
following are on, such as: headlamps, high beams, fog
lamps, rear window defogger, climate control fan at
high speed, heated seats, engine cooling fans, trailer
loads, and loads plugged into accessory power outlets.
EPM works to prevent excessive discharge of the
battery. It does this by balancing the generator’s output
and the vehicle’s electrical needs. It can increase
engine idle speed to generate more power, whenever
needed. It can temporarily reduce the power demands of
some accessories.
Normally, these actions occur in steps or levels, without
being noticeable. In rare cases at the highest levels of
corrective action, this action may be noticeable to the
driver. If so, a Driver Information Center (DIC) message
might be displayed, such as BATTERY SAVER ACTIVE,
BATTERY VOLTAGE LOW, or LOW BATTERY. If this
message is displayed, it is recommended that the driver
reduce the electrical loads as much as possible. SeeDIC
Warnings and Messages on page 3-64.Battery Run-Down Protection
This feature shuts off the dome, and reading lamps
if they are left on for more than 10 minutes when
the ignition is off. This will keep the battery from
running down.
Accessory Power Outlet(s)
Accessory power outlets can be used to connect
auxiliary electrical equipment, such as a cellular
telephone.
There are two under the climate controls, one inside the
center �oor console, one on the rear of the center
�oor console and one accessory power outlet in the rear
cargo area on the passenger side.
To use an accessory power outlet, remove the protective
cap. When not in use, always cover the accessory
power outlet with the protective cap.
The accessory power outlets are powered, even with
the ignition off. Continuing to use accessory power
outlets while the ignition is in LOCK/OFF may cause the
vehicle’s battery to run down.
Notice:If electrical devices are left plugged into a
power outlet, the battery may drain causing the
vehicle not to start or damage to the battery. This
would not be covered by the warranty. Always unplug
all electrical devices when turning off the vehicle.
3-20
Page 209 of 578
Certain accessory plugs may not be compatible to the
accessory power outlet and could result in blown
adapter or vehicle fuses. If you experience a problem,
see your dealer/retailer for additional information on
the accessory power plugs.
Notice:Adding any electrical equipment to the
vehicle can damage it or keep other components
from working as they should. The repairs would not
be covered by the vehicle warranty. Do not use
equipment exceeding maximum amperage rating of
20 amperes. Check with your dealer/retailer before
adding electrical equipment.
When adding electrical equipment, be sure to follow the
proper installation instructions included with the
equipment. Do not use equipment exceeding the
maximum amperage rating of 20 amperes.
Notice:Improper use of the power outlet can cause
damage not covered by the warranty. Do not hang
any type of accessory or accessory bracket from the
plug because the power outlets are designed for
accessory power plugs only.Ashtray(s) and Cigarette Lighter
The front ashtray is located near the center of the
instrument panel or on the front console, if equipped.
Pull on the ashtray door to open it.
Notice:If papers, pins, or other �ammable items
are put in the ashtray, hot cigarettes or other
smoking materials could ignite them and possibly
damage the vehicle. Never put �ammable items
in the ashtray.
To remove the front ashtray pull the ashtray up.
To use the cigarette lighter, push it in all the way, and
let go. When it is ready, it will pop back out by itself.
Notice:Holding a cigarette lighter in while it
is heating does not let the lighter back away from
the heating element when it is hot. Damage from
overheating can occur to the lighter or heating
element, or a fuse could be blown. Do not hold a
cigarette lighter in while it is heating.
3-21
Page 220 of 578
Rear Air Conditioning and Heating
System and Electronic Climate
Controls
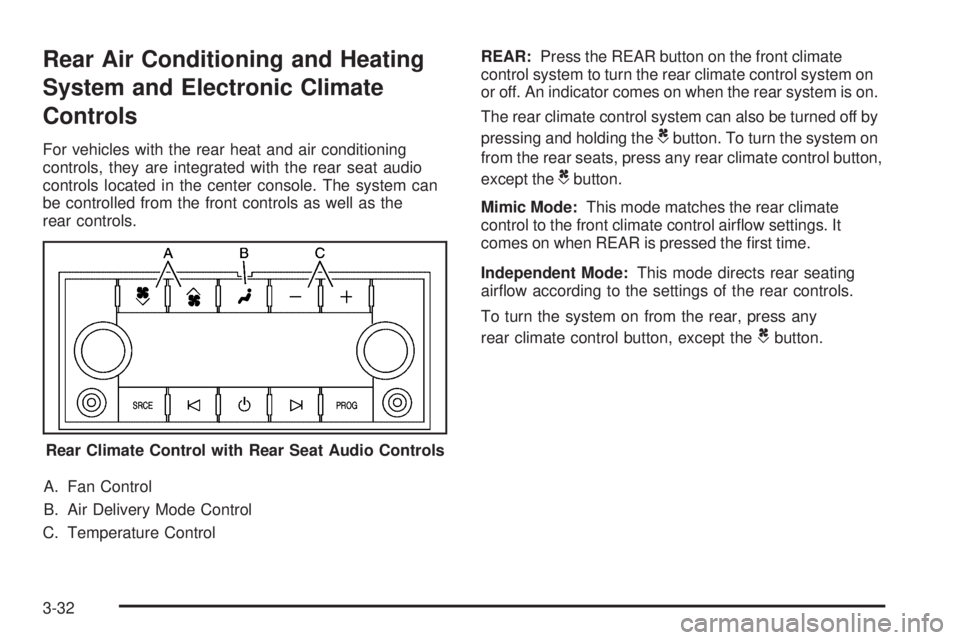
For vehicles with the rear heat and air conditioning
controls, they are integrated with the rear seat audio
controls located in the center console. The system can
be controlled from the front controls as well as the
rear controls.
A. Fan Control
B. Air Delivery Mode Control
C. Temperature ControlREAR:Press the REAR button on the front climate
control system to turn the rear climate control system on
or off. An indicator comes on when the rear system is on.
The rear climate control system can also be turned off by
pressing and holding theCbutton. To turn the system on
from the rear seats, press any rear climate control button,
except the
Cbutton.
Mimic Mode:This mode matches the rear climate
control to the front climate control air�ow settings. It
comes on when REAR is pressed the �rst time.
Independent Mode:This mode directs rear seating
air�ow according to the settings of the rear controls.
To turn the system on from the rear, press any
rear climate control button, except the
Cbutton.
Rear Climate Control with Rear Seat Audio Controls
3-32
Page 565 of 578
C
Calibration.....................................................3-61
California
Perchlorate Materials Requirements................. 5-4
Warning....................................................... 5-4
California Fuel.................................................. 5-6
Camera, Rear Vision.......................................2-62
Canadian Owners............................................... iii
Capacities and Speci�cations..........................5-122
Carbon Monoxide...................................2-13, 2-15
Engine Exhaust...........................................2-50
Winter Driving.............................................4-29
Care of
Safety Belts..............................................5-109
Cargo Cover..................................................2-80
CD, MP3 ............................................3-105, 3-109
Center Console Storage...................................2-79
Center Seat...................................................1-13
Chains, Tire...................................................5-84
Charging System Light....................................3-39
Check Engine Lamp........................................3-43
Checking Things Under the Hood......................5-12
Chemical Paint Spotting.................................5-113
Child Restraints
Infants and Young Children...........................1-57
Lower Anchors and Tethers for Children..........1-65
Older Children.............................................1-54Child Restraints (cont.)
Securing a Child Restraint in a Rear
Seat Position...........................................1-73
Securing a Child Restraint in the Center
Front Seat Position...................................1-77
Securing a Child Restraint in the Right
Front Seat Position...................................1-77
Systems.....................................................1-61
Where to Put the Restraint...........................1-63
Cigarette Lighter.............................................3-21
Circuit Breakers............................................5-115
Cleaning
Aluminum or Chrome-Plated Wheels.............5-112
Exterior Lamps/Lenses................................5-110
Fabric/Carpet............................................
5-108
Finish Care...............................................5-110
Instrument Panel, Vinyl, and Other Plastic
Surfaces...............................................5-109
Interior.....................................................5-106
Leather....................................................5-108
Tires........................................................5-112
Underbody Maintenance.............................5-113
Washing Your Vehicle.................................5-110
Weatherstrips............................................5-109
Windshield, Backglass, and Wiper Blades......5-111
3
Page 575 of 578
Seats
60/40 Split Bench Seat.................................1-14
Bucket Seats, Rear......................................1-20
Center Seat................................................1-13
Head Restraints............................................ 1-2
Heated and Cooled Seats.............................. 1-8
Heated Seats............................................... 1-7
Heated Seats - Rear....................................1-14
Manual Lumbar............................................. 1-6
Memory, Mirrors and Pedals........................... 1-8
Power Lumbar .............................................. 1-6
Power Seats................................................. 1-5
Reclining Seatbacks.....................................1-10
Third Row Seat...........................................1-27
Secondary Latch System.................................5-99
Securing a Child Restraint
Center Front Seat Position............................1-77
Rear Seat Position......................................1-73
Right Front Seat Position..............................1-77
Security
Light..........................................................3-48
Service........................................................... 5-3
Accessories and Modi�cations......................... 5-3
Adding Equipment to the Outside of the
Vehicle..................................................... 5-5
Doing Your Own Work................................... 5-4
Engine Soon Lamp......................................3-43
Parts Identi�cation Label.............................5-114
Publications Ordering Information...................7-15
Scheduling Appointments..............................7-10Service (cont.)
Servicing Your Airbag-Equipped Vehicle..............1-96
Setting the Clock............................................3-84
Sheet Metal Damage.....................................5-113
Shifting
Out of Park................................................2-49
Shifting Into Park............................................2-47
Side Blind Zone Alert......................................2-58
Signals, Turn and Lane-Change.......................... 3-7
Snow Plow....................................................4-39
Spare Tire....................................................5-106
Installing....................................................5-92
Removing
...................................................5-87
Storing.....................................................5-102
Speci�cations and Capacities..........................5-122
Speedometer..................................................3-36
Split Bench Seat (60/40)..................................1-14
StabiliTrak
®Indicator Light...............................3-42
StabiliTrak®System.......................................... 4-6
Start Vehicle, Remote....................................... 2-8
Starting the Engine.........................................2-28
Steering.......................................................... 4-9
Steering Wheel Controls, Audio.......................3-138
Steering Wheel, Tilt Wheel................................. 3-6
Steps
Power Assist...............................................2-18
Storage Areas
Center Console...........................................2-79
Cupholders.................................................2-78
Glove Box..................................................2-78
13