low CHEVROLET SUBURBAN 2012 10.G Owner's Manual
[x] Cancel search | Manufacturer: CHEVROLET, Model Year: 2012, Model line: SUBURBAN, Model: CHEVROLET SUBURBAN 2012 10.GPages: 514, PDF Size: 7.54 MB
Page 45 of 514
Black plate (11,1)Chevrolet Tahoe/Suburban Owner Manual - 2012
Keys, Doors, and Windows 2-11
On vehicles with a power liftgate,
the button is on the overhead
console.
The vehicle must be in P (Park) to
use the power liftgate feature.
8:Press the top of the button to
open or close the power liftgate.
OFF: Press the bottom of the
button for manual operation of the
power liftgate.
The taillamps will flash and a chime
will sound when the power liftgate is
moving.
{WARNING
You or others could be injured if
caught in the path of the power
liftgate. Make sure there is no one
in the way of the liftgate as it is
opening and closing.
Notice: If you open the liftgate
without checking for overhead
obstructions such as a garage
door, you could damage the liftgate or the liftgate glass.
Always check to make sure the
area above and behind the liftgate
is clear before opening it.
The power liftgate can be power
opened and closed in the
following ways:
.Press and hold8on the
Remote Keyless Entry (RKE)
transmitter until the liftgate starts
moving. See Remote Keyless
Entry (RKE) System Operation
on page 2‑3.
.Press8on the overhead
console.
.Press the touch pad on the
outside liftgate handle.
Pressing the buttons, or touch pad
switch a second time while the
liftgate is moving reverses the
direction.
l: The liftgate can also be
closed by pressing this button next
to the liftgate latch. Press the button a second time
during liftgate operation to reverse
that operation.
The power liftgate may be
temporarily disabled under extreme
temperatures, or under low battery
conditions. If this occurs, the liftgate
can still be operated manually.
If the transmission is shifted out of
P (Park) while the power function
is in progress, the liftgate power
function will continue to completion.
If the transmission is shifted out of
P (Park) and the vehicle accelerates
before the power liftgate latches
closed, the liftgate may reverse to
the open position. Cargo could fall
out of the vehicle. Always make
sure the power liftgate is closed and
latched before you drive away.
If you power open the liftgate and
the liftgate support struts have lost
pressure, the lamps will flash and a
chime will sound. The liftgate will
stay open temporarily, then slowly
close. See your dealer for service
before using the liftgate.
Page 46 of 514
Black plate (12,1)Chevrolet Tahoe/Suburban Owner Manual - 2012
2-12 Keys, Doors, and Windows
Obstacle Detection Features
If the liftgate encounters an obstacle
during a power open or close cycle,
a warning chime will sound and the
liftgate will automatically reverse
direction to the full closed or open
position. After removing the
obstruction, the power liftgate
operation can be used again.
If the liftgate encounters multiple
obstacles on the same power cycle,
the power function will deactivate,
and you must manually open or
close the liftgate. The REAR
ACCESS OPEN warning message
in the Driver Information Center
(DIC) will indicate that the liftgate
is open. After removing the
obstructions, manually open the
liftgate to the full open position or
close the liftgate to the fully closed
and latched position. The liftgate
will now resume normal power
operation.
Pinch sensors are located on the
sides of the liftgate. If an object
is caught between the liftgate and
the body and presses against thissensor, the liftgate will reverse
direction and open fully. The liftgate
will remain open until it is activated
again or closed manually. Do not
force the liftgate open or closed
during a power cycle.
Manual Operation of Power
Liftgate
To change the liftgate to manual
operation, press the switch on the
overhead console to the OFF
position.
With the power liftgate disabled and
all of the doors unlocked, the liftgate
can be manually opened and
closed.
To open the liftgate, press the touch
pad on the handle on the outside of
the liftgate, and lift the gate open.
To close the liftgate, use the pull
cup to lower the liftgate and close.
The liftgate latch will power close.
Always close the liftgate before
driving.
If the RKE button or the power close
button on the liftgate is pressed
while power operation is disabled,
the lamps will flash three times, but
the liftgate will not move.
It is not recommended that you
drive with the liftgate open,
however, if you must drive with the
liftgate open, the liftgate should be
set to manual operation by pressing
the OFF switch on the center
console.
The liftgate has an electric latch.
If the battery is disconnected or has
low voltage, the liftgate will not
open. The liftgate will resume
operation when the battery is
reconnected and charged.
If the battery is properly connected
with adequate voltage, the switch is
not disabled, and the liftgate still will
not function, your vehicle should be
taken to a dealer for service.
Page 47 of 514
Black plate (13,1)Chevrolet Tahoe/Suburban Owner Manual - 2012
Keys, Doors, and Windows 2-13
Power Assist Steps
The vehicle may have power assist
steps.
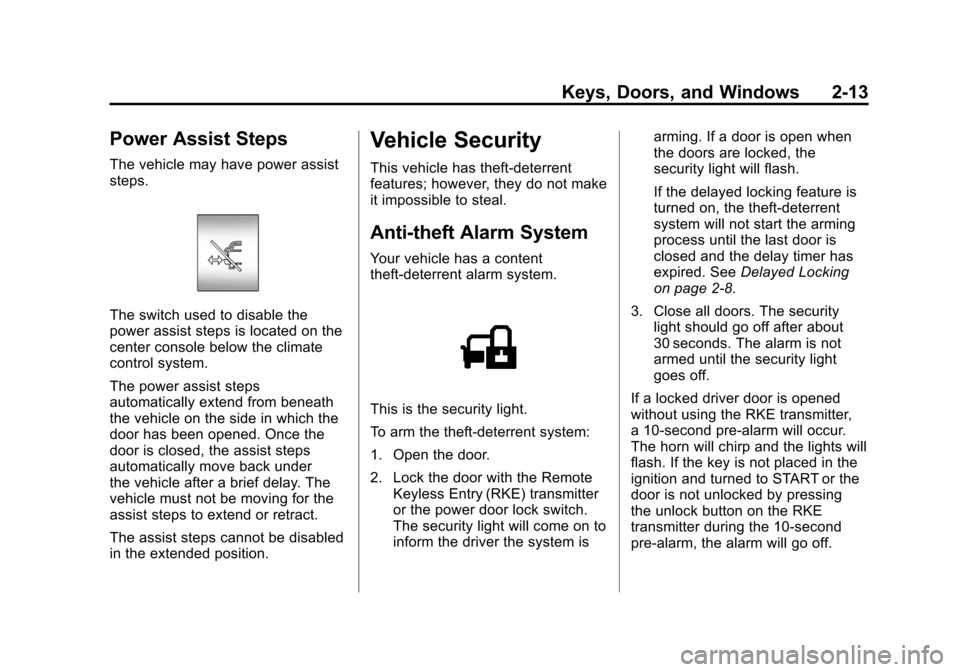
The switch used to disable the
power assist steps is located on the
center console below the climate
control system.
The power assist steps
automatically extend from beneath
the vehicle on the side in which the
door has been opened. Once the
door is closed, the assist steps
automatically move back under
the vehicle after a brief delay. The
vehicle must not be moving for the
assist steps to extend or retract.
The assist steps cannot be disabled
in the extended position.
Vehicle Security
This vehicle has theft-deterrent
features; however, they do not make
it impossible to steal.
Anti-theft Alarm System
Your vehicle has a content
theft-deterrent alarm system.
This is the security light.
To arm the theft-deterrent system:
1. Open the door.
2. Lock the door with the RemoteKeyless Entry (RKE) transmitter
or the power door lock switch.
The security light will come on to
inform the driver the system is arming. If a door is open when
the doors are locked, the
security light will flash.
If the delayed locking feature is
turned on, the theft‐deterrent
system will not start the arming
process until the last door is
closed and the delay timer has
expired. See
Delayed Locking
on page 2‑8.
3. Close all doors. The security light should go off after about
30 seconds. The alarm is not
armed until the security light
goes off.
If a locked driver door is opened
without using the RKE transmitter,
a 10-second pre-alarm will occur.
The horn will chirp and the lights will
flash. If the key is not placed in the
ignition and turned to START or the
door is not unlocked by pressing
the unlock button on the RKE
transmitter during the 10-second
pre-alarm, the alarm will go off.
Page 48 of 514
Black plate (14,1)Chevrolet Tahoe/Suburban Owner Manual - 2012
2-14 Keys, Doors, and Windows
Your vehicle's headlamps will flash
and the horn will sound for about
30 seconds, then will turn off to save
the battery power.
The theft-deterrent system will not
activate if the doors are locked with
the vehicle's key or the manual door
lock. It activates only if you use the
power door lock switch with the door
open or the RKE transmitter. You
should also remember that you can
start your vehicle with the correct
ignition key if the alarm has been
set off.
To avoid setting off the alarm by
accident:
.If you do not want to activate the
theft-deterrent system, the
vehicle should be locked with
the door key after the doors are
closed.
.Always unlock the doors with the
RKE transmitter. Unlocking a
door any other way will set off
the alarm if it is armed.If you set off the alarm by accident,
press unlock on the RKE transmitter
or place the key in the ignition and
turn it to START to turn off the
alarm. The alarm will not stop if you
try to unlock a door any other way.
Testing the Alarm
To test the alarm:
1. From inside the vehicle, lower
the driver window and open the
driver door.
2. Activate the system by locking the doors with the power door
lock switch while the door is
open, or with the RKE
transmitter.
3. Get out of the vehicle, close the door and wait for the security
light to go out.
4. Then reach in through the window, unlock the door with the
manual door lock and open the
door. This should set off the
alarm. While the alarm is set, the power
door unlock switch will not work.
If the alarm does not sound when
it should but the headlamps flash,
check to see if the horn works. The
horn fuse may be blown. To replace
the fuse, see
Fuses and Circuit
Breakers on page 10‑37.
If the alarm does not sound or the
headlamps do not flash, the vehicle
should be serviced by your dealer.
Immobilizer
See Radio Frequency Statement on
page 13‑20 for information
regarding Part 15 of the Federal
Communications Commission (FCC)
rules and Industry Canada
Standards RSS-GEN/210/220/310.
Immobilizer Operation
This vehicle has PASS-Key®III+
(Personalized Automotive Security
System) theft-deterrent system.
PASS-Key III+ is a passive
theft-deterrent system.
Page 49 of 514
Black plate (15,1)Chevrolet Tahoe/Suburban Owner Manual - 2012
Keys, Doors, and Windows 2-15
The system is automatically armed
when the key is removed from the
ignition.
The system is automatically
disarmed when the key is turned
to ON/RUN, ACC/ACCESSORY,
or START from the LOCK/OFF
position.
You do not have to manually arm or
disarm the system.
The security light will come on if
there is a problem with arming or
disarming the theft-deterrent
system.
When the PASS-Key III+ system
senses that someone is using the
wrong key, it prevents the vehicle
from starting. Anyone using a
trial-and-error method to start the
vehicle will be discouraged because
of the high number of electrical key
codes.If the engine does not start and the
security light on the instrument
panel cluster comes on when trying
to start the vehicle, there may be
a problem with the theft-deterrent
system. Turn the ignition off and try
again.
If the engine still does not start, and
the key appears to be undamaged,
try another ignition key. At this time,
you may also want to check the
fuse. See
Fuses and Circuit
Breakers on page 10‑37. If the
engine still does not start with the
other key, the vehicle needs service.
If the vehicle does start, the first key
may be faulty. See your dealer who
can service the PASS-Key III+ to
have a new key made.
It is possible for the PASS-Key III+
decoder to learn the transponder
value of a new or replacement key.
Up to 10 keys may be programmed
for the vehicle. The following
procedure is for programming additional keys only. If all the
currently programmed keys are lost
or do not operate, you must see
your dealer or a locksmith who
can service PASS-Key III+ to have
keys made and programmed to the
system.
See your dealer or a locksmith who
can service PASS-Key III+ to get a
new key blank cut exactly as the
ignition key that operates the
system.
To program the new additional key:
1. Verify that the new key has
a
1stamped on it.
2. Insert the original, already programmed key in the ignition
and start the engine. If the
engine will not start, see your
dealer for service.
3. After the engine has started, turn the key to LOCK/OFF, and
remove the key.
Page 51 of 514
Black plate (17,1)Chevrolet Tahoe/Suburban Owner Manual - 2012
Keys, Doors, and Windows 2-17
Trailer-Tow Mirrors
If the vehicle has towing mirrors,
they can be adjusted for a clearer
view of the objects behind you.
Manually pull out the mirror head to
extend it for better visibility when
towing a trailer.
The lower portion of the mirror is
convex. A convex mirror's surface is
curved to see more from the driver
seat. The convex mirror can be
adjusted manually to the driver
preferred position for better vision.
The mirror may have a turn signal
arrow that flashes in the direction of
the turn or lane change.
Power Mirrors
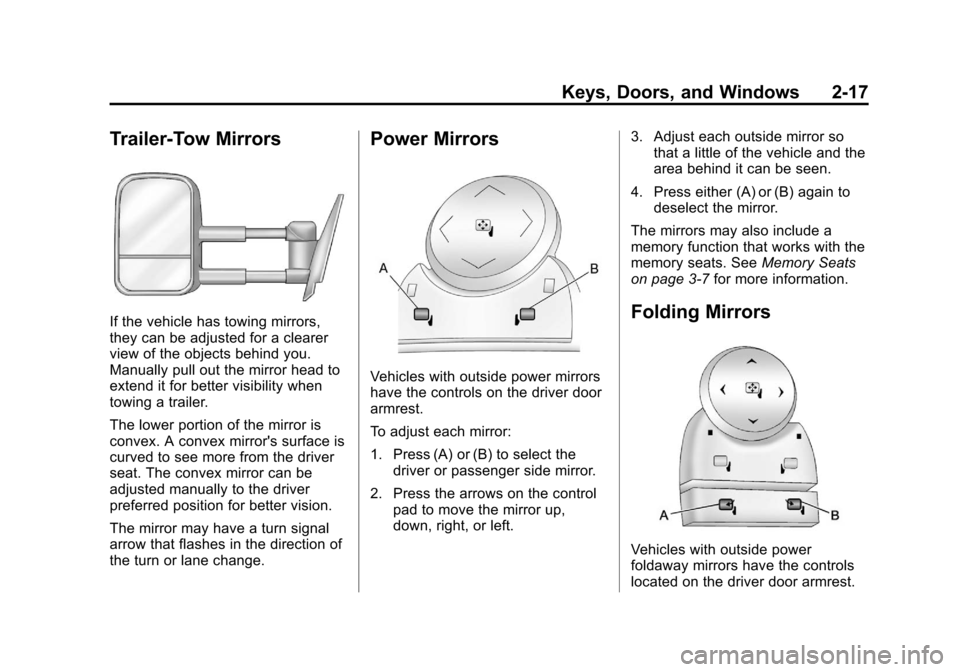
Vehicles with outside power mirrors
have the controls on the driver door
armrest.
To adjust each mirror:
1. Press (A) or (B) to select thedriver or passenger side mirror.
2. Press the arrows on the control pad to move the mirror up,
down, right, or left. 3. Adjust each outside mirror so
that a little of the vehicle and the
area behind it can be seen.
4. Press either (A) or (B) again to deselect the mirror.
The mirrors may also include a
memory function that works with the
memory seats. See Memory Seats
on page 3‑7 for more information.
Folding Mirrors
Vehicles with outside power
foldaway mirrors have the controls
located on the driver door armrest.
Page 55 of 514
Black plate (21,1)Chevrolet Tahoe/Suburban Owner Manual - 2012
Keys, Doors, and Windows 2-21
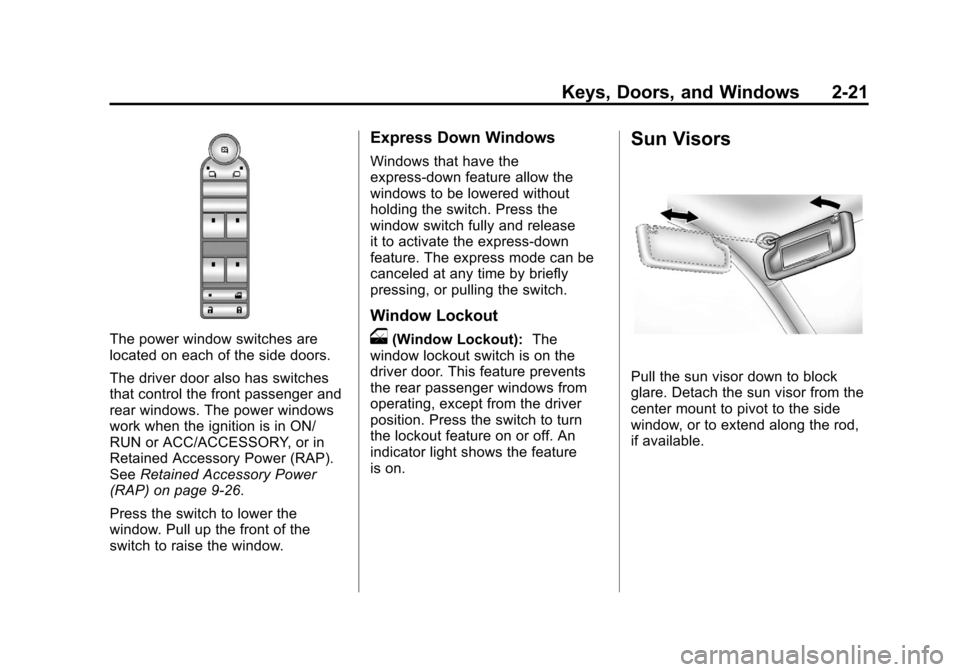
The power window switches are
located on each of the side doors.
The driver door also has switches
that control the front passenger and
rear windows. The power windows
work when the ignition is in ON/
RUN or ACC/ACCESSORY, or in
Retained Accessory Power (RAP).
SeeRetained Accessory Power
(RAP) on page 9‑26.
Press the switch to lower the
window. Pull up the front of the
switch to raise the window.
Express Down Windows
Windows that have the
express‐down feature allow the
windows to be lowered without
holding the switch. Press the
window switch fully and release
it to activate the express‐down
feature. The express mode can be
canceled at any time by briefly
pressing, or pulling the switch.
Window Lockout
o(Window Lockout): The
window lockout switch is on the
driver door. This feature prevents
the rear passenger windows from
operating, except from the driver
position. Press the switch to turn
the lockout feature on or off. An
indicator light shows the feature
is on.
Sun Visors
Pull the sun visor down to block
glare. Detach the sun visor from the
center mount to pivot to the side
window, or to extend along the rod,
if available.
Page 57 of 514
Black plate (1,1)Chevrolet Tahoe/Suburban Owner Manual - 2012
Seats and Restraints 3-1
Seats and
Restraints
Head Restraints
Head Restraints . . . . . . . . . . . . . . . 3-2
Front Seats
Seat Adjustment . . . . . . . . . . . . . . 3-3
Center Seat . . . . . . . . . . . . . . . . . . . 3-4
Power Seat Adjustment . . . . . . . 3-4
Lumbar Adjustment . . . . . . . . . . . 3-4
Reclining Seatbacks . . . . . . . . . . 3-5
Memory Seats . . . . . . . . . . . . . . . . 3-7
Heated and Ventilated FrontSeats . . . . . . . . . . . . . . . . . . . . . . . . 3-9
Rear Seats
Heated Rear Seats . . . . . . . . . . 3-10
Second Row Seats . . . . . . . . . . 3-11
Third Row Seats . . . . . . . . . . . . . 3-16
Safety Belts
Safety Belts . . . . . . . . . . . . . . . . . . 3-19
How to Wear Safety BeltsProperly . . . . . . . . . . . . . . . . . . . . 3-20
Lap-Shoulder Belt . . . . . . . . . . . 3-21 Safety Belt Use During
Pregnancy . . . . . . . . . . . . . . . . . . 3-27
Lap Belt . . . . . . . . . . . . . . . . . . . . . 3-27
Safety Belt Extender . . . . . . . . . 3-28
Safety System Check . . . . . . . . 3-28
Safety Belt Care . . . . . . . . . . . . . 3-28
Replacing Safety Belt System Parts after a Crash . . . . . . . . . 3-29
Airbag System
Airbag System . . . . . . . . . . . . . . . 3-29
Where Are the Airbags? . . . . . 3-31
When Should an AirbagInflate? . . . . . . . . . . . . . . . . . . . . . 3-33
What Makes an Airbag Inflate? . . . . . . . . . . . . . . . . . . . . . 3-35
How Does an Airbag
Restrain? . . . . . . . . . . . . . . . . . . . 3-35
What Will You See after an Airbag Inflates? . . . . . . . . . . . . 3-36
Passenger Sensing System . . . . . . . . . . . . . . . . . . . . . 3-37
Servicing the Airbag-Equipped Vehicle . . . . . . . . . . . . . . . . . . . . . 3-42
Adding Equipment to the Airbag-Equipped Vehicle . . . 3-42
Airbag System Check . . . . . . . . 3-44
Replacing Airbag System Parts after a Crash . . . . . . . . . 3-44
Child Restraints
Older Children . . . . . . . . . . . . . . . 3-45
Infants and YoungChildren . . . . . . . . . . . . . . . . . . . . 3-47
Child Restraint Systems . . . . . 3-49
Where to Put the Restraint . . . 3-51
Lower Anchors and Tethers for Children (LATCH
System) . . . . . . . . . . . . . . . . . . . . 3-53
Replacing LATCH System Parts After a Crash . . . . . . . . . 3-60
Securing Child Restraints (Rear Seat Position) . . . . . . . . 3-60
Securing Child Restraints (Center Front Seat
Position) . . . . . . . . . . . . . . . . . . . 3-63
Securing Child Restraints (Right Front Seat
Position) . . . . . . . . . . . . . . . . . . . 3-64
Page 58 of 514
Black plate (2,1)Chevrolet Tahoe/Suburban Owner Manual - 2012
3-2 Seats and Restraints
Head Restraints
{WARNING
With head restraints that are not
installed and adjusted properly,
there is a greater chance that
occupants will suffer a neck/
spinal injury in a crash. Do not
drive until the head restraints for
all occupants are installed and
adjusted properly.
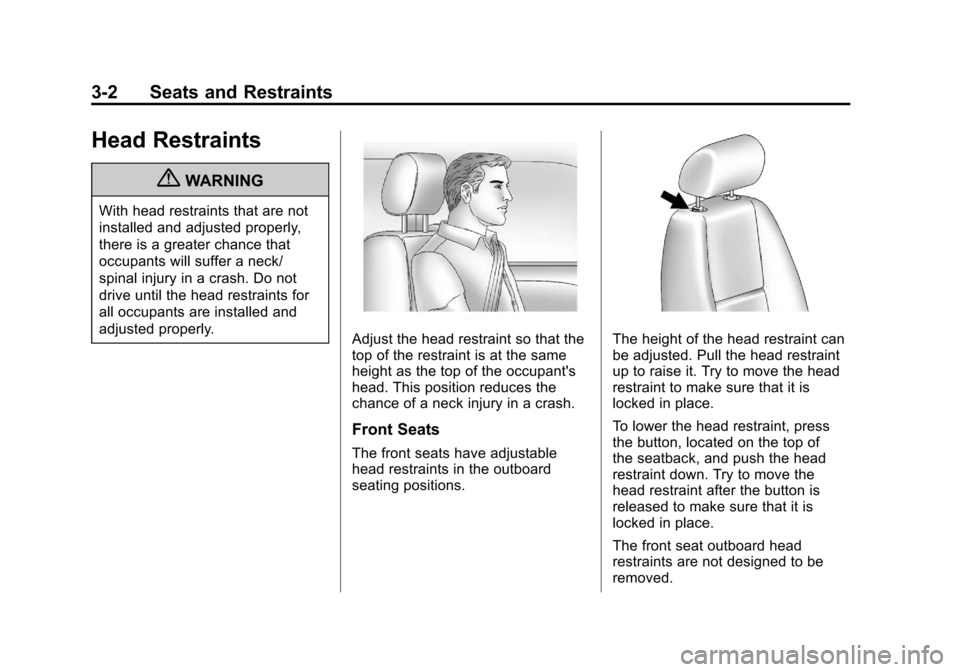
Adjust the head restraint so that the
top of the restraint is at the same
height as the top of the occupant's
head. This position reduces the
chance of a neck injury in a crash.
Front Seats
The front seats have adjustable
head restraints in the outboard
seating positions.
The height of the head restraint can
be adjusted. Pull the head restraint
up to raise it. Try to move the head
restraint to make sure that it is
locked in place.
To lower the head restraint, press
the button, located on the top of
the seatback, and push the head
restraint down. Try to move the
head restraint after the button is
released to make sure that it is
locked in place.
The front seat outboard head
restraints are not designed to be
removed.
Page 59 of 514
Black plate (3,1)Chevrolet Tahoe/Suburban Owner Manual - 2012
Seats and Restraints 3-3
Rear Seats
The vehicle's second-row seats
have head restraints in the outboard
seating positions that cannot be
adjusted.
The vehicle's third-row seats,
if equipped, have adjustable
headrests in the outboard seating
positions.
The height of the headrest can be
adjusted. Pull the headrest up to
raise it. To lower the headrest, push
down on the headrest.
Rear seat head restraints and
headrests are not designed to be
removed.
Front Seats
Seat Adjustment
{WARNING
You can lose control of the
vehicle if you try to adjust a
manual driver seat while the
vehicle is moving. The sudden
movement could startle and
confuse you, or make you push a
pedal when you do not want to.
Adjust the driver seat only when
the vehicle is not moving.
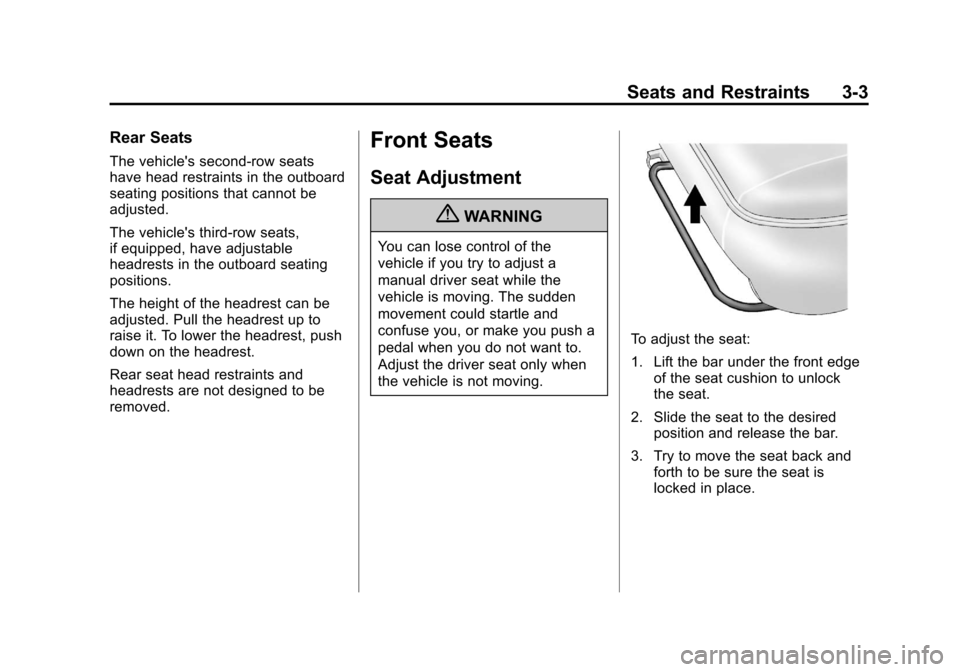
To adjust the seat:
1. Lift the bar under the front edgeof the seat cushion to unlock
the seat.
2. Slide the seat to the desired position and release the bar.
3. Try to move the seat back and forth to be sure the seat is
locked in place.