Hood CHEVROLET SUBURBAN 2018 Owner's Manual
[x] Cancel search | Manufacturer: CHEVROLET, Model Year: 2018, Model line: SUBURBAN, Model: CHEVROLET SUBURBAN 2018Pages: 443, PDF Size: 6.05 MB
Page 8 of 443

Chevrolet Tahoe/Suburban Owner Manual (GMNA-Localizing-U.S./Canada/
Mexico-11349385) - 2018 - crc - 11/3/17
In Brief 7
1.Air Vents 0197.
2. Head-Up Display (HUD) 0165
(If Equipped).
3.
gTraction Control/Electronic
Stability Control 0242.
jPower Assist Steps 052 (If
Equipped).
XParking Assist Button (If
Equipped). See Assistance
Systems for Parking or Backing
0 256.
ALane Keep Assist (LKA)
(1500 Series) 0265 (If
Equipped).
0Pedal Adjust Switch (If
Equipped). See Adjustable
Throttle and Brake Pedal
0 217.
4. Turn Signal Lever. See Turn
and Lane-Change Signals
0 185.
Windshield Wiper/Washer
0 134. 5. Favorite Switches (Out of
View). See Steering Wheel
Controls 0133.
Volume Switches (Out of View).
See Steering Wheel Controls
0 133.
6. Instrument Cluster 0143.
7. Hazard Warning Flashers
0185.
8. Shift Lever. See Automatic
Transmission 0228.
Tow/Haul Selector Button. See
Tow/Haul Mode 0233.
Range Selection Mode (If
Equipped). See Manual Mode
0 231.
9. Light Sensor. See Automatic
Headlamp System 0184.
10. Infotainment 0191.
11. Dual Automatic Climate Control
System 0192.
12. Heated and Ventilated Front
Seats 072 (If Equipped). 13. 110/120-Volt Power Outlet (If
Equipped). See Power Outlets
0 138.
14. Power Outlets 0138 (If
Equipped).
15. Rear Climate Control Buttons. SeeDual Automatic Climate
Control System 0192.
16. Steering Wheel Controls 0133.
17. Horn 0133.
18. Steering Wheel Adjustment
0132.
19. Hood Release. See Hood
0 292.
20. Cruise Control 0245.
Adaptive Cruise Control 0248
(If Equipped).
Forward Collision Alert (FCA)
System 0258 (If Equipped).
Heated Steering Wheel 0133
(If Equipped).
21. Trailer Brake Control Panel (If Equipped). See Towing
Equipment 0278.
Page 44 of 443
Chevrolet Tahoe/Suburban Owner Manual (GMNA-Localizing-U.S./Canada/
Mexico-11349385) - 2018 - crc - 11/3/17
Keys, Doors, and Windows 43
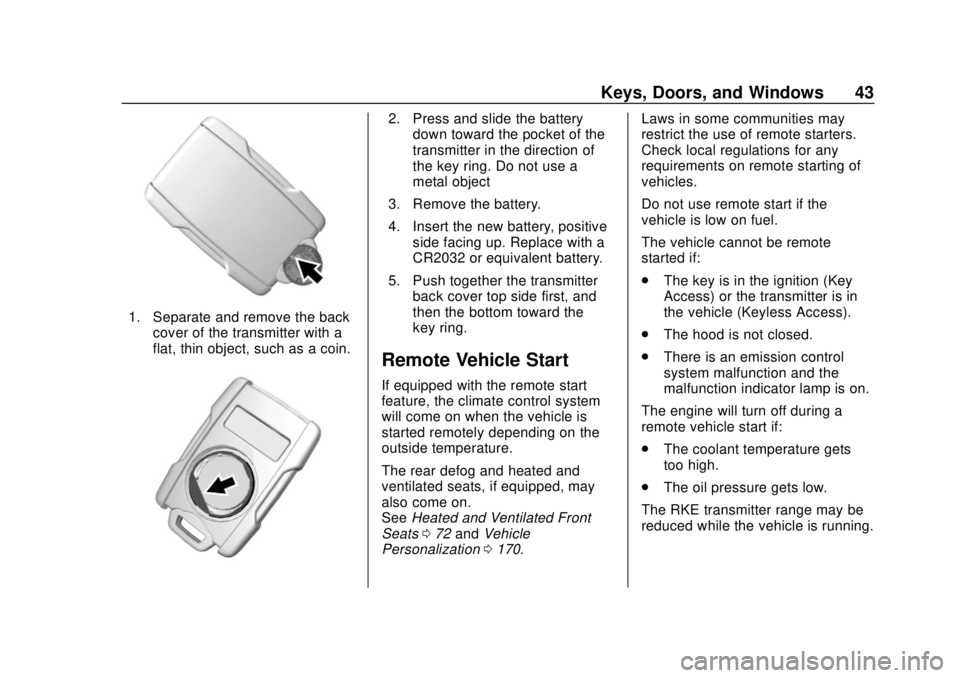
1. Separate and remove the backcover of the transmitter with a
flat, thin object, such as a coin.
2. Press and slide the batterydown toward the pocket of the
transmitter in the direction of
the key ring. Do not use a
metal object
3. Remove the battery.
4. Insert the new battery, positive side facing up. Replace with a
CR2032 or equivalent battery.
5. Push together the transmitter back cover top side first, and
then the bottom toward the
key ring.
Remote Vehicle Start
If equipped with the remote start
feature, the climate control system
will come on when the vehicle is
started remotely depending on the
outside temperature.
The rear defog and heated and
ventilated seats, if equipped, may
also come on.
See Heated and Ventilated Front
Seats 072 and Vehicle
Personalization 0170. Laws in some communities may
restrict the use of remote starters.
Check local regulations for any
requirements on remote starting of
vehicles.
Do not use remote start if the
vehicle is low on fuel.
The vehicle cannot be remote
started if:
.
The key is in the ignition (Key
Access) or the transmitter is in
the vehicle (Keyless Access).
. The hood is not closed.
. There is an emission control
system malfunction and the
malfunction indicator lamp is on.
The engine will turn off during a
remote vehicle start if:
. The coolant temperature gets
too high.
. The oil pressure gets low.
The RKE transmitter range may be
reduced while the vehicle is running.
Page 54 of 443
Chevrolet Tahoe/Suburban Owner Manual (GMNA-Localizing-U.S./Canada/
Mexico-11349385) - 2018 - crc - 11/3/17
Keys, Doors, and Windows 53
If equipped, the power assist steps
will deploy when the door is opened
and automatically retract
three seconds after the door is
closed. The power assist steps will
retract immediately if the vehicle
starts moving.
Disable the power assist steps
before jacking or placing any object
under the vehicle. Too much ice
buildup may prevent deployment of
the power assist steps. Check the
step position before exiting the
power assist steps, clear the ice,
then enable the assist steps and
confirm normal function prior to use.
Keep hands, children, pets, objects,
and clothing clear of the power
assist steps when in motion. The
steps will reverse direction if they
encounter an obstruction when
opening or closing. Remove the
obstruction, then open and close the
door on the same side to complete
the motion of the assist steps. If the
obstruction is not cleared, the assist
steps remain extended while driving.
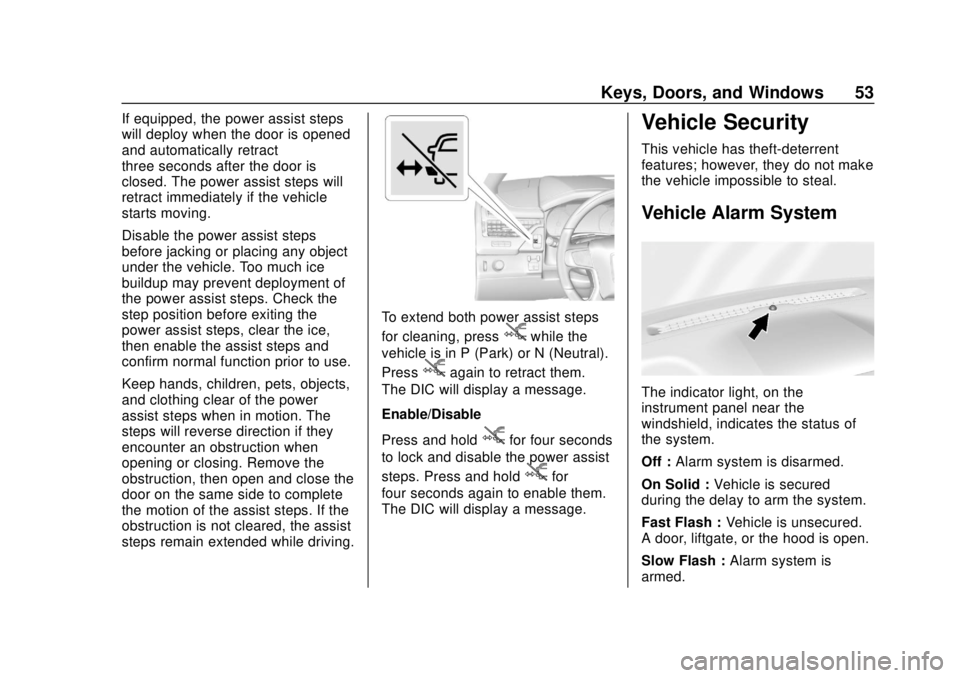
To extend both power assist steps
for cleaning, press
jwhile the
vehicle is in P (Park) or N (Neutral).
Press
jagain to retract them.
The DIC will display a message.
Enable/Disable
Press and hold
jfor four seconds
to lock and disable the power assist
steps. Press and hold
jfor
four seconds again to enable them.
The DIC will display a message.
Vehicle Security
This vehicle has theft-deterrent
features; however, they do not make
the vehicle impossible to steal.
Vehicle Alarm System
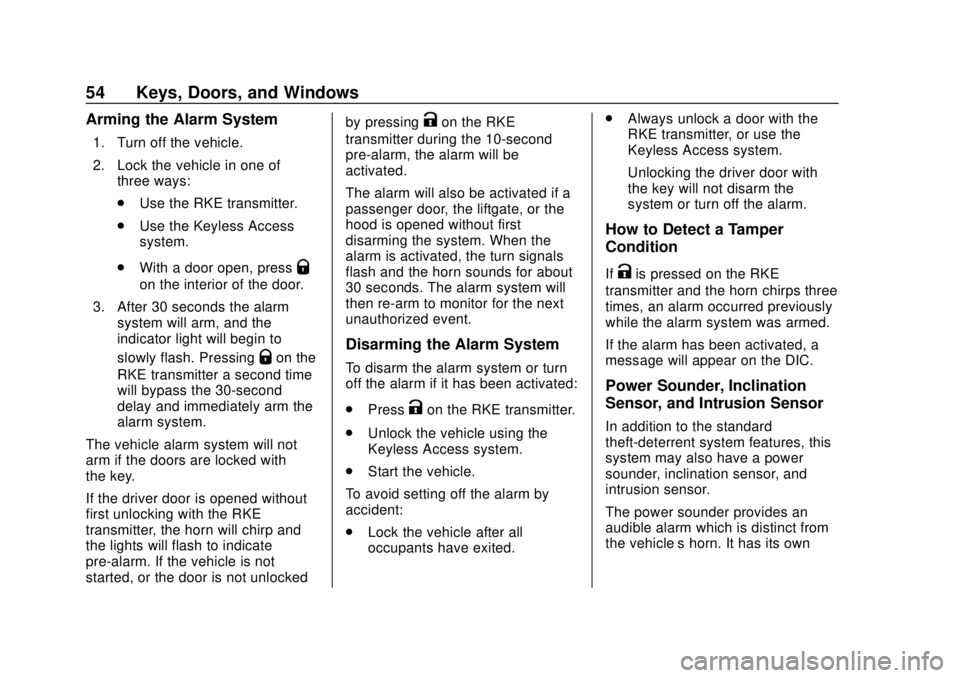
The indicator light, on the
instrument panel near the
windshield, indicates the status of
the system.
Off : Alarm system is disarmed.
On Solid : Vehicle is secured
during the delay to arm the system.
Fast Flash : Vehicle is unsecured.
A door, liftgate, or the hood is open.
Slow Flash : Alarm system is
armed.
Page 55 of 443
Chevrolet Tahoe/Suburban Owner Manual (GMNA-Localizing-U.S./Canada/
Mexico-11349385) - 2018 - crc - 11/3/17
54 Keys, Doors, and Windows
Arming the Alarm System
1. Turn off the vehicle.
2. Lock the vehicle in one ofthree ways:
.Use the RKE transmitter.
. Use the Keyless Access
system.
. With a door open, press
Q
on the interior of the door.
3. After 30 seconds the alarm system will arm, and the
indicator light will begin to
slowly flash. Pressing
Qon the
RKE transmitter a second time
will bypass the 30-second
delay and immediately arm the
alarm system.
The vehicle alarm system will not
arm if the doors are locked with
the key.
If the driver door is opened without
first unlocking with the RKE
transmitter, the horn will chirp and
the lights will flash to indicate
pre-alarm. If the vehicle is not
started, or the door is not unlocked by pressing
Kon the RKE
transmitter during the 10-second
pre-alarm, the alarm will be
activated.
The alarm will also be activated if a
passenger door, the liftgate, or the
hood is opened without first
disarming the system. When the
alarm is activated, the turn signals
flash and the horn sounds for about
30 seconds. The alarm system will
then re-arm to monitor for the next
unauthorized event.
Disarming the Alarm System
To disarm the alarm system or turn
off the alarm if it has been activated:
. Press
Kon the RKE transmitter.
. Unlock the vehicle using the
Keyless Access system.
. Start the vehicle.
To avoid setting off the alarm by
accident:
. Lock the vehicle after all
occupants have exited. .
Always unlock a door with the
RKE transmitter, or use the
Keyless Access system.
Unlocking the driver door with
the key will not disarm the
system or turn off the alarm.
How to Detect a Tamper
Condition
IfKis pressed on the RKE
transmitter and the horn chirps three
times, an alarm occurred previously
while the alarm system was armed.
If the alarm has been activated, a
message will appear on the DIC.
Power Sounder, Inclination
Sensor, and Intrusion Sensor
In addition to the standard
theft-deterrent system features, this
system may also have a power
sounder, inclination sensor, and
intrusion sensor.
The power sounder provides an
audible alarm which is distinct from
the vehicle’ s horn. It has its own
Page 198 of 443
Chevrolet Tahoe/Suburban Owner Manual (GMNA-Localizing-U.S./Canada/
Mexico-11349385) - 2018 - crc - 11/3/17
Climate Controls 197
climate controls, the rear climate
temperature is linked to the driver
temperature setting.
MODE :Press to change the
direction of the airflow in the vehicle.
Repeatedly press the button until
the desired mode appears on the
display. Multiple presses will cycle
through the delivery selections.
MorL: If equipped, pressMorLto heat the left or right outboard seat
cushion. See Heated Rear Seats (If
Equipped) 074.
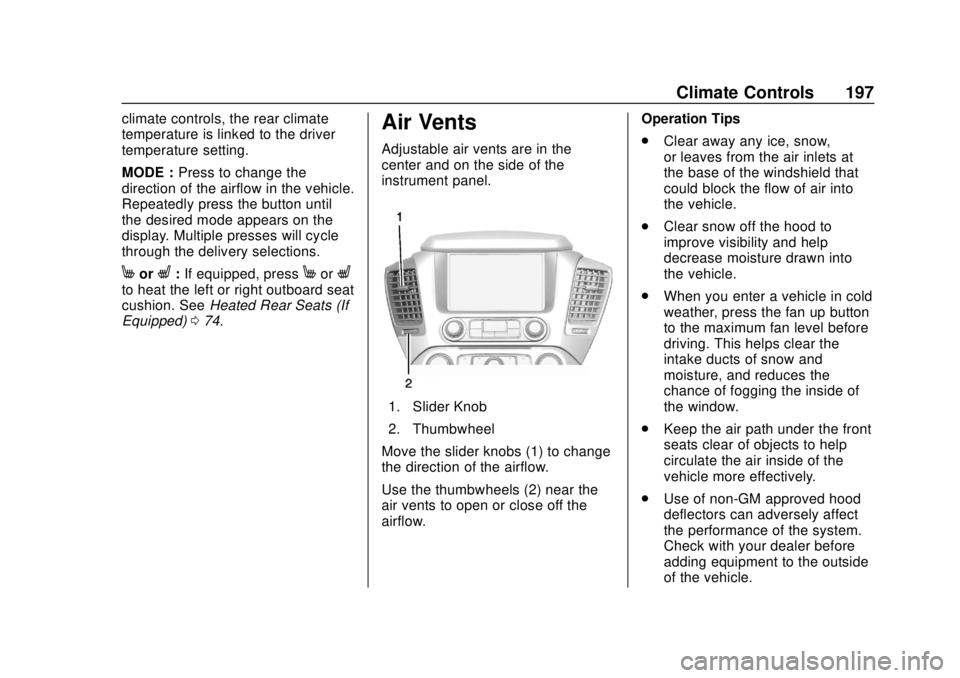
Air Vents
Adjustable air vents are in the
center and on the side of the
instrument panel.
1. Slider Knob
2. Thumbwheel
Move the slider knobs (1) to change
the direction of the airflow.
Use the thumbwheels (2) near the
air vents to open or close off the
airflow. Operation Tips
.
Clear away any ice, snow,
or leaves from the air inlets at
the base of the windshield that
could block the flow of air into
the vehicle.
. Clear snow off the hood to
improve visibility and help
decrease moisture drawn into
the vehicle.
. When you enter a vehicle in cold
weather, press the fan up button
to the maximum fan level before
driving. This helps clear the
intake ducts of snow and
moisture, and reduces the
chance of fogging the inside of
the window.
. Keep the air path under the front
seats clear of objects to help
circulate the air inside of the
vehicle more effectively.
. Use of non-GM approved hood
deflectors can adversely affect
the performance of the system.
Check with your dealer before
adding equipment to the outside
of the vehicle.
Page 200 of 443
Chevrolet Tahoe/Suburban Owner Manual (GMNA-Localizing-U.S./Canada/
Mexico-11349385) - 2018 - crc - 11/3/17
Climate Controls 199
Service
All vehicles have a label underhood
that identifies the refrigerant used in
the vehicle. The refrigerant system
should only be serviced by trained
and certified technicians. The air
conditioning evaporator should
never be repaired or replaced by
one from a salvage vehicle.
It should only be replaced by a new
evaporator to ensure proper and
safe operation.
During service, all refrigerants
should be reclaimed with proper
equipment. Venting refrigerants
directly to the atmosphere is harmful
to the environment and may also
create unsafe conditions based on
inhalation, combustion, frostbite,
or other health-based concerns.
Page 210 of 443
Chevrolet Tahoe/Suburban Owner Manual (GMNA-Localizing-U.S./Canada/
Mexico-11349385) - 2018 - crc - 11/3/17
Driving and Operating 209
and it may take longer to stop. See
“Driving on Wet Roads”later in this
section.
After Off-Road Driving
Remove any brush or debris that
has collected on the underbody or
chassis, or under the hood. These
accumulations can be a fire hazard.
After operation in mud or sand,
have the brake linings cleaned and
checked. These substances can
cause glazing and uneven braking.
Check the body structure, driveline,
steering, suspension, wheels, tires,
and exhaust system for damage and
check the fuel lines and cooling
system for any leakage.
More frequent maintenance service
is required. See the Maintenance
Schedule 0389.
Driving on Wet Roads
Rain and wet roads can reduce
vehicle traction and affect your
ability to stop and accelerate.
Always drive slower in these types of driving conditions and avoid
driving through large puddles and
deep-standing or flowing water.
{Warning
Wet brakes can cause crashes.
They might not work as well in a
quick stop and could cause
pulling to one side. You could
lose control of the vehicle.
After driving through a large
puddle of water or a car/vehicle
wash, lightly apply the brake
pedal until the brakes work
normally.
Flowing or rushing water creates
strong forces. Driving through
flowing water could cause the
vehicle to be carried away. If this
happens, you and other vehicle
occupants could drown. Do not
ignore police warnings and be
very cautious about trying to drive
through flowing water.
Hydroplaning
Hydroplaning is dangerous. Water
can build up under the vehicle's
tires so they actually ride on the
water. This can happen if the road is
wet enough and you are going fast
enough. When the vehicle is
hydroplaning, it has little or no
contact with the road.
There is no hard and fast rule about
hydroplaning. The best advice is to
slow down when the road is wet.
Other Rainy Weather Tips
Besides slowing down, other wet
weather driving tips include:
.
Allow extra following distance.
. Pass with caution.
. Keep windshield wiping
equipment in good shape.
. Keep the windshield washer fluid
reservoir filled.
. Have good tires with proper
tread depth. See Tires0336.
. Turn off cruise control.
Page 224 of 443
Chevrolet Tahoe/Suburban Owner Manual (GMNA-Localizing-U.S./Canada/
Mexico-11349385) - 2018 - crc - 11/3/17
Driving and Operating 223
at or below−18 °C (0 °F). Vehicles
with an engine heater should be
plugged in at least four hours before
starting. There may be an internal
thermostat in the plug end of the
cord, which will prevent engine
heater operation at temperatures
above −18 °C (0 °F).
To Use the Engine Heater
1. Turn off the engine.
2. Open the hood and unwrap the
electrical cord. The cord is by
the left front fender, next to the
engine compartment fuse
block.
Check the heater cord for
damage. If it is damaged, do
not use it. See your dealer for
a replacement. Inspect the
cord for damage yearly.
3. Plug the cord into a normal, grounded 110-volt AC outlet.
{Warning
Improper use of the heater cord
or an extension cord can damage
the cord and may result in
overheating and fire.
. Plug the cord into a
three-prong electrical utility
receptacle that is protected
by a ground fault detection
function. An ungrounded
outlet could cause an
electric shock.
. Use a weatherproof,
heavy-duty, 15 amp-rated
extension cord if needed.
Failure to use the
recommended extension
cord in good operating
condition, or using a
damaged heater or
extension cord, could make
(Continued)
Warning (Continued)
it overheat and cause a fire,
property damage, electric
shock, and injury.
. Do not operate the vehicle
with the heater cord
permanently attached to the
vehicle. Possible heater
cord and thermostat
damage could occur.
. While in use, do not let the
heater cord touch vehicle
parts or sharp edges. Never
close the hood on the
heater cord.
. Before starting the vehicle,
unplug the cord, reattach
the cover to the plug, and
securely fasten the cord.
Keep the cord away from
any moving parts.
4. Before starting the engine, be sure to unplug and store the
cord as it was before to keep it
Page 268 of 443
Chevrolet Tahoe/Suburban Owner Manual (GMNA-Localizing-U.S./Canada/
Mexico-11349385) - 2018 - crc - 11/3/17
Driving and Operating 267
higher. Do not use gasoline with a
posted octane rating of less than 87,
as this may cause engine knock and
will lower fuel economy.
Prohibited Fuels
Caution
Do not use fuels with any of the
following conditions; doing so
may damage the vehicle and void
its warranty:. For vehicles which are not
FlexFuel, fuel labeled
greater than 15% ethanol by
volume, such as mid-level
ethanol blends (16 –50%
ethanol), E85, or FlexFuel.
. Fuel with any amount of
methanol, methylal, and
aniline. These fuels can
corrode metal fuel system
parts or damage plastic and
rubber parts.
(Continued)
Caution (Continued)
.Fuel containing metals such
as methylcyclopentadienyl
manganese tricarbonyl
(MMT), which can damage
the emissions control
system and spark plugs.
. Fuel with a posted octane
rating of less than the
recommended fuel. Using
this fuel will lower fuel
economy and performance,
and may decrease the life of
the emissions catalyst.
California Fuel
Requirements
If the vehicle is certified to meet
California Emissions Standards, it is
designed to operate on fuels that
meet California specifications. See
the underhood emission control
label. If this fuel is not available in
states adopting California Emissions
Standards, the vehicle will operate
satisfactorily on fuels meeting federal specifications, but emission
control system performance may be
affected. The malfunction indicator
lamp could turn on and the vehicle
may not pass a smog-check test.
See
Malfunction Indicator Lamp
0 153. If this occurs, return to your
authorized dealer for diagnosis. If it
is determined that the condition is
caused by the type of fuel used,
repairs may not be covered by the
vehicle warranty.
Fuels in Foreign
Countries
To keep fuel systems clean, TOP
TIER detergent gasoline is
recommended. See Fuel0266.
If TOP TIER detergent gasoline is
not available, one bottle of GM Fuel
System Treatment Cleaner added to
the fuel tank at every engine oil
change, can help. GM Fuel System
Treatment Cleaner is the only
gasoline additive recommended by
General Motors. It is available at
your dealer.
Page 290 of 443
Chevrolet Tahoe/Suburban Owner Manual (GMNA-Localizing-U.S./Canada/
Mexico-11349385) - 2018 - crc - 11/3/17
Vehicle Care 289
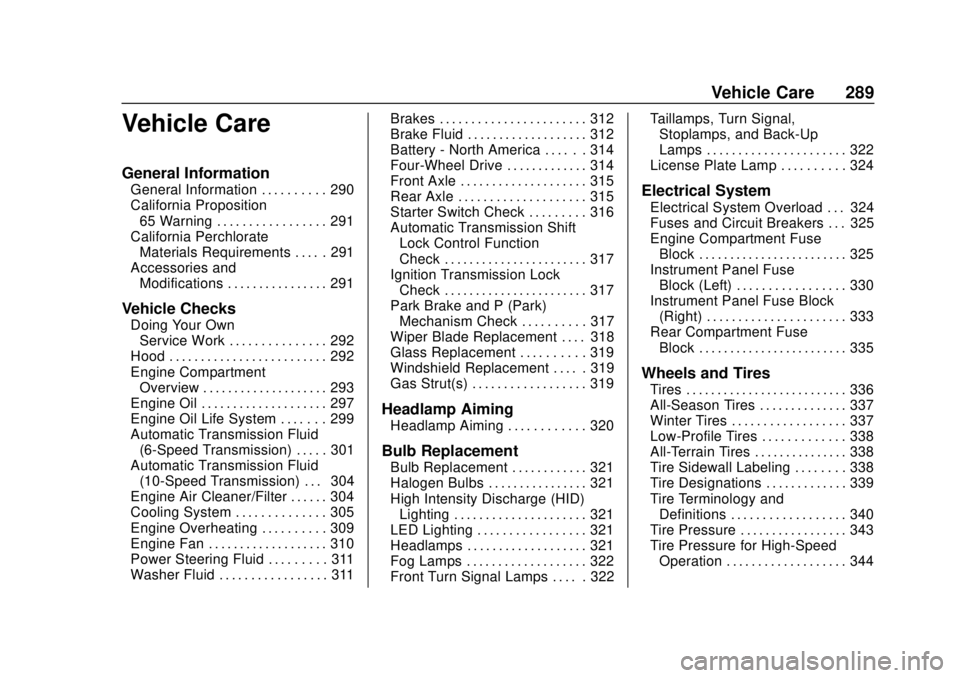
Vehicle Care
General Information
General Information . . . . . . . . . . 290
California Proposition65 Warning . . . . . . . . . . . . . . . . . 291
California Perchlorate Materials Requirements . . . . . 291
Accessories and Modifications . . . . . . . . . . . . . . . . 291
Vehicle Checks
Doing Your OwnService Work . . . . . . . . . . . . . . . 292
Hood . . . . . . . . . . . . . . . . . . . . . . . . . 292
Engine Compartment Overview . . . . . . . . . . . . . . . . . . . . 293
Engine Oil . . . . . . . . . . . . . . . . . . . . 297
Engine Oil Life System . . . . . . . 299
Automatic Transmission Fluid (6-Speed Transmission) . . . . . 301
Automatic Transmission Fluid (10-Speed Transmission) . . . 304
Engine Air Cleaner/Filter . . . . . . 304
Cooling System . . . . . . . . . . . . . . 305
Engine Overheating . . . . . . . . . . 309
Engine Fan . . . . . . . . . . . . . . . . . . . 310
Power Steering Fluid . . . . . . . . . 311
Washer Fluid . . . . . . . . . . . . . . . . . 311 Brakes . . . . . . . . . . . . . . . . . . . . . . . 312
Brake Fluid . . . . . . . . . . . . . . . . . . . 312
Battery - North America . . . . . . 314
Four-Wheel Drive . . . . . . . . . . . . . 314
Front Axle . . . . . . . . . . . . . . . . . . . . 315
Rear Axle . . . . . . . . . . . . . . . . . . . . 315
Starter Switch Check . . . . . . . . . 316
Automatic Transmission Shift
Lock Control Function
Check . . . . . . . . . . . . . . . . . . . . . . . 317
Ignition Transmission Lock Check . . . . . . . . . . . . . . . . . . . . . . . 317
Park Brake and P (Park) Mechanism Check . . . . . . . . . . 317
Wiper Blade Replacement . . . . 318
Glass Replacement . . . . . . . . . . 319
Windshield Replacement . . . . . 319
Gas Strut(s) . . . . . . . . . . . . . . . . . . 319
Headlamp Aiming
Headlamp Aiming . . . . . . . . . . . . 320
Bulb Replacement
Bulb Replacement . . . . . . . . . . . . 321
Halogen Bulbs . . . . . . . . . . . . . . . . 321
High Intensity Discharge (HID) Lighting . . . . . . . . . . . . . . . . . . . . . 321
LED Lighting . . . . . . . . . . . . . . . . . 321
Headlamps . . . . . . . . . . . . . . . . . . . 321
Fog Lamps . . . . . . . . . . . . . . . . . . . 322
Front Turn Signal Lamps . . . . . 322 Taillamps, Turn Signal,
Stoplamps, and Back-Up
Lamps . . . . . . . . . . . . . . . . . . . . . . 322
License Plate Lamp . . . . . . . . . . 324
Electrical System
Electrical System Overload . . . 324
Fuses and Circuit Breakers . . . 325
Engine Compartment Fuse Block . . . . . . . . . . . . . . . . . . . . . . . . 325
Instrument Panel Fuse Block (Left) . . . . . . . . . . . . . . . . . 330
Instrument Panel Fuse Block (Right) . . . . . . . . . . . . . . . . . . . . . . 333
Rear Compartment Fuse Block . . . . . . . . . . . . . . . . . . . . . . . . 335
Wheels and Tires
Tires . . . . . . . . . . . . . . . . . . . . . . . . . . 336
All-Season Tires . . . . . . . . . . . . . . 337
Winter Tires . . . . . . . . . . . . . . . . . . 337
Low-Profile Tires . . . . . . . . . . . . . 338
All-Terrain Tires . . . . . . . . . . . . . . . 338
Tire Sidewall Labeling . . . . . . . . 338
Tire Designations . . . . . . . . . . . . . 339
Tire Terminology andDefinitions . . . . . . . . . . . . . . . . . . 340
Tire Pressure . . . . . . . . . . . . . . . . . 343
Tire Pressure for High-Speed Operation . . . . . . . . . . . . . . . . . . . 344