traction control CHEVROLET TAHOE 2009 3.G Owners Manual
[x] Cancel search | Manufacturer: CHEVROLET, Model Year: 2009, Model line: TAHOE, Model: CHEVROLET TAHOE 2009 3.GPages: 574, PDF Size: 3.06 MB
Page 5 of 574
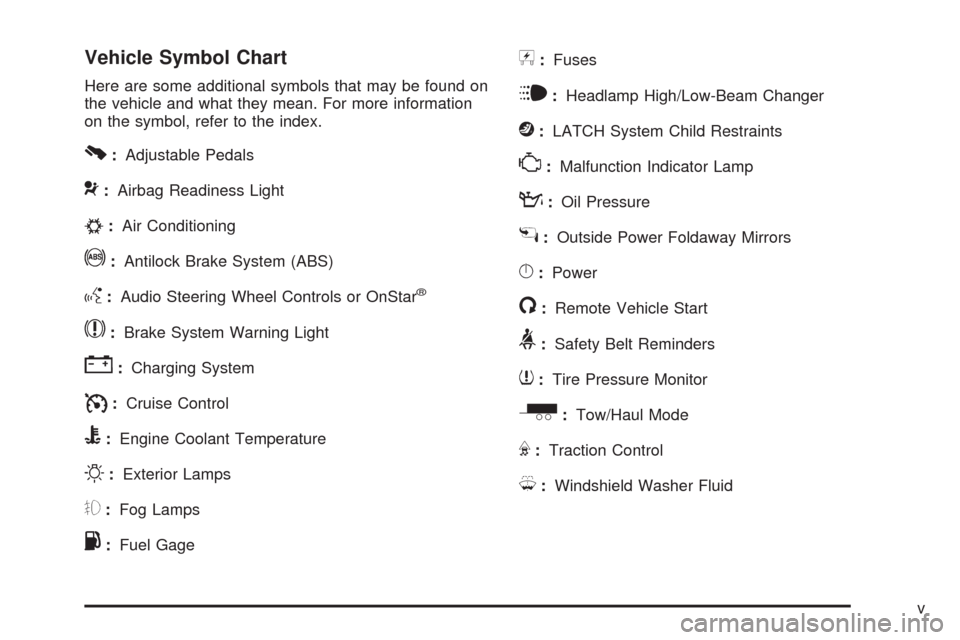
Vehicle Symbol Chart
Here are some additional symbols that may be found on
the vehicle and what they mean. For more information
on the symbol, refer to the index.
0:Adjustable Pedals
9:Airbag Readiness Light
#:Air Conditioning
!:Antilock Brake System (ABS)
g:Audio Steering Wheel Controls or OnStar®
$:Brake System Warning Light
":Charging System
I:Cruise Control
B:Engine Coolant Temperature
O:Exterior Lamps
#:Fog Lamps
.:Fuel Gage
+:Fuses
i:Headlamp High/Low-Beam Changer
j:LATCH System Child Restraints
*:Malfunction Indicator Lamp
::Oil Pressure
g:Outside Power Foldaway Mirrors
}:Power
/:Remote Vehicle Start
>:Safety Belt Reminders
7:Tire Pressure Monitor
_:Tow/Haul Mode
F:Traction Control
M:Windshield Washer Fluid
v
Page 143 of 574
To use this feature, do the following:
1. Move the shift lever to M (Manual Mode).
2. Press the plus/minus buttons, located on the
steering column shift lever, to select the desired
range of gears for the current driving conditions.
When M (Manual Mode) is selected a number displays
next to the M, indicating the current gear.
This number is the highest gear that can be used.
However, the vehicle can automatically shift to lower
gears as it adjusts to driving conditions. This means
that all gears below that number are available. When
5 (Fifth) is selected, 1 (First) through 5 (Fifth) gears
are automatically shifted by the vehicle, but 6 (Sixth)
cannot be used until the plus/minus button located
on the steering column lever is used to change to
the gear.
Grade Braking is not available when Range Selection
Mode is active. SeeTow/Haul Mode on page 2-38.While using Range Selection Mode, cruise control and
the Tow/Haul mode can be used.
Notice:Spinning the tires or holding the vehicle
in one place on a hill using only the accelerator
pedal may damage the transmission. The repair
will not be covered by the vehicle warranty. If you
are stuck, do not spin the tires. When stopping on a
hill, use the brakes to hold the vehicle in place.
Low Traction Mode
If the vehicle has the Hydra-Matic®6-Speed Automatic
Transmission, it has a Low Traction Mode that assists
in vehicle acceleration when road conditions are
slippery, such as with ice or snow. While the vehicle is
at a stop, select the second gear range using Range
Selection Mode. This will limit torque to the wheels after
it detects wheel slip, preventing the tires from spinning.
2-37
Page 146 of 574
Four-Wheel Drive
If the vehicle has four-wheel drive, you can send the
engine’s driving power to all four wheels for extra
traction. Read the following before using four-wheel
drive.
Notice:Driving on clean, dry pavement in
Four-Wheel-Drive High or Four-Wheel-Drive Low for
an extended period of time may cause premature
wear on your vehicle’s powertrain. Do not drive on
clean, dry pavement in Four-Wheel-Drive High or
Four-Wheel-Drive Low for extended periods of time.
While driving on clean dry pavement and during tight
turns, you may experience a vibration in the steering
system.
The vehicle has StabiliTrak
®. Shifting into
Four-Wheel-Drive Low will turn Traction Control and
StabiliTrak
®off. SeeStabiliTrak®System on page 4-6.
Front Axle
The front axle engages and disengages automatically
when you shift the transfer case. Some delay for
the axle to engage or disengage is normal.
Automatic Transfer Case
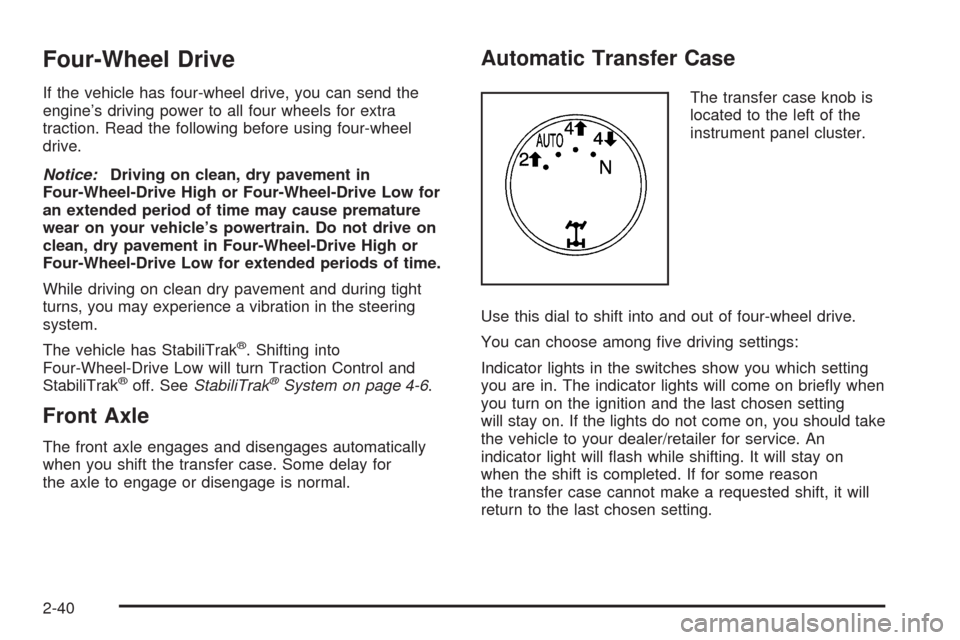
The transfer case knob is
located to the left of the
instrument panel cluster.
Use this dial to shift into and out of four-wheel drive.
You can choose among �ve driving settings:
Indicator lights in the switches show you which setting
you are in. The indicator lights will come on brie�y when
you turn on the ignition and the last chosen setting
will stay on. If the lights do not come on, you should take
the vehicle to your dealer/retailer for service. An
indicator light will �ash while shifting. It will stay on
when the shift is completed. If for some reason
the transfer case cannot make a requested shift, it will
return to the last chosen setting.
2-40
Page 147 of 574
2m(Two-Wheel Drive High):This setting is used for
driving in most street and highway situations. The
front axle is not engaged in two-wheel drive. This setting
also provides the best fuel economy.
AUTO (Automatic Four-Wheel Drive):This setting is
ideal for use when road surface traction conditions
are variable. When driving your vehicle in AUTO, the
front axle is engaged, but the vehicle’s power is primarily
sent to the rear wheels. When the vehicle’s software
determines a need for more traction, the system
will transfer more power to the front wheels. Driving in
this mode results in slightly lower fuel economy than
Two-Wheel Drive High.
4
m(Four-Wheel Drive High):Use the four-wheel high
position when you need extra traction, such as on snowy
or icy roads or in most off-road situations. This setting
also engages your front axle to help drive the vehicle.
This is the best setting to use when plowing snow.
4
n(Four-Wheel Drive Low):This setting also
engages the front axle and delivers extra torque. You
may never need this setting. It sends maximum power to
all four wheels. You might choose Four-Wheel Drive Low
if you are driving off-road in deep sand, deep mud, deep
snow, and while climbing or descending steep hills.The vehicle has StabiliTrak
®. Shifting into
Four-Wheel-Drive Low will turn Traction Control and
StabiliTrak
®off. SeeStabiliTrak®System on page 4-6.
{CAUTION:
Shifting the transfer case to N (Neutral) can cause
the vehicle to roll even if the transmission is in
P (Park). You or someone else could be seriously
injured. Be sure to set the parking brake before
placing the transfer case in N (Neutral). See
Parking Brake on page 2-45.
N (Neutral):Shift the vehicle’s transfer case to
N (Neutral) only when towing the vehicle. See
Recreational Vehicle Towing on page 4-44orTowing
Your Vehicle on page 4-43for more information.
If the SERVICE 4 WHEEL DRIVE message stays on,
you should take the vehicle to your dealer/retailer
for service. See “SERVICE 4 WHEEL DRIVE message”
underDIC Warnings and Messages on page 3-64.
2-41
Page 200 of 574
Cruise Control
{CAUTION:
Cruise control can be dangerous where you
cannot drive safely at a steady speed. So, do not
use the cruise control on winding roads or in
heavy traffic.
Cruise control can be dangerous on slippery
roads. On such roads, fast changes in tire traction
can cause excessive wheel slip, and you could
lose control. Do not use cruise control on slippery
roads.
With cruise control, a speed of about 25 mph (40 km/h)
or more can be maintained without keeping your foot
on the accelerator. Cruise control does not work
at speeds below about 25 mph (40 km/h).
When the brakes are applied, cruise control is turned off.
If the vehicle has StabiliTrak
®, and the system begins to
limit wheel spin, cruise control will automatically
disengage. SeeStabiliTrak
®System on page 4-6. When
road conditions allow the cruise control to be safely
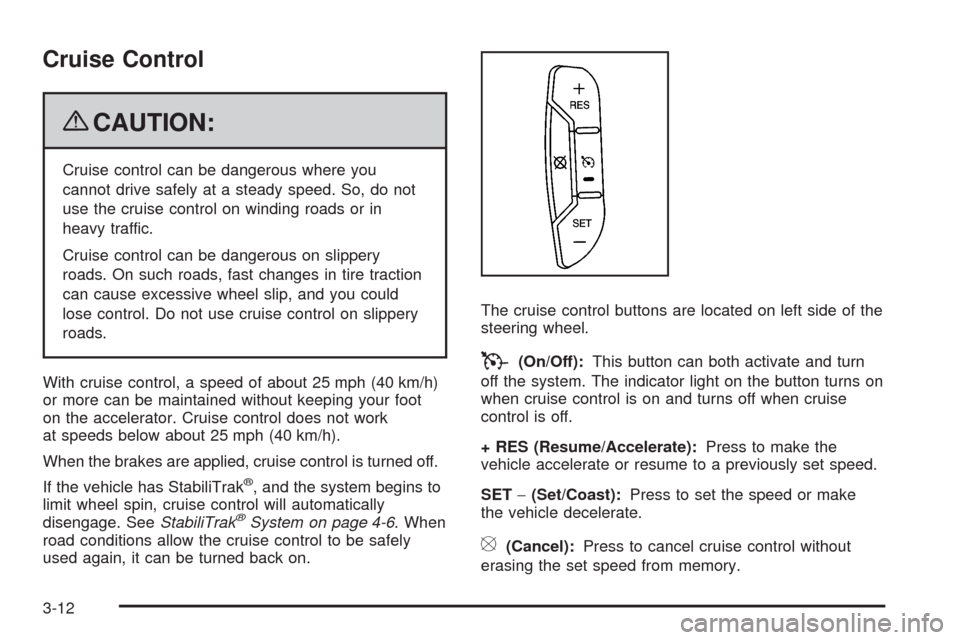
used again, it can be turned back on.The cruise control buttons are located on left side of the
steering wheel.
T(On/Off):This button can both activate and turn
off the system. The indicator light on the button turns on
when cruise control is on and turns off when cruise
control is off.
+ RES (Resume/Accelerate):Press to make the
vehicle accelerate or resume to a previously set speed.
SET−(Set/Coast):Press to set the speed or make
the vehicle decelerate.
[(Cancel):Press to cancel cruise control without
erasing the set speed from memory.
3-12
Page 258 of 574
SERVICE SIDE BLIND ZONE ALERT
SYSTEM
If your vehicle has the Side Blind Zone Alert (SBZA)
system and this message displays, both SBZA displays
will remain on indicating there is a problem with the
SBZA system. If these displays remain on after
continued driving, the system needs service. See your
dealer/retailer. SeeSide Blind Zone Alert (SBZA)
on page 2-58for more information.
SERVICE STABILITRAK
If your vehicle has StabiliTrak®and this message
displays, it means there may be a problem with the
StabiliTrak system. If you see this message, try to reset
the system. Stop; turn off the engine for at least
15 seconds; then start the engine again. If this message
still comes on, it means there is a problem. You
should see your dealer/retailer for service. The vehicle
is safe to drive, however, you do not have the bene�t
of StabiliTrak, so reduce your speed and drive
accordingly.
SERVICE SUSPENSION SYSTEM
If your vehicle has the Autoride®suspension system,
this message displays when the Autoride suspension
system is not operating properly. Have your vehicle
serviced by your dealer/retailer.
SERVICE THEFT DETERRENT SYSTEM
This message displays when there is a problem with
the theft-deterrent system. The vehicle may or may not
restart so you may want to take the vehicle to your
dealer/retailer before turning off the engine. See
PASS-Key
®III+ Electronic Immobilizer Operation on
page 2-24for more information.
SERVICE TIRE MONITOR SYSTEM
On vehicles with the Tire Pressure Monitor System
(TPMS), this message displays if a part on the TPMS is
not working properly. The tire pressure light also
�ashes and then remains on during the same ignition
cycle. SeeTire Pressure Light on page 3-43. Several
conditions may cause this message to appear. SeeTire
Pressure Monitor Operation on page 5-73for more
information. If the warning comes on and stays on, there
may be a problem with the TPMS. See your
dealer/retailer.
SERVICE TRACTION CONTROL
If your vehicle has StabiliTrak, this message displays
when there is a problem with the Traction Control
System (TCS). When this message displays, the system
will not limit wheel spin. Adjust your driving accordingly.
See your dealer/retailer for service. SeeStabiliTrak
®
System on page 4-6for more information.
3-70
Page 260 of 574
There are several conditions that can cause this
message to appear.
One condition is overheating, which could occur if
StabiliTrak activates continuously for an extended
period of time.
The message also displays if the brake system
warning light is on. SeeBrake System Warning
Light on page 3-40.
The message could display if the stability system
takes longer than usual to complete its diagnostic
checks due to driving conditions.
The message displays if an engine or vehicle
related problem has been detected and the vehicle
needs service. See your dealer/retailer.
The message also displays if the vehicle is shifted
into 4LO.
The message turns off as soon as the conditions that
caused the message to be displayed are no longer
present.
TIGHTEN GAS CAP
This message may display along with the check engine
light on the instrument panel cluster if the vehicle’s
fuel cap is not tightened properly. SeeMalfunction
Indicator Lamp on page 3-43. Reinstall the fuel cap fully.
SeeFilling the Tank on page 5-9. The diagnostic
system can determine if the fuel cap has been left off or
improperly installed. A loose or missing fuel cap
allows fuel to evaporate into the atmosphere. A few
driving trips with the cap properly installed should turn
this light and message off.
TIRE LEARNING ACTIVE
On vehicles with the Tire Pressure Monitor System
(TPMS), this message displays when the TPMS
is re-learning the tire positions on your vehicle. The tire
positions must be re-learned after rotating the tires
or after replacing a tire or sensor. SeeTire Inspection
and Rotation on page 5-76,Tire Pressure Monitor
System on page 5-71, andInflation - Tire Pressure on
page 5-70for more information.
TRACTION CONTROL OFF
If your vehicle has StabiliTrak, this message displays
when the Traction Control System (TCS) is turned
off. Adjust your driving accordingly. SeeStabiliTrak
®
System on page 4-6for more information.
3-72
Page 290 of 574
Stopping and Resuming Playback
To stop playing a DVD without turning off the system,
press the
cbutton on the remote control, or press the
pushbutton located under the stop or the play/pause
symbol tags displayed on the radio. If the radio head is
sourced to something other than DVD-V, press the
DVD/CD AUX button to make DVD-V the active source.
To resume DVD playback, press the
r/jbutton
on the remote control, or press the pushbutton located
under the play/pause symbol tag displayed on the
radio. The DVD should resume play from where it last
stopped if the disc has not been ejected and the
stop button has not been pressed twice on the remote
control. If the disc has been ejected or the stop
button has been pressed twice on the remote control,
the disc resumes playing at the beginning of the disc.
Ejecting a Disc
Press theZbutton on the radio to eject the disc. If a
disc is ejected from the radio, but not removed, the radio
reloads the disc after a short period of time. The disc is
stored in the radio. The radio does not resume play of the
disc automatically. If the RSA system is sourced to the
DVD, the movie when reloaded into the DVD player
begins to play again. In case loading and reading of a
DVD or CD cannot be completed (unknown format, etc.),
and the disc fails to eject, press and hold the DVD
Z
button more than �ve seconds to force the disc to eject.
DVD Radio Error Messages
Player Error:This message displays when there are
disc load or eject problems.
Disc Format Error:This message displays, if the disc
is inserted with the disc label wrong side up, or if
the disc is damaged.
Disc Region Error:This message displays, if the disc
is not from a correct region.
No Disc Inserted:This message displays, if no disc is
present when the
Zor DVD/CD AUX button is
pressed on the radio.
Using the Auxiliary Input Jack
The radio system has an auxiliary input jack located on
the lower right side of the faceplate. This is not an
audio output; do not plug the headphone set into the
front auxiliary input jack. An external audio device such
as an iPod, laptop computer, MP3 player, CD player,
or cassette tape player, etc. can be connected to
the auxiliary input jack for use as another audio source.
Drivers are encouraged to set up any auxiliary device
while the vehicle is in P (Park). SeeDefensive
Driving on page 4-2for more information on driver
distraction.
3-102
Page 330 of 574
Your Driving, the Road, and
the Vehicle
Driving for Better Fuel Economy
Driving habits can affect fuel mileage. Here are some
driving tips to get the best fuel economy possible.
Avoid fast starts and accelerate smoothly.
Brake gradually and avoid abrupt stops.
Avoid idling the engine for long periods of time.
When road and weather conditions are appropriate,
use cruise control, if equipped.
Always follow posted speed limits or drive more
slowly when conditions require.
Keep vehicle tires properly in�ated.
Combine several trips into a single trip.
Replace the vehicle’s tires with the same TPC Spec
number molded into the tire’s sidewall near the size.
Follow recommended scheduled maintenance.
Defensive Driving
Defensive driving means “always expect the
unexpected.” The �rst step in driving defensively is to
wear your safety belt — SeeSafety Belts: They Are for
Everyone on page 1-32.
{CAUTION:
Assume that other road users (pedestrians,
bicyclists, and other drivers) are going to be
careless and make mistakes. Anticipate what they
might do and be ready. In addition:
Allow enough following distance between you
and the driver in front of you.
Focus on the task of driving.
Driver distraction can cause collisions resulting in
injury or possible death. These simple defensive
driving techniques could save your life.
4-2
Page 335 of 574
If the system fails to turn on or activate, the StabiliTrak
light along with one of the following messages will
be displayed on the Driver Information Center (DIC):
TRACTION CONTROL OFF, SERVICE TRACTION
CONTROL, STABILITRAK OFF, SERVICE
STABILITRAK. If these DIC messages appear, make
sure the StabiliTrak system has not been turned
off using the StabiliTrak on/off button. Then turn the
steering wheel clockwise from the nine o’clock position
to the three o’clock position. If this clears the
message(s), the vehicle does not need servicing. If this
does not clear the message(s), then turn the vehicle
off, wait 15 seconds, and then turn it back on again to
reset the system. If any of these messages still
appear on the Driver Information Center (DIC), the
vehicle should be taken in for service. For more
information on the DIC messages, seeDriver
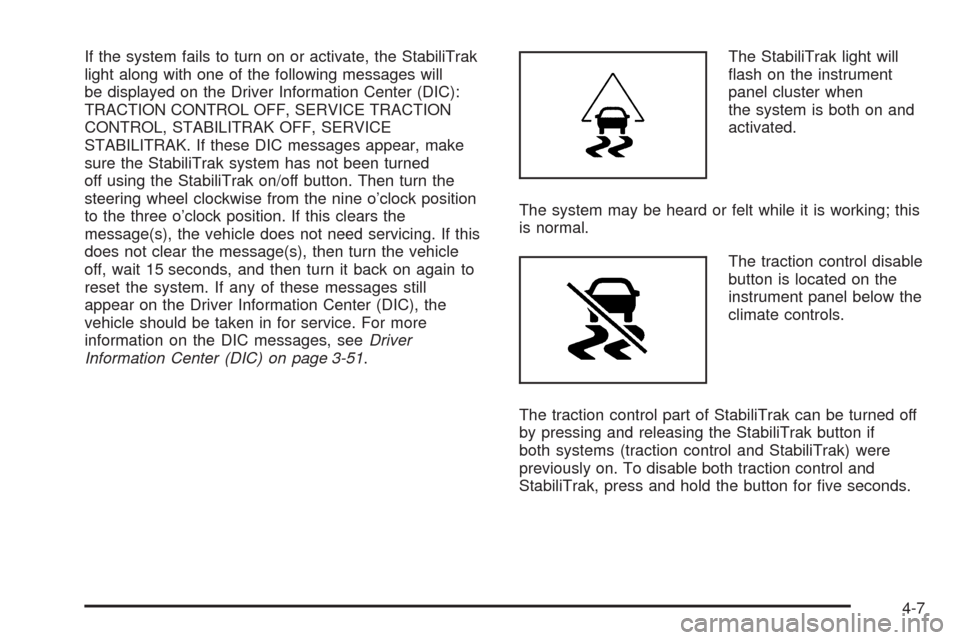
Information Center (DIC) on page 3-51.The StabiliTrak light will
�ash on the instrument
panel cluster when
the system is both on and
activated.
The system may be heard or felt while it is working; this
is normal.
The traction control disable
button is located on the
instrument panel below the
climate controls.
The traction control part of StabiliTrak can be turned off
by pressing and releasing the StabiliTrak button if
both systems (traction control and StabiliTrak) were
previously on. To disable both traction control and
StabiliTrak, press and hold the button for �ve seconds.
4-7