ECU CHEVROLET TAHOE 2010 3.G Service Manual
[x] Cancel search | Manufacturer: CHEVROLET, Model Year: 2010, Model line: TAHOE, Model: CHEVROLET TAHOE 2010 3.GPages: 608, PDF Size: 6.53 MB
Page 214 of 608
Center Console Storage
For vehicles with a console compartment, it is located
between the bucket seats.
Press the button and lift the lid to access the console
compartment.
A cupholder located in the rear of the console, swings
down for the rear seat passenger to use.
Roof Rack System
{WARNING:
If something is carried on top of the vehicle that is
longer or wider than the roof rack—like paneling,
plywood, or a mattress— the wind can catch it
while the vehicle is being driven. The item being
carried could be violently torn off, and this could
cause a collision, and damage the vehicle. Never
carry something longer or wider than the roof rack
on top of the vehicle unless using a GM Certified
accessory carrier. For vehicles with a roof rack, the rack can be used to
load items. For roof racks that do not have crossrails
included, GM Certified crossrails can be purchased as
an accessory. See your dealer for additional
information.
Notice:
Loading cargo on the roof rack that weighs
more than 91 kg (200 lbs) or hangs over the rear or
sides of the vehicle may damage the vehicle. Load
cargo so that it rests evenly between the crossrails,
making sure to fasten cargo securely.
To prevent damage or loss of cargo when driving,
check to make sure crossrails and cargo are securely
fastened. Loading cargo on the roof rack will make the
vehicle’s center of gravity higher. Avoid high speeds,
sudden starts, sharp turns, sudden braking or abrupt
maneuvers, otherwise it may result in loss of control.
If driving for a long distance, on rough roads, or at high
speeds, occasionally stop the vehicle to make sure the
cargo remains in its place.
3-74
Page 215 of 608
Do not exceed the maximum vehicle capacity when
loading the vehicle. For more information on vehicle
capacity and loading, seeLoading the Vehicle
on
page 5‑29.
.If small heavy objects are placed on the roof, cut a
piece of 3/8 inch plywood to fit inside the crossrails
and siderails to spread the load. Tie the plywood to
the siderail supports.
.Tie the load and secure it to the crossrails or the
siderail supports. Use the crossrails only to keep
the load from sliding. To move a crossrail, lift the
release lever up, on both sides of the rail. Then
slide the crossrail to the desired position balancing
the force side to side. Press the release lever
down on both sides of the rail, down to tighten it.
Try to slide the crossrail back and forth slightly to
make sure it is tight.
.To carry long items, move the crossrails as far
apart as possible. Tie the load to the crossrails and
the siderails or siderail supports. Also tie the load
to the bumpers, but do not tie the load so tightly
that the crossrails or siderails are damaged.
.After moving a crossrail, be sure it is securely
locked into the siderail. A Center High-Mounted Stoplamp (CHMSL) is located
above the rear window glass.
Make sure items loaded on the roof of the vehicle do
not block or damage the CHMSL.
Rear Storage Area
For vehicles with a rear storage area, it is located in the
rear cargo area of the vehicle on the driver's side trim
panel.
Turn the knobs and swing the storage door to access
the storage compartment. The door can be removed.
Rear Seat Armrest
For vehicles with a rear seat armrest, pull the loop at
the top of the armrest down to access the cupholders.
3-75
Page 216 of 608
Cargo Cover
{WARNING:
An improperly stored cargo cover could be thrown
about the vehicle during a collision or sudden
maneuver. Someone could be injured. If the cover
is removed, always store it in the proper storage
location. When it is replaced, always be sure that
it is securely reattached.
To use the cargo cover, if equipped: 1. Pull the cover handle toward the rear of the vehicle.
2. Latch the cover posts into the retaining sockets on the cargo area trim panels.
To return the cover to the retracted position: 1. Pull up on the cover handle to release the cover posts from the retaining sockets.
2. Let the cover move forward to the full retracted position. To remove the cover from a regular wheelbase model:
1. Let the cover go all the way into the holder.
2. Then, grasping the driver's side cover end cap, push the cover end cap toward the passenger side
of the vehicle.
3. Swing the cover rearward and take it out of the vehicle.
To put the cover in the vehicle: 1. Make sure the cover slot in the holder faces rearward with the round surface facing down.
2. Then, hold the cover at an angle and place the cover end cap into the slot in the passenger side
trim panel.
3. Move the other end of the cover forward and hold it next to the driver's side trim panel slot.
4. Press the end caps in, to allow the cover to fit into the trim slot.
5. Pull lightly on the cover holder to make sure it is secure.
On extended wheelbase models there are
two cover positions. The slots furthest forward
allow the cover to be used if the third seat is
removed or folded down. The cover can be
installed and removed from either side.
3-76
Page 220 of 608
Section 4 Instrument Panel
Tire Pressure Light . . . . . . . . . . . . . . . . . . . . . . . . . . . . 4-38
Malfunction Indicator Lamp . . . . . . . . . . . . . . . . . . . . 4-39
Oil Pressure Gauge . . . . . . . . . . . . . . . . . . . . . . . . . . . . 4-42
Oil Pressure Light . . . . . . . . . . . . . . . . . . . . . . . . . . . . . 4-43
Security Light . . . . . . . . . . . . . . . . . . . . . . . . . . . . . . . . . . 4-44
Fog Lamp Light . . . . . . . . . . . . . . . . . . . . . . . . . . . . . . . . 4-44
Cruise Control Light . . . . . . . . . . . . . . . . . . . . . . . . . . . 4-44
Highbeam On Light . . . . . . . . . . . . . . . . . . . . . . . . . . . . 4-44
Tow/Haul Mode Light . . . . . . . . . . . . . . . . . . . . . . . . . . 4-45
Fuel Gauge . . . . . . . . . . . . . . . . . . . . . . . . . . . . . . . . . . . . 4-45
Low Fuel Warning Light . . . . . . . . . . . . . . . . . . . . . . . . 4-46
Driver Information Center (DIC) . . . . . . . . . . . . . . . . . . 4-47
DIC Operation and Displays (With DIC Buttons) . . . . . . . . . . . . . . . . . . . . . . . . . . . . . . . . . . . . . 4-47
DIC Operation and Displays (Without DIC Buttons) . . . . . . . . . . . . . . . . . . . . . . . . . . . . . . . . . . . . . 4-55
DIC Compass . . . . . . . . . . . . . . . . . . . . . . . . . . . . . . . . . . 4-58
DIC Warnings and Messages . . . . . . . . . . . . . . . . . . 4-61
DIC Vehicle Customization (With DIC Buttons) . . . . . . . . . . . . . . . . . . . . . . . . . . . . . . . . . . . . . 4-71 Audio System(s)
. . . . . . . . . . . . . . . . . . . . . . . . . . . . . . . . . . 4-80
Setting the Clock . . . . . . . . . . . . . . . . . . . . . . . . . . . . . . 4-81
Radio(s) . . . . . . . . . . . . . . . . . . . . . . . . . . . . . . . . . . . . . . . 4-82
Using an MP3 (Radios with CD) . . . . . . . . . . . . . . . 4-99
Using an MP3 (Radios with CD and DVD) . . . . 4-106
XM Radio Messages . . . . . . . . . . . . . . . . . . . . . . . . . 4-113
Navigation/Radio System . . . . . . . . . . . . . . . . . . . . . 4-114
Bluetooth
®. . . . . . . . . . . . . . . . . . . . . . . . . . . . . . . . . . . . 4-114
Rear Seat Entertainment (RSE) System . . . . . . 4-125
Rear Seat Audio (RSA) . . . . . . . . . . . . . . . . . . . . . . . 4-134
Theft-Deterrent Feature . . . . . . . . . . . . . . . . . . . . . . 4-135
Audio Steering Wheel Controls . . . . . . . . . . . . . . . 4-136
Radio Reception . . . . . . . . . . . . . . . . . . . . . . . . . . . . . . 4-138
Rear Side Window Antenna . . . . . . . . . . . . . . . . . . 4-139
XM™ Satellite Radio Antenna System . . . . . . . . 4-139
4-2
Page 262 of 608
If the light comes on and stays on, it means that oil is
not flowing through the engine properly. The vehicle
could be low on oil and it might have some other
system problem.
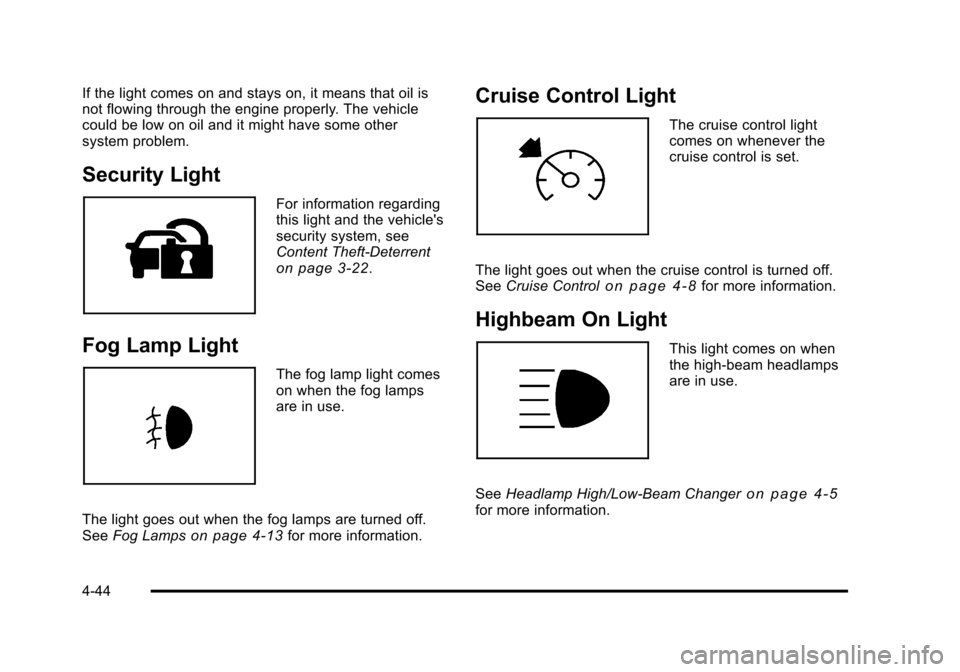
Security Light
For information regarding
this light and the vehicle's
security system, see
Content Theft-Deterrent
on page 3‑22.
Fog Lamp Light
The fog lamp light comes
on when the fog lamps
are in use.
The light goes out when the fog lamps are turned off.
See Fog Lamps
on page 4‑13for more information.
Cruise Control Light
The cruise control light
comes on whenever the
cruise control is set.
The light goes out when the cruise control is turned off.
See Cruise Control
on page 4‑8for more information.
Highbeam On Light
This light comes on when
the high-beam headlamps
are in use.
See Headlamp High/Low-Beam Changer
on page 4‑5for more information.
4-44
Page 332 of 608
Channel Unavail:This previously assigned channel is
no longer assigned. Tune to another station. If this
station was one of the presets, choose another station
for that preset button.
No Artist Info: No artist information is available at this
time on this channel. The system is working properly.
No Title Info: No song title information is available at
this time on this channel. The system is working
properly.
No CAT Info: No category information is available at
this time on this channel. The system is working
properly.
No Information: No text or informational messages are
available at this time on this channel. The system is
working properly.
CAT Not Found: There are no channels available for
the selected category. The system is working properly.
XM Theftlocked: The XM receiver in the vehicle could
have previously been in another vehicle. For security
purposes, XM receivers cannot be swapped between
vehicles. If this message is received after having the
vehicle serviced, check with your dealer.
XM Radio ID: If tuned to channel 0, this message
alternates with the XM™ Radio 8 digit radio ID label.
This label is needed to activate the service. Unknown:
If this message is received when tuned to
channel 0, there could be a receiver fault. Consult with
your dealer.
Check Antenna: If this message does not clear within
a short period of time, the receiver or antenna could
have a fault. Consult with your dealer.
Check XM Receivr: If this message does not clear
within a short period of time, the receiver could have a
fault. Consult with your dealer.
XM Not Available: If this message does not clear
within a short period of time, the receiver could have a
fault. Consult with your dealer.
Navigation/Radio System
For vehicles with a navigation radio system, see the
separate Navigation System manual.
Bluetooth®
Vehicles with a Bluetooth system can use a Bluetooth
capable cell phone with a Hands Free Profile to make
and receive phone calls. The system can be used while
the key is in ON/RUN or ACC/ACCESSORY position.
The range of the Bluetooth system can be up to 9.1 m
(30 ft). Not all phones support all functions, and not all
phones are guaranteed to work with the in-vehicle
Bluetooth system. See www.gm.com/bluetooth for more
information on compatible phones.
4-114
Page 371 of 608
Loading Your Vehicle for Off-Road
Driving
{WARNING:
.Cargo on the load floor piled higher than the
seatbacks can be thrown forward during a
sudden stop. You or your passengers could
be injured. Keep cargo below the top of the
seatbacks.
.Unsecured cargo on the load floor can be
tossed about when driving over rough terrain.
You or your passengers can be struck by
flying objects. Secure the cargo properly.
.Heavy loads on the roof raise the vehicle's
center of gravity, making it more likely to roll
over. You can be seriously or fatally injured if
the vehicle rolls over. Put heavy loads inside
the cargo area, not on the roof. Keep cargo in
the cargo area as far forward and low as
possible.There are some important things to remember about
how to load your vehicle.
.The heaviest things should be on the floor, forward
of the rear axle. Put heavier items as far forward
as you can.
.Be sure the load is properly secured, so things are
not tossed around.
You will find other important information under Loading
the Vehicle
on page 5‑29and Tires on page 6‑63.
Environmental Concerns
Off-road driving can provide wholesome and satisfying
recreation. However, it also raises environmental
concerns. We recognize these concerns and urge every
off-roader to follow these basic rules for protecting the
environment:
.Always use established trails, roads, and areas
that have been specially set aside for public
off-road recreational driving and obey all posted
regulations.
.Avoid any driving practice that could damage
shrubs, flowers, trees, or grasses or disturb
wildlife. This includes wheel-spinning, breaking
down trees, or unnecessary driving through
streams or over soft ground.
.Always carry a litter bag and make sure all refuse
is removed from any campsite before leaving.
5-13
Page 393 of 608
If you put things inside your vehicle—like
suitcases, tools, packages, or anything
else —they go as fast as the vehicle goes. If you
have to stop or turn quickly, or if there is a crash,
they will keep going.
{WARNING:
Things you put inside your vehicle can strike
and injure people in a sudden stop or turn,
or in a crash.
.Put things in the cargo area of your
vehicle. Try to spread the weight evenly.
.Never stack heavier things, like
suitcases, inside the vehicle so that some
of them are above the tops of the seats.
(Continued)
WARNING: (Continued)
.Do not leave an unsecured child restraint
in your vehicle.
.When you carry something inside the
vehicle, secure it whenever you can.
.Do not leave a seat folded down unless
you need to.
There is also important loading information for
off-road driving in this manual. See “Loading Your
Vehicle for Off-Road Driving” underOff-Road
Driving
on page 5‑11.
5-35
Page 395 of 608
Here are some guidelines for safely carrying a snow
plow on your vehicle:
.Make sure the weight on the front and rear axles
does not exceed the axle rating for each.
.For the front axle, if more cargo or passengers
must be carried, appropriate counter ballast must
be installed rear of the rear axle. Counter ballast
must be properly secured so it will not move during
driving.
.Follow the snow plow manufacturer's
recommendations regarding rear ballast. Rear
ballast may be required to ensure a proper front
and rear weight distribution ratio, even though the
actual weight at the front axle may be less than the
front axle rating.
.The snow plow manufacturer or installer can assist
you in determining the amount of rear ballast
required, to help make sure your snowplow/vehicle
combination does not exceed the GVW rating, the
front and rear axle ratings, and the front and rear
weight distribution ratio.
.The total vehicle must not exceed the GVW rating.Front axle reserve capacity is the difference between
your front Gross Axle Weight Rating (GAWR) and the
front axle weight of your vehicle with full fuel and
passengers. Basically, it is the amount of weight you
can add to your front axle before reaching your
front GAWR.
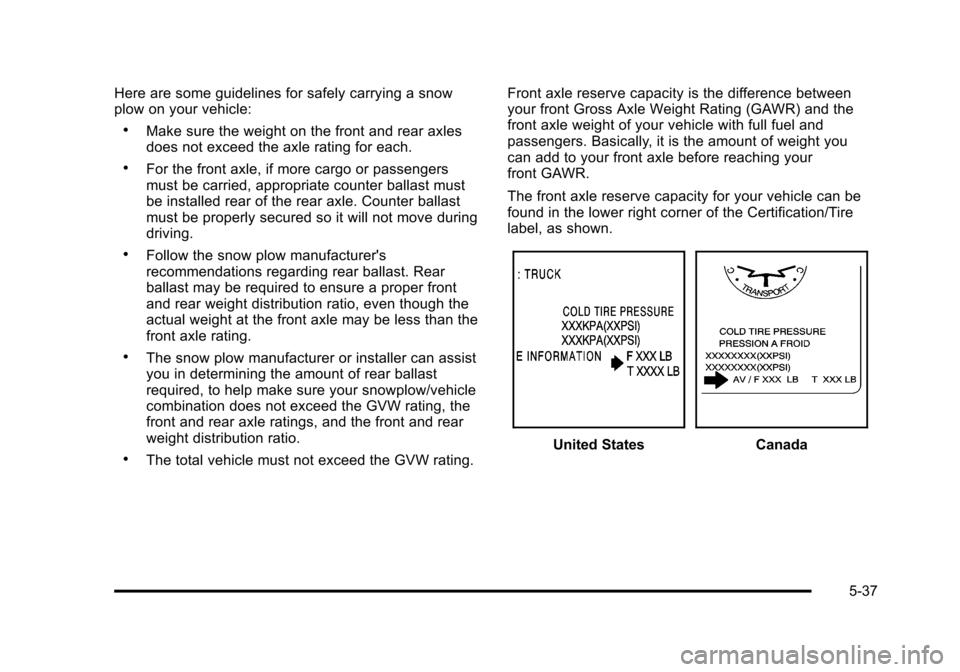
The front axle reserve capacity for your vehicle can be
found in the lower right corner of the Certification/Tire
label, as shown.United StatesCanada
5-37
Page 400 of 608
Four-Wheel Drive Vehicles with a
Two Speed Automatic Transfer Case
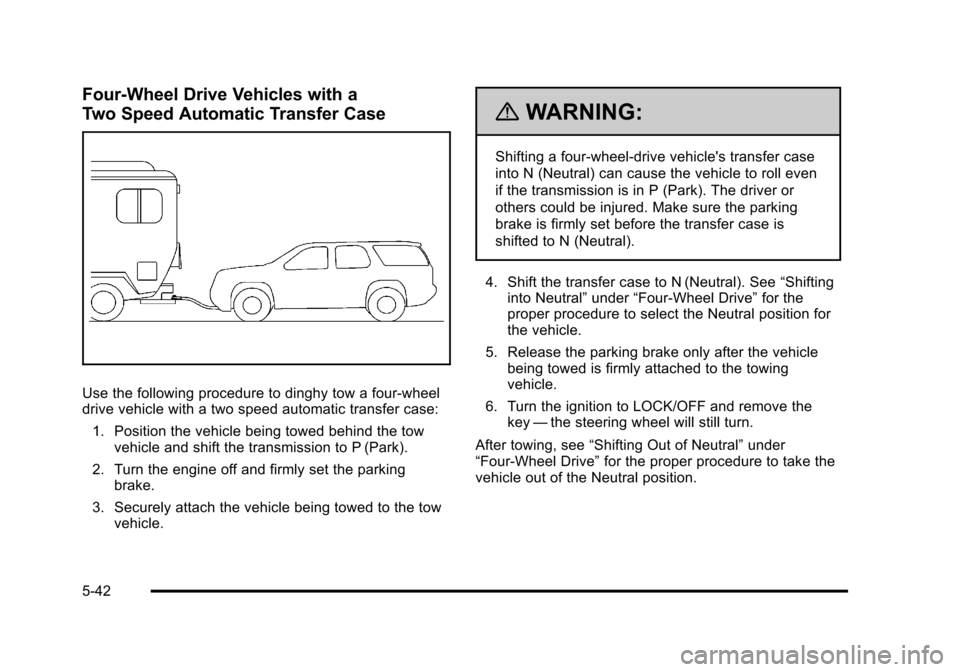
Use the following procedure to dinghy tow a four-wheel
drive vehicle with a two speed automatic transfer case:1. Position the vehicle being towed behind the tow vehicle and shift the transmission to P (Park).
2. Turn the engine off and firmly set the parking brake.
3. Securely attach the vehicle being towed to the tow vehicle.
{WARNING:
Shifting a four-wheel-drive vehicle's transfer case
into N (Neutral) can cause the vehicle to roll even
if the transmission is in P (Park). The driver or
others could be injured. Make sure the parking
brake is firmly set before the transfer case is
shifted to N (Neutral).
4. Shift the transfer case to N (Neutral). See “Shifting
into Neutral” under“Four-Wheel Drive” for the
proper procedure to select the Neutral position for
the vehicle.
5. Release the parking brake only after the vehicle being towed is firmly attached to the towing
vehicle.
6. Turn the ignition to LOCK/OFF and remove the key —the steering wheel will still turn.
After towing, see “Shifting Out of Neutral” under
“Four-Wheel Drive” for the proper procedure to take the
vehicle out of the Neutral position.
5-42