mirror CHEVROLET TAHOE 2010 3.G Owners Manual
[x] Cancel search | Manufacturer: CHEVROLET, Model Year: 2010, Model line: TAHOE, Model: CHEVROLET TAHOE 2010 3.GPages: 608, PDF Size: 6.53 MB
Page 7 of 608
Section 1 In Brief
Instrument Panel. . . . . . . . . . . . . . . . . . . . . . . . . . . . . . . . . . . 1-2
Initial Drive Information . . . . . . . . . . . . . . . . . . . . . . . . . . . 1-4
Remote Keyless Entry (RKE) System . . . . . . . . . . . 1-4
Remote Vehicle Start . . . . . . . . . . . . . . . . . . . . . . . . . . . 1-4
Door Locks . . . . . . . . . . . . . . . . . . . . . . . . . . . . . . . . . . . . . 1-5
Liftgate . . . . . . . . . . . . . . . . . . . . . . . . . . . . . . . . . . . . . . . . . . 1-6
Windows . . . . . . . . . . . . . . . . . . . . . . . . . . . . . . . . . . . . . . . . 1-7
Seat Adjustment . . . . . . . . . . . . . . . . . . . . . . . . . . . . . . . . 1-7
Second Row Seats . . . . . . . . . . . . . . . . . . . . . . . . . . . . 1-11
Third Row Seats . . . . . . . . . . . . . . . . . . . . . . . . . . . . . . . 1-11
Heated Seats . . . . . . . . . . . . . . . . . . . . . . . . . . . . . . . . . . 1-12
Head Restraint Adjustment . . . . . . . . . . . . . . . . . . . . 1-12
Safety Belt . . . . . . . . . . . . . . . . . . . . . . . . . . . . . . . . . . . . . 1-13
Sensing System for Passenger Airbag . . . . . . . . . 1-13
Mirror Adjustment . . . . . . . . . . . . . . . . . . . . . . . . . . . . . . 1-14
Steering Wheel Adjustment . . . . . . . . . . . . . . . . . . . . 1-15
Interior Lighting . . . . . . . . . . . . . . . . . . . . . . . . . . . . . . . . 1-16
Exterior Lighting . . . . . . . . . . . . . . . . . . . . . . . . . . . . . . . 1-16
Windshield Wiper/Washer . . . . . . . . . . . . . . . . . . . . . . 1-17
Climate Controls . . . . . . . . . . . . . . . . . . . . . . . . . . . . . . . 1-18
Transmission . . . . . . . . . . . . . . . . . . . . . . . . . . . . . . . . . . 1-19
Four-Wheel Drive . . . . . . . . . . . . . . . . . . . . . . . . . . . . . . 1-19 Vehicle Features
. . . . . . . . . . . . . . . . . . . . . . . . . . . . . . . . . . 1-21
Radio(s) . . . . . . . . . . . . . . . . . . . . . . . . . . . . . . . . . . . . . . . 1-21
Satellite Radio . . . . . . . . . . . . . . . . . . . . . . . . . . . . . . . . . 1-22
Portable Audio Devices . . . . . . . . . . . . . . . . . . . . . . . . 1-22
Steering Wheel Controls . . . . . . . . . . . . . . . . . . . . . . . 1-23
Bluetooth
®. . . . . . . . . . . . . . . . . . . . . . . . . . . . . . . . . . . . . 1-23
Navigation System . . . . . . . . . . . . . . . . . . . . . . . . . . . . . 1-23
Cruise Control . . . . . . . . . . . . . . . . . . . . . . . . . . . . . . . . . 1-24
Side Blind Zone Alert (SBZA) . . . . . . . . . . . . . . . . . . 1-24
Rear Vision Camera (RVC) . . . . . . . . . . . . . . . . . . . . 1-25
Ultrasonic Parking Assist . . . . . . . . . . . . . . . . . . . . . . 1-25
Power Outlets . . . . . . . . . . . . . . . . . . . . . . . . . . . . . . . . . 1-25
Universal Remote System . . . . . . . . . . . . . . . . . . . . . 1-25
Sunroof . . . . . . . . . . . . . . . . . . . . . . . . . . . . . . . . . . . . . . . . 1-26
Performance and Maintenance . . . . . . . . . . . . . . . . . . 1-27
StabiliTrak
®. . . . . . . . . . . . . . . . . . . . . . . . . . . . . . . . . . . . 1-27
Tire Pressure Monitor . . . . . . . . . . . . . . . . . . . . . . . . . . 1-27
Engine Oil Life System . . . . . . . . . . . . . . . . . . . . . . . . 1-28
Fuel E85 (85% Ethanol) . . . . . . . . . . . . . . . . . . . . . . . 1-28
Driving for Better Fuel Economy . . . . . . . . . . . . . . . 1-29
Roadside Assistance Program . . . . . . . . . . . . . . . . . 1-29
OnStar
®. . . . . . . . . . . . . . . . . . . . . . . . . . . . . . . . . . . . . . . 1-30
1-1
Page 17 of 608
Memory Features
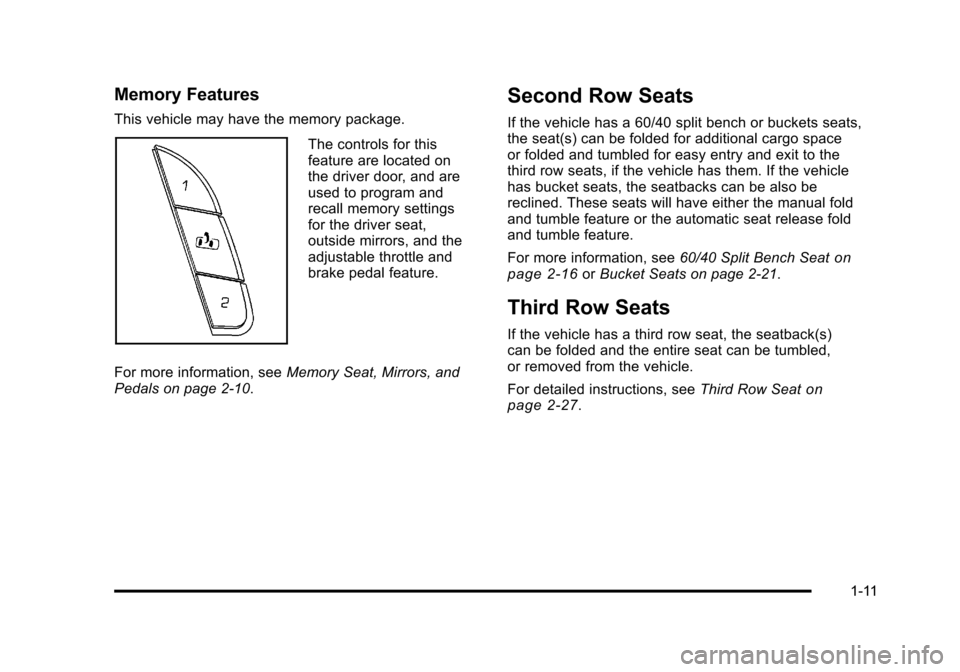
This vehicle may have the memory package.
The controls for this
feature are located on
the driver door, and are
used to program and
recall memory settings
for the driver seat,
outside mirrors, and the
adjustable throttle and
brake pedal feature.
For more information, see Memory Seat, Mirrors, and
Pedals on page 2‑10.
Second Row Seats
If the vehicle has a 60/40 split bench or buckets seats,
the seat(s) can be folded for additional cargo space
or folded and tumbled for easy entry and exit to the
third row seats, if the vehicle has them. If the vehicle
has bucket seats, the seatbacks can be also be
reclined. These seats will have either the manual fold
and tumble feature or the automatic seat release fold
and tumble feature.
For more information, see 60/40 Split Bench Seat
on
page 2‑16or Bucket Seats on page 2‑21.
Third Row Seats
If the vehicle has a third row seat, the seatback(s)
can be folded and the entire seat can be tumbled,
or removed from the vehicle.
For detailed instructions, see Third Row Seat
on
page 2‑27.
1-11
Page 20 of 608
Mirror Adjustment
Exterior Mirrors
Vehicles with manual outside mirrors can be adjusted
so that the side of the vehicle and the area behind
are seen.
If the vehicle has towing mirrors, they can be adjusted
for a clearer view of the objects behind you. Manually
pull out the mirror head to extend it for better visibility
when towing a trailer. SeeOutside Towing Mirrors
on
page 3‑53.
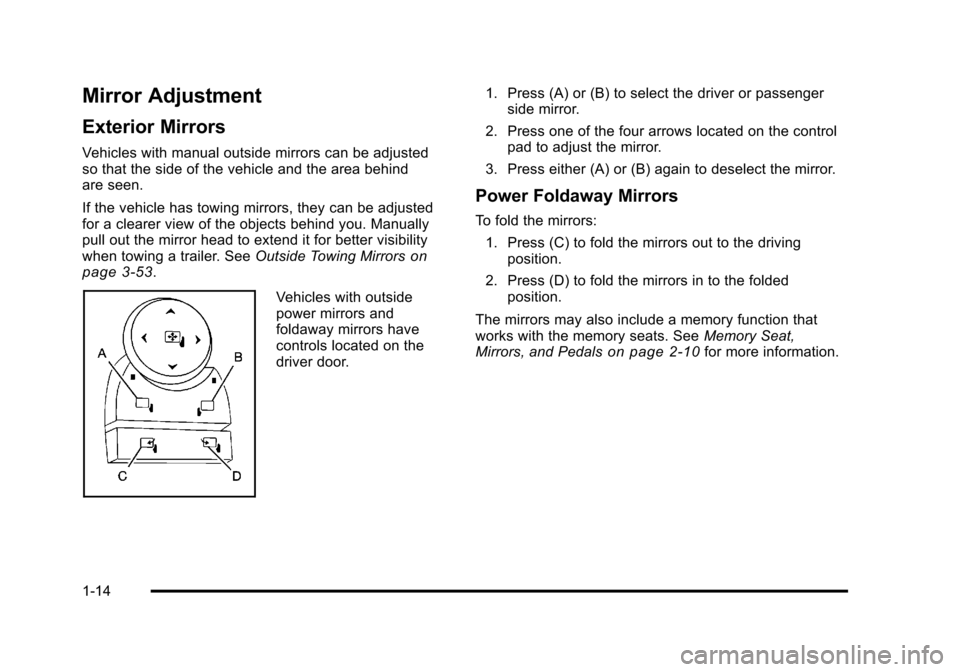
Vehicles with outside
power mirrors and
foldaway mirrors have
controls located on the
driver door. 1. Press (A) or (B) to select the driver or passenger
side mirror.
2. Press one of the four arrows located on the control pad to adjust the mirror.
3. Press either (A) or (B) again to deselect the mirror.
Power Foldaway Mirrors
To fold the mirrors: 1. Press (C) to fold the mirrors out to the driving position.
2. Press (D) to fold the mirrors in to the folded position.
The mirrors may also include a memory function that
works with the memory seats. See Memory Seat,
Mirrors, and Pedals
on page 2‑10for more information.
1-14
Page 21 of 608
Manual Foldaway Mirrors
Manually fold the mirrors inward to prevent damage
when going through an automatic car wash. To fold,
push the mirror toward the vehicle. Push the mirror
outward, to return to its original position.
Interior Mirror
Vehicles with a manual rearview mirror can be adjusted
to see clearly behind the vehicle. Hold the mirror in the
center to move it up or down and side to side. To
reduce headlamp glare during nighttime use, push the
tab forward for daytime use and pull it for nighttime use.
Vehicles with the automatic dimming feature will
automatically reduce the glare of lights from behind
the vehicle. The dimming feature comes on and the
indicator light illuminates each time the vehicle is
started.
SeeAutomatic Dimming Rearview Mirror
on page 3‑52for more information.
Steering Wheel Adjustment
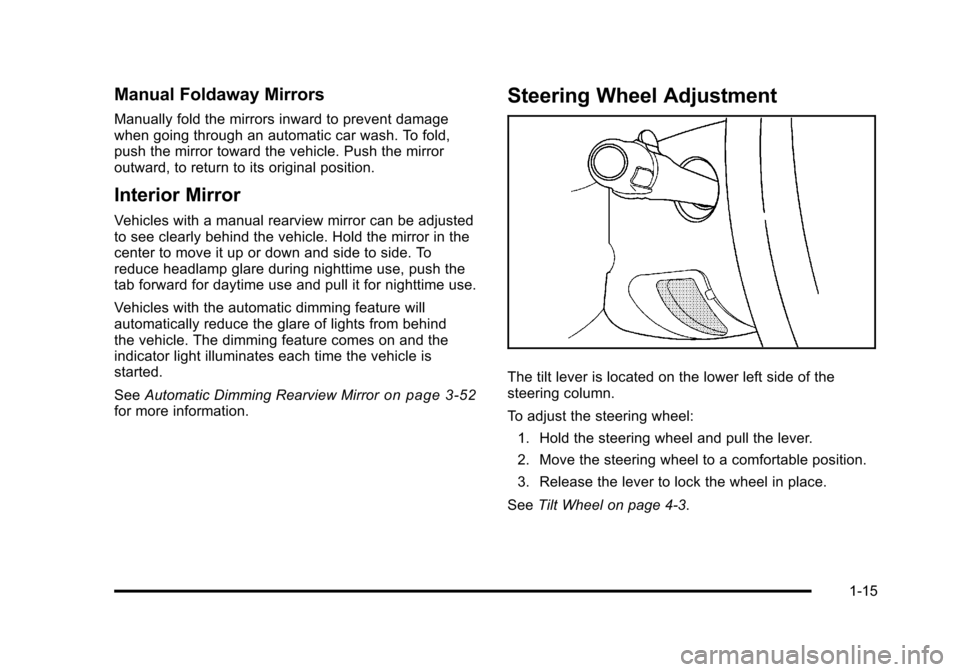
The tilt lever is located on the lower left side of the
steering column.
To adjust the steering wheel:
1. Hold the steering wheel and pull the lever.
2. Move the steering wheel to a comfortable position.
3. Release the lever to lock the wheel in place.
See Tilt Wheel on page 4‑3.
1-15
Page 30 of 608
Cruise Control
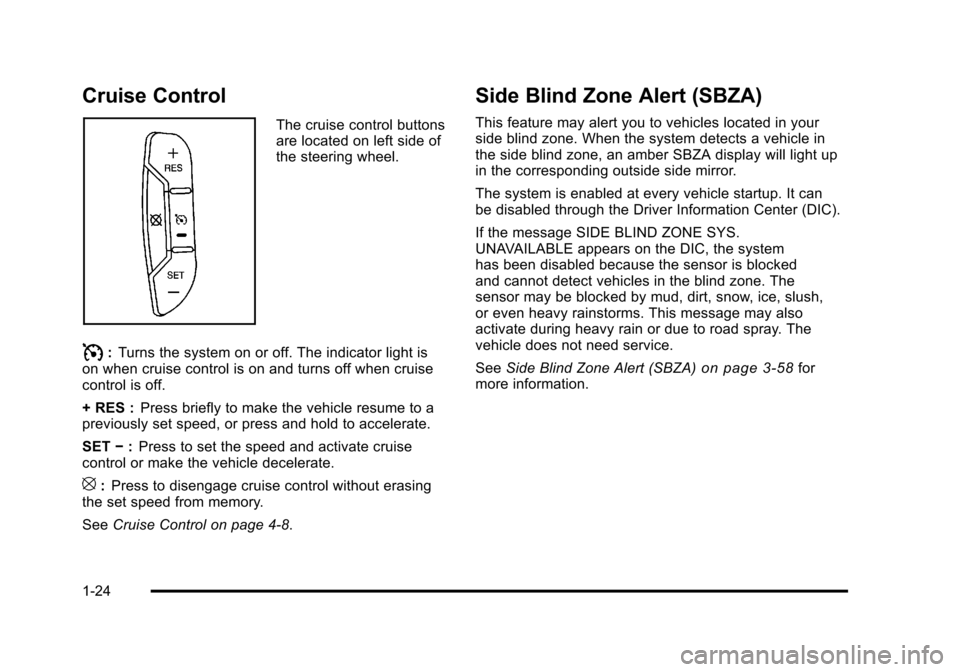
The cruise control buttons
are located on left side of
the steering wheel.
I:Turns the system on or off. The indicator light is
on when cruise control is on and turns off when cruise
control is off.
+ RES : Press briefly to make the vehicle resume to a
previously set speed, or press and hold to accelerate.
SET −:Press to set the speed and activate cruise
control or make the vehicle decelerate.
[: Press to disengage cruise control without erasing
the set speed from memory.
See Cruise Control on page 4‑8.
Side Blind Zone Alert (SBZA)
This feature may alert you to vehicles located in your
side blind zone. When the system detects a vehicle in
the side blind zone, an amber SBZA display will light up
in the corresponding outside side mirror.
The system is enabled at every vehicle startup. It can
be disabled through the Driver Information Center (DIC).
If the message SIDE BLIND ZONE SYS.
UNAVAILABLE appears on the DIC, the system
has been disabled because the sensor is blocked
and cannot detect vehicles in the blind zone. The
sensor may be blocked by mud, dirt, snow, ice, slush,
or even heavy rainstorms. This message may also
activate during heavy rain or due to road spray. The
vehicle does not need service.
SeeSide Blind Zone Alert (SBZA)
on page 3‑58for
more information.
1-24
Page 31 of 608
Rear Vision Camera (RVC)
The rear vision camera displays a view of the area
behind the vehicle when the vehicle is shifted into
R (Reverse) on the inside rear view mirror or the
navigation screen, if equipped.
To clean the camera lense, located above the license
plate, rinse it with water and wipe it with a soft cloth.
Ultrasonic Parking Assist
This feature uses sensors on the rear bumper to detect
objects while parking the vehicle. URPA comes on
automatically when the shift lever is moved into
R (Reverse) and operates at speeds less than 8 km/h
(5 mph). URPA uses audio beeps to provide distance
and system information.
Keep the sensors on the vehicle's rear bumper clean to
ensure proper operation.
The system can be disabled by pressing the rear park
aid disable button located next to the radio.
SeeUltrasonic Rear Parking Assist (URPA)
on
page 3‑56for more information.
Power Outlets
Accessory power outlets can be used to connect
auxiliary electrical equipment, such as a cellular
telephone.
There are two under the climate controls, one inside the
center floor console, one on the rear of the center floor
console and one accessory power outlet in the rear
cargo area on the passenger side.
The accessory power outlets are powered, even with
the ignition off. Continuing to use accessory power
outlets while the ignition is in LOCK/OFF may cause the
vehicle's battery to run down.
Universal Remote System
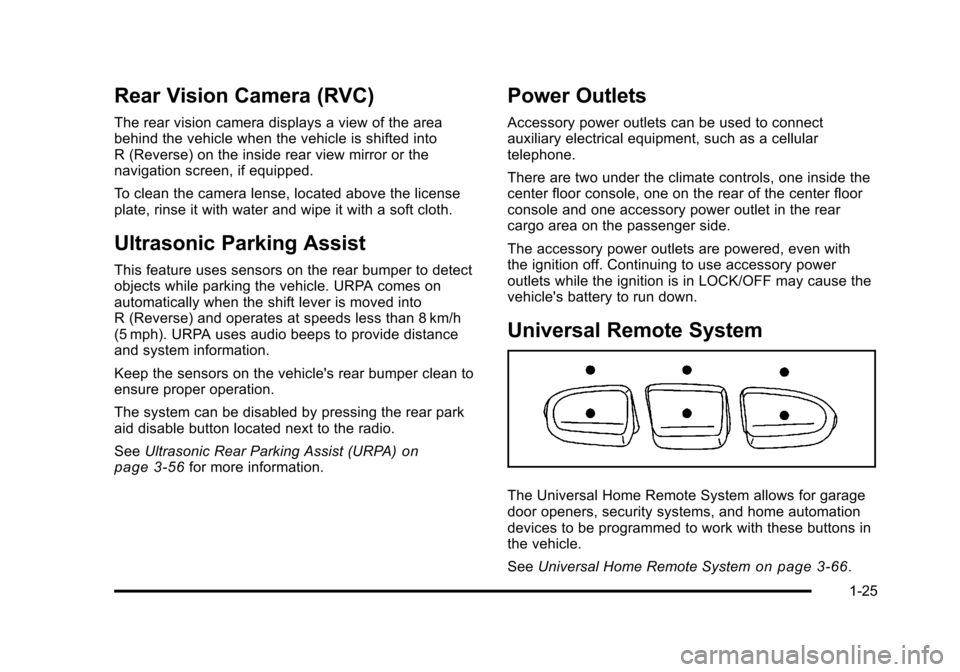
The Universal Home Remote System allows for garage
door openers, security systems, and home automation
devices to be programmed to work with these buttons in
the vehicle.
See Universal Home Remote System
on page 3‑66.
1-25
Page 32 of 608
Sunroof
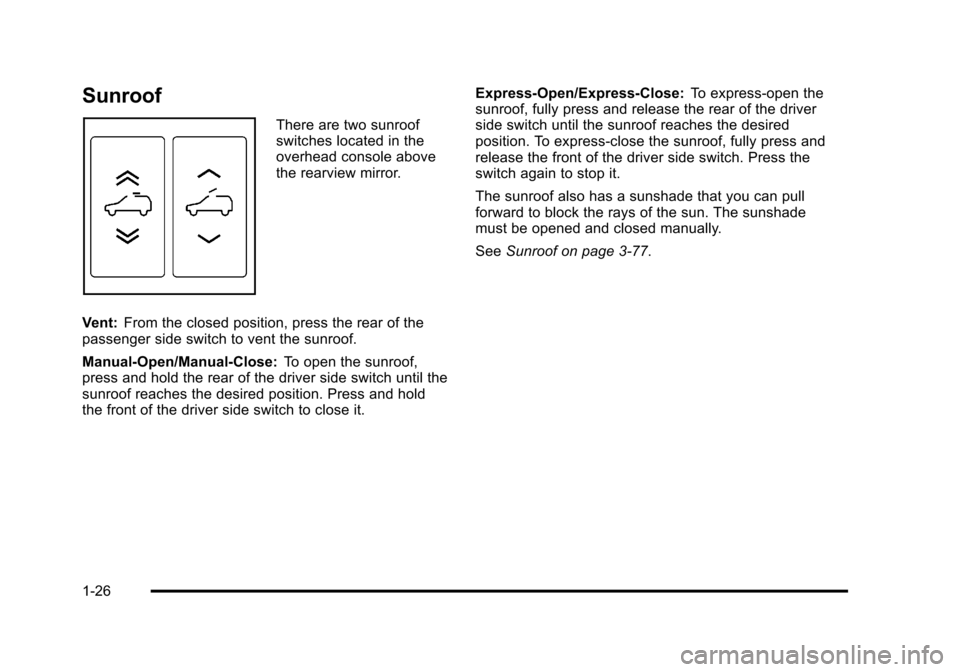
There are two sunroof
switches located in the
overhead console above
the rearview mirror.
Vent: From the closed position, press the rear of the
passenger side switch to vent the sunroof.
Manual-Open/Manual-Close: To open the sunroof,
press and hold the rear of the driver side switch until the
sunroof reaches the desired position. Press and hold
the front of the driver side switch to close it. Express-Open/Express-Close:
To express-open the
sunroof, fully press and release the rear of the driver
side switch until the sunroof reaches the desired
position. To express-close the sunroof, fully press and
release the front of the driver side switch. Press the
switch again to stop it.
The sunroof also has a sunshade that you can pull
forward to block the rays of the sun. The sunshade
must be opened and closed manually.
See Sunroof on page 3‑77.
1-26
Page 39 of 608
Section 2 Seats and Restraint System
Head Restraints. . . . . . . . . . . . . . . . . . . . . . . . . . . . . . . . . . . . 2-3
Front Seats . . . . . . . . . . . . . . . . . . . . . . . . . . . . . . . . . . . . . . . . . 2-4
Manual Seats . . . . . . . . . . . . . . . . . . . . . . . . . . . . . . . . . . . 2-4
Power Seats . . . . . . . . . . . . . . . . . . . . . . . . . . . . . . . . . . . . 2-5
Manual Lumbar . . . . . . . . . . . . . . . . . . . . . . . . . . . . . . . . . 2-6
Power Lumbar . . . . . . . . . . . . . . . . . . . . . . . . . . . . . . . . . . 2-7
Heated Seats . . . . . . . . . . . . . . . . . . . . . . . . . . . . . . . . . . . 2-8
Heated and Cooled Seats . . . . . . . . . . . . . . . . . . . . . . . 2-9
Memory Seat, Mirrors, and Pedals . . . . . . . . . . . . . 2-10
Reclining Seatbacks . . . . . . . . . . . . . . . . . . . . . . . . . . . 2-12
Center Seat . . . . . . . . . . . . . . . . . . . . . . . . . . . . . . . . . . . . 2-15
Rear Seats . . . . . . . . . . . . . . . . . . . . . . . . . . . . . . . . . . . . . . . . 2-15
Heated Seats . . . . . . . . . . . . . . . . . . . . . . . . . . . . . . . . . . 2-15
60/40 Split Bench Seat . . . . . . . . . . . . . . . . . . . . . . . . 2-16
Bucket Seats . . . . . . . . . . . . . . . . . . . . . . . . . . . . . . . . . . 2-21
Third Row Seat . . . . . . . . . . . . . . . . . . . . . . . . . . . . . . . . 2-27
Safety Belts . . . . . . . . . . . . . . . . . . . . . . . . . . . . . . . . . . . . . . . 2-32
Safety Belts: They Are for Everyone . . . . . . . . . . . 2-32
How to Wear Safety Belts Properly . . . . . . . . . . . . 2-37
Lap-Shoulder Belt . . . . . . . . . . . . . . . . . . . . . . . . . . . . . 2-46 Safety Belt Use During Pregnancy . . . . . . . . . . . . . 2-53
Lap Belt . . . . . . . . . . . . . . . . . . . . . . . . . . . . . . . . . . . . . . . 2-54
Safety Belt Extender . . . . . . . . . . . . . . . . . . . . . . . . . . . 2-55
Child Restraints . . . . . . . . . . . . . . . . . . . . . . . . . . . . . . . . . . 2-55
Older Children . . . . . . . . . . . . . . . . . . . . . . . . . . . . . . . . . 2-55
Infants and Young Children . . . . . . . . . . . . . . . . . . . . 2-59
Child Restraint Systems . . . . . . . . . . . . . . . . . . . . . . . 2-63
Where to Put the Restraint . . . . . . . . . . . . . . . . . . . . . 2-66
Lower Anchors and Tethers for Children
(LATCH) . . . . . . . . . . . . . . . . . . . . . . . . . . . . . . . . . . . . . 2-67
Securing a Child Restraint in a Rear Seat Position . . . . . . . . . . . . . . . . . . . . . . . . . . . . . . . . . . . . . . 2-75
Securing a Child Restraint in the Center Front Seat Position . . . . . . . . . . . . . . . . . . . . . . . . . . . . . . . . 2-79
Securing a Child Restraint in the Right Front Seat Position . . . . . . . . . . . . . . . . . . . . . . . . . . . . . . . . 2-80
Airbag System . . . . . . . . . . . . . . . . . . . . . . . . . . . . . . . . . . . . 2-83
Where Are the Airbags? . . . . . . . . . . . . . . . . . . . . . . . 2-86
When Should an Airbag Inflate? . . . . . . . . . . . . . . . 2-89
What Makes an Airbag Inflate? . . . . . . . . . . . . . . . . 2-90
2-1
Page 44 of 608
Your vehicle may have additional features to adjust your
vehicle's power seat:
.Raise or lower the front part of the seat cushion by
moving the front of the control up or down.
.Raise or lower the rear part of the seat cushion by
moving the rear of the control up or down.
.Raise or lower the entire seat by moving the entire
control up or down.
On seats with power reclining seatbacks, the control is
located behind the power seat control on the outboard
side of the seats. See “Power Reclining Seatbacks”
under Reclining Seatbacks on page 2‑12.
A vehicle with a memory function allows seat settings to
be saved and recalled. See Memory Seat, Mirrors, and
Pedals
on page 2‑10for more information.
Manual Lumbar
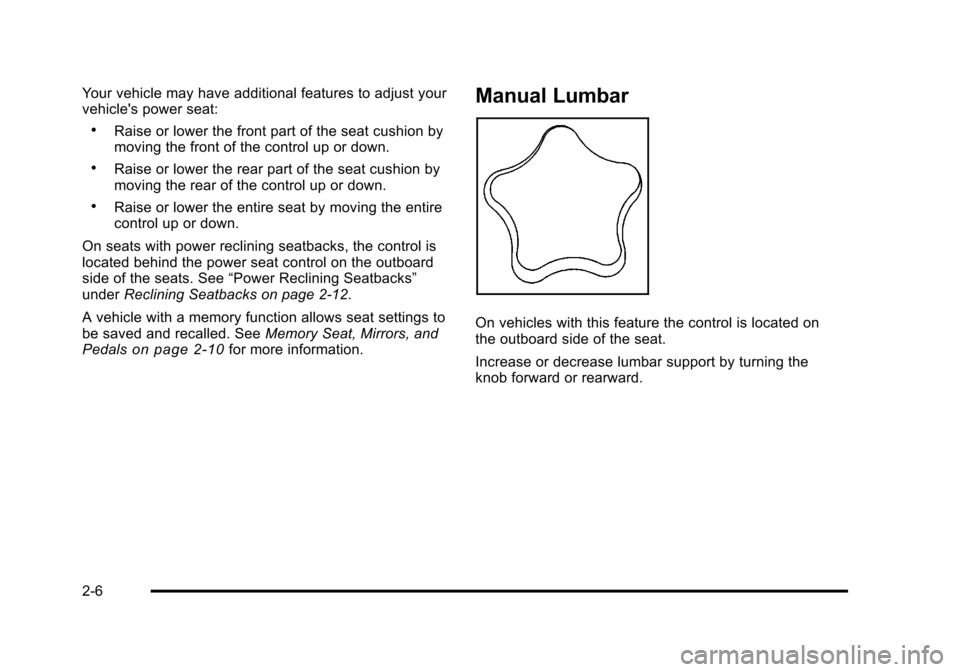
On vehicles with this feature the control is located on
the outboard side of the seat.
Increase or decrease lumbar support by turning the
knob forward or rearward.
2-6
Page 45 of 608
Power Lumbar
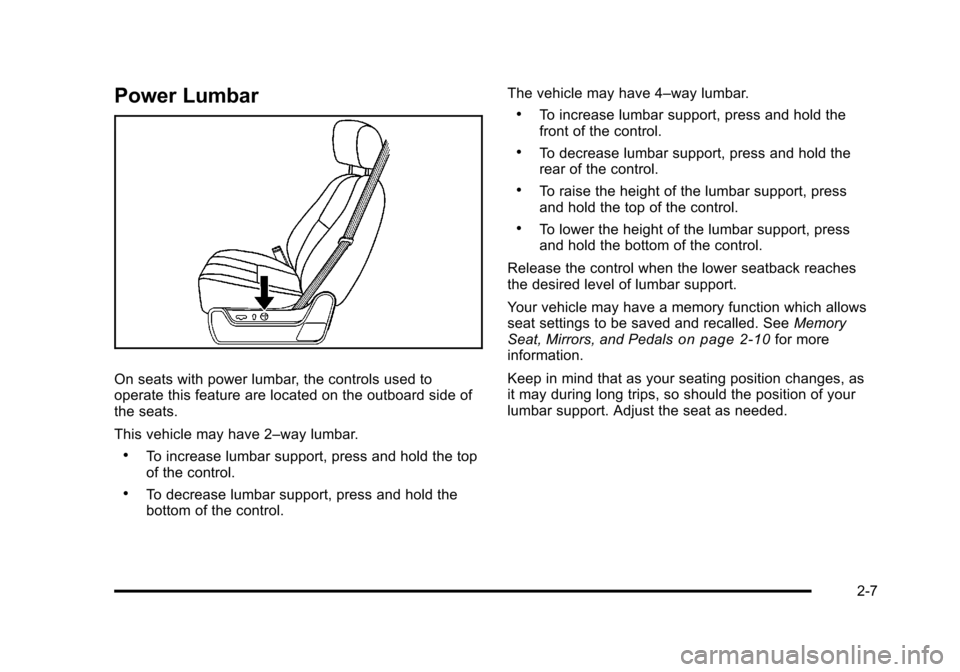
On seats with power lumbar, the controls used to
operate this feature are located on the outboard side of
the seats.
This vehicle may have 2–way lumbar.
.To increase lumbar support, press and hold the top
of the control.
.To decrease lumbar support, press and hold the
bottom of the control.The vehicle may have 4–way lumbar.
.To increase lumbar support, press and hold the
front of the control.
.To decrease lumbar support, press and hold the
rear of the control.
.To raise the height of the lumbar support, press
and hold the top of the control.
.To lower the height of the lumbar support, press
and hold the bottom of the control.
Release the control when the lower seatback reaches
the desired level of lumbar support.
Your vehicle may have a memory function which allows
seat settings to be saved and recalled. See Memory
Seat, Mirrors, and Pedals
on page 2‑10for more
information.
Keep in mind that as your seating position changes, as
it may during long trips, so should the position of your
lumbar support. Adjust the seat as needed.
2-7