remote control CHEVROLET TAHOE 2010 3.G Owners Manual
[x] Cancel search | Manufacturer: CHEVROLET, Model Year: 2010, Model line: TAHOE, Model: CHEVROLET TAHOE 2010 3.GPages: 608, PDF Size: 6.53 MB
Page 7 of 608
Section 1 In Brief
Instrument Panel. . . . . . . . . . . . . . . . . . . . . . . . . . . . . . . . . . . 1-2
Initial Drive Information . . . . . . . . . . . . . . . . . . . . . . . . . . . 1-4
Remote Keyless Entry (RKE) System . . . . . . . . . . . 1-4
Remote Vehicle Start . . . . . . . . . . . . . . . . . . . . . . . . . . . 1-4
Door Locks . . . . . . . . . . . . . . . . . . . . . . . . . . . . . . . . . . . . . 1-5
Liftgate . . . . . . . . . . . . . . . . . . . . . . . . . . . . . . . . . . . . . . . . . . 1-6
Windows . . . . . . . . . . . . . . . . . . . . . . . . . . . . . . . . . . . . . . . . 1-7
Seat Adjustment . . . . . . . . . . . . . . . . . . . . . . . . . . . . . . . . 1-7
Second Row Seats . . . . . . . . . . . . . . . . . . . . . . . . . . . . 1-11
Third Row Seats . . . . . . . . . . . . . . . . . . . . . . . . . . . . . . . 1-11
Heated Seats . . . . . . . . . . . . . . . . . . . . . . . . . . . . . . . . . . 1-12
Head Restraint Adjustment . . . . . . . . . . . . . . . . . . . . 1-12
Safety Belt . . . . . . . . . . . . . . . . . . . . . . . . . . . . . . . . . . . . . 1-13
Sensing System for Passenger Airbag . . . . . . . . . 1-13
Mirror Adjustment . . . . . . . . . . . . . . . . . . . . . . . . . . . . . . 1-14
Steering Wheel Adjustment . . . . . . . . . . . . . . . . . . . . 1-15
Interior Lighting . . . . . . . . . . . . . . . . . . . . . . . . . . . . . . . . 1-16
Exterior Lighting . . . . . . . . . . . . . . . . . . . . . . . . . . . . . . . 1-16
Windshield Wiper/Washer . . . . . . . . . . . . . . . . . . . . . . 1-17
Climate Controls . . . . . . . . . . . . . . . . . . . . . . . . . . . . . . . 1-18
Transmission . . . . . . . . . . . . . . . . . . . . . . . . . . . . . . . . . . 1-19
Four-Wheel Drive . . . . . . . . . . . . . . . . . . . . . . . . . . . . . . 1-19 Vehicle Features
. . . . . . . . . . . . . . . . . . . . . . . . . . . . . . . . . . 1-21
Radio(s) . . . . . . . . . . . . . . . . . . . . . . . . . . . . . . . . . . . . . . . 1-21
Satellite Radio . . . . . . . . . . . . . . . . . . . . . . . . . . . . . . . . . 1-22
Portable Audio Devices . . . . . . . . . . . . . . . . . . . . . . . . 1-22
Steering Wheel Controls . . . . . . . . . . . . . . . . . . . . . . . 1-23
Bluetooth
®. . . . . . . . . . . . . . . . . . . . . . . . . . . . . . . . . . . . . 1-23
Navigation System . . . . . . . . . . . . . . . . . . . . . . . . . . . . . 1-23
Cruise Control . . . . . . . . . . . . . . . . . . . . . . . . . . . . . . . . . 1-24
Side Blind Zone Alert (SBZA) . . . . . . . . . . . . . . . . . . 1-24
Rear Vision Camera (RVC) . . . . . . . . . . . . . . . . . . . . 1-25
Ultrasonic Parking Assist . . . . . . . . . . . . . . . . . . . . . . 1-25
Power Outlets . . . . . . . . . . . . . . . . . . . . . . . . . . . . . . . . . 1-25
Universal Remote System . . . . . . . . . . . . . . . . . . . . . 1-25
Sunroof . . . . . . . . . . . . . . . . . . . . . . . . . . . . . . . . . . . . . . . . 1-26
Performance and Maintenance . . . . . . . . . . . . . . . . . . 1-27
StabiliTrak
®. . . . . . . . . . . . . . . . . . . . . . . . . . . . . . . . . . . . 1-27
Tire Pressure Monitor . . . . . . . . . . . . . . . . . . . . . . . . . . 1-27
Engine Oil Life System . . . . . . . . . . . . . . . . . . . . . . . . 1-28
Fuel E85 (85% Ethanol) . . . . . . . . . . . . . . . . . . . . . . . 1-28
Driving for Better Fuel Economy . . . . . . . . . . . . . . . 1-29
Roadside Assistance Program . . . . . . . . . . . . . . . . . 1-29
OnStar
®. . . . . . . . . . . . . . . . . . . . . . . . . . . . . . . . . . . . . . . 1-30
1-1
Page 11 of 608
When the vehicle starts, the parking lamps will turn on
and remain on as long as the engine is running. The
doors will be locked and the climate control system may
come on.
The engine will continue to run for 10 minutes. Repeat
the steps for a 10-minute time extension. Remote start
can be extended only once.
Canceling a Remote Start
To cancel a remote start:
.Aim the RKE transmitter at the vehicle and press
and hold
/until the parking lamps turn off.
.Turn on the hazard warning flashers.
.Turn the ignition on and then back off.
See Remote Vehicle Start on page 3‑7.
Door Locks
There are several ways to lock and unlock the vehicle.
From outside, use the Remote Keyless Entry (RKE)
transmitter or the key in the driver door. From inside,
use the power door locks or the manual door locks.
To lock or unlock the door with the manual locks, push
down or pull up on the manual lock knob.
Power Door Locks
If available, these switches are located on the front
doors.
K:Press to unlock the doors.
Q:Remove the key from the ignition and press to lock
the doors.
For more information, see:
.Programmable Automatic Door Lockson
page 3‑11.
.Rear Door Security Locks on page 3‑11.
1-5
Page 31 of 608
Rear Vision Camera (RVC)
The rear vision camera displays a view of the area
behind the vehicle when the vehicle is shifted into
R (Reverse) on the inside rear view mirror or the
navigation screen, if equipped.
To clean the camera lense, located above the license
plate, rinse it with water and wipe it with a soft cloth.
Ultrasonic Parking Assist
This feature uses sensors on the rear bumper to detect
objects while parking the vehicle. URPA comes on
automatically when the shift lever is moved into
R (Reverse) and operates at speeds less than 8 km/h
(5 mph). URPA uses audio beeps to provide distance
and system information.
Keep the sensors on the vehicle's rear bumper clean to
ensure proper operation.
The system can be disabled by pressing the rear park
aid disable button located next to the radio.
SeeUltrasonic Rear Parking Assist (URPA)
on
page 3‑56for more information.
Power Outlets
Accessory power outlets can be used to connect
auxiliary electrical equipment, such as a cellular
telephone.
There are two under the climate controls, one inside the
center floor console, one on the rear of the center floor
console and one accessory power outlet in the rear
cargo area on the passenger side.
The accessory power outlets are powered, even with
the ignition off. Continuing to use accessory power
outlets while the ignition is in LOCK/OFF may cause the
vehicle's battery to run down.
Universal Remote System
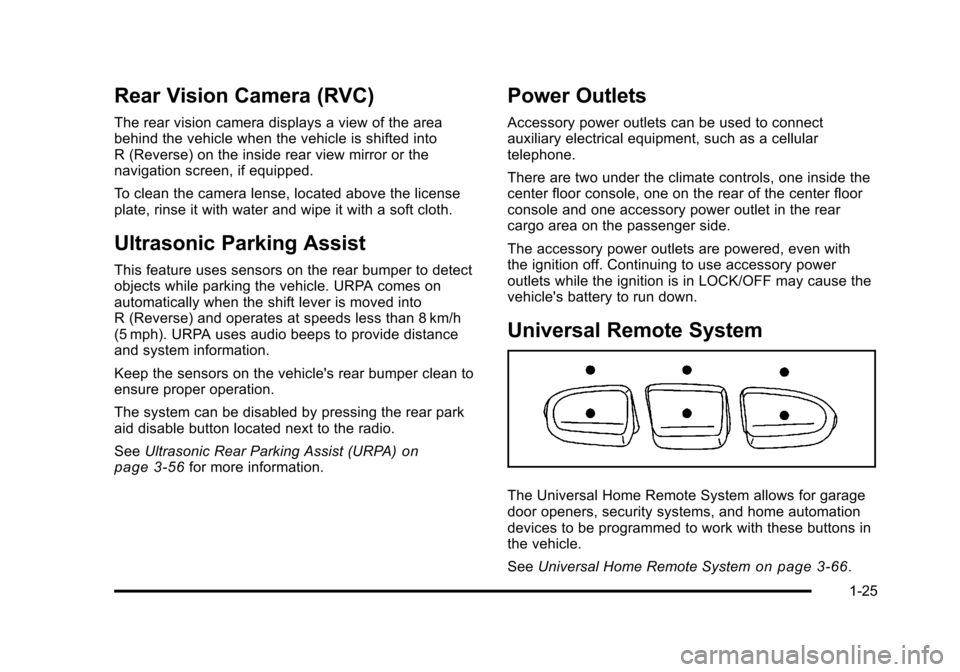
The Universal Home Remote System allows for garage
door openers, security systems, and home automation
devices to be programmed to work with these buttons in
the vehicle.
See Universal Home Remote System
on page 3‑66.
1-25
Page 49 of 608
If you use the remote keyless entry transmitter to enter
your vehicle and the remote recall memory feature is
on, automatic seat, adjustable mirror, and adjustable
pedal movements will occur. See“MEMORY SEAT
RECALL” underDIC Vehicle Customization (With DIC
Buttons)
on page 4‑71for more information.
To stop recall movement of the memory function at any
time, press one of the power seat controls, memory
buttons, power mirror buttons, or adjustable pedal
switch.
If something has blocked the driver ’s seat and/or the
adjustable pedals while recalling a memory position, the
driver ’s seat and/or the adjustable pedals recall may
stop working. If this happens, remove the obstruction
and press the appropriate control for the area that is not
responding for two seconds. Try recalling the memory
position again by pressing the appropriate memory
button. If the memory position is still not recalling, see
your dealer for service.
Easy Exit Seat
The control for this feature is located on the driver ’s
door panel between buttons 1 and 2.
With the vehicle in P (Park), the driver's seat exit
position can be recalled by pressing the exit button.
You will hear a single beep, and the driver ’s seat will
move back approximately 8 cm (3 in). To move the seat
back further, press the exit button again until the seat is
all the way back.
If the easy exit seat feature is programmed in the Driver
Information Center (DIC), automatic seat movement will
occur when the key is removed from the ignition. See
“EASY EXIT SEAT” underDIC Vehicle Customization
(With DIC Buttons)
on page 4‑71for more information.
The memory seat and easy exit features can also be
programmed using the DIC.
For programming information, see DIC Vehicle
Customization (With DIC Buttons) on page 4‑71.
2-11
Page 141 of 608
Section 3 Features and Controls
Keys. . . . . . . . . . . . . . . . . . . . . . . . . . . . . . . . . . . . . . . . . . . . . . . . 3-3
Remote Keyless Entry (RKE) System . . . . . . . . . . . 3-4
Remote Keyless Entry (RKE) System Operation . . . . . . . . . . . . . . . . . . . . . . . . . . . . . . . . . . . . . 3-4
Remote Vehicle Start . . . . . . . . . . . . . . . . . . . . . . . . . . . 3-7
Doors and Locks . . . . . . . . . . . . . . . . . . . . . . . . . . . . . . . . . 3-10
Door Locks . . . . . . . . . . . . . . . . . . . . . . . . . . . . . . . . . . . . 3-10
Power Door Locks . . . . . . . . . . . . . . . . . . . . . . . . . . . . . 3-10
Delayed Locking . . . . . . . . . . . . . . . . . . . . . . . . . . . . . . . 3-11
Programmable Automatic Door Locks . . . . . . . . . . 3-11
Rear Door Security Locks . . . . . . . . . . . . . . . . . . . . . . 3-11
Lockout Protection . . . . . . . . . . . . . . . . . . . . . . . . . . . . . 3-12
Liftgate/Liftglass . . . . . . . . . . . . . . . . . . . . . . . . . . . . . . . 3-12
Power Liftgate . . . . . . . . . . . . . . . . . . . . . . . . . . . . . . . . . 3-14
Power Assist Steps . . . . . . . . . . . . . . . . . . . . . . . . . . . . 3-17
Windows . . . . . . . . . . . . . . . . . . . . . . . . . . . . . . . . . . . . . . . . . . 3-18
Power Windows . . . . . . . . . . . . . . . . . . . . . . . . . . . . . . . 3-19
Sun Visors . . . . . . . . . . . . . . . . . . . . . . . . . . . . . . . . . . . . . 3-21
Theft-Deterrent Systems . . . . . . . . . . . . . . . . . . . . . . . . . 3-22
Content Theft-Deterrent . . . . . . . . . . . . . . . . . . . . . . . . 3-22
PASS-Key
®III+ Electronic Immobilizer . . . . . . . . . 3-24
PASS-Key®III+ Electronic Immobilizer
Operation . . . . . . . . . . . . . . . . . . . . . . . . . . . . . . . . . . . . 3-24 Starting and Operating Your Vehicle
. . . . . . . . . . . . 3-26
New Vehicle Break-In . . . . . . . . . . . . . . . . . . . . . . . . . . 3-26
Ignition Positions . . . . . . . . . . . . . . . . . . . . . . . . . . . . . . 3-27
Retained Accessory Power (RAP) . . . . . . . . . . . . . 3-28
Starting the Engine . . . . . . . . . . . . . . . . . . . . . . . . . . . . 3-28
Adjustable Throttle and Brake Pedal . . . . . . . . . . . 3-30
Engine Coolant Heater . . . . . . . . . . . . . . . . . . . . . . . . . 3-30
Active Fuel Management™ . . . . . . . . . . . . . . . . . . . . 3-31
Automatic Transmission Operation . . . . . . . . . . . . . 3-32
Tow/Haul Mode . . . . . . . . . . . . . . . . . . . . . . . . . . . . . . . . 3-38
Four-Wheel Drive (Two Speed Automatic Transfer Case) . . . . . . . . . . . . . . . . . . . . . . . . . . . . . . 3-39
Four-Wheel Drive (Single Speed Automatic Transfer Case) . . . . . . . . . . . . . . . . . . . . . . . . . . . . . . 3-44
Parking Brake . . . . . . . . . . . . . . . . . . . . . . . . . . . . . . . . . 3-46
Shifting Into Park . . . . . . . . . . . . . . . . . . . . . . . . . . . . . . 3-47
Shifting Out of Park . . . . . . . . . . . . . . . . . . . . . . . . . . . . 3-49
Parking Over Things That Burn . . . . . . . . . . . . . . . . 3-49
Engine Exhaust . . . . . . . . . . . . . . . . . . . . . . . . . . . . . . . . 3-50
Running the Vehicle While Parked . . . . . . . . . . . . . 3-51
Mirrors . . . . . . . . . . . . . . . . . . . . . . . . . . . . . . . . . . . . . . . . . . . . 3-52
Manual Rearview Mirror . . . . . . . . . . . . . . . . . . . . . . . . 3-52
Automatic Dimming Rearview Mirror . . . . . . . . . . . 3-52
Outside Manual Mirrors . . . . . . . . . . . . . . . . . . . . . . . . 3-52
3-1
Page 142 of 608
Section 3 Features and Controls
Outside Towing Mirrors . . . . . . . . . . . . . . . . . . . . . . . . 3-53
Outside Power Mirrors . . . . . . . . . . . . . . . . . . . . . . . . . 3-53
Outside Power Foldaway Mirrors . . . . . . . . . . . . . . 3-54
Outside Automatic Dimming Mirror . . . . . . . . . . . . . 3-55
Park Tilt Mirrors . . . . . . . . . . . . . . . . . . . . . . . . . . . . . . . . 3-55
Outside Convex Mirror . . . . . . . . . . . . . . . . . . . . . . . . . 3-55
Outside Heated Mirrors . . . . . . . . . . . . . . . . . . . . . . . . 3-56
Object Detection Systems . . . . . . . . . . . . . . . . . . . . . . . 3-56
Ultrasonic Rear Parking Assist (URPA) . . . . . . . . 3-56
Side Blind Zone Alert (SBZA) . . . . . . . . . . . . . . . . . . 3-58
Rear Vision Camera (RVC) . . . . . . . . . . . . . . . . . . . . 3-61 Universal Home Remote System
. . . . . . . . . . . . . . . . 3-66
Universal Home Remote System Operation (With Three Round LED) . . . . . . . . . . . . . . . . . . . . 3-66
Storage Areas . . . . . . . . . . . . . . . . . . . . . . . . . . . . . . . . . . . . 3-73
Glove Box . . . . . . . . . . . . . . . . . . . . . . . . . . . . . . . . . . . . . 3-73
Cupholders . . . . . . . . . . . . . . . . . . . . . . . . . . . . . . . . . . . . 3-73
Center Console Storage . . . . . . . . . . . . . . . . . . . . . . 3-74
Roof Rack System . . . . . . . . . . . . . . . . . . . . . . . . . . . . . 3-74
Rear Storage Area . . . . . . . . . . . . . . . . . . . . . . . . . . . . . 3-75
Rear Seat Armrest . . . . . . . . . . . . . . . . . . . . . . . . . . . . . 3-75
Cargo Cover . . . . . . . . . . . . . . . . . . . . . . . . . . . . . . . . . . . 3-76
Sunroof . . . . . . . . . . . . . . . . . . . . . . . . . . . . . . . . . . . . . . . . . . . 3-77
3-2
Page 147 of 608
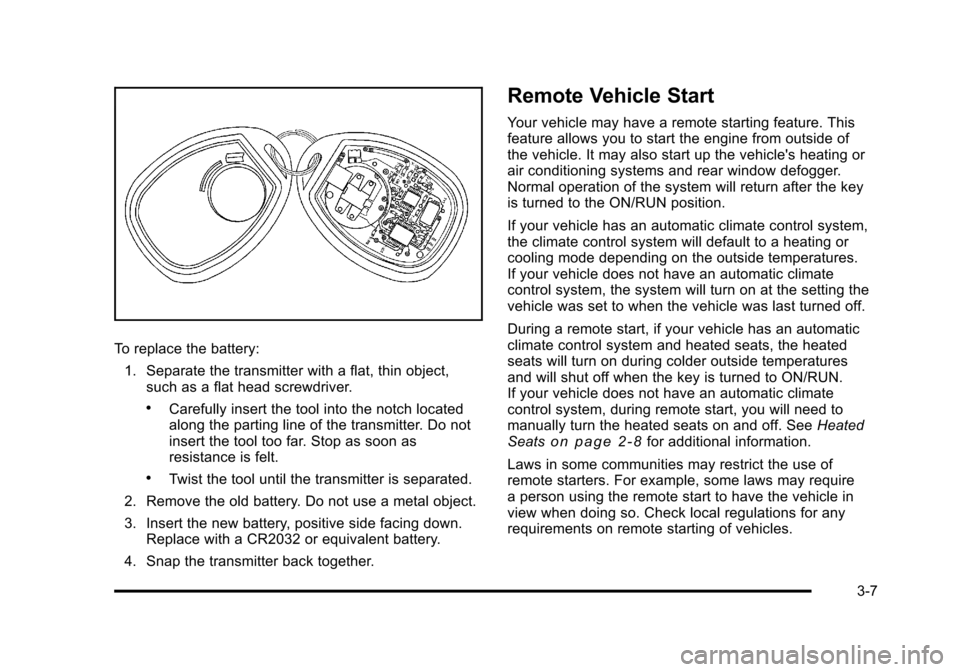
To replace the battery:1. Separate the transmitter with a flat, thin object, such as a flat head screwdriver.
.Carefully insert the tool into the notch located
along the parting line of the transmitter. Do not
insert the tool too far. Stop as soon as
resistance is felt.
.Twist the tool until the transmitter is separated.
2. Remove the old battery. Do not use a metal object.
3. Insert the new battery, positive side facing down. Replace with a CR2032 or equivalent battery.
4. Snap the transmitter back together.
Remote Vehicle Start
Your vehicle may have a remote starting feature. This
feature allows you to start the engine from outside of
the vehicle. It may also start up the vehicle's heating or
air conditioning systems and rear window defogger.
Normal operation of the system will return after the key
is turned to the ON/RUN position.
If your vehicle has an automatic climate control system,
the climate control system will default to a heating or
cooling mode depending on the outside temperatures.
If your vehicle does not have an automatic climate
control system, the system will turn on at the setting the
vehicle was set to when the vehicle was last turned off.
During a remote start, if your vehicle has an automatic
climate control system and heated seats, the heated
seats will turn on during colder outside temperatures
and will shut off when the key is turned to ON/RUN.
If your vehicle does not have an automatic climate
control system, during remote start, you will need to
manually turn the heated seats on and off. See Heated
Seats
on page 2‑8for additional information.
Laws in some communities may restrict the use of
remote starters. For example, some laws may require
a person using the remote start to have the vehicle in
view when doing so. Check local regulations for any
requirements on remote starting of vehicles.
3-7
Page 149 of 608

The vehicle can be remote started two separate times
between driving sequences. The engine will run for
10 minutes after each remote start.
Or, you can extend the engine run time by another
10 minutes within the first 10 minute remote start time
frame, and before the engine stops.
For example, if the lock button and then the remote start
buttons are pressed again after the vehicle has been
running for five minutes, 10 minutes are added, allowing
the engine to run for 15 minutes.
The additional ten minutes are considered a
second remote vehicle start.
Once two remote starts, or a single remote start with
one time extension has been done, the vehicle must be
started with the key. After the key is removed from the
ignition, the vehicle can be remote started again.
The vehicle cannot be remote started if the key is in
the ignition, the hood is not closed, or if there is an
emission control system malfunction and the check
engine light comes on.Also, the engine will turn off during a remote vehicle
start if the coolant temperature gets too high or if the oil
pressure gets low.
Vehicles that have the remote vehicle start feature
are shipped from the factory with the remote vehicle
start system enabled. The system may be enabled or
disabled through the DIC. See
“REMOTE START”
under DIC Vehicle Customization (With DIC Buttons)
on
page 4‑71for additional information. If your vehicle
does not have DIC buttons, see your dealer to enable
or disable the remote vehicle start system.
Remote Start Ready
If your vehicle does not have the remote vehicle start
feature, it may have the remote start ready feature. This
feature allows your dealer to add the manufacturer's
remote vehicle start feature.
See your dealer if you would like to add the
manufacturer's remote vehicle start feature to your
vehicle.
3-9
Page 152 of 608
When you want to open a rear door when the security
lock is on, do the following:1. Unlock the door by lifting the rear door manual lock, using the power door lock switch, or the
Remote Keyless Entry (RKE) transmitter, if the
vehicle has one.
2. Open the door from the outside.
To cancel the rear door security lock, do the following: 1. Unlock the door and open it from the outside.
2. Insert the key into the security lock slot and turn it so the slot is in the vertical position.
Lockout Protection
This feature protects you from locking the key in the
vehicle when the key is in the ignition and a front door
is open.
If the driver's side power door lock switch is pressed
when the driver's door is open and the key is in the
ignition, all of the doors will lock and then the driver's
door will unlock.
If the passenger's side power door lock switch is
pressed when the front passenger's door is open and
the key is in the ignition, all of the doors will lock and
then the front passenger's door will unlock.
Liftgate/Liftglass
{WARNING:
It can be dangerous to drive with the liftglass or
liftgate open because carbon monoxide (CO) gas
can come into your vehicle. You cannot see or
smell CO. It can cause unconsciousness and
even death.
If you must drive with the liftglass or liftgate open,
or if electrical wiring or other cable connections
must pass through the seal between the body and
the liftglass or liftgate:
.Make sure all other windows are shut.
.Turn the fan on your heating or cooling
system to its highest speed with the
recirculation mode off. That will force outside
air into your vehicle. See Climate Control
System
on page 4‑18or Dual Automatic
Climate Control System on page 4‑20.
(Continued)
3-12
Page 161 of 608
Programming the Power Windows
If the battery on the vehicle has been recharged,
disconnected, or is not working, you will need to
reprogram each front power window for the express-up
feature to work. Before reprogramming, replace or
recharge the vehicle's battery.
To program each front window, follow these steps:1. With the ignition in ACC/ACCESSORY, ON/RUN, or when Retained Accessory Power (RAP) is
active, close all doors.
2. Press and hold the power window switch until the window is fully open.
3. Pull the power window switch up until the window is fully closed.
4. Continue holding the switch up for approximately two seconds after the window is completely closed.
The window is now reprogrammed. Repeat the process
for the other windows.
Window Lockout
o (Window Lockout): The rear window lockout button
is located on the driver door near the window switches.
Press the right side of the button to disable the rear
window controls. The light on the button will illuminate,
indicating the feature is in use. The rear windows still
can be raised or lowered using the driver window
switches when the lockout feature is active.
To restore power to the rear windows, press the button
again. The light on the button will go out.
Sun Visors
Swing down the visor to block out glare. It can also be
detached from the center mount and moved to the side
to block glare from that direction.
The driver visor may also have buttons for a built-in
garage door opener. See Universal Home Remote
System
on page 3‑66for more information.
Lighted Visor Vanity Mirror
Pull the visor down and lift the cover to access the
mirror. A light comes on when the cover is lifted and
goes out when it is closed.
3-21