clock CHEVROLET TRACKER 1997 Owners Manual
[x] Cancel search | Manufacturer: CHEVROLET, Model Year: 1997, Model line: TRACKER, Model: CHEVROLET TRACKER 1997Pages: 388, PDF Size: 20.12 MB
Page 127 of 388
Section 3 Comfort Controls and Audio Systems
In this section, you’ll find out how to operate the comfort control and audio systems offered with your Geo. Be sure
to read about the particular systems supplied with your
. v-e. ..
3-2 Climate Controls 3-1 1
3-3 Air
Conditioning
3-4 Heating
3-18
3-5 Rear Window Defogger 3-
17
3-5 Tips for Defogging and Defrosting 3-17
3-4 Ventilation System and Tips 3-
15
3-6 Setting the
Clock
3-19
3-8 AM-FM Stereo with Cassette Tape Player 3-
19
3
-7 AM-FM Stereo 3-18 AM-FM
Stereo with Cassette Tape and
Compact Disc Player
Theft-Deterrent Feature Understanding Radio Reception
Tips About Your Audio System
Adding Sound Equipment to Your Vehicle
Care of Your Cassette Tape Player
Care of Your Compact Discs
Antenna
3-1
ProCarManuals.com
Page 132 of 388
I I
NOTICE:
Don’t use a razor blade or something else sharp
on the inside
of the rear window. If you do, you
could cut or damage the warming grid, and the
repairs wouldn’t be covered by your warranty.
1- A 30 Systems
your Delco@ audio system has been designed to operate
easily and give years of listening pleasure. You will get
the most enjoyment out
of it if you acquaint yourself
with
it first. Find out what your Delco system can do
and how to operate all its controls, to be sure you’re
getting the most out of the advanced engineering that
went into it.
Setting the Clock for AM-FM Stereo
Press and hold RCL (TIME SET) to set the correct hour.
At the same time, press and hold the TUNE
left arrow
(HR) until the correct hour appears.
Press and hold
RCL (TIME SET) to set the correct
minute. At the same time, press
and hold the TUNE
right arrow (MIN) until the correct minute appears.
Setting the Clock for AM-FM Stereo with
Cassette Tape Player
Press and hold RCL-PROG (TIME SET) to set the
correct hour. At the same time, press and hold the
TUNE left arrow (HR) until the correct hour appears.
Press and hold RCL-PROG (TIME
SET) to set the
correct minute. At the same time, press and hold the
TUNE right arrow (MIN) until the correct minute
appears.
Setting the Clock for AM-FM Stereo with Cassette Tape and Compact Disc Players
Press and hold the RCL up and down arrow (TIME
SET). At
the same time, press and hold the TUNE left
arrow (HR)
until the correct hour appears.
Press and hold
the RCL up and down arrow (TIME
SET). At the same time, press and hold TUNE right
arrow (MIN)
until the correct minute appears.
3-6
ProCarManuals.com
Page 133 of 388
AM-FM Stereo (If Equipr
Playing the Radio
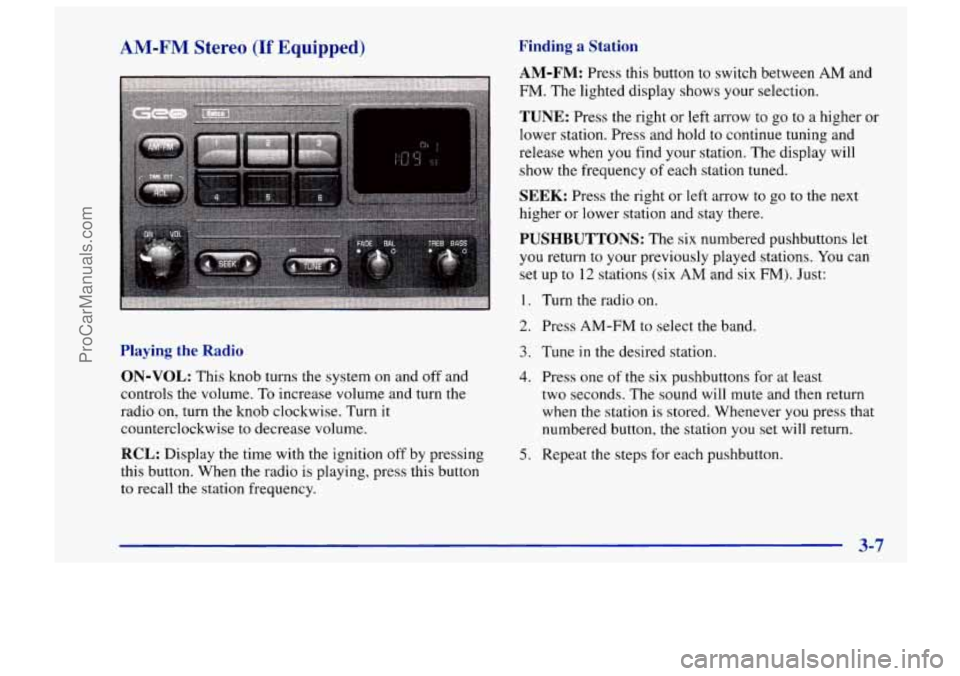
ON-VOL: This knob turns the system on and off and
controls the volume.
To increase volume and turn the
radio on, turn the knob clockwise. Turn it
counterclockwise
to decrease volume.
RCL: Display the time with the ignition off by pressing
this button. When the radio is playing, press this button
to recall the station frequency.
Finding a Station
AM-FM: Press this button to switch between AM and
FM. The lighted display shows your selection.
TUNE: Press the right or left arrow to go to a higher or
lower station. Press and hold to continue tuning and
release when you find your station. The display will
show the frequency of each station tuned.
SEEK: Press the right or left arrow to go to the next
higher or lower station and stay there.
PUSHBUTTONS: The six numbered pushbuttons let
you return to your previously played stations. You can
set up to
12 stations (six AM and six FM). Just:
1. Turn the radio on.
2. Press AM-FM to select the band.
3. Tune in the desired station.
4. Press one of the six pushbuttons for at least
two seconds. The sound will mute and then return
when the station is stored. Whenever
you press that
numbered button, the station you set will return.
5. Repeat the steps for each pushbutton.
3-7
ProCarManuals.com
Page 134 of 388
Setting the Tone
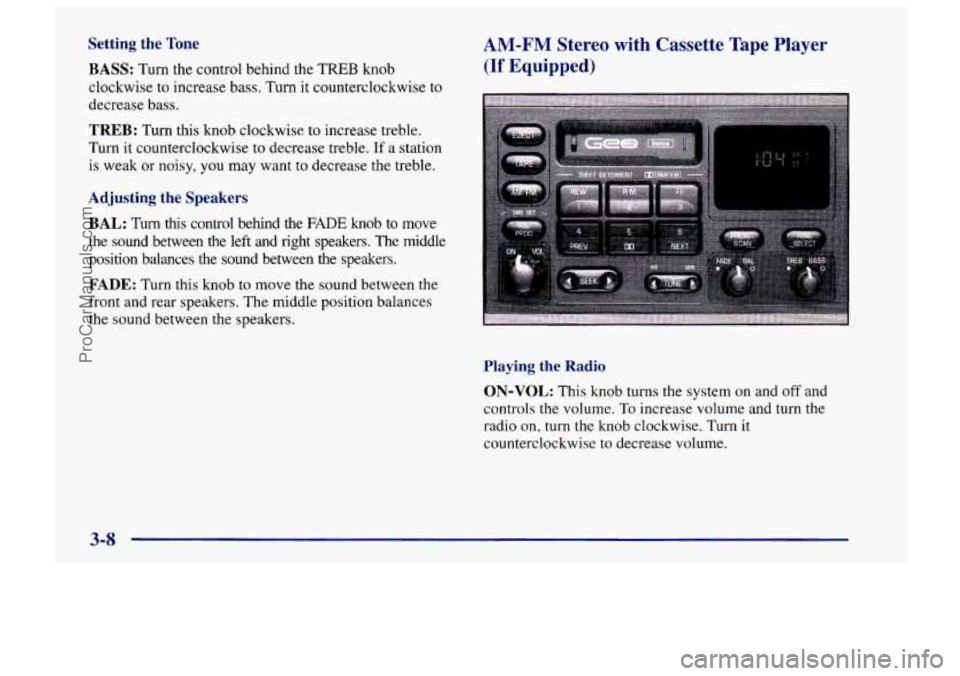
BASS:
Turn the control behind the TREB knob
clockwise
to increase bass. Turn it counterclockwise to
decrease bass.
TREB: Turn this knob clockwise to increase treble.
Turn it counterclockwise to decrease treble.
If a station
is weak or noisy, you may want to decrease the treble.
Adjusting the Speakers
AM-FM Stereo with Cassette Tape Player
(If Equipped)
BAL: Turn this control behind the FADE knob to move
the sound between the left and right speakers. The middle
position balances the sound between the speakers.
FADE: Turn this knob to move the sound between the
front and rear speakers. The middle position balances
the sound between the speakers.
Playing the Radio
ON-VOL: This knob turns the system on and off and
controls the volume.
To increase volume and turn the
radio on, turn the knob clockwise. Turn it
counterclockwise to decrease volume.
3-8
ProCarManuals.com
Page 135 of 388
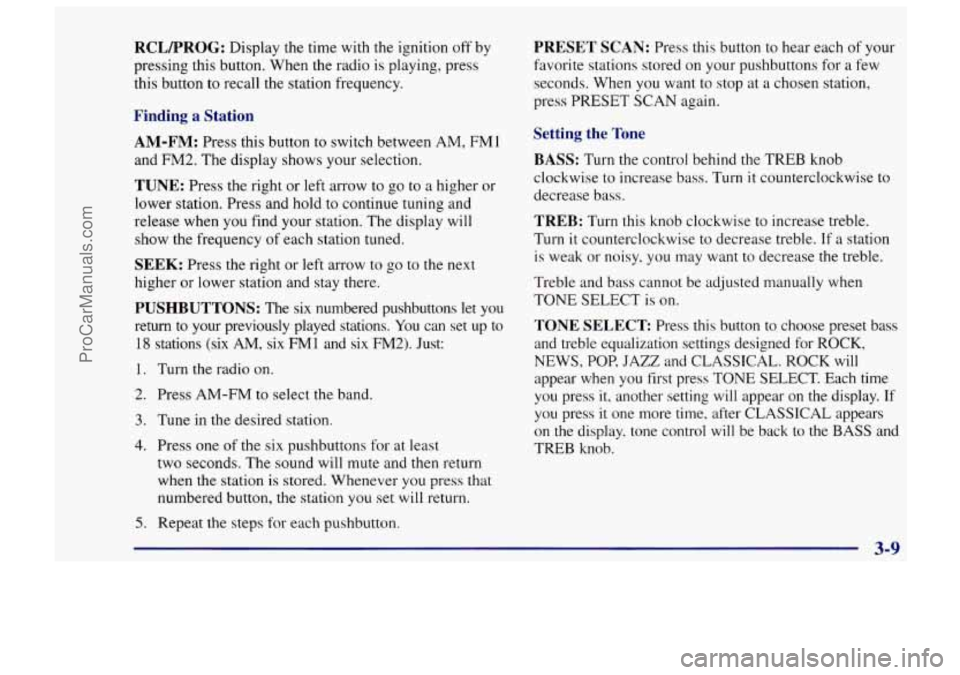
RCLFROG: Display the time with the ignition off by
pressing this button. When the radio
is playing, press
this button
to recall the station frequency.
Finding a Station
AM-FM: Press this button to switch between AM, FMl
and FM2. The display shows your selection.
TUNE: Press the right or left arrow to go to a higher or
lower station. Press and hold to continue tuning and
release when you find your station. The display will
show the frequency of each station tuned.
SEEK: Press the right or left arrow to go to the next
higher or lower station and stay there.
PUSHBUTTONS: The six numbered pushbuttons let you
return to your previously played stations.
You can set up to
18 stations (six AM, six FM1 and six FM2). Just:
1. Turn the radio on.
2. Press AM-FM to select the band.
3. Tune in the desired station.
4. Press one of the six pushbuttons for at least
two seconds. The sound
will mute and then return
when the station is stored. Whenever you press that
numbered button, the station you
set will return.
5. Repeat the steps for each pushbutton.
PRESET SCAN: Press this button to hear each of your
favorite stations stored on your pushbuttons for
a few
seconds. When you want to stop at
a chosen station.
press PRESET
SCAN again.
Setting the Tone
BASS:
Turn the control behind the TREB knob
clockwise to increase bass. Turn it counterclockwise to
decrease bass.
TREB: Turn this knob clockwise to increase treble.
Turn it counterclockwise to decrease treble. If a station
is weak or noisy, you may want to decrease the treble.
Treble and bass cannot be adjusted manually when
TONE SELECT
is on.
TONE SELECT Press this button to choose preset bass
and treble equalization settings designed for ROCK,
NEWS, POP, JAZZ and CLASSICAL. ROCK will
appear when you first press TONE SELECT. Each time
you press it, another setting will appear on the display. If
you press it one more time, after CLASSICAL appears
on the display, tone control will be back to
the BASS and
TREB knob.
3-9
I
ProCarManuals.com
Page 137 of 388
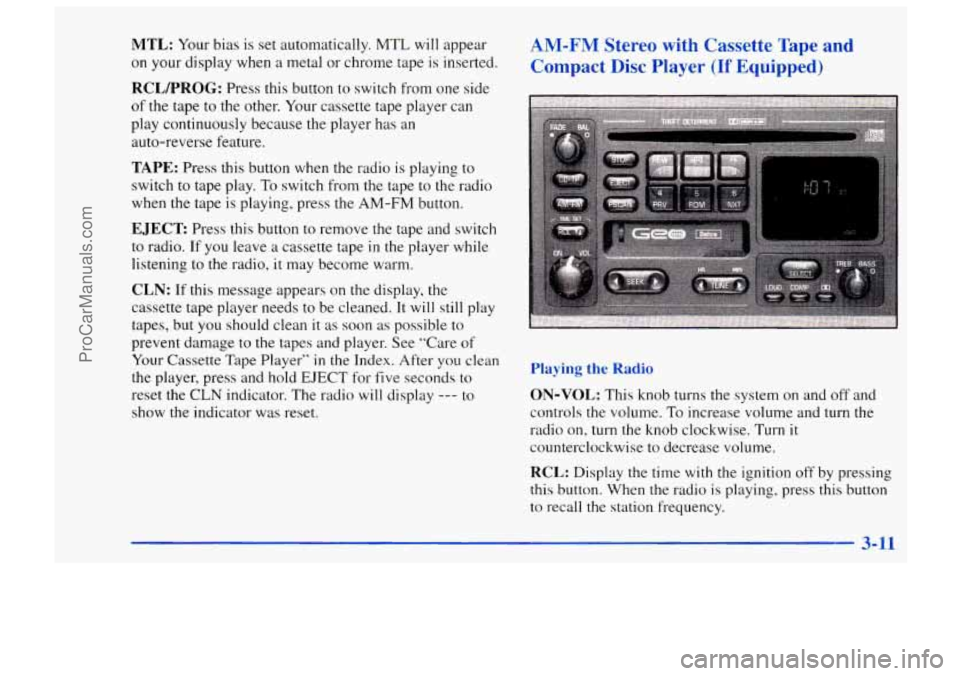
MTL: Your bias is set automatically. MTL will appear
on your display when a metal or chrome tape is inserted.
RCLPROG: Press this button to switch from one side
of the tape to the other. Your cassette tape player can
play continuously because the player has an
auto-reverse feature.
TAPE: Press this button when the radio is playing to
switch to tape play. To switch from the tape to the radio
when the tape
is playing, press the AM-FM button.
EJECT Press this button to remove the tape and switch
to radio. If you leave a cassette tape
in the player while
listening to the radio, it may become warm.
CLN: If this message appears on the display, the
cassette tape player needs to be cleaned. It will still play
tapes, but you should clean it
as soon as possible to
prevent damage to the tapes and player. See “Care of
Your Cassette Tape Player”
in the Index. After you clean
the player, press and hold
EJECT for five seconds to
reset the CLN indicator. The radio will display --- to
show the indicator was reset.
AM-FM Stereo with Cassette Tape and
Compact
Disc Player (If Equipped)
Playing the Radio
ON-VOL: This knob turns the system on and off and
controls
the volume. To increase volume and turn the
radio on, turn the knob clockwise. Turn
it
counterclockwise to decrease volume.
RCL: Display the time with the ignition off by pressing
this button. When the radio is playing. press
this button
to recall the station frequency.
3-11
ProCarManuals.com
Page 138 of 388
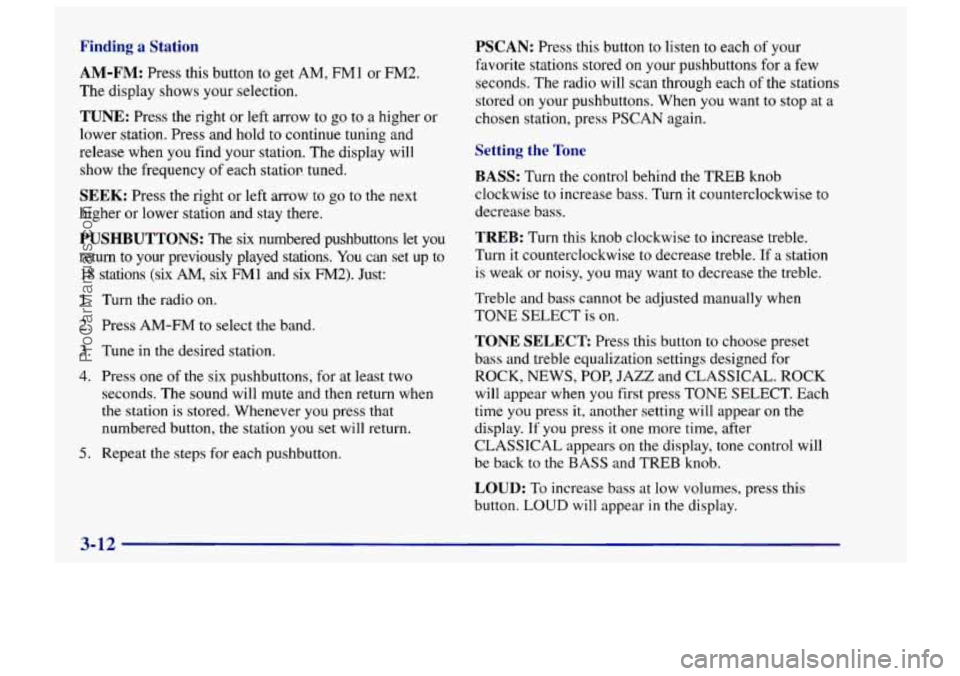
Finding a Station
AM-FM:
Press this button to get AM, FMl or FM2.
The display shows your selection.
TUNE: Press the right or left arrow to go to a higher or
lower station. Press and hold to continue tuning and
release when you find your station. The display will
show the frequency of each statior! tuned.
SEEK: Press the right or left arrow to go to the next
higher or lower station and stay there.
PUSHBUTTONS: The six numbered pushbuttons let you
return
to your previously played stations. You can set up to
18 stations (six AM, six FM1 and six FM2). Just:
1.
2.
3.
4.
5.
Turn the radio on.
Press AM-FM to select the band.
Tune
in the desired station.
Press one of
the six pushbuttons, for at least two
seconds. The sound will mute and then return when
the station is stored. Whenever
you press that
numbered button, the station you
set will return.
Repeat the steps for each pushbutton.
PSCAN: Press this button to listen to each of your
favorite stations stored on your pushbuttons for a few
seconds. The radio will scan through each
of the stations
stored
on your pushbuttons. When you want to stop at a
chosen station, press PSCAN aeain.
Setting the Tone
BASS:
Turn the control behind the TREB knob
clockwise to increase bass. Turn it counterclockwise to
decrease bass.
TREB: Turn this knob clockwise to increase treble.
Turn it counterclockwise to decrease treble.
If a station
is weak or noisy, you may want to decrease the treble.
Treble and bass cannot be adjusted manually when
TONE SELECT is on.
TONE SELECT Press this button to choose preset
bass and treble equalization settings designed for
ROCK, NEWS,
POP, JAZZ and CLASSICAL. ROCK
will appear when you first press TONE SELECT. Each
time you press it, another setting will appear on the
display. If you press it one more time, after
CLASSICAL appears on the display, tone control will
be back to the BASS and TREB knob.
LOUD: To increase bass at low volumes, press this
button. LOUD
will appear in the display.
3-12
ProCarManuals.com
Page 157 of 388
Steering in Emergencies
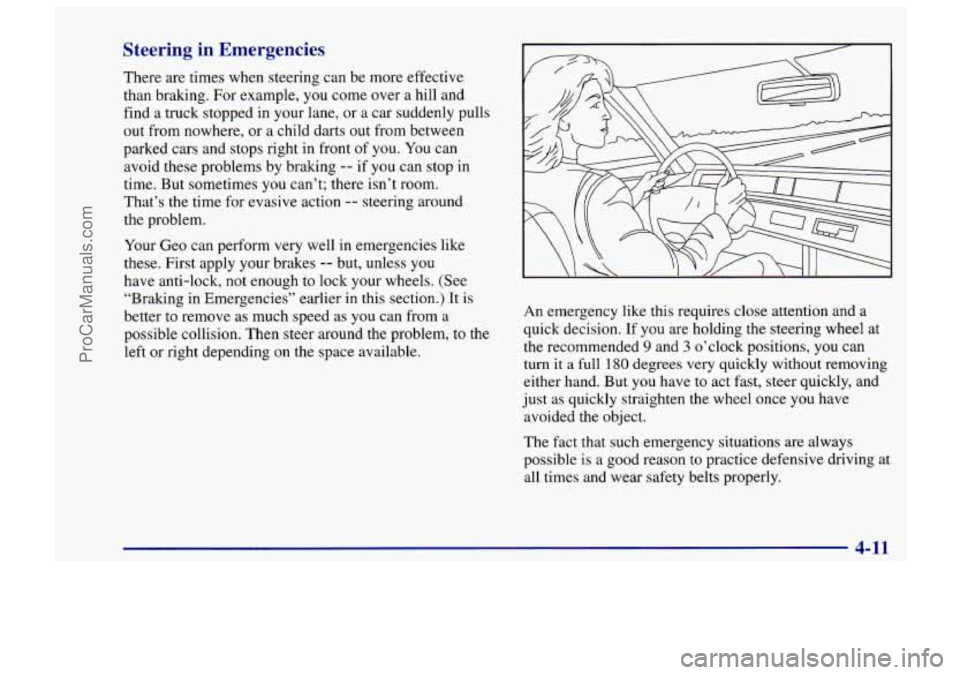
There are times when steering can be more effective
than braking. For example,
you come over a hill and
find a truck stopped in your lane, or a car suddenly pulls
out from nowhere, or
a child darts out from between
parked cars and stops right in front of you. You can
avoid these problems by braking
-- if you can stop in
time. But sometimes you can’t; there isn’t room.
That’s the time for evasive action
-- steering around
the problem.
Your Geo can perform very well in emergencies like
these. First apply your brakes
-- but, unless you
have anti-lock, not enough to lock your wheels. (See
“Braking in Emergencies’’ earlier in this section.) It
is
better to remove as much speed as you can from a
possible collision. Then steer around the problem, to the
left or right depending on the space available. An
emergency like this requires close attention and a
quick decision. If you are holding the steering wheel at
the recommended 9 and 3 o’clock positions, you can
turn
it a full 180 degrees very quickly without removing
either hand. But you have
to act fast, steer quickly, and
just as quickly straighten
the wheel once you have
avoided the object.
The fact that such emergency situations are always
possible
is a good reason to practice defensive driving at
all times and wear safety belts properly.
4-11
I
ProCarManuals.com
Page 168 of 388
&.’ What should I do if my vehicle stalls, or is about
A: If this happens, there are some things you should
to stall, and I can’t make it up the hill?
do, and there are some things you must not do.
First, here’s what you
should do:
Push the brake pedal to stop the vehicle and keep it
from rolling backwards. Also, apply the parking brake.
If your engine is still running, shift the transmission
to REVERSE (R), release the parking brake, and
slowly back down the hill in REVERSE
(R).
If your engine has stopped running, you’ll need to
restart
it. With the brake pedal depressed and the
parking brake still applied, shift the transmission to
PARK
(P) (or, shift to NEUTRAL (N) if your
vehicle has a manual transmission) and restart the
engine. Then, shift to REVERSE (R), release the
parking brake, and slowly back down the hill as
straight as possible in REVERSE (R).
0 As you are backing down the hill, put your left hand
on the steering wheel at the 12 o’clock position. This
way, you’ll be able to tell
if your wheels are straight and maneuver
as you back down. It’s best that you
back down the hill with your wheels straight rather
than in the left or right direction. Turning the wheel
too far to the left or right will increase the possibility
of a rollover.
Here are some things you
must not do if you stall, or
are about to stall, when going up a hill.
Never attempt to prevent a stall by shifting into
NEUTRAL
(N) (or depressing the clutch, if you
have a manual transmission) to “rev-up” the engine
and regain forward momentum. This won’t work.
Your vehicle will roll backwards very quickly and
you could go out of control.
Instead, apply the regular brake to stop the vehicle. Then
apply the parking brake. Shift to REVERSE (R), release
the parking brake, and slowly back straight down.
Never attempt to turn around if you are about to stall
when going up a hill. If the hill is steep enough to
stall your vehicle, it’s steep enough to cause you to
roll over if you turn around.
If you can’t make it up
the hill,
you must back straight down the hill.
4-22
I
ProCarManuals.com
Page 222 of 388
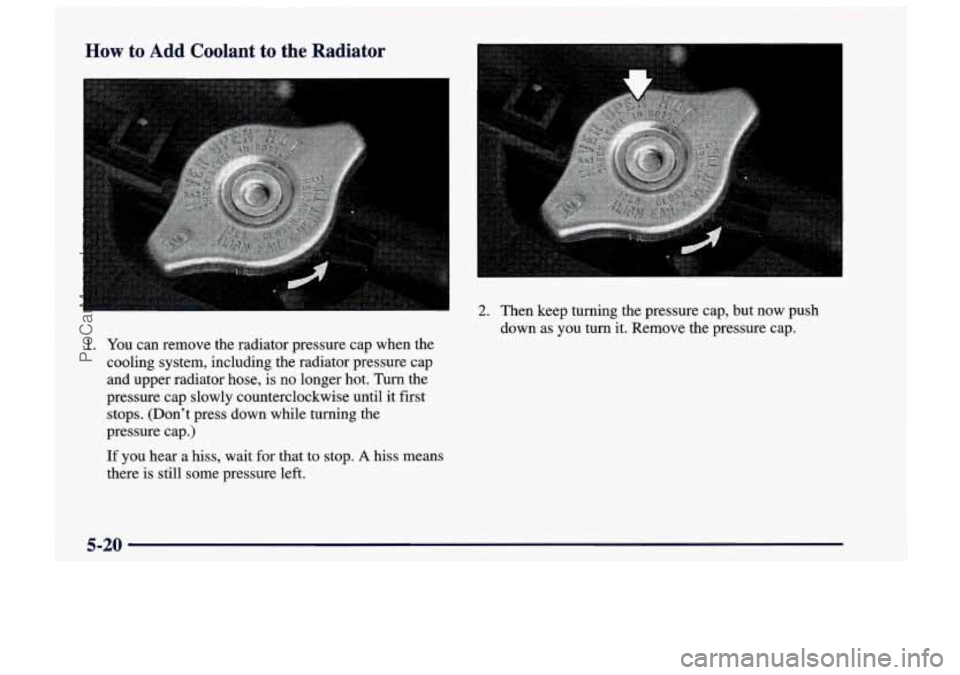
How to Add Coolant to the Radiator
2. Then keep turning the pressure cap, but now push
down as you turn it. Remove the pressure cap.
1. You can remove the radiator pressure cap when the
cooling system, including the radiator pressure cap
and upper radiator hose, is no longer hot.
Turn the
pressure cap slowly counterclockwise until it first
stops. (Don’t press down while turning the
pressure cap.)
If you hear a
hiss, wait for that to stop. A hiss means
there is still some pressure left.
5-20
ProCarManuals.com