steering CHEVROLET TRACKER 2004 2.G Owners Manual
[x] Cancel search | Manufacturer: CHEVROLET, Model Year: 2004, Model line: TRACKER, Model: CHEVROLET TRACKER 2004 2.GPages: 374, PDF Size: 2.57 MB
Page 60 of 374
Where Are the Air Bags?
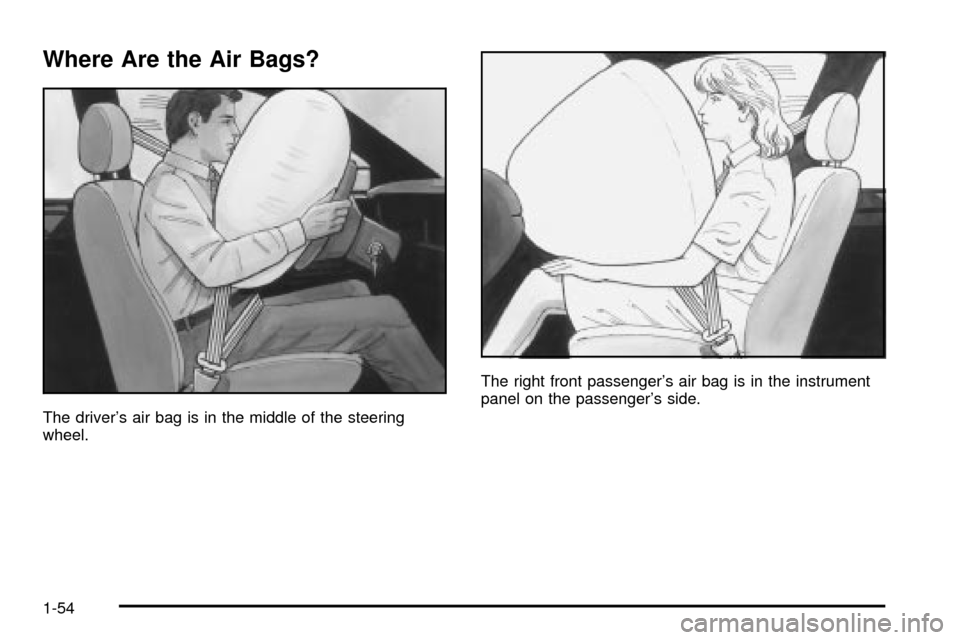
The driver's air bag is in the middle of the steering
wheel.The right front passenger's air bag is in the instrument
panel on the passenger's side.
1-54
Page 61 of 374
{CAUTION:
If something is between an occupant and an
air bag, the bag might not in¯ate properly or it
might force the object into that person causing
severe injury or even death. The path of an
in¯ating air bag must be kept clear. Don't put
anything between an occupant and an air bag,
and don't attach or put anything on the
steering wheel hub or on or near any other air
bag covering.
When Should an Air Bag In¯ate?
An air bag is designed to in¯ate in a moderate to severe
frontal, or near-frontal crash. The air bag will in¯ate
only if the impact speed is above the system's designed
ªthreshold level.º If your vehicle goes straight into a
wall that doesn't move or deform, the threshold level is
about 9 to 13 mph (14 to 21 km/h). The threshold
level can vary, however, with speci®c vehicle design, so
that it can be somewhat above or below this range.If your vehicle strikes something that will move or
deform, such as a parked car, the threshold level will
be higher. The air bag is not designed to in¯ate in
rollovers, rear impacts, or in many side impacts because
in¯ation would not help the occupant.
In any particular crash, no one can say whether an air
bag should have in¯ated simply because of the damage
to a vehicle or because of what the repair costs were.
In¯ation is determined by the angle of the impact
and how quickly the vehicle slows down in frontal or
near-frontal impacts.
The air bag system is designed to work properly under
a wide range of conditions, including off-road usage.
Observe safe driving speeds, especially on rough
terrain. As always, wear your safety belt. See
Off-Road
Driving with Your Four-Wheel-Drive Vehicle on
page 4-16
for more tips on off-road driving.
What Makes an Air Bag In¯ate?
In an impact of sufficient severity, the air bag sensing
system detects that the vehicle is in a crash. The
sensing system triggers a release of gas from the
in¯ator, which in¯ates the air bag. The in¯ator, air bag,
and related hardware are all part of the air bag
modules inside the steering wheel and in the instrument
panel in front of the right front passenger.
1-55
Page 62 of 374
How Does an Air Bag Restrain?
In moderate to severe frontal or near-frontal collisions,
even belted occupants can contact the steering wheel or
the instrument panel. Air bags supplement the
protection provided by safety belts. Air bags distribute
the force of the impact more evenly over the occupant's
upper body, stopping the occupant more gradually.
But air bags would not help you in many types of
collisions, including rollovers, rear impacts and many
side impacts, primarily because an occupant's motion is
not toward those air bags. Air bags should never be
regarded as anything more than a supplement to safety
belts, and then only in moderate to severe frontal or
near-frontal collisions.
What Will You See After an Air Bag
In¯ates?
After the air bag in¯ates, it quickly de¯ates, so quickly
that some people may not even realize the air bag
in¯ated. Some components of the air bag module ± the
steering wheel hub for the driver's air bag, or the
instrument panel for the right front passenger's
bag ± will be hot for a short time.The parts of the bag that come into contact with you
may be warm, but not too hot to touch. There will
be some smoke and dust coming from the vents in the
de¯ated air bags. Air bag in¯ation does not prevent
the driver from seeing or being able to steer the vehicle,
nor does it stop people from leaving the vehicle.
{CAUTION:
When an air bag in¯ates, there is dust in the
air. This dust could cause breathing problems
for people with a history of asthma or other
breathing trouble. To avoid this, everyone in
the vehicle should get out as soon as it is safe
to do so. If you have breathing problems but
can't get out of the vehicle after an air bag
in¯ates, then get fresh air by opening a
window or a door. If you experience breathing
problems following an air bag deployment, you
should seek medical attention.
1-56
Page 63 of 374

In many crashes severe enough to in¯ate the air bag,
windshields are broken by vehicle deformation.
Additional windshield breakage may also occur from the
right front passenger air bag.
·Air bags are designed to in¯ate only once. After an
air bag in¯ates, you will need some new parts for
your air bag system. If you do not get them, the air
bag system will not be there to help protect you
in another crash. A new system will include air bag
modules and possibly other parts. The service
manual for your vehicle covers the need to replace
other parts.
·Your vehicle is equipped with a crash sensing and
diagnostic module, which records information
about the air bag system. The module records
information about the readiness of the system, when
the system commands air bag in¯ation and
driver's safety belt usage at deployment.
·Let only quali®ed technicians work on your air bag
systems. Improper service can mean that an air
bag system will not work properly. See your dealer
for service.
Notice:If you damage the covering for the driver's
or the right front passenger's air bag, the bag
may not work properly. You may have to replace the
air bag module in the steering wheel or both the
air bag module and the instrument panel for
the right front passenger's air bag. Do not open or
break the air bag coverings.
If your vehicle ever gets into a lot of water ± such as
water up to the carpeting or higher ± or if water enters
your vehicle and soaks the carpet, the air bag
controller can be soaked and ruined. If this ever
happens, and then you start your vehicle, the damage
could make the air bags in¯ate, even if there is no crash.
You would have to replace the air bags as well as the
sensors and related parts. If your vehicle is ever in
a ¯ood, or if it is exposed to water that soaks the carpet,
you can avoid needless repair costs by turning off the
vehicle immediately and disconnecting the battery
cables. Do not let anyone start the vehicle under any
circumstances. See your dealer for service.
1-57
Page 78 of 374

Starting and Operating Your
Vehicle
New Vehicle Break-In
Notice:Your vehicle does not need an elaborate
ªbreak-in.º But it will perform better in the long run
if you follow these guidelines:
·Keep your speed at 55 mph (88 km/h) or less for
the ®rst 500 miles (805 km).
·Do not drive at any one speed Ð fast or
slow Ð for the ®rst 500 miles (805 km). Do not
make full-throttle starts.
·Avoid making hard stops for the ®rst 200 miles
(322 km) or so. During this time your new
brake linings are not yet broken in. Hard stops
with new linings can mean premature wear
and earlier replacement. Follow this breaking-in
guideline every time you get new brake
linings.
·Do not tow a trailer during break-in. SeeTowing
a Trailer on page 4-57
for more information.
Ignition Positions
With the key in the ignition
switch, you can turn it to
four different positions.
LOCK (A):This is the only position from which you can
remove the key. This position locks your steering
wheel, ignition and automatic transmission.
If you have an automatic transmission, the ignition
switch can't be turned to LOCK unless the shift lever is
in PARK (P).
2-12
Page 79 of 374
{CAUTION:
On manual transmission vehicles, turning the
key to LOCK will lock the steering column and
result in a loss of ability to steer the vehicle.
This could cause a collision. If you need to
turn the engine off while the vehicle is moving,
turn the key only to ACC. Do not push the key
in while the vehicle is moving.
Notice:Using a tool to force the key from the
ignition switch could cause damage or break the
key. Use the correct key and turn the key only with
your hand. Make sure the key is all the way in. If
it is, turn the steering wheel left and right while you
turn the key hard. If none of this works, then
your vehicle needs service.ACC (ACCESSORY) (B):This is the position in which
you can operate your electrical accessories or items
plugged into the accessory power outlets. It also unlocks
the steering wheel and ignition. Use this position if
your vehicle must be pushed or towed.
ON (C):This is the position that the switch returns to
after you start your engine and release the switch.
The switch stays in ON while the engine is running. But
even while the engine is not running, you can use
ON to operate your electrical accessories and to display
some instrument panel cluster warning and indicator
lights.
START (D):This is the position that starts the engine.
When the engine starts, release the key. The ignition
switch will return to ON for normal driving.
When the engine is not running, ACC and ON allow you
to operate your electrical accessories, such as the
radio or items plugged into the accessory power outlets.
A warning tone will sound if you open the driver's
door while the ignition is in ACC or LOCK and the key
is in the ignition.
2-13
Page 99 of 374
Outside Convex Mirror
Your passenger's side mirror is convex. A convex
mirror's surface is curved so you can see more from the
driver's seat.
{CAUTION:
A convex mirror can make things (like other
vehicles) look farther away than they really are.
If you cut too sharply into the right lane, you
could hit a vehicle on your right. Check your
inside mirror or glance over your shoulder
before changing lanes.
Storage Areas
Glove Box
Use your key to lock and unlock the glove box. To open
the glove box, pull the latch toward you.
The glove box may have a two-position detent for
opening the door. Lower the door to the ®rst detent for
access to the glove box. Pull it to the next detent
for further access.
Cupholder(s)
Two cupholders are on the center console next to the
parking brake lever.
Coinholder(s)
Your instrument panel may have two coinholders
located to the left of the steering wheel.
2-33
Page 107 of 374
Other Warning Devices
If you carry re¯ective triangles, you can set one up at
the side of the road about 300 feet (100 m) behind your
vehicle.
Horn
To sound the horn, press the portion of your steering
wheel marked with the horn symbol.
Tilt Wheel
If your vehicle has a tilt wheel, you can adjust the
steering wheel before you drive. You can raise it to the
highest level to give your legs more room when you
exit and enter your vehicle.
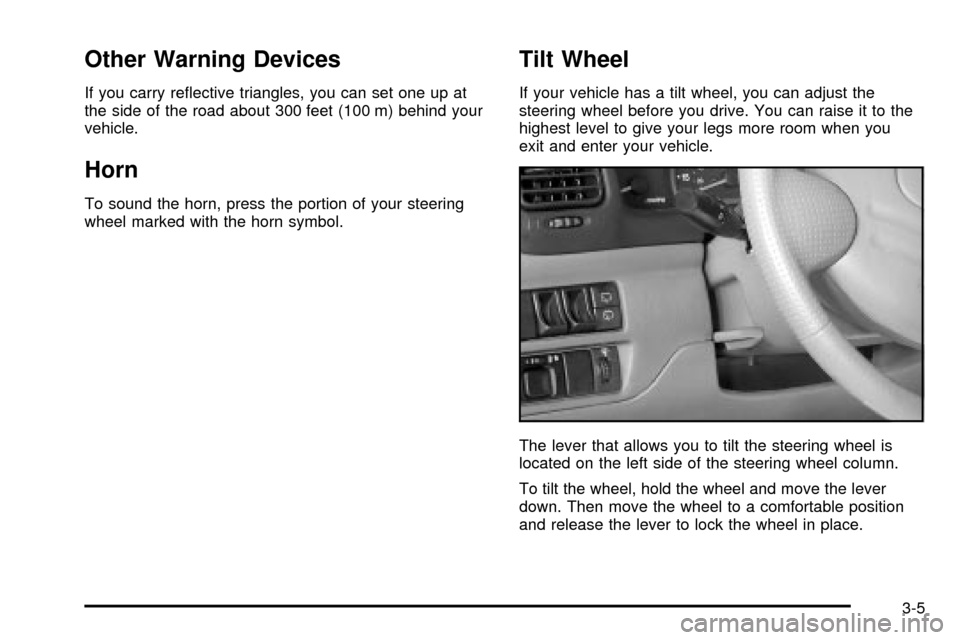
The lever that allows you to tilt the steering wheel is
located on the left side of the steering wheel column.
To tilt the wheel, hold the wheel and move the lever
down. Then move the wheel to a comfortable position
and release the lever to lock the wheel in place.
3-5
Page 108 of 374

Turn Signal/Multifunction Lever
The lever on the left side of the steering column
includes the following:
·Turn and Lane-Change Signals
·Headlamp High/Low-Beam Changer
·Flash-to-Pass
·Manual Operation of Headlamps and Parklamps
For information on exterior lamps, see
Exterior Lamps
on page 3-13.
Turn and Lane-Change Signals
The turn signal has an upward (for right) and a
downward (for left) position. These positions allow you
to signal a turn or a lane change.
To signal a turn, move the lever all the way up or down.
When the turn is ®nished, the lever will return
automatically.
An arrow on the instrument
panel cluster will ¯ash in
the direction of the
turn or lane change.
To signal a lane change, just raise or lower the lever
until the arrow starts to ¯ash. Hold it there until you
complete your lane change. The lever will return by itself
when you release it.
As you signal a turn or a lane change, if the arrows
don't ¯ash but just stay on, a signal bulb may be burned
out and other drivers won't see your turn signal.
If a bulb is burned out, replace it to help avoid an
accident. If the arrows don't go on at all when you signal
a turn, check the fuse and for burned-out bulbs. See
Fuses and Circuit Breakers on page 5-94.
3-6
Page 109 of 374

Headlamp High/Low-Beam Changer
First, you must have the headlamps on. For high beams,
push the turn signal lever toward the instrument
panel.
While the high beams are
on, a light on the
instrument panel cluster
also will be on. It will go
off when you switch to
low beam.
To switch back to low beams, pull the lever toward you.
Flash to Pass
With the lever in the low-beam position, pull the lever
toward you to momentarily switch to high beam (to
signal that you are going to pass). When you release
the lever, the headlamps will return to low-beam
operation.
Windshield Wipers
Use this lever located on the right side of the steering
wheel to operate the windshield wipers and washers.
OFF:Move the lever to OFF to turn off the windshield
wipers.
INT (Intermittent):Move the stalk to INT (Intermittent)
then turn the inner band and choose the delay you
want. Turn the inner band up for longer intervals
between wiper cycles. Turn the band down for shorter
intervals.
3-7