maintenance schedule CHEVROLET TRAIL BLAZER 2003 1.G Owners Manual
[x] Cancel search | Manufacturer: CHEVROLET, Model Year: 2003, Model line: TRAIL BLAZER, Model: CHEVROLET TRAIL BLAZER 2003 1.GPages: 436, PDF Size: 2.98 MB
Page 1 of 436

Seats and Restraint Systems........................... 1-1
Front Seats
............................................... 1-2
Rear Seats
............................................... 1-6
Safety Belts
.............................................. 1-8
Child Restraints
.......................................1-28
Air Bag Systems
......................................1-49
Restraint System Check
............................1-59
Features and Controls..................................... 2-1
Keys
........................................................ 2-3
Doors and Locks
....................................... 2-8
Windows
.................................................2-14
Theft-Deterrent Systems
............................2-16
Starting and Operating Your Vehicle
...........2-18
Mirrors
....................................................2-34
OnStar
žSystem
......................................2-38
HomeLinkžTransmitter
.............................2-39
Storage Areas
.........................................2-43
Sunroof
..................................................2-50
Vehicle Personalization
.............................2-50
Instrument Panel............................................. 3-1
Instrument Panel Overview
.......................... 3-4
Climate Controls
......................................3-21
Warning Lights, Gages and Indicators
.........3-35
Driver Information Center (DIC)
..................3-51Audio System(s)
.......................................3-64
Driving Your Vehicle....................................... 4-1
Your Driving, the Road, and Your Vehicle
..... 4-2
Towing
...................................................4-44
Service and Appearance Care.......................... 5-1
Service
..................................................... 5-3
Fuel
......................................................... 5-4
Checking Things Under the Hood
...............5-10
Rear Axle
...............................................5-47
Four-Wheel Drive
.....................................5-48
Bulb Replacement
....................................5-50
Windshield Wiper Blade Replacement
.........5-51
Tires
......................................................5-54
Appearance Care
.....................................5-79
Vehicle Identi®cation
.................................5-87
Electrical System
......................................5-88
Capacities and Speci®cations
...................5-100
Normal Maintenance Replacement Parts
....5-102
Maintenance Schedule..................................... 6-1
Maintenance Schedule
................................ 6-2
Customer Assistance Information.................... 7-1
Customer Assistance Information
.................. 7-2
Reporting Safety Defects
............................ 7-8
Index................................................................ 1
2003 Chevrolet TrailBlazerM
Page 254 of 436
Driving in Water
Heavy rain can mean ¯ash ¯ooding, and ¯ood waters
demand extreme caution.
Find out how deep the water is before you drive through
it. If it is deep enough to cover your wheel hubs,
axles or exhaust pipe, do not try it Ð you probably will
not get through. Also, water that deep can damage
your axle and other vehicle parts.
If the water is not too deep, drive slowly through it.
At faster speeds, water splashes on your ignition system
and your vehicle can stall. Stalling can also occur if
you get your tailpipe under water. And, as long as your
tailpipe is under water, you will never be able to
start your engine. When you go through water,
remember that when your brakes get wet, it may take
you longer to stop.
{CAUTION:
Driving through rushing water can be
dangerous. Deep water can sweep your vehicle
downstream and you and your passengers
CAUTION: (Continued)
CAUTION: (Continued)
could drown. If it is only shallow water, it can
still wash away the ground from under your
tires, and you could lose traction and roll
the vehicle over. Do not drive through
rushing water.
See
Driving in Rain and on Wet Roads on page 4-30for
more information on driving through water.
After Off-Road Driving
Remove any brush or debris that has collected on the
underbody, chassis or under the hood. These
accumulations can be a ®re hazard.
After operation in mud or sand, have the brake linings
cleaned and checked. These substances can cause
glazing and uneven braking. Check the body structure,
steering, suspension, wheels, tires and exhaust
system for damage. Also, check the fuel lines and
cooling system for any leakage.
Your vehicle will require more frequent service due to
off-road use. Refer to the Maintenance Schedule
for additional information.
4-28
Page 285 of 436
{CAUTION:
It can be dangerous to get out of your vehicle
if the shift lever is not fully in PARK (P) with
the parking brake ®rmly set. Your vehicle
can roll.
If you have left the engine running, the vehicle
can move suddenly. You or others could be
injured. To be sure your vehicle won't move,
even when you're on fairly level ground, use
the steps that follow.
Always put the shift lever fully in PARK (P)
with the parking brake ®rmly set.
If the transfer case on four-wheel drive
vehicles is in NEUTRAL, your vehicle will be
free to roll, even if your shift lever is in
PARK (P). So, be sure the transfer case is in a
drive gear Ð not in NEUTRAL.
See ªFour-Wheel Drive (Automatic Transfer
Case)º in the Index.
When You Are Ready to Leave After
Parking on a Hill
1. Apply your regular brakes and hold the pedal down
while you:
·start your engine,
·shift into a gear, and
·release the parking brake.
2. Let up on the brake pedal.
3. Drive slowly until the trailer is clear of the chocks.
4. Stop and have someone pick up and store the
chocks.
Maintenance When Trailer Towing
Your vehicle will need service more often when you're
pulling a trailer. See the Maintenance Schedule for more
on this. Things that are especially important in trailer
operation are automatic transmission ¯uid (don't over®ll),
engine oil, axle lubricant, belt(s), cooling system and
brake system. Each of these is covered in this manual,
and the Index will help you ®nd them quickly. If
you're trailering, it's a good idea to review these sections
before you start your trip.
Check periodically to see that all hitch nuts and bolts
are tight.
4-59
Page 310 of 436

How to Add Fluid
Refer to the Maintenance Schedule to determine
what kind of transmission ¯uid to use. See
Part D: Recommended Fluids and Lubricants on
page 6-18.
Add ¯uid only after checking the transmission ¯uid while
it is hot. (A cold check is used only as a reference.) If
the ¯uid level is low, add only enough of the proper
¯uid to bring the level up to the HOT area for a
hot check. It doesn't take much ¯uid, generally less
than one pint (0.5 L).
Don't over®ll.
Notice:
We recommend you use only ¯uid labeled
DEXRONž-III, because ¯uid with that label is
made especially for your automatic transmission.
Damage caused by ¯uid other than DEXRON
ž-III is
not covered by your new vehicle warranty.
·After adding ¯uid, recheck the ¯uid level as
described under ªHow to Check².
·When the correct ¯uid level is obtained, push the
dipstick back in all the way; then ¯ip the handle
down to lock the dipstick in place.
Engine Coolant
The cooling system in your vehicle is ®lled with
DEX-COOLžengine coolant. This coolant is designed
to remain in your vehicle for 5 years or 150,000 miles
(240 000 km), whichever occurs ®rst, if you add
only DEX-COOL
žextended life coolant.
The following explains your cooling system and how to
add coolant when it is low. If you have a problem
with engine overheating, see
Engine Overheating on
page 5-27.
A 50/50 mixture of clean, drinkable water and
DEX-COOL
žcoolant will:
·Give freezing protection down to-34ÉF (-37ÉC).
·Give boiling protection up to 265ÉF (129ÉC).
·Protect against rust and corrosion.
·Help keep the proper engine temperature.
·Let the warning lights and gages work as they
should.
Notice:Using coolant other than DEX-COOLžmay
cause premature engine, heater core or radiator
corrosion. In addition, the engine coolant may
require changing sooner, at 30,000 miles (50 000 km)
or 24 months, whichever occurs ®rst. Any repairs
would not be covered by your warranty. Always use
DEX-COOL
ž(silicate-free) coolant in your vehicle.
5-24
Page 324 of 436
Brakes
Brake Fluid
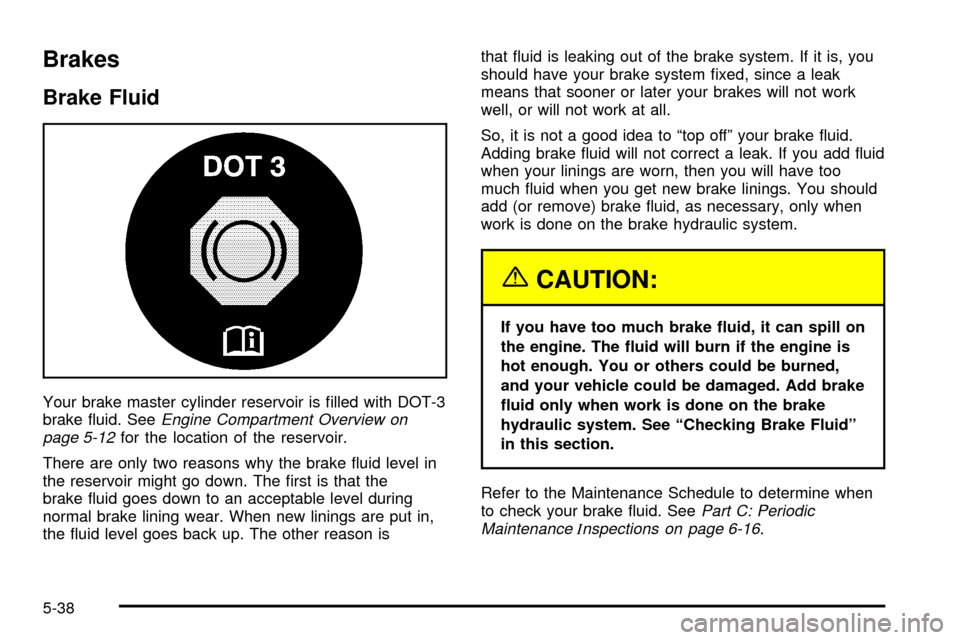
Your brake master cylinder reservoir is ®lled with DOT-3
brake ¯uid. SeeEngine Compartment Overview on
page 5-12for the location of the reservoir.
There are only two reasons why the brake ¯uid level in
the reservoir might go down. The ®rst is that the
brake ¯uid goes down to an acceptable level during
normal brake lining wear. When new linings are put in,
the ¯uid level goes back up. The other reason isthat ¯uid is leaking out of the brake system. If it is, you
should have your brake system ®xed, since a leak
means that sooner or later your brakes will not work
well, or will not work at all.
So, it is not a good idea to ªtop offº your brake ¯uid.
Adding brake ¯uid will not correct a leak. If you add ¯uid
when your linings are worn, then you will have too
much ¯uid when you get new brake linings. You should
add (or remove) brake ¯uid, as necessary, only when
work is done on the brake hydraulic system.
{CAUTION:
If you have too much brake ¯uid, it can spill on
the engine. The ¯uid will burn if the engine is
hot enough. You or others could be burned,
and your vehicle could be damaged. Add brake
¯uid only when work is done on the brake
hydraulic system. See ªChecking Brake Fluidº
in this section.
Refer to the Maintenance Schedule to determine when
to check your brake ¯uid. See
Part C: Periodic
MaintenanceInspections on page 6-16.
5-38
Page 333 of 436
Rear Axle
When to Check Lubricant
Refer to the Maintenance Schedule to determine how
often to check the lubricant.
How to Check Lubricant
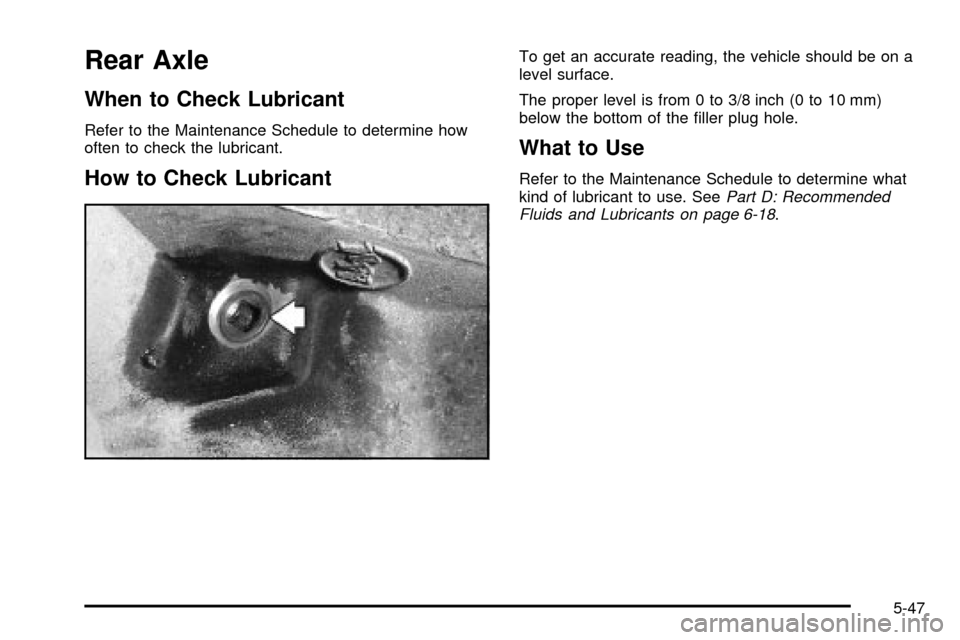
To get an accurate reading, the vehicle should be on a
level surface.
The proper level is from 0 to 3/8 inch (0 to 10 mm)
below the bottom of the ®ller plug hole.
What to Use
Refer to the Maintenance Schedule to determine what
kind of lubricant to use. SeePart D: Recommended
Fluids and Lubricants on page 6-18.
5-47
Page 334 of 436
Four-Wheel Drive
Lubricant checks in this section also apply to these
vehicles. However, there are two additional systems that
need lubrication.
Transfer Case
When to Check Lubricant
Refer to the Maintenance Schedule to determine how
often to check the lubricant. SeePart C: Periodic
MaintenanceInspections on page 6-16.
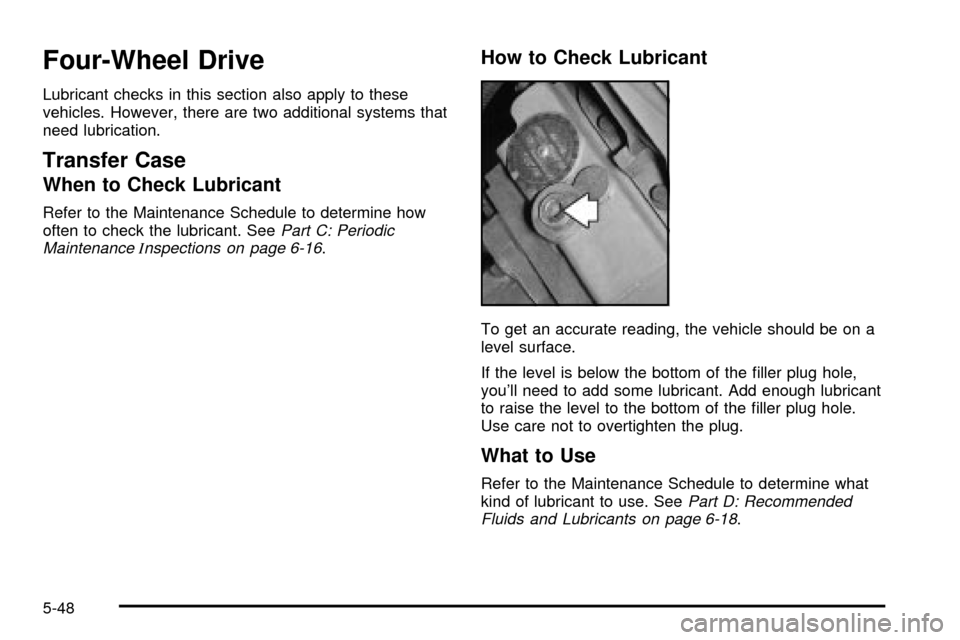
How to Check Lubricant
To get an accurate reading, the vehicle should be on a
level surface.
If the level is below the bottom of the ®ller plug hole,
you'll need to add some lubricant. Add enough lubricant
to raise the level to the bottom of the ®ller plug hole.
Use care not to overtighten the plug.
What to Use
Refer to the Maintenance Schedule to determine what
kind of lubricant to use. SeePart D: Recommended
Fluids and Lubricants on page 6-18.
5-48
Page 335 of 436
Front Axle
When to Check and Change Lubricant
Refer to the Maintenance Schedule to determine how
often to check the lubricant and when to change it.
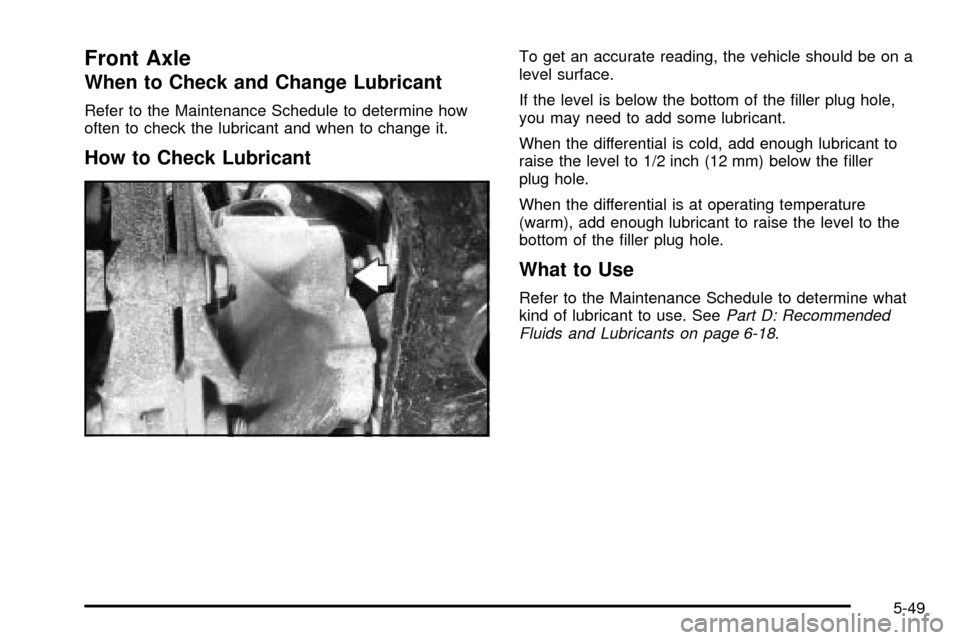
How to Check Lubricant
To get an accurate reading, the vehicle should be on a
level surface.
If the level is below the bottom of the ®ller plug hole,
you may need to add some lubricant.
When the differential is cold, add enough lubricant to
raise the level to 1/2 inch (12 mm) below the ®ller
plug hole.
When the differential is at operating temperature
(warm), add enough lubricant to raise the level to the
bottom of the ®ller plug hole.
What to Use
Refer to the Maintenance Schedule to determine what
kind of lubricant to use. SeePart D: Recommended
Fluids and Lubricants on page 6-18.
5-49
Page 341 of 436

Notice:Don't let anyone tell you that underin¯ation
or overin¯ation is all right. It's not. If your tires
don't have enough air (underin¯ation), you can get
the following:
·Too much ¯exing
·Too much heat
·Tire overloading
·Bad wear
·Bad handling
·Bad fuel economy
If your tires have too much air (overin¯ation), you
can get the following:
·Unusual wear
·Bad handling
·Rough ride
·Needless damage from road hazards
When to Check
Check your tires once a month or more.
Also, check the tire pressure of the spare tire.
How to Check
Use a good quality pocket-type gage to check tire
pressure. You can't tell if your tires are properly in¯ated
simply by looking at them. Radial tires may look
properly in¯ated even when they're underin¯ated.
Be sure to put the valve caps back on the valve stems.
They help prevent leaks by keeping out dirt and
moisture.
Tire Inspection and Rotation
Tires should be rotated every 7,500 miles (12 500 km).
Any time you notice unusual wear, rotate your tires
as soon as possible and check wheel alignment. Also
check for damaged tires or wheels. See
When It Is Time
for New Tires on page 5-57andWheel Replacement
on page 5-61for more information.
Make sure the spare tire is stored securely. Push, pull,
and then try to rotate or turn the tire. If it moves,
use the wheel wrench to tighten the cable. See
Changing a Flat Tire on page 5-64.
The purpose of regular rotation is to achieve more
uniform wear for all tires on the vehicle. The ®rst rotation
is the most important. See ªPart A: Scheduled
Maintenance Services,º in Section 6, for scheduled
rotation intervals.
5-55
Page 389 of 436
Maintenance Schedule......................................6-2
Introduction...................................................6-2
Your Vehicle and the Environment....................6-2
Maintenance Requirements..............................6-2
How This Section is Organized.........................6-3
Part A: Scheduled Maintenance Services...........6-4
Using Your Maintenance Schedule....................6-4
Scheduled Maintenance...................................6-5
Part B: Owner Checks and Services................6-11
At Each Fuel Fill..........................................6-11
At Least Once a Month.................................6-11
At Least Twice a Year...................................6-12At Least Once a Year...................................6-13
Part C: Periodic MaintenanceInspections.........6-16
Steering, Suspension and Front Drive Axle
Boot and Seal Inspection............................6-16
Exhaust System Inspection............................6-16
Fuel System Inspection..................................6-16
Engine Cooling System Inspection...................6-16
Transfer Case and Front Axle
(Four-Wheel Drive) Inspection.....................6-17
Brake System Inspection................................6-17
Part D: Recommended Fluids and Lubricants. . . .6-18
Part E: Maintenance Record...........................6-20
Section 6 Maintenance Schedule
6-1