remote start CHEVROLET TRAIL BLAZER 2003 1.G Owners Manual
[x] Cancel search | Manufacturer: CHEVROLET, Model Year: 2003, Model line: TRAIL BLAZER, Model: CHEVROLET TRAIL BLAZER 2003 1.GPages: 436, PDF Size: 2.98 MB
Page 67 of 436

Keys...............................................................2-3
Remote Keyless Entry System.........................2-5
Remote Keyless Entry System Operation...........2-6
Doors and Locks.............................................2-8
Door Locks....................................................2-8
Power Door Locks..........................................2-9
Delayed Locking.............................................2-9
Programmable Automatic Door Locks..............2-10
Rear Door Security Locks..............................2-12
Lockout Protection........................................2-12
Leaving Your Vehicle....................................2-12
Liftgate/Liftglass............................................2-13
Windows........................................................2-14
Power Windows............................................2-15
Sun Visors...................................................2-15Theft-Deterrent Systems..................................2-16
Content Theft-Deterrent.................................2-16
Passlock
ž....................................................2-18
Starting and Operating Your Vehicle................2-18
New Vehicle Break-In....................................2-18
Ignition Positions..........................................2-19
Starting Your Engine.....................................2-20
Engine Coolant Heater..................................2-21
Automatic Transmission Operation...................2-22
Four-Wheel Drive..........................................2-24
Parking Brake..............................................2-28
Shifting Into Park (P).....................................2-29
Shifting Out of Park (P).................................2-31
Parking Over Things That Burn.......................2-31
Engine Exhaust............................................2-32
Running Your Engine While You Are
Parked.....................................................2-32
Section 2 Features and Controls
2-1
Page 72 of 436
Remote Keyless Entry System
Operation
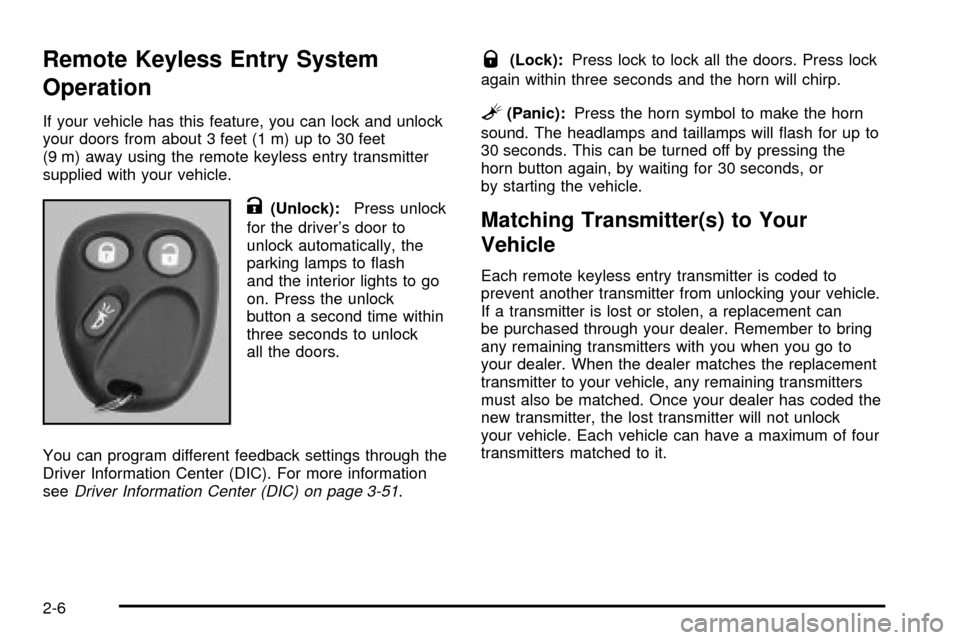
If your vehicle has this feature, you can lock and unlock
your doors from about 3 feet (1 m) up to 30 feet
(9 m) away using the remote keyless entry transmitter
supplied with your vehicle.
K(Unlock):Press unlock
for the driver's door to
unlock automatically, the
parking lamps to ¯ash
and the interior lights to go
on. Press the unlock
button a second time within
three seconds to unlock
all the doors.
You can program different feedback settings through the
Driver Information Center (DIC). For more information
see
Driver Information Center (DIC) on page 3-51.
Q(Lock):Press lock to lock all the doors. Press lock
again within three seconds and the horn will chirp.
L(Panic):Press the horn symbol to make the horn
sound. The headlamps and taillamps will ¯ash for up to
30 seconds. This can be turned off by pressing the
horn button again, by waiting for 30 seconds, or
by starting the vehicle.
Matching Transmitter(s) to Your
Vehicle
Each remote keyless entry transmitter is coded to
prevent another transmitter from unlocking your vehicle.
If a transmitter is lost or stolen, a replacement can
be purchased through your dealer. Remember to bring
any remaining transmitters with you when you go to
your dealer. When the dealer matches the replacement
transmitter to your vehicle, any remaining transmitters
must also be matched. Once your dealer has coded the
new transmitter, the lost transmitter will not unlock
your vehicle. Each vehicle can have a maximum of four
transmitters matched to it.
2-6
Page 82 of 436

Lighted Visor Vanity Mirror
Your vehicle may have this feature. Pull the sun visor
down and lift the mirror cover to turn on the lamps.
The lamps will turn off when the cover is closed.
Theft-Deterrent Systems
Vehicle theft is big business, especially in some cities.
Although your vehicle has a number of theft-deterrent
features, we know that nothing we put on it can make
it impossible to steal. However, there are ways you
can help.
Content Theft-Deterrent
Your vehicle may be equipped with a content
theft-deterrent alarm system.Here's how to operate the system:
1. Open the door.
2. Lock the door with the power door lock switch or
the remote keyless entry transmitter. The
SECURITY light should ¯ash.
3. Close all doors. The SECURITY light should turn off
after approximately 30 seconds. The alarm is not
armed until the SECURITY light turns off.
If a locked door is opened without the key or the remote
keyless entry transmitter, the alarm will go off. The
headlamps and parking lamps will ¯ash for two minutes,
and the horn will sound for 30 seconds, then will turn
off to save the battery power.
Remember, the theft-deterrent system won't activate if
you lock the doors with a key or use the manual
door lock. It activates only if you use a power door lock
switch with the door open, or with the remote keyless
entry transmitter. You should also remember that
you can start your vehicle with the correct ignition key if
the alarm has been set off.
United States
Canada
2-16
Page 214 of 436
DVD Player
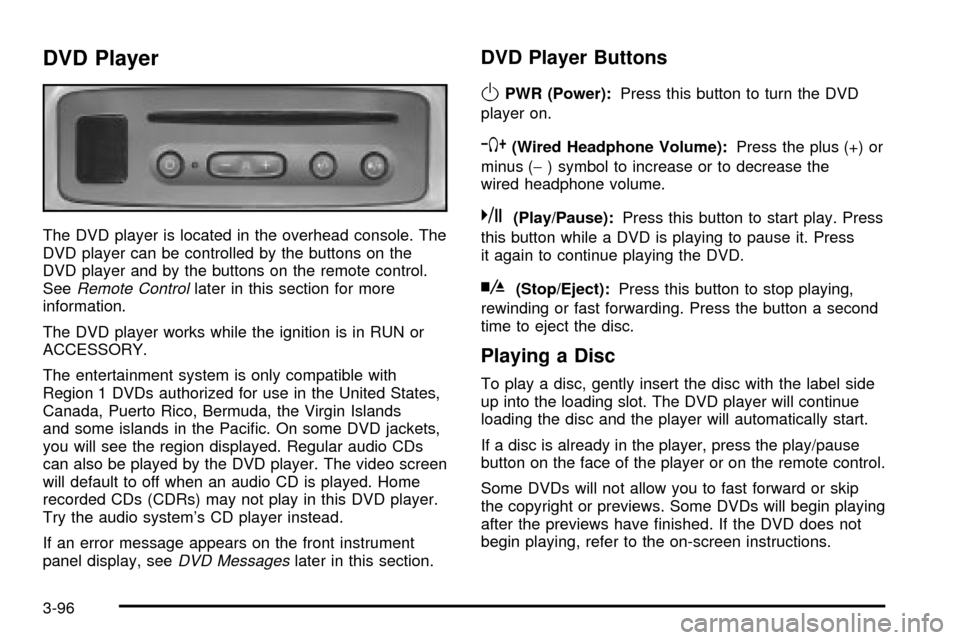
The DVD player is located in the overhead console. The
DVD player can be controlled by the buttons on the
DVD player and by the buttons on the remote control.
See
Remote Controllater in this section for more
information.
The DVD player works while the ignition is in RUN or
ACCESSORY.
The entertainment system is only compatible with
Region 1 DVDs authorized for use in the United States,
Canada, Puerto Rico, Bermuda, the Virgin Islands
and some islands in the Paci®c. On some DVD jackets,
you will see the region displayed. Regular audio CDs
can also be played by the DVD player. The video screen
will default to off when an audio CD is played. Home
recorded CDs (CDRs) may not play in this DVD player.
Try the audio system's CD player instead.
If an error message appears on the front instrument
panel display, see
DVD Messageslater in this section.
DVD Player Buttons
OPWR (Power):Press this button to turn the DVD
player on.
`(Wired Headphone Volume):Press the plus (+) or
minus (-) symbol to increase or to decrease the
wired headphone volume.
k(Play/Pause):Press this button to start play. Press
this button while a DVD is playing to pause it. Press
it again to continue playing the DVD.
h(Stop/Eject):Press this button to stop playing,
rewinding or fast forwarding. Press the button a second
time to eject the disc.
Playing a Disc
To play a disc, gently insert the disc with the label side
up into the loading slot. The DVD player will continue
loading the disc and the player will automatically start.
If a disc is already in the player, press the play/pause
button on the face of the player or on the remote control.
Some DVDs will not allow you to fast forward or skip
the copyright or previews. Some DVDs will begin playing
after the previews have ®nished. If the DVD does not
begin playing, refer to the on-screen instructions.
3-96
Page 220 of 436
Problem Recommended Action
The remote does not
work.Point the remote directly
at the player, but not the
screen.
The batteries could be
dead or put in wrong.
If the power button on
the player is ¯ashing, the
parental control is on,
which disables the
remote.
I can not hear anything
when I lower the volume.Quickly press and
release the
COMP/AUDIO button on
the remote. This tells you
the current default
setting. Press and
release the
COMP/AUDIO button
again to choose another
setting.Problem Recommended Action
How do I get subtitles on
or off?Press and hold the
DISP/S-TITLE buttons on
the remote to go to the
DVDs main menu. Then
follow the prompts.
After stopping the player,
I push PLAY but
sometimes the DVD
starts where I left off and
sometimes at the
beginning.Press the STOP button
on the remote to resume
where the DVD left off.
Press the STOP button
twice to start the DVD at
the beginning.
If the power is off and the
DVD is still in the player,
press and release the
PLAY button.
The DVD is playing but
there is no picture or
sound.
The auxiliary medium
(video game, camcorder,
etc.) is running but there
is no picture or sound.Press the INPUT/TITLE
button on the remote to
get to auxiliary input.
The auxiliary medium's
cords could be plugged
into the wrong jack.
3-102
Page 221 of 436
Problem Recommended Action
The audio or video skips
or jumps.The DVD could be dirty
or scratched. Try
cleaning the DVD.
When I return to the DVD
from the system menu,
sometimes it plays from
the beginning and
sometimes from where it
left off.If the STOP button was
pressed once, it resumes
play from where it left off.
If the STOP button was
pressed twice, it will
start at the beginning of
the DVD.
However, if a change
was made to the menu,
the DVD will start from
the beginning, even if the
STOP button was only
pressed once.
The fast forward, fast
reverse, previous and
next functions do
not work.Some commands that do
one thing for DVDs will
not always work or
perform the same
function for audio, CDs
or games.Problem Recommended Action
My disc is stuck in the
player. The EJECT/LOAD
button does not work.Press the EJECT/LOAD
button on the remote, or
the STOP/EJECT button
on the DVD player.
Turn the power off, then
on again.
Do not attempt to forcibly
remove the disc from the
player.
I lost the remote and/or
the headphones.See your dealer for
assistance.
What is the best way to
clean the screen?Pour some isopropyl or
rubbing alcohol on a
clean cloth and wipe.
Sometimes the wireless
headphone audio cuts
out or buzzes for a
moment then it
comes back.This could be caused by
interference from cell
towers or by using your
cell phone in the vehicle.
3-103
Page 299 of 436

A. Coolant Recovery Tank. SeeEngine Coolant on
page 5-24.
B. Engine Air Cleaner/Filter. See
Engine Air
Cleaner/Filter on page 5-20.
C. Windshield Washer Fluid Reservoir. See
Windshield
Washer Fluid on page 5-37.
D. Power Steering Fluid Reservoir. See
Power Steering
Fluid on page 5-36.
E. Automatic Transmission Dipstick. See
Automatic
Transmission Fluid on page 5-22.
F. Engine Oil Dipstick. See
Engine Oil on page 5-16.G. Radiator Pressure Cap. See
Radiator Pressure Cap
on page 5-26.
H. Engine Oil Fill Cap. See
Engine Oil on page 5-16.
I. Remote Negative (-) Terminal Marked GND.
See
Jump Starting on page 5-42.
J. Brake Master Cylinder. See
Brakes on page 5-38.
K. Battery. See
Battery on page 5-41.
L. Engine Compartment Fuse Block. See ªEngine
Compartment Fuse Blockº under
Fuses and Circuit
Breakers on page 5-89.
5-13
Page 301 of 436

A. Coolant Recovery Tank. SeeEngine Coolant on
page 5-24.
B. Engine Air Cleaner/Filter. See
Engine Air
Cleaner/Filter on page 5-20.
C. Windshield Washer Fluid Reservoir. See
Windshield
Washer Fluid on page 5-37.
D. Engine Oil Dipstick. See
Engine Oil on page 5-16.
E. Automatic Transmission Dipstick. See
Automatic
Transmission Fluid on page 5-22.
F. Engine Oil Fill Cap. See
Engine Oil on page 5-16.G. Radiator Pressure Cap. See
Radiator Pressure Cap
on page 5-26.
H. Remote Negative (-) Terminal Marked GND.
See
Jump Starting on page 5-42.
I. Power Steering Fluid Reservoir. See
Power Steering
Fluid on page 5-36.
J. Brake Master Cylinder. See
Brakes on page 5-38.
K. Engine Compartment Fuse Block. See ªEngine
Compartment Fuse blockº under
Fuses and Circuit
Breakers on page 5-89.
L. Battery. See
Battery on page 5-41.
5-15
Page 329 of 436
Notice:If you leave your radio or other accessories
on during the jump starting procedure, they could
be damaged. The repairs would not be covered
by your warranty. Always turn off your radio and
other accessories when jump starting your vehicle.
3. Turn off the ignition on both vehicles. Unplug
unnecessary accessories plugged into the cigarette
lighter or accessory power outlets (if equipped).
Turn off the radio and all lamps that aren't needed.
This will avoid sparks and help to save both
batteries. And it could save your radio!
4. Open both hoods and locate the batteries. Find the
positive (+) and negative (-) terminals on each
battery. Your vehicle has a remote negative (-) jump
starting terminal. You should always use this
remote terminal instead of the terminal on the
battery. The remote negative (-) terminal is located
on the front engine lift bracket on vehicles with
the L6 engine or the engine accessory drive bracket
for vehicles with the V8 engine, and is marked
ªGND.º See
Engine Compartment Overview
on page 5-12for more information on location.
{CAUTION:
Using a match near a battery can cause battery
gas to explode. People have been hurt doing
this, and some have been blinded. Use a
¯ashlight if you need more light.
Be sure the battery has enough water. You do
not need to add water to the ACDelco
žbattery
installed in your new vehicle. But if a battery
has ®ller caps, be sure the right amount of
¯uid is there. If it is low, add water to take care
of that ®rst. If you do not, explosive gas could
be present.
Battery ¯uid contains acid that can burn you.
Do not get it on you. If you accidentally get it
in your eyes or on your skin, ¯ush the place
with water and get medical help immediately.
5-43
Page 331 of 436
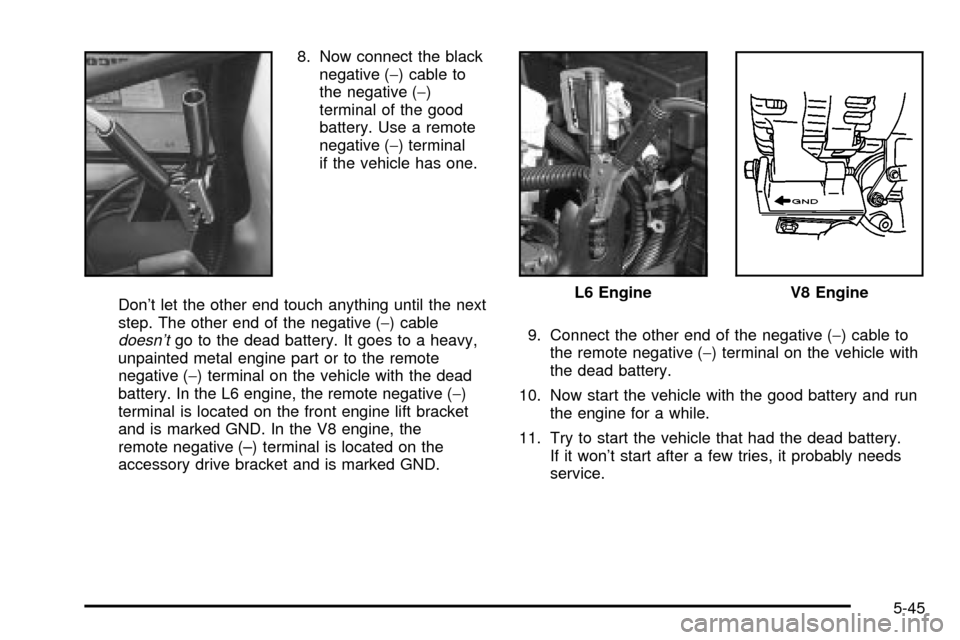
8. Now connect the black
negative (-) cable to
the negative (-)
terminal of the good
battery. Use a remote
negative (-) terminal
if the vehicle has one.
Don't let the other end touch anything until the next
step. The other end of the negative (-) cable
doesn'tgo to the dead battery. It goes to a heavy,
unpainted metal engine part or to the remote
negative (-) terminal on the vehicle with the dead
battery. In the L6 engine, the remote negative (-)
terminal is located on the front engine lift bracket
and is marked GND. In the V8 engine, the
remote negative (±) terminal is located on the
accessory drive bracket and is marked GND.9. Connect the other end of the negative (-) cable to
the remote negative (-) terminal on the vehicle with
the dead battery.
10. Now start the vehicle with the good battery and run
the engine for a while.
11. Try to start the vehicle that had the dead battery.
If it won't start after a few tries, it probably needs
service.
L6 EngineV8 Engine
5-45