spare tire CHEVROLET TRAIL BLAZER 2003 1.G Owners Manual
[x] Cancel search | Manufacturer: CHEVROLET, Model Year: 2003, Model line: TRAIL BLAZER, Model: CHEVROLET TRAIL BLAZER 2003 1.GPages: 436, PDF Size: 2.98 MB
Page 242 of 436
Before You Go Off-Roading
There are some things to do before you go out. For
example, be sure to have all necessary maintenance
and service work done. Check to make sure all
underbody shields (if so equipped) are properly
attached.
Be sure you read all the information about your
four-wheel-drive vehicle in this manual.
Is there enough fuel? Is the spare tire fully in¯ated?
Are the ¯uid levels up where they should be? What
are the local laws that apply to off-roading where you will
be driving? If you do not know, you should check with
law enforcement people in the area. Will you be on
someone's private land? If so, be sure to get the
necessary permission.
Loading Your Vehicle for Off-Road
Driving
There are some important things to remember about
how to load your vehicle.
·The heaviest things should be on the load ¯oor and
forward of your rear axle. Put heavier items as far
forward as you can.
·Be sure the load is secured properly, so driving on
the off-road terrain does not toss things around.
{CAUTION:
·Cargo on the load ¯oor piled higher than
the seatbacks can be thrown forward
during a sudden stop. You or your
passengers could be injured. Keep cargo
below the top of the seatbacks.
·Unsecured cargo on the load ¯oor can be
tossed about when driving over rough
terrain. You or your passengers can be
struck by ¯ying objects. Secure the cargo
properly.
·Heavy loads on the roof raise the vehicle's
center of gravity, making it more likely to
roll over. You can be seriously or fatally
injured if the vehicle rolls over. Put heavy
loads inside the cargo area, not on the
roof. Keep cargo in the cargo area as far
forward and low as possible.
You will ®nd other important information in this manual.
See
Loading Your Vehicle on page 4-48,Luggage
Carrier on page 2-47andTires on page 5-54.
4-16
Page 341 of 436

Notice:Don't let anyone tell you that underin¯ation
or overin¯ation is all right. It's not. If your tires
don't have enough air (underin¯ation), you can get
the following:
·Too much ¯exing
·Too much heat
·Tire overloading
·Bad wear
·Bad handling
·Bad fuel economy
If your tires have too much air (overin¯ation), you
can get the following:
·Unusual wear
·Bad handling
·Rough ride
·Needless damage from road hazards
When to Check
Check your tires once a month or more.
Also, check the tire pressure of the spare tire.
How to Check
Use a good quality pocket-type gage to check tire
pressure. You can't tell if your tires are properly in¯ated
simply by looking at them. Radial tires may look
properly in¯ated even when they're underin¯ated.
Be sure to put the valve caps back on the valve stems.
They help prevent leaks by keeping out dirt and
moisture.
Tire Inspection and Rotation
Tires should be rotated every 7,500 miles (12 500 km).
Any time you notice unusual wear, rotate your tires
as soon as possible and check wheel alignment. Also
check for damaged tires or wheels. See
When It Is Time
for New Tires on page 5-57andWheel Replacement
on page 5-61for more information.
Make sure the spare tire is stored securely. Push, pull,
and then try to rotate or turn the tire. If it moves,
use the wheel wrench to tighten the cable. See
Changing a Flat Tire on page 5-64.
The purpose of regular rotation is to achieve more
uniform wear for all tires on the vehicle. The ®rst rotation
is the most important. See ªPart A: Scheduled
Maintenance Services,º in Section 6, for scheduled
rotation intervals.
5-55
Page 345 of 436

Uniform Tire Quality Grading
Quality grades can be found where applicable on the
tire sidewall between tread shoulder and maximum
section width. For example:
Treadwear 200 Traction AA Temperature A
The following information relates to the system
developed by the United States National Highway
Traffic Safety Administration, which grades tires by
treadwear, traction and temperature performance.
(This applies only to vehicles sold in the United States.)
The grades are molded on the sidewalls of most
passenger car tires. The Uniform Tire Quality Grading
system does not apply to deep tread, winter-type
snow tires, space-saver or temporary use spare tires,
tires with nominal rim diameters of 10 to 12 inches
(25 to 30 cm), or to some limited-production tires.
While the tires available on General Motors passenger
cars and light trucks may vary with respect to these
grades, they must also conform to federal safety
requirements and additional General Motors Tire
Performance Criteria (TPC) standards.
Treadwear
The treadwear grade is a comparative rating based on
the wear rate of the tire when tested under controlled
conditions on a speci®ed government test course.
For example, a tire graded 150 would wear one and
a half (1.5) times as well on the government course as
a tire graded 100. The relative performance of tires
depends upon the actual conditions of their use,
however, and may depart signi®cantly from the norm
due to variations in driving habits, service practices and
differences in road characteristics and climate.
Traction ± AA, A, B, C
The traction grades, from highest to lowest, are AA, A,
B, and C. Those grades represent the tire's ability
to stop on wet pavement as measured under controlled
conditions on speci®ed government test surfaces of
asphalt and concrete. A tire marked C may have poor
traction performance. Warning: The traction grade
assigned to this tire is based on straight-ahead braking
traction tests, and does not include acceleration,
cornering, hydroplaning, or peak traction characteristics.
5-59
Page 351 of 436
Removing the Spare Tire and Tools
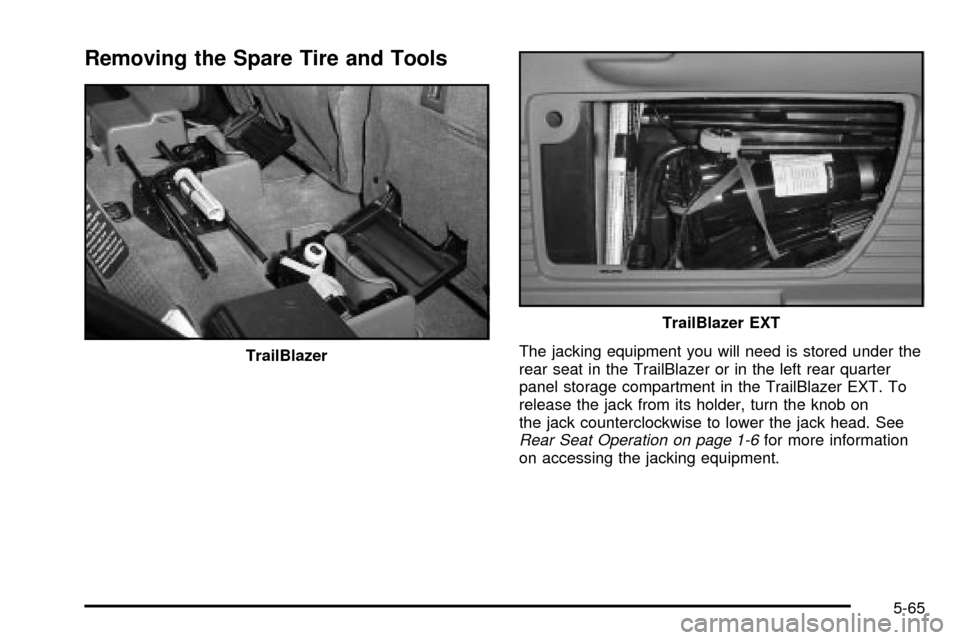
The jacking equipment you will need is stored under the
rear seat in the TrailBlazer or in the left rear quarter
panel storage compartment in the TrailBlazer EXT. To
release the jack from its holder, turn the knob on
the jack counterclockwise to lower the jack head. See
Rear Seat Operation on page 1-6for more information
on accessing the jacking equipment. TrailBlazer
TrailBlazer EXT
5-65
Page 352 of 436
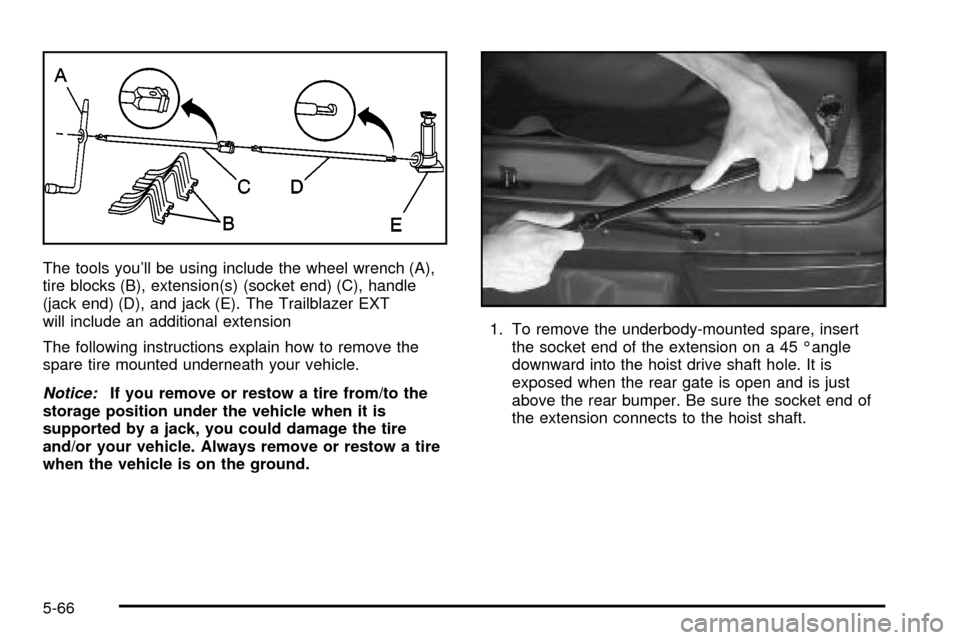
The tools you'll be using include the wheel wrench (A),
tire blocks (B), extension(s) (socket end) (C), handle
(jack end) (D), and jack (E). The Trailblazer EXT
will include an additional extension
The following instructions explain how to remove the
spare tire mounted underneath your vehicle.
Notice:If you remove or restow a tire from/to the
storage position under the vehicle when it is
supported by a jack, you could damage the tire
and/or your vehicle. Always remove or restow a tire
when the vehicle is on the ground.1. To remove the underbody-mounted spare, insert
the socket end of the extension on a 45 Éangle
downward into the hoist drive shaft hole. It is
exposed when the rear gate is open and is just
above the rear bumper. Be sure the socket end of
the extension connects to the hoist shaft.
5-66
Page 353 of 436
2. Turn the wheel wrench counterclockwise to lower
the spare tire. Keep turning the wheel wrench until
the spare tire can be pulled out from under the
vehicle.
If the spare tire does not lower to the ground, the
secondary latch is engaged causing the tire
not to lower. See ªSecondary Latch Systemº later in
this section.
When the tire has been completely lowered, tilt the
retainer at the end of the cable and pull it through
the wheel opening. Pull the tire out from under
the vehicle.
Notice:If you drive away before the spare tire or
secondary latch system cable has been reinstalled,
you could damage your vehicle. Always reinstall
this cable before driving your vehicle.
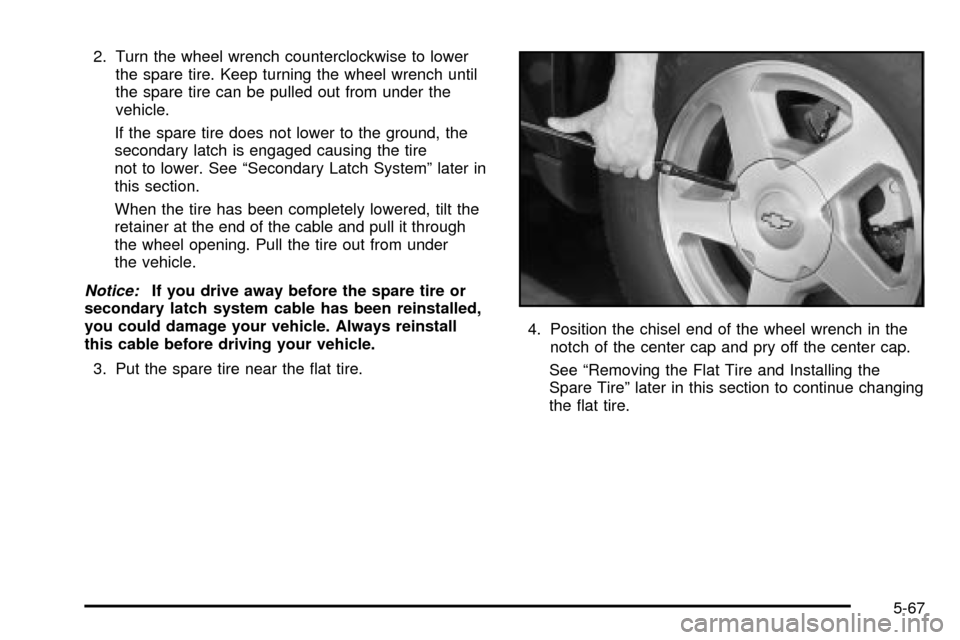
3. Put the spare tire near the ¯at tire.4. Position the chisel end of the wheel wrench in the
notch of the center cap and pry off the center cap.
See ªRemoving the Flat Tire and Installing the
Spare Tireº later in this section to continue changing
the ¯at tire.
5-67
Page 354 of 436
Secondary Latch System
Your vehicle has an underbody mounted tire hoist
assembly equipped with a secondary latch system.
It's designed to stop the spare or ¯at road tire
from suddenly falling off your vehicle if the cable holding
the spare tire is damaged. For the secondary latch to
work, the tire must be stored with the valve stem
pointing up. See ªStoring a Flat Tire and Toolsº for
instructions on storing the spare or ¯at tire correctly.{CAUTION:
Before beginning this procedure read all the
instructions. Failure to read and follow the
instructions could damage the hoist assembly
and you and others could get hurt. Read and
follow the instructions listed below.
{CAUTION:
Someone standing too close during the
procedure could be injured by the jack. If the
spare tire does not slide off the jack
completely, make sure no one is behind you or
on either side of you as you pull the jack out
from the spare.
5-68
Page 355 of 436
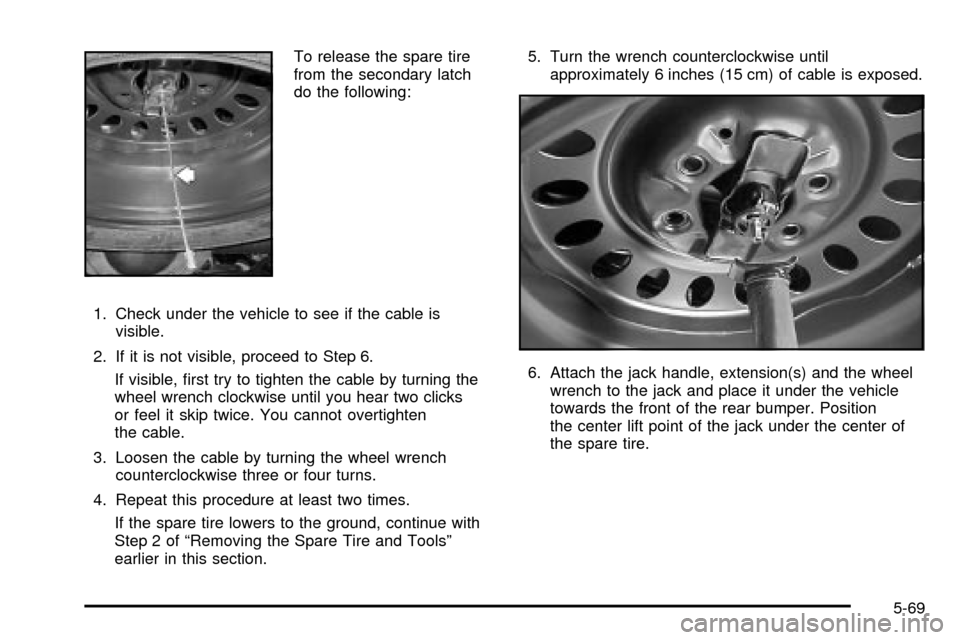
To release the spare tire
from the secondary latch
do the following:
1. Check under the vehicle to see if the cable is
visible.
2. If it is not visible, proceed to Step 6.
If visible, ®rst try to tighten the cable by turning the
wheel wrench clockwise until you hear two clicks
or feel it skip twice. You cannot overtighten
the cable.
3. Loosen the cable by turning the wheel wrench
counterclockwise three or four turns.
4. Repeat this procedure at least two times.
If the spare tire lowers to the ground, continue with
Step 2 of ªRemoving the Spare Tire and Toolsº
earlier in this section.5. Turn the wrench counterclockwise until
approximately 6 inches (15 cm) of cable is exposed.
6. Attach the jack handle, extension(s) and the wheel
wrench to the jack and place it under the vehicle
towards the front of the rear bumper. Position
the center lift point of the jack under the center of
the spare tire.
5-69
Page 356 of 436
7. Turn the wrench clockwise to raise the jack until it
lifts the end ®tting.
8. Continue raising the jack until the spare tire stops
moving upward and is held ®rmly in place. The
secondary latch has released and the spare tire is
balancing on the jack.
9. Lower the jack by turning the wheel wrench
counterclockwise. Keep lowering the jack until the
spare tire slides off the jack or is hanging by
the cable.
10. Disconnect the jack handle from the jack and
carefully remove the jack. Use one hand to push
against the spare while ®rmly pulling the jack out
from under the spare tire with the other hand.
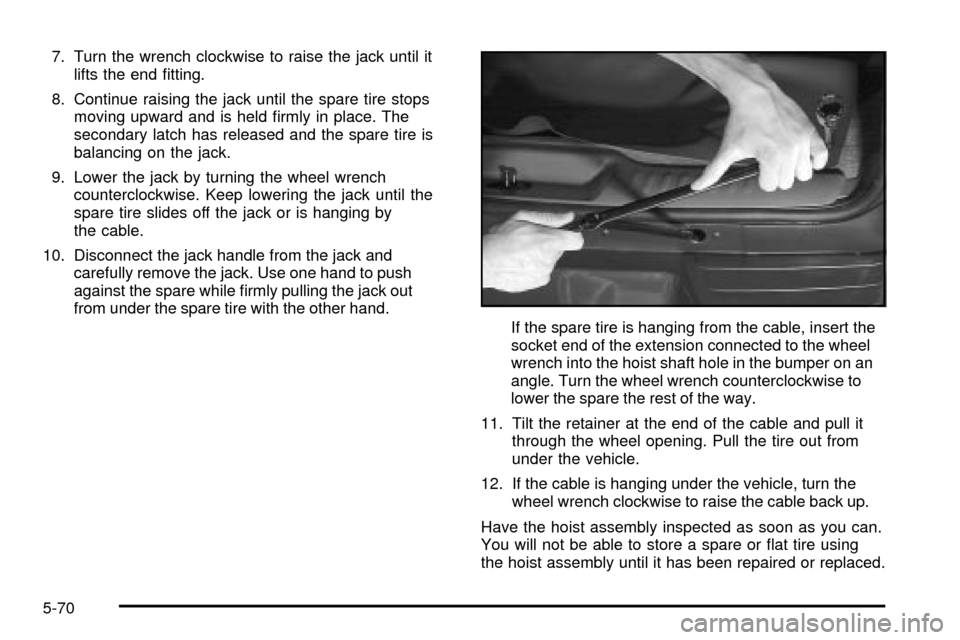
If the spare tire is hanging from the cable, insert the
socket end of the extension connected to the wheel
wrench into the hoist shaft hole in the bumper on an
angle. Turn the wheel wrench counterclockwise to
lower the spare the rest of the way.
11. Tilt the retainer at the end of the cable and pull it
through the wheel opening. Pull the tire out from
under the vehicle.
12. If the cable is hanging under the vehicle, turn the
wheel wrench clockwise to raise the cable back up.
Have the hoist assembly inspected as soon as you can.
You will not be able to store a spare or ¯at tire using
the hoist assembly until it has been repaired or replaced.
5-70
Page 357 of 436
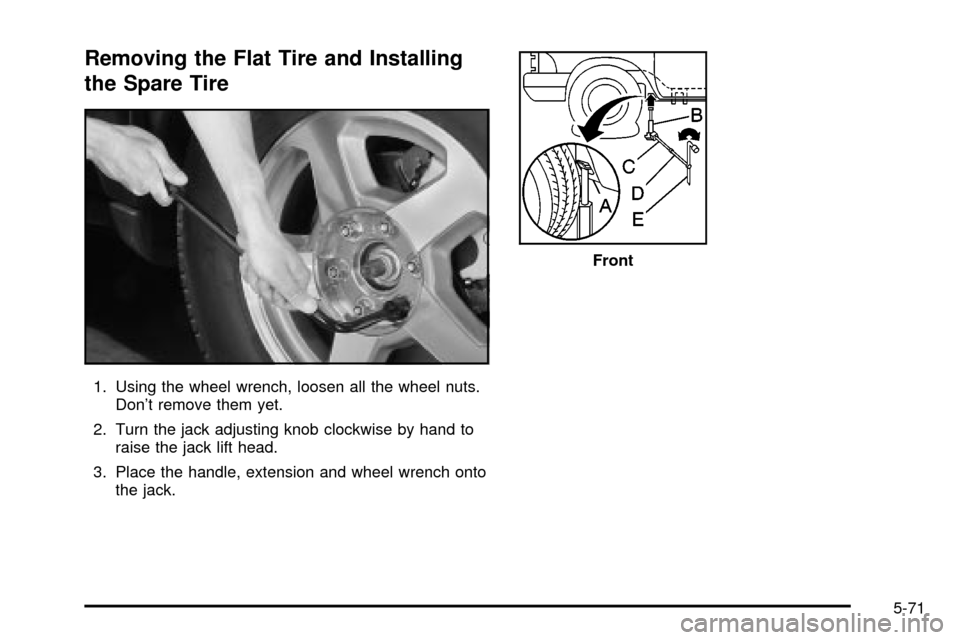
Removing the Flat Tire and Installing
the Spare Tire
1. Using the wheel wrench, loosen all the wheel nuts.
Don't remove them yet.
2. Turn the jack adjusting knob clockwise by hand to
raise the jack lift head.
3. Place the handle, extension and wheel wrench onto
the jack.
Front
5-71