ECO mode CHEVROLET TRAIL BLAZER 2007 1.G Owners Manual
[x] Cancel search | Manufacturer: CHEVROLET, Model Year: 2007, Model line: TRAIL BLAZER, Model: CHEVROLET TRAIL BLAZER 2007 1.GPages: 574, PDF Size: 2.94 MB
Page 3 of 574
GENERAL MOTORS, GM, the GM Emblem,
CHEVROLET, the CHEVROLET Emblem, and the
names TRAILBLAZER and EXT are registered
trademarks of General Motors Corporation.
This manual includes the latest information at the
time it was printed. We reserve the right to
make changes after that time without further
notice. For vehicles �rst sold in Canada, substitute
the name “General Motors of Canada Limited”
for Chevrolet Motor Division whenever it appears
in this manual.This manual describes features that may be
available in this model, but your vehicle may not
have all of them. For example, more than one
entertainment system may be offered or your
vehicle may have been ordered without a front
passenger or rear seats.
Keep this manual in the vehicle, so it will be there
if it is needed while you are on the road. If the
vehicle is sold, leave this manual in the vehicle.
Canadian Owners
A French language copy of this manual can be
obtained from your dealer/retailer or from:
Helm, Incorporated
P.O. Box 07130
Detroit, MI 48207
Litho in U.S.A.
Part No. 15863673 B Second Printing
©2006 General Motors Corporation. All Rights Reserved.
3
Page 101 of 574
Programmable Locking Feature
Following are the two locking modes that can be
programmed:
Mode 1:All doors lock when the transmission is
shifted out of PARK (P).
Mode 2:All doors lock when the vehicle speed is
greater than 8 mph (13 km/h).
The automatic door locks were pre-programmed at
the factory to lock all the doors when the
transmission is shifted into gear. The following
instructions detail how to program your door locks
differently than the factory setting. Choose one
of the two programming options listed previously
before entering the program mode.
To enter the program mode, do the following:
1. Begin with the ignition off. Then pull the turn
signal/multifunction lever toward you and hold
it there while you perform the next step.
2. Turn the key to RUN and LOCK twice.
Then, with the key in LOCK, release the turn
signal/multifunction lever. Once you do
this, you will hear the lock switch lock and
unlock, the horn will chirp twice, and a
30-second program timer will begin.3. You are now ready to program the automatic
door locks. Select one of the two programming
options listed previously, and press the lock
side of the power door lock switch to
cycle through the lock options. You will have
30 seconds to begin programming. If you
exceed the 30-second limit, the locks
will automatically lock and unlock and the
horn will chirp twice to indicate that you have
left the program mode. If this occurs, repeat
the procedure beginning with Step 1 to
re-enter the programming mode.
You can exit the program mode any time by
turning the ignition to RUN. The locks will
automatically lock and unlock and the horn will
chirp twice to indicate that you are leaving
the program mode. If the lock/unlock switches are
not pressed while in the programming mode,
the current auto lock/unlock setting will not
be modi�ed.
See your dealer for more information.
101
Page 102 of 574
Programmable Unlocking Feature
The following is the list of available programming
options:
Mode 1:Driver’s door unlocks when the
transmission is shifted into PARK (P).
Mode 2:All doors unlock when the transmission
is shifted into PARK (P).
Mode 3:All doors unlock when the key is
removed from the ignition.
Mode 4:No automatic door unlock.
The automatic door locks were pre-programmed
at the factory to unlock all doors once the
transmission is shifted to PARK (P). The following
instructions detail how to program your door
locks differently than the factory setting. Choose
one of the four programming options listed
previously before entering the program mode.
To enter the program mode you need to do the
following:
1. Begin with the ignition off. Then pull the turn
signal/multifunction lever toward you and hold
it there while you perform the next step.2. Turn the key to RUN and LOCK twice.
Then, with the key in LOCK, release the
turn signal/multifunction lever. Once you do
this, you will hear the lock switch lock
and unlock, the horn will chirp twice, and a
30-second program timer will begin.
3. You are now ready to program the automatic
door locks. Select one of the four
programming options listed above, and press
the unlock side of the power door lock
switch to cycle through the unlocking options.
You will have 30 seconds to begin
programming. If you exceed the 30-second
limit, the locks will automatically lock and
unlock and the horn will chirp twice to indicate
that you have left the program mode. If this
occurs, repeat the procedure beginning
with Step 1 to re-enter the programming mode.
You can exit the program mode any time by turning
the ignition to RUN. The locks will automatically
lock and unlock and the horn will chirp twice to
indicate that you are leaving the program mode.
If the lock/unlock switches are not pressed while
in the programming mode, the current auto
lock/unlock setting will not be modi�ed.
See your dealer for more information.
102
Page 117 of 574
4. Before starting the engine, be sure to unplug
and store the cord as it was before to keep it
away from moving engine parts. If you do not,
it could be damaged.
How long should you keep the coolant heater
plugged in? The answer depends on the outside
temperature, the kind of oil you have, and some
other things. Instead of trying to list everything here,
we ask that you contact your dealer in the area
where you will be parking your vehicle. The
dealer/retailer can give you the best advice for that
particular area.
Active Fuel Management™
Your vehicle’s V8 engine may have Active Fuel
Management™. This system allows the engine to
operate on either all or half of its cylinders,
depending on your driving conditions.When less power is required, such as cruising at a
constant vehicle speed, the system will operate
in the half cylinder mode, allowing your vehicle to
achieve better fuel economy. When greater
power demands are required, such as accelerating
from a stop, passing, or merging onto a freeway,
the system will maintain full-cylinder operation.
Automatic Transmission Operation
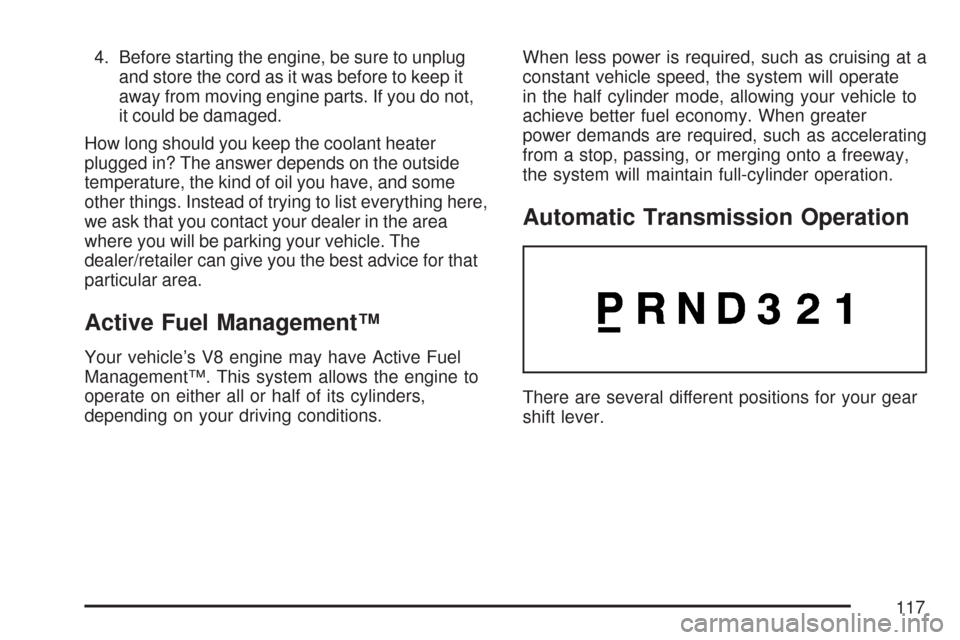
There are several different positions for your gear
shift lever.
117
Page 122 of 574
Automatic Transfer Case
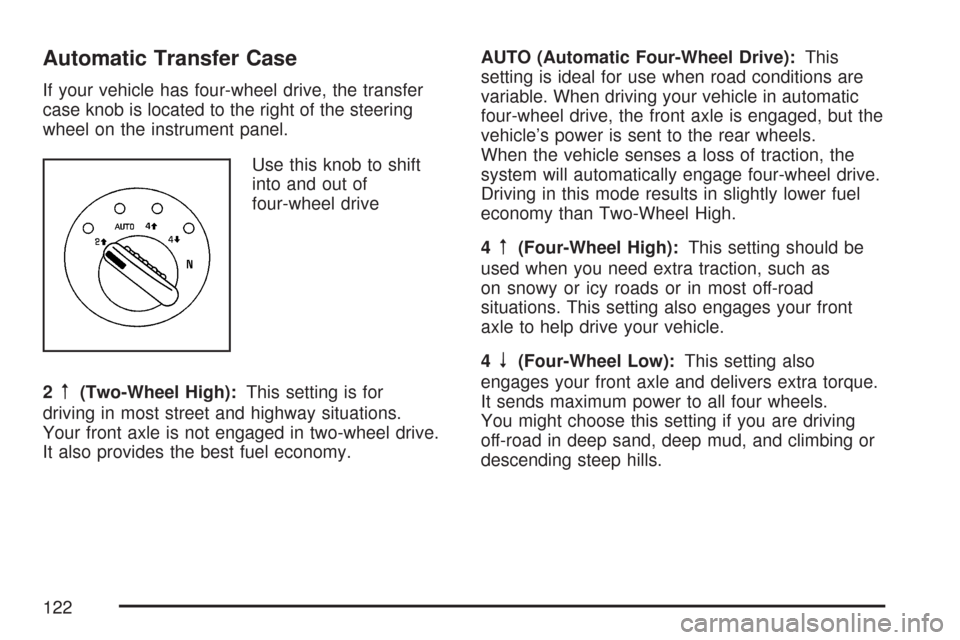
If your vehicle has four-wheel drive, the transfer
case knob is located to the right of the steering
wheel on the instrument panel.
Use this knob to shift
into and out of
four-wheel drive
2
m(Two-Wheel High):This setting is for
driving in most street and highway situations.
Your front axle is not engaged in two-wheel drive.
It also provides the best fuel economy.AUTO (Automatic Four-Wheel Drive):This
setting is ideal for use when road conditions are
variable. When driving your vehicle in automatic
four-wheel drive, the front axle is engaged, but the
vehicle’s power is sent to the rear wheels.
When the vehicle senses a loss of traction, the
system will automatically engage four-wheel drive.
Driving in this mode results in slightly lower fuel
economy than Two-Wheel High.
4
m(Four-Wheel High):This setting should be
used when you need extra traction, such as
on snowy or icy roads or in most off-road
situations. This setting also engages your front
axle to help drive your vehicle.
4
n(Four-Wheel Low):This setting also
engages your front axle and delivers extra torque.
It sends maximum power to all four wheels.
You might choose this setting if you are driving
off-road in deep sand, deep mud, and climbing or
descending steep hills.
122
Page 134 of 574
Compass Calibration
Press and hold the on/off button to activate the
compass calibration mode. CAL will be displayed in
the compass window on the mirror.
The compass can be calibrated by driving the
vehicle in circles at 5 mph (8 km/h) or less until the
display reads a direction.
If after a few seconds the display does not show a
compass direction, (N for North for example), there
may be a strong magnetic �eld interfering with the
compass. Such interference may be caused by a
magnetic antenna mount, note pad holder, or
similar object. If the letter C or CAL appears in the
compass window, the compass may need to be
reset or calibrated.
Compass Variance
Compass variance is the difference between
earth’s magnetic north and true geographic north.
The mirror is set to zone eight upon leaving
the factory. It will be necessary to adjust the
compass to compensate for compass variance
if you live outside zone eight. Under certain
circumstances, such as during a long distance
cross-country trip, it will be necessary to adjustfor compass variance. If not adjusted to account
for compass variance, your compass could
give false readings.
To adjust for compass variance, do the following:
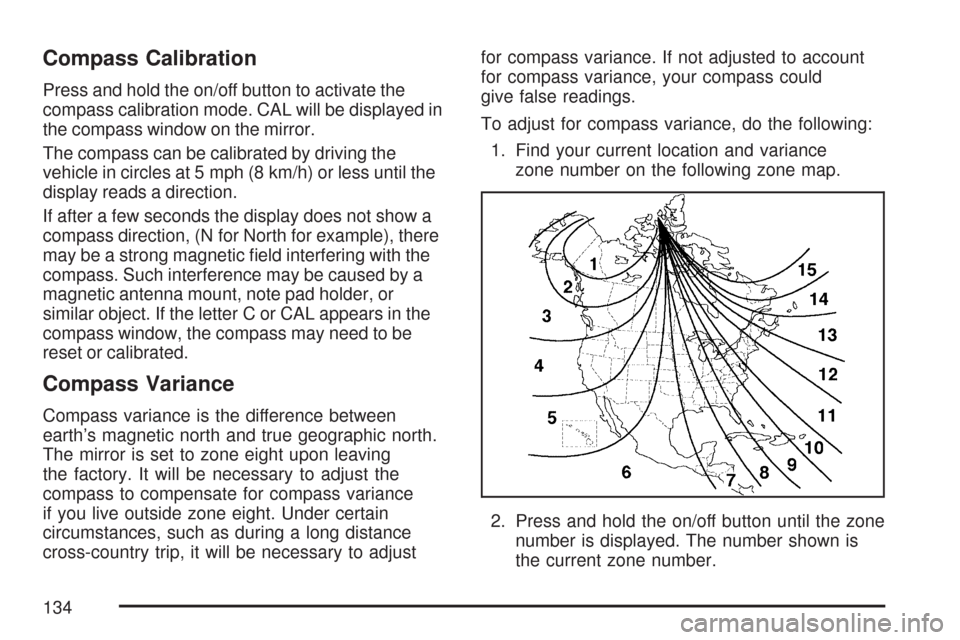
1. Find your current location and variance
zone number on the following zone map.
2. Press and hold the on/off button until the zone
number is displayed. The number shown is
the current zone number.
134
Page 135 of 574
3. Scroll through the zone numbers that appear in
the window on the mirror by pressing the on/off
button. Once you �nd your zone number,
release the button. After about four seconds,
the mirror will return to the compass display,
and the new zone number will be set. If C or
CAL appears in the compass window, the
compass may need calibration. See “Compass
Calibration” listed previously.
Automatic Dimming Rearview Mirror
with OnStar
®, Compass and
Temperature Display
Your vehicle may have this feature. When on, an
automatic dimming mirror automatically dims
to the proper level to minimize glare from lights
behind you after dark.
The mirror also includes a dual display in the
upper right corner of the mirror face. The compass
reading and the outside temperature will both
appear in the display at the same time.
P(On/Off):This is the on/off button.
Automatic Dimming Mirror Operation
The automatic dimming mirror function is turned on
automatically each time the ignition is started.
To operate the automatic dimming mirror, do the
following:
1. Make sure the green indicator light, located to
the left of the on/off button, is lit. If it’s not,
press and hold the on/off button until the green
light comes on, indicating that the mirror is
in automatic dimming mode.
2. Turn off the automatic dimming mirror function
by pressing and holding the on/off button until
the green indicator light turns off.
Temperature and Compass Display
Press the on/off button, located to the far
left, brie�y to turn the compass/temperature
display on or off.
135
Page 136 of 574
If the display reads CAL, you will need to calibrate
the compass. For more information on calibration,
see below.
To adjust between Fahrenheit and Celsius, do the
following:
1. Press and hold the on/off button until either a
�ashing F or C appears.
2. Press the button again to change the display
to the desired unit of measurement. After
approximately four seconds of inactivity, the
new unit will be locked in and the display
will return.
If an abnormal temperature reading is displayed
for an extended period of time, please consult your
dealer. Under certain circumstances, a delay in
updating the temperature is normal.
Compass Variance
The mirror is set in zone eight upon leaving the
factory. It will be necessary to adjust the compass
to compensate for compass variance if you live
outside of zone eight. Under certain circumstances,
as during a long distance cross-country trip, it will
be necessary to adjust for compass variance.Compass variance is the difference between earth’s
magnetic north and true geographic north. If not
adjusted to account for compass variance, your
compass could give false readings.
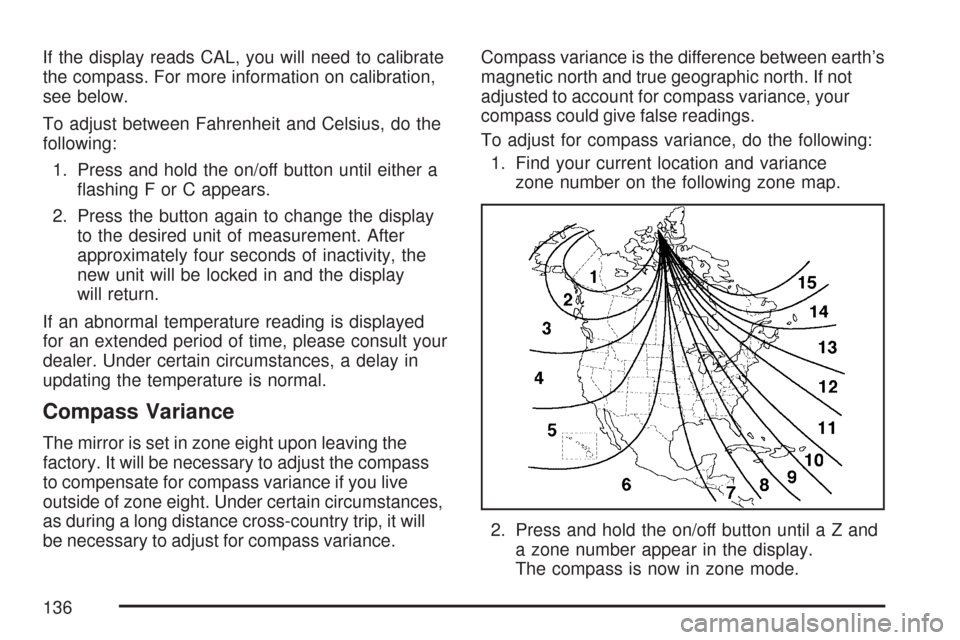
To adjust for compass variance, do the following:
1. Find your current location and variance
zone number on the following zone map.
2. Press and hold the on/off button untilaZand
a zone number appear in the display.
The compass is now in zone mode.
136
Page 153 of 574
Gate Operator and Canadian
Programming
Canadian radio-frequency laws require transmitter
signals to time out or quit after several seconds
of transmission. This may not be long enough
for Universal Home Remote to pick up the signal
during programming. Similarly, some U.S. gate
operators are manufactured to time out in
the same manner.
If you live in Canada, or you are having difficulty
programming a gate operator or garage door
opener by using the “Programming Universal
Home Remote” procedures, regardless of where
you live, replace Step 3 under “Programming
Universal Home Remote” with the following:
Continue to press and hold the Universal Home
Remote button while you press and release every
two seconds (cycle) the hand-held transmitter
button until the frequency signal has been
successfully accepted by the Universal Home
Remote. The Universal Home Remote indicator
light will �ash slowly at �rst and then rapidly.
Proceed with Step 4 under “Programming
Universal Home Remote” to complete.
Using Universal Home Remote
Press and hold the appropriate Universal Home
Remote button for at least half of a second.
The indicator light will come on while the signal
is being transmitted.
Erasing Universal Home Remote
Buttons
To erase programming from the three Universal
Home Remote buttons do the following:
1. Press and hold down the two outside buttons
until the indicator light begins to �ash, after
20 seconds. Do not hold the two outside
buttons for longer than 30 seconds.
2. Release both buttons.
The Universal Home Remote is now in the training
(learning) mode and can be programmed at any
time beginning with Step 2 under “Programming
Universal Home Remote” shown earlier in
this section.
Individual buttons cannot be erased, but they can
be reprogrammed. See “Reprogramming a
Single Universal Home Remote Button” following
this section.
153
Page 154 of 574
Reprogramming a Single Universal
Home Remote Button
To program a device to Universal Home Remote
using a Universal Home Remote button
previously trained, follow these steps:
1. Press and hold the desired Universal Home
Remote button. Do not release the button.
2. The indicator light will begin to �ash after
20 seconds. While still holding the Universal
Home Remote button, proceed with Step
2 under “Programming Universal Home
Remote” shown earlier in this section.
For help or information on the Universal Home
Remote System, call the customer assistance
phone number underCustomer Assistance Offices
on page 542.
Universal Home Remote System
Operation (With Three Round LED)
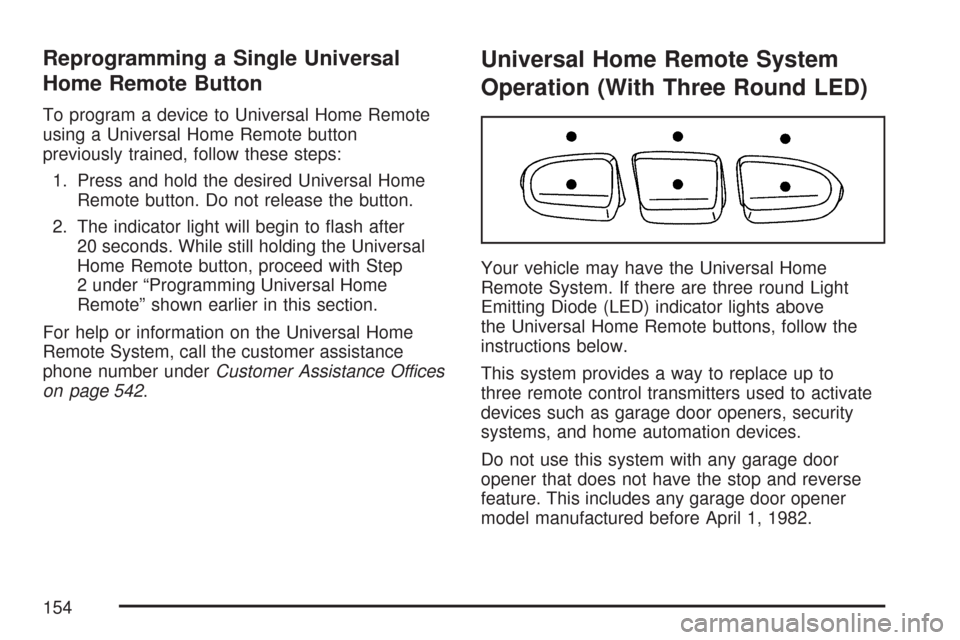
Your vehicle may have the Universal Home
Remote System. If there are three round Light
Emitting Diode (LED) indicator lights above
the Universal Home Remote buttons, follow the
instructions below.
This system provides a way to replace up to
three remote control transmitters used to activate
devices such as garage door openers, security
systems, and home automation devices.
Do not use this system with any garage door
opener that does not have the stop and reverse
feature. This includes any garage door opener
model manufactured before April 1, 1982.
154