change time CHEVROLET TRAIL BLAZER 2009 1.G User Guide
[x] Cancel search | Manufacturer: CHEVROLET, Model Year: 2009, Model line: TRAIL BLAZER, Model: CHEVROLET TRAIL BLAZER 2009 1.GPages: 484, PDF Size: 2.61 MB
Page 217 of 484
oSEEKp:Press the left SEEK arrow to go to the
start of the previous track. Press the right SEEK arrow to
go to the start of the next track. Press either SEEK arrow
for more than two seconds to search the previous or next
tracks at two tracks per second. Release the button to
stop searching and to play the track.
oTUNEp:Turn to fast track reverse or
advance through the tracks in all folders or playlists.
The track number and �le name displays for each track.
Turn
oTUNEpwhile in random to fast track reverse or
advance the tracks in sequential order.
DISPL (Display):Press to switch between track mode,
folder/playlist mode, and time of day mode. The display
shows only eight characters, but there can be up to
four pages of text. If there are more than eight characters
in the song, folder, or playlist name, they are displayed
if DISPL is not pressed again, pressing DISPL within
two seconds goes to the next display mode.
Track mode displays the current track number and
the ID3 tag song name.
Folder/playlist mode displays the current folder or
playlist number and the folder/playlist name.
Time of day mode displays the time of day and the
ID3 tag song name.To change the default on the display, press the DISPL
knob until the desired display appears, then press and
hold this knob for two seconds. The radio produces
one beep and the selected display becomes the default.
INFO (Information):INFO displays when a current
track has ID3 tag information. Press INFO to display
the artist name and album contained in the tag. INFO
disappears from the display when the information in the
ID3 tag has �nished.
BAND:Press to listen to the radio when a CD is
playing. The inactive CD remains inside the radio for
future listening.
CD AUX (Auxiliary):Press to play a CD when listening
to the radio. The CD symbol displays when a CD is
loaded.
Z(Eject):Press to eject a CD. Eject can activate
while either the ignition or the radio is off. CDs can be
loaded while the ignition and the radio is off if this button
is pressed �rst.
3-83
Page 220 of 484
Audio System
When using the in-vehicle Bluetooth system, sound
comes through the vehicle’s front audio system speakers
and overrides the audio system. Use the audio system
volume knob, during a call, to change the volume level.
The adjusted volume level remains in memory for later
calls. To prevent missed calls, a minimum volume level
is used if the volume is turned down too low.
Bluetooth Controls
Use thegbutton located on the steering wheel to
operate the in-vehicle Bluetooth system. SeeAudio
Steering Wheel Controls on page 3-109for more
information.
g(Push To Talk):Press to answer incoming calls,
to con�rm system information, and to start speech
recognition.
Pairing
A Bluetooth enabled cell phone must be paired to the
in-vehicle Bluetooth system �rst and then connected to
the vehicle before it can be used. See the cell phone
manufacturers user guide for Bluetooth functions before
pairing the cell phone. If a Bluetooth phone is not
connected, calls will be made using OnStar
®Hands-Free
Calling, if available. Refer to the OnStar owner’s guide for
more information.
Pairing Information:
Up to �ve cell phones can be paired to the in-vehicle
Bluetooth system.
The pairing process is disabled when the vehicle is
moving.
The in-vehicle Bluetooth system automatically links
with the �rst available paired cell phone in the
order the phone was paired.
Only one paired cell phone can be connected to the
in-vehicle Bluetooth system at a time.
Pairing should only need to be completed once,
unless changes to the pairing information have
been made or the phone is deleted.
To link to a different paired phone, see Linking to a
Different Phone later in this section.
3-86
Page 231 of 484
Both sets of rear seat headphones may include foam
ear pads.
The foam ear pads can become worn or damaged if
they are not handled or stored properly. They can
be replaced separately from the headphone set.
The headphone replacement foam ear pads can be
ordered in pairs. See your dealer/retailer for more
information.
Battery Replacement
To change the batteries on the headphones:
1. Loosen the screw to the battery door on the left
side of the headphones and slide open.
2. Replace the two batteries in the compartment.
Install correctly using the diagram on the inside
of the battery compartment.
3. Replace the battery door and tighten the door
screw.
If the headphones are to be stored for a long period of
time, remove the batteries and keep them in a cool,
dry place.
Stereo RCA Jacks
The RCA jacks are located behind the video screen.
The RCA jacks allow audio and video signals to be
connected from an auxiliary device such as a camcorder
or a video game unit to the RSE system. Standard RCA
cables, not included, are needed to connect the auxiliary
device to the RCA jacks. The yellow connector inputs
video and the red and white connectors input right and
left audio. Refer to the manufacturer’s instructions for
proper connection of the auxiliary device.
To use the auxiliary inputs on the RSE system, connect
an external auxiliary device to the color-coded RCA jacks
and turn both the auxiliary device and the RSE system
power on. If the RSE system had been previously in the
DVD player mode, pressing the SRCE button on the
faceplate or the remote control switches the RSE system
between the auxiliary device and the DVD player.
3-97
Page 234 of 484
DVD Player Buttons (Without Sunroof)
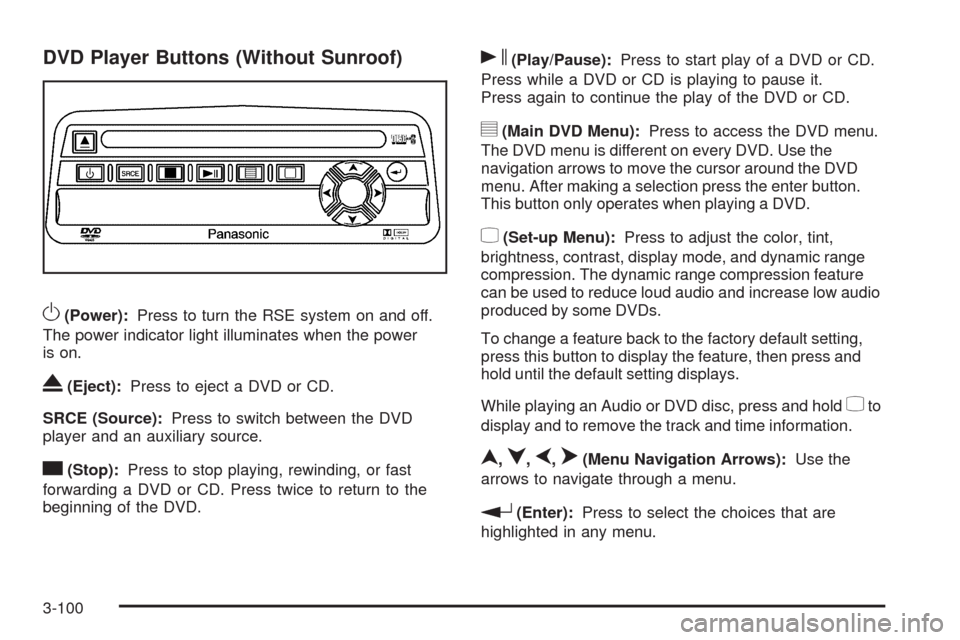
O(Power):Press to turn the RSE system on and off.
The power indicator light illuminates when the power
is on.
X(Eject):Press to eject a DVD or CD.
SRCE (Source):Press to switch between the DVD
player and an auxiliary source.
c(Stop):Press to stop playing, rewinding, or fast
forwarding a DVD or CD. Press twice to return to the
beginning of the DVD.
s(Play/Pause):Press to start play of a DVD or CD.
Press while a DVD or CD is playing to pause it.
Press again to continue the play of the DVD or CD.
y(Main DVD Menu):Press to access the DVD menu.
The DVD menu is different on every DVD. Use the
navigation arrows to move the cursor around the DVD
menu. After making a selection press the enter button.
This button only operates when playing a DVD.
z(Set-up Menu):Press to adjust the color, tint,
brightness, contrast, display mode, and dynamic range
compression. The dynamic range compression feature
can be used to reduce loud audio and increase low audio
produced by some DVDs.
To change a feature back to the factory default setting,
press this button to display the feature, then press and
hold until the default setting displays.
While playing an Audio or DVD disc, press and hold
zto
display and to remove the track and time information.
n,q,p,o(Menu Navigation Arrows):Use the
arrows to navigate through a menu.
r(Enter):Press to select the choices that are
highlighted in any menu.
3-100
Page 238 of 484
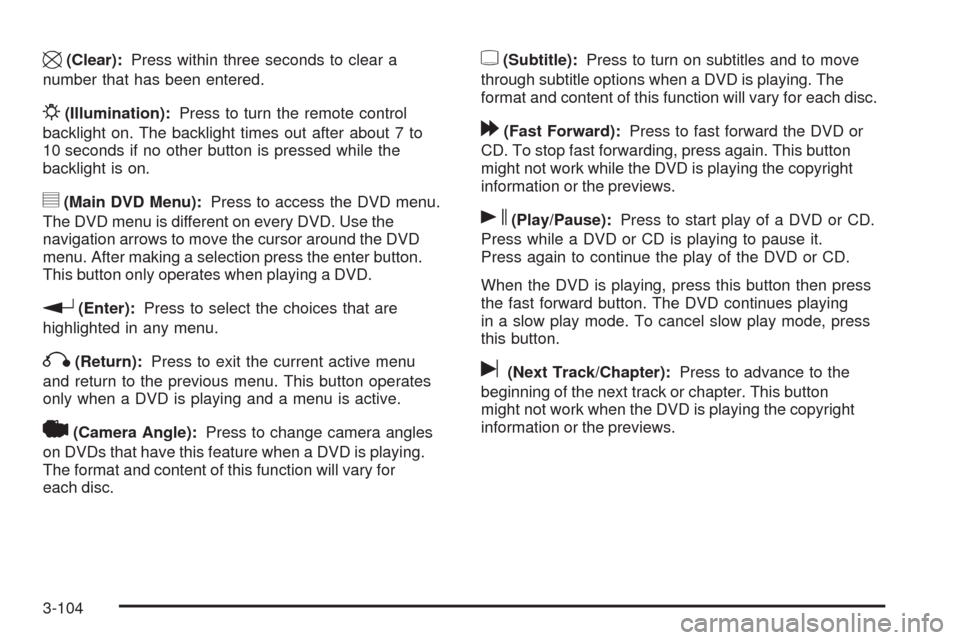
\(Clear):Press within three seconds to clear a
number that has been entered.
P(Illumination):Press to turn the remote control
backlight on. The backlight times out after about 7 to
10 seconds if no other button is pressed while the
backlight is on.
y(Main DVD Menu):Press to access the DVD menu.
The DVD menu is different on every DVD. Use the
navigation arrows to move the cursor around the DVD
menu. After making a selection press the enter button.
This button only operates when playing a DVD.
r(Enter):Press to select the choices that are
highlighted in any menu.
q(Return):Press to exit the current active menu
and return to the previous menu. This button operates
only when a DVD is playing and a menu is active.
|(Camera Angle):Press to change camera angles
on DVDs that have this feature when a DVD is playing.
The format and content of this function will vary for
each disc.
{(Subtitle):Press to turn on subtitles and to move
through subtitle options when a DVD is playing. The
format and content of this function will vary for each disc.
[(Fast Forward):Press to fast forward the DVD or
CD. To stop fast forwarding, press again. This button
might not work while the DVD is playing the copyright
information or the previews.
s(Play/Pause):Press to start play of a DVD or CD.
Press while a DVD or CD is playing to pause it.
Press again to continue the play of the DVD or CD.
When the DVD is playing, press this button then press
the fast forward button. The DVD continues playing
in a slow play mode. To cancel slow play mode, press
this button.
u(Next Track/Chapter):Press to advance to the
beginning of the next track or chapter. This button
might not work when the DVD is playing the copyright
information or the previews.
3-104
Page 239 of 484
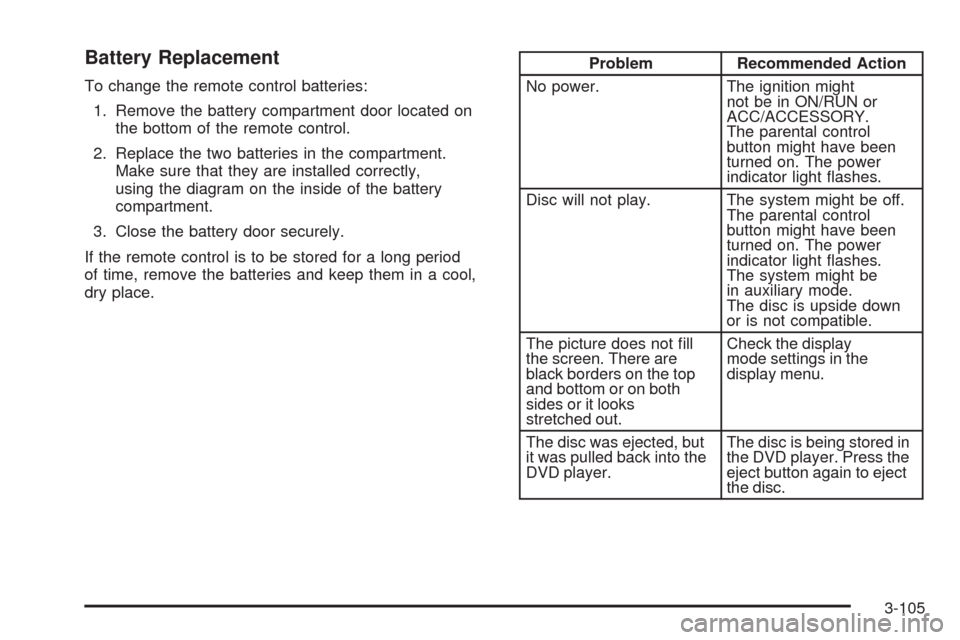
Battery Replacement
To change the remote control batteries:
1. Remove the battery compartment door located on
the bottom of the remote control.
2. Replace the two batteries in the compartment.
Make sure that they are installed correctly,
using the diagram on the inside of the battery
compartment.
3. Close the battery door securely.
If the remote control is to be stored for a long period
of time, remove the batteries and keep them in a cool,
dry place.
Problem Recommended Action
No power. The ignition might
not be in ON/RUN or
ACC/ACCESSORY.
The parental control
button might have been
turned on. The power
indicator light �ashes.
Disc will not play. The system might be off.
The parental control
button might have been
turned on. The power
indicator light �ashes.
The system might be
in auxiliary mode.
The disc is upside down
or is not compatible.
The picture does not �ll
the screen. There are
black borders on the top
and bottom or on both
sides or it looks
stretched out.Check the display
mode settings in the
display menu.
The disc was ejected, but
it was pulled back into the
DVD player.The disc is being stored in
the DVD player. Press the
eject button again to eject
the disc.
3-105
Page 240 of 484
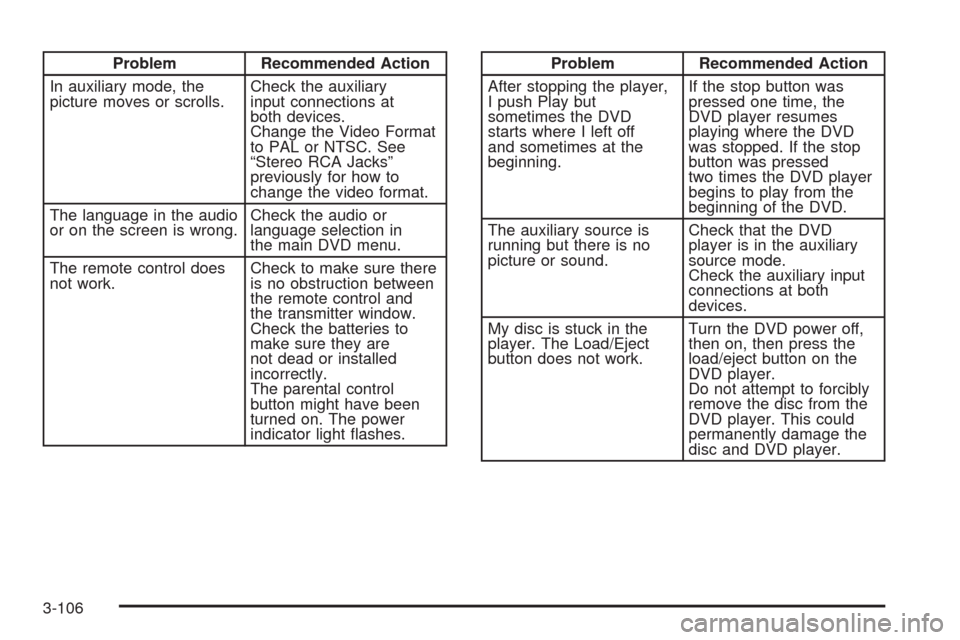
Problem Recommended Action
In auxiliary mode, the
picture moves or scrolls.Check the auxiliary
input connections at
both devices.
Change the Video Format
to PAL or NTSC. See
“Stereo RCA Jacks”
previously for how to
change the video format.
The language in the audio
or on the screen is wrong.Check the audio or
language selection in
the main DVD menu.
The remote control does
not work.Check to make sure there
is no obstruction between
the remote control and
the transmitter window.
Check the batteries to
make sure they are
not dead or installed
incorrectly.
The parental control
button might have been
turned on. The power
indicator light �ashes.Problem Recommended Action
After stopping the player,
I push Play but
sometimes the DVD
starts where I left off
and sometimes at the
beginning.If the stop button was
pressed one time, the
DVD player resumes
playing where the DVD
was stopped. If the stop
button was pressed
two times the DVD player
begins to play from the
beginning of the DVD.
The auxiliary source is
running but there is no
picture or sound.Check that the DVD
player is in the auxiliary
source mode.
Check the auxiliary input
connections at both
devices.
My disc is stuck in the
player. The Load/Eject
button does not work.Turn the DVD power off,
then on, then press the
load/eject button on the
DVD player.
Do not attempt to forcibly
remove the disc from the
DVD player. This could
permanently damage the
disc and DVD player.
3-106
Page 245 of 484
XM™ Satellite Radio Service
XM Satellite Radio Service gives digital radio reception
from coast-to-coast in the 48 contiguous United States,
and in Canada. Just as with FM, tall buildings or hills can
interfere with satellite radio signals, causing the sound to
fade in and out. In addition, traveling or standing under
heavy foliage, bridges, garages, or tunnels may cause
loss of the XM signal for a period of time.
Cellular Phone Usage
Cellular phone usage may cause interference with the
vehicle’s radio. This interference may occur when making
or receiving phone calls, charging the phone’s battery,
or simply having the phone on. This interference causes
an increased level of static while listening to the radio.
If static is received while listening to the radio, unplug
the cellular phone and turn it off.
Fixed Mast Antenna
The �xed mast antenna can withstand most car washes
without being damaged. If the mast becomes slightly
bent, straighten it out by hand. If the mast is badly bent,
replace it.
Occasionally check to make sure the antenna is
tightened to its base. If tightening is required, tighten
by hand until fully seated plus one quarter turn.
XM™ Satellite Radio Antenna
System
The XM Satellite Radio antenna is located on the roof of
the vehicle. Keep the antenna clear of obstructions for
clear radio reception.
If the vehicle has a sunroof, the performance of the XM
system may be affected if the sunroof is open.
Chime Level Adjustment
The radio is used to adjust the vehicle’s chime level.
To change the volume level of the chime, press and hold
pushbutton 6 with the ignition on and the radio power off.
The volume level will change from the normal level to
loud, and LOUD CHIME will appear on the radio display.
To change back to the default or normal setting, press
and hold pushbutton 6 again. The volume level will
change from the loud level to normal, and NORMAL
CHIME will appear on the radio display. Removing the
radio and not replacing it with a factory radio or chime
module will disable vehicle chimes.
3-111
Page 251 of 484
Antilock Brake System (ABS)
This vehicle has the Antilock Brake System (ABS), an
advanced electronic braking system that will help
prevent a braking skid.
When the engine is started and the vehicle begins to
drive away, ABS checks itself. A momentary motor or
clicking noise might be heard while this test is going on.
This is normal.
If there is a problem with
ABS, this warning light
stays on. SeeAntilock
Brake System (ABS)
Warning Light on
page 3-37.
Along with ABS, the vehicle has a Dynamic Rear
Proportioning (DRP) system. If there is a DRP problem,
both the brake and ABS warning lights come on
accompanied by a 10-second chime. The lights and
chime will come on each time the ignition is turned on
until the problem is repaired. See your dealer/retailer for
service.Let us say the road is wet and you are driving safely.
Suddenly, an animal jumps out in front of you. You
slam on the brakes and continue braking. Here is what
happens with ABS:
A computer senses that the wheels are slowing down.
If one of the wheels is about to stop rolling, the computer
will separately work the brakes at each front wheel
and at both rear wheels.
ABS can change the brake pressure to each wheel, as
required, faster than any driver could. This can help
the driver steer around the obstacle while braking hard.
As the brakes are applied, the computer keeps
receiving updates on wheel speed and controls braking
pressure accordingly.
Remember: ABS does not change the time needed to get
a foot up to the brake pedal or always decrease stopping
distance. If you get too close to the vehicle in front of you,
there will not be enough time to apply the brakes if that
vehicle suddenly slows or stops. Always leave enough
room up ahead to stop, even with ABS.
4-5
Page 264 of 484
Controlling the vehicle is the key to successful off-road
driving. One of the best ways to control the vehicle
is to control the speed. At higher speeds:
You approach things faster and have less time to
react.
There is less time to scan the terrain for obstacles.
The vehicle has more bounce when driving over
obstacles.
More braking distance is needed, especially on an
unpaved surface.
{CAUTION:
When you are driving off-road, bouncing and quick
changes in direction can easily throw you out of
position. This could cause you to lose control and
crash. So, whether you are driving on or off the
road, you and your passengers should wear
safety belts.
Scanning the Terrain
Off-road driving can take you over many different kinds
of terrain. Be familiar with the terrain and its many
different features.
Surface Conditions:Off-roading surfaces can be
hard-packed dirt, gravel, rocks, grass, sand, mud, snow,
or ice. Each of these surfaces affects the vehicle’s
steering, acceleration, and braking in different ways.
Depending on the surface, slipping, sliding, wheel
spinning, delayed acceleration, poor traction, and longer
braking distances can occur.
Surface Obstacles:Unseen or hidden obstacles can
be hazardous. A rock, log, hole, rut, or bump can startle
you if you are not prepared for them. Often these
obstacles are hidden by grass, bushes, snow, or even
the rise and fall of the terrain itself.
Some things to consider:
Is the path ahead clear?
Will the surface texture change abruptly up ahead?
Does the travel take you uphill or downhill?
Will you have to stop suddenly or change direction
quickly?
4-18