air condition CHEVROLET TRAVERSE 2010 1.G Owner's Manual
[x] Cancel search | Manufacturer: CHEVROLET, Model Year: 2010, Model line: TRAVERSE, Model: CHEVROLET TRAVERSE 2010 1.GPages: 448, PDF Size: 6.96 MB
Page 248 of 448
8-8 Climate Controls
The air conditioning system
removes moisture from the air, so
water might drip under the vehicle
while idling or after turning off the
engine. This is normal.
@(Recirculation):Press to turn
the recirculation mode on or off. An
indicator light comes on when
recirculation is on. When the engine
is turned off, the recirculation mode
automatically turns off and must be
re‐selected when the engine is
turned on again.
This mode recirculates and helps to
quickly cool the air inside the
vehicle. It can be used to prevent
outside air and odors from entering
the vehicle.
The recirculation mode cannot be
used with floor, defog, or defrosting
modes. If recirculation is selected in
these modes, the indicator flashes
three times and turns off. The air
conditioning compressor also comes
on when this mode is activated.
While in recirculation mode the
windows can fog when the weather is cold and damp. To clear the fog,
select either the defog or defrost
mode and increase the fan speed.
REAR:
Press to turn the rear
heating and air conditioning on or
off. See Rear Climate Control
System (Rear Climate Control Only)
on page 8‑10or Rear Climate
Control System (Rear Climate with
Rear Seat Audio) on page 8‑11.
Rear Window Defogger
The rear window defogger uses a
warming grid to remove fog from the
rear window.
<(Rear Window Defogger):
Press to turn the rear window
defogger on or off. The rear window
defogger stays on for about
10 minutes, before turning off. The
defogger also turns off when the
engine is turned off. Do not drive the
vehicle until all the windows are
clear. For vehicles with heated outside
rearview mirrors, fog or frost is
cleared from the surface of the
mirror when the rear window defog
button is pressed.
Notice:
Do not use a razor blade
or sharp object to clear the inside
rear window. Do not adhere
anything to the defogger grid
lines in the rear glass. These
actions may damage the rear
defogger. Repairs would not be
covered by your warranty.
Page 252 of 448
8-12 Climate Controls
N(Air Delivery Mode Control):
Press to manually change the
direction of the airflow. Repeatedly
press the button until the desired
mode appears on the display.
H(Vent): Air is directed through
the overhead outlets.
)(Bi-Level): Air is directed
through the rear floor outlets, as
well as the overhead outlets.
6(Floor): Air is directed through
the floor outlets. The rear system
floor outlets are located under the
third row seats.
Air Vents
Use the slider switch in the center of
the outlet, to change the direction of
the air flow. Use the thumbwheel
near the outlet to control the amount
of air flow or to shut off the airflow.
Keep all outlets open whenever
possible for best system
performance.
Operation Tips
.Clear away any ice, snow,
or leaves from the air inlets at
the base of the windshield that
can block the flow of air into the
vehicle.
.Use of non-GM approved hood
deflectors can adversely affect
the performance of the system.
.Keep the path under all seats
clear of objects to help circulate
the air inside the vehicle more
effectively.
.If fogging reoccurs while in vent
or bi-level modes with mild
temperature throughout the
vehicle, turn on the air
conditioner to reduce windshield
fogging.
Page 282 of 448
9-30 Driving and Operating
Traction control can be turned on by
pressing and releasing the traction
control disable button if not
automatically shut off for any other
reason.
When the traction control system is
turned off, the StabiliTrak light and
the appropriate traction control off
message will be displayed on the
DIC to warn the driver. The vehicle
will still have brake-traction control
when traction control is off, but will
not be able to use the engine speed
management system. See“Traction
Control Operation” next for more
information.
When the traction control system
has been turned off, system noises
may be heard and felt as a result of
the brake-traction control working.
It is recommended to leave the
system on for normal driving
conditions, but it may be necessary
to turn the system off if the vehicle
is stuck in sand, mud, ice or snow,
and you want to “rock”the vehicle to
attempt to free it. It may also be necessary to turn off the system
when driving in extreme off-road
conditions where high wheel spin is
required. See
If the Vehicle is Stuck
on page 9‑11.
Traction Control Operation
The traction control system is part of
the StabiliTrak system. Traction
control limits wheel spin by reducing
engine power to the wheels (engine
speed management) and by
applying brakes to each individual
wheel (brake-traction control) as
necessary.
The traction control system is
enabled automatically when the
vehicle is started. It will activate and
the StabiliTrak light will flash if it
senses that any of the wheels are
spinning or beginning to lose
traction while driving. If traction
control is turned off, only the
brake-traction control portion of
traction control will work. The
engine speed management will be
disabled. In this mode, engine
power is not reduced automatically and the driven wheels can spin
more freely. This can cause the
brake-traction control to activate
constantly.
Notice:
If the wheel(s) of one axle
is allowed to spin excessively
while the StabiliTrak, ABS and
brake warning lights and any
relevant DIC messages are
displayed, the transfer case could
be damaged. The repairs would
not be covered by the vehicle
warranty. Reduce engine power
and do not spin the wheel(s)
excessively while these lights and
messages are displayed.
The traction control system may
activate on dry or rough roads or
under conditions such as heavy
acceleration while turning or abrupt
upshifts/downshifts of the
transmission. When this happens, a
reduction in acceleration may be
noticed, or a noise or vibration may
be heard. This is normal.
Page 286 of 448
9-34 Driving and Operating
How the System Works
URPA comes on automatically when
the shift lever is moved into
R (Reverse). A single tone sounds
to indicate the system is working.
URPA operates only at speeds less
than 5 mph (8 km/h).
An obstacle is indicated by audible
beeps. The interval between the
beeps becomes shorter as the
vehicle gets closer to the obstacle.
When the distance is less than
30 cm (12 in) the beeps are
continuous.
To be detected, objects must be at
least 25.4 cm (10 in) off the ground
and below liftgate level. Objects
must also be within 2.5 m (8 ft) from
the rear bumper. This distance may
be less during warmer or humid
weather.
The system can be disabled through
the Driver Information Center (DIC).
See“Park Assist” underVehicle
Personalization (With DIC Buttons)
on page 5‑40for more information.
When the System Does Not
Seem to Work Properly
If the URPA system does not
activate due to a temporary
condition, the message PARK
ASSIST OFF displays on the DIC
when the shift lever is moved into
R (Reverse). This may occur under
the following conditions:
.The driver disables the system.
.The ultrasonic sensors are not
clean. Keep the vehicle's rear
bumper free of mud, dirt, snow,
ice and slush. For cleaning
instructions, see Exterior Care
on page 10‑86.
.A trailer was attached to the
vehicle, or a bicycle or an object
was hanging out of the liftgate
during the last drive cycle. Once
the attached object is removed,
URPA will return to normal
operation.
.A tow bar is attached to the
vehicle.
.The vehicle's bumper is
damaged. Take the vehicle to
your dealer to repair the system.
.Other conditions may affect
system performance, such as
vibrations from a jackhammer or
the compression of air brakes on
a very large truck.
If the system is still disabled, after
driving forward at least 25 km/h
(15 mph), take the vehicle to your
dealer.
Page 293 of 448
Driving and Operating 9-41
California Fuel
Requirements
If the vehicle is certified to meet
California Emissions Standards, it is
designed to operate on fuels that
meet California specifications. See
the underhood emission control
label. If this fuel is not available in
states adopting California emissions
standards, the vehicle will operate
satisfactorily on fuels meeting
federal specifications, but emission
control system performance might
be affected. The malfunction
indicator lamp could turn on and the
vehicle might fail a smog‐check test.
SeeMalfunction Indicator Lamp
on
page 5‑16. If this occurs, return to
your authorized dealer for diagnosis.
If it is determined that the condition
is caused by the type of fuel used,
repairs might not be covered by the
vehicle warranty.
Fuels in Foreign
Countries
If you plan on driving in another
country outside the United States or
Canada, the proper fuel might be
hard to find. Never use leaded
gasoline or any other fuel not
recommended in the previous text
on fuel. Costly repairs caused by
use of improper fuel would not be
covered by the vehicle warranty.
To check the fuel availability, ask an
auto club, or contact a major oil
company that does business in the
country where you will be driving.
Fuel Additives
To provide cleaner air, all gasolines
in the United States are now
required to contain additives that
help prevent engine and fuel system
deposits from forming, allowing the
emission control system to work
properly. In most cases, nothing
should have to be added to the fuel.
However, some gasolines contain
only the minimum amount of
additive required to meet U.S.
Environmental Protection Agency
regulations. To help keep fuel
injectors and intake valves clean,
or if the vehicle experiences
problems due to dirty injectors or
valves, look for gasoline that is
advertised as TOP TIER Detergent
Gasoline. Look for the TOP TIER
label on the fuel pump to ensure
gasoline meets enhanced
detergency standards developed by
the auto companies. A list of
marketers providing TOP TIER
Detergent Gasoline can be found at
www.toptiergas.com.
Page 320 of 448
10-12 Vehicle Care
The transmission fluid will not reach
the end of the dipstick unless the
transmission is at operating
temperature. If you need to check
the transmission fluid level, please
take the vehicle to your dealer.
Engine Air Cleaner/Filter
When to Inspect the Engine Air
Cleaner/Filter
Inspect the air cleaner/filter at the
MaintenanceIIintervals and replace
it at the first oil change after each
80 000 km (50,000 mile) interval.
See Scheduled Maintenance
on
page 11‑2for more information.
If you are driving in dusty/dirty
conditions, inspect the filter at each
engine oil change. See
Engine Compartment Overview
on page 10‑6for the location of the
engine air cleaner/filter.
How to Inspect the Engine Air
Cleaner/Filter
To inspect the air cleaner/filter,
remove the filter from the vehicle
and lightly shake the filter (away
from vehicle) to release loose dust
and dirt. If the filter remains caked
with dirt, a new filter is required. To inspect or replace the engine air
cleaner/filter:
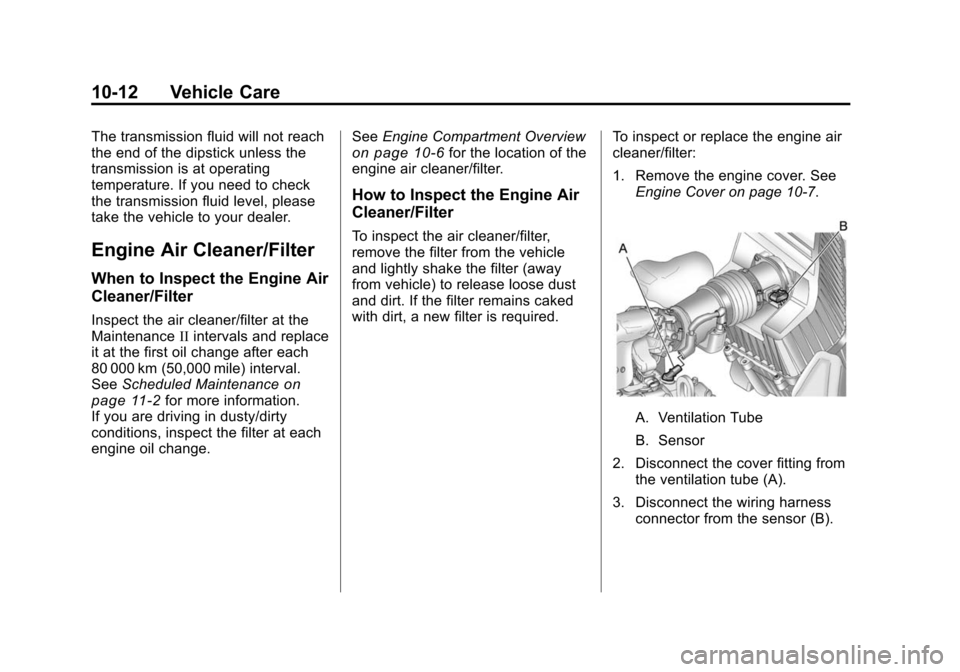
1. Remove the engine cover. See
Engine Cover on page 10‑7.
A. Ventilation Tube
B. Sensor
2. Disconnect the cover fitting from the ventilation tube (A).
3. Disconnect the wiring harness connector from the sensor (B).
Page 327 of 448
Vehicle Care 10-19
If Steam Is Coming From The
Engine Compartment
{WARNING
Steam from an overheated engine
can burn you badly, even if you
just open the hood. Stay away
from the engine if you see or hear
steam coming from it. Turn it off
and get everyone away from the
vehicle until it cools down. Wait
until there is no sign of steam or
coolant before you open
the hood.
If you keep driving when the
vehicles engine is overheated,
the liquids in it can catch fire. You
or others could be badly burned.
Stop the engine if it overheats,
and get out of the vehicle until the
engine is cool.(Continued)
WARNING (Continued)
SeeOverheated Engine
Protection Operating Mode
on
page 10‑20
for information on
driving to a safe place in an
emergency.
If No Steam Is Coming From
The Engine Compartment
If an engine overheat warning is
displayed but no steam can be seen
or heard, the problem may not be
too serious. Sometimes the engine
can get a little too hot when the
vehicle:
.Climbs a long hill on a hot day.
.Stops after high-speed driving.
.Idles for long periods in traffic.
.Tows a trailer. If the overheat warning is displayed
with no sign of steam:
1. Turn the air conditioning off.
2. Turn the heater on to the highest
temperature and to the highest
fan speed. Open the windows as
necessary.
3. If in a traffic jam, shift to N (Neutral), otherwise, shift to
the highest gear while
driving —D (Drive) or L (Low).
If the temperature overheat gauge is
no longer in the overheat zone or an
overheat warning no longer
displays, the vehicle can be driven.
Continue to drive the vehicle slow
for about 10 minutes. Keep a safe
vehicle distance from the car in front
of you. If the warning does not come
back on, continue to drive normally.
If the warning continues, pull over,
stop, and park the vehicle
right away.
If there is no sign of steam, idle the
engine for three minutes while
parked. If the warning is still
Page 328 of 448
10-20 Vehicle Care
displayed, turn off the engine until it
cools down. Also, see“Overheated
Engine Protection Operating Mode”
next in this section.
Overheated Engine
Protection
Operating Mode
This emergency operating mode lets
the vehicle be driven to a safe place
in an emergency situation. If an
overheated engine condition exists,
an overheat protection mode which
alternates firing groups of cylinders
helps prevent engine damage. In
this mode, there is a significant loss
in power and engine performance.
The temperature gauge indicates an
overheat condition exists. Driving
extended distances and/or towing a
trailer in the overheat protection
mode should be avoided.
Notice: After driving in the
overheated engine protection
operating mode, to avoid engine
damage, allow the engine to cool
before attempting any repair. The engine oil will be severely
degraded. Repair the cause of
coolant loss, change the oil and
reset the oil life system. See
Engine Oil on page 10‑8.
Power Steering Fluid
The power steering fluid reservoir is
located under the engine cover on
the passenger side of the vehicle.
See
Engine Compartment Overview
on page 10‑6for reservoir location.
When to Check Power Steering
Fluid
It is not necessary to regularly
check power steering fluid unless
you suspect there is a leak in the
system or you hear an unusual noise. A fluid loss in this system
could indicate a problem. Have the
system inspected and repaired.
How to Check Power Steering
Fluid
To check the power steering fluid:
1. Turn the key off and let the
engine compartment cool down.
2. Remove the engine cover. See Engine Cover on page 10‑7.
3. Wipe the cap and the top of the reservoir clean.
4. Unscrew the cap and wipe the dipstick with a clean rag.
5. Replace the cap and completely tighten it.
6. Remove the cap again and look at the fluid level on the dipstick.
The fluid level should be
somewhere between MAX and MIN
line on the dipstick in room
temperature. If the fluid is on or
below MIN line, you should add fluid
close to MAX Line.
Page 330 of 448
10-22 Vehicle Care
Brakes
This vehicle has disc brakes. Disc
brake pads have built-in wear
indicators that make a high-pitched
warning sound when the brake pads
are worn and new pads are needed.
The sound can come and go or be
heard all the time the vehicle is
moving, except when applying the
brake pedal firmly.
{WARNING
The brake wear warning sound
means that soon the brakes will
not work well. That could lead to
an accident. When the brake
wear warning sound is heard,
have the vehicle serviced.
Notice: Continuing to drive with
worn-out brake pads could result
in costly brake repair. Some driving conditions or climates
can cause a brake squeal when the
brakes are first applied or lightly
applied. This does not mean
something is wrong with the brakes.
Properly torqued wheel nuts are
necessary to help prevent brake
pulsation. When tires are rotated,
inspect brake pads for wear and
evenly tighten wheel nuts in the
proper sequence to torque
specifications in
Capacities and
Specifications on page 12‑2.
Brake linings should always be
replaced as complete axle sets.
Brake Pedal Travel
See your dealer if the brake pedal
does not return to normal height,
or if there is a rapid increase in
pedal travel. This could be a sign
that brake service might be
required.
Brake Adjustment
Every time the brakes are applied,
with or without the vehicle moving,
the brakes adjust for wear.
Replacing Brake System Parts
The braking system on a vehicle is
complex. Its many parts have to be
of top quality and work well together
if the vehicle is to have really good
braking. The vehicle was designed
and tested with top-quality brake
parts. When parts of the braking
system are replaced, be sure to get
new, approved replacement parts.
If this is not done, the brakes might
not work properly. For example,
installing disc brake pads that are
wrong for the vehicle, can change
the balance between the front and
rear brakes —for the worse. The
braking performance expected can
change in many other ways if the
wrong replacement brake parts are
installed.
Page 339 of 448
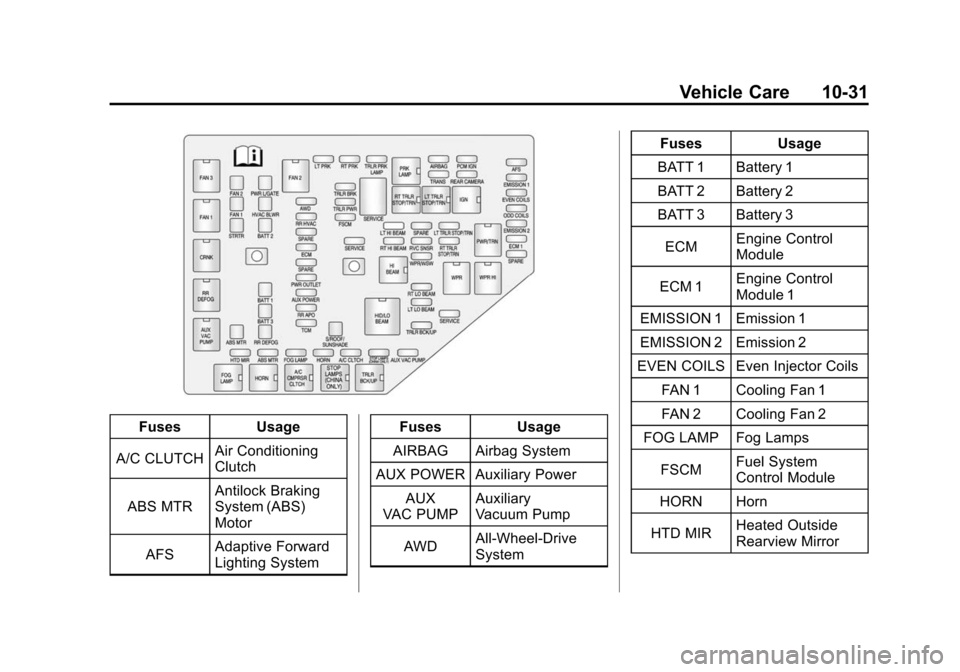
Vehicle Care 10-31
FusesUsage
A/C CLUTCH Air Conditioning
Clutch
ABS MTR Antilock Braking
System (ABS)
Motor
AFS Adaptive Forward
Lighting System Fuses
Usage
AIRBAG Airbag System
AUX POWER Auxiliary Power AUX
VAC PUMP Auxiliary
Vacuum Pump
AWD All-Wheel-Drive
System Fuses
Usage
BATT 1 Battery 1
BATT 2 Battery 2
BATT 3 Battery 3
ECM Engine Control
Module
ECM 1 Engine Control
Module 1
EMISSION 1 Emission 1
EMISSION 2 Emission 2
EVEN COILS Even Injector Coils FAN 1 Cooling Fan 1
FAN 2 Cooling Fan 2
FOG LAMP Fog Lamps
FSCM Fuel System
Control Module
HORN Horn
HTD MIR Heated Outside
Rearview Mirror