spare wheel CHEVROLET TRAVERSE 2010 1.G Owner's Manual
[x] Cancel search | Manufacturer: CHEVROLET, Model Year: 2010, Model line: TRAVERSE, Model: CHEVROLET TRAVERSE 2010 1.GPages: 448, PDF Size: 6.96 MB
Page 384 of 448

10-76 Vehicle Care
To release the spare tire from the
secondary latch:
{WARNING
Someone standing too close
during the procedure could be
injured by the jack. If the spare
tire does not slide off the jack
completely, make sure no one is
behind you or on either side of
you as you pull the jack out from
under the spare.
1. If the cable is not visible, start this procedure at Step 3.
All‐Wheel‐Drive Vehicle shown
2. Turn the lug wrench counterclockwise until
approximately 6 inches (15 cm)
of cable is exposed.
3. Attach the lug wrench to the jack and raise the jack at least
10 turns.
4. Place the jack under the vehicle, ahead of the rear bumper.
Position the center lift point of
the jack under the center of the
spare tire. 5. Turn the lug wrench clockwise to
raise the jack until it lifts the
secondary latch spring.
6. Keep raising the jack until the spare tire stops moving upward
and is held firmly in place. This
lets you know that the secondary
latch has released and the spare
tire is balancing on the jack.
7. Lower the jack by turning the lugwrench counterclockwise. Keep
lowering the jack until the spare
tire slides off the jack.
Page 385 of 448

Vehicle Care 10-77
8. Disconnect the lug wrench fromthe jack and carefully remove
the jack. Use one hand to push
against the spare tire while firmly
pulling the jack out from under
the spare tire with the
other hand.
9. Tilt the retainer and slip it through the wheel opening when
the spare tire has been
completely lowered.
10. Turn the lug wrench clockwise to raise the cable back up if the
cable is hanging. Have the hoist shaft assembly
inspected as soon as you can. You
will not be able to store a spare tire
using the hoist assembly until it has
been repaired or replaced.
Compact Spare Tire
{WARNING
Driving with more than one
compact spare tire at a time could
result in loss of braking and
handling. This could lead to a
crash and you or others could be
injured. Use only one compact
spare tire at a time.
The compact spare tire, if the
vehicle has one, was fully inflated
when the vehicle was new, however,
it can lose air after a time. Check
the inflation pressure regularly.
It should be 60 psi (420 kPa). After installing the compact spare
on the vehicle, stop as soon as
possible and make sure the spare
tire is correctly inflated. The
compact spare is made to perform
well at speeds up to 65 mph
(105 km/h) for distances up to
3,000 miles (5 000 km), so you can
finish your trip and have the full-size
tire repaired or replaced at your
convenience. Of course, it is best to
replace the spare with a full-size tire
as soon as possible. The spare tire
will last longer and be in good
shape in case it is needed again.
Notice:
When the compact spare
is installed, do not take the
vehicle through an automatic car
wash with guide rails. The
compact spare can get caught on
the rails which can damage the
tire, wheel and other parts of the
vehicle.
Do not use the compact spare on
other vehicles.
Page 386 of 448
10-78 Vehicle Care
And do not mix the compact spare
tire or wheel with other wheels or
tires. They will not fit. Keep the
spare tire and its wheel together.
The All-Wheel Drive (AWD) system
will be automatically disabled when
you use the compact spare. To
restore the AWD and prevent
excessive wear on the clutch in your
AWD, replace the compact spare
tire with a full-size tire as soon as
possible.
Notice:Tire chains will not fit the
compact spare. Using them can
damage the vehicle and can
damage the chains too. Do not
use tire chains on the compact
spare.Jump Starting
If the vehicle's battery has run
down, you may want to use another
vehicle and some jumper cables to
start your vehicle. Be sure to use
the following steps to do it safely.
{WARNING
Batteries can hurt you. They can
be dangerous because:
.They contain acid that can
burn you.
.They contain gas that can
explode or ignite.
.They contain enough
electricity to burn you.
If you do not follow these steps
exactly, some or all of these
things can hurt you. Notice:
Ignoring these steps
could result in costly damage to
the vehicle that would not be
covered by the warranty.
Trying to start the vehicle by
pushing or pulling it will not
work, and it could damage the
vehicle.
1. Check the other vehicle. It must
have a 12‐volt battery with a
negative ground system.
Notice: If the other vehicle's
system is not a 12-volt system
with a negative ground, both
vehicles can be damaged. Only
use vehicles with 12-volt systems
with negative grounds to jump
start your vehicle.
2. Get the vehicles close enough so the jumper cables can reach,
but be sure the vehicles are not
touching each other. If they are,
it could cause a ground
connection you do not want. You
would not be able to start your
Page 392 of 448
10-84 Vehicle Care
6. To prevent the battery fromdraining while the vehicle is
being towed, remove the 50 amp
BATT1 fuse from the underhood
fuse block and store in a safe
location. See Engine
Compartment Fuse Block
on
page 10‑30.
7. Release the parking brake.
Notice: If the vehicle is towed
without performing each of the
steps listed under “Dinghy
Towing,” the automatic
transmission could be damaged.
Be sure to follow all steps of the
dinghy towing procedure prior to
and after towing the vehicle.
Notice: If 105 km/h (65 mph) is
exceeded while towing the
vehicle, it could be damaged.
Never exceed 105 km/h (65 mph)
while towing the vehicle. Once the destination is reached:
1. Set the parking brake.
2. Reinstall the 50 amp BATT1 fuse
to the underhood fuse block.
3. Shift the transmission to P (Park), turn the ignition to
LOCK/OFF and remove the key
from the ignition.
4. Disconnect the vehicle from the towing vehicle.
Notice: Do not tow a vehicle with
the front drive wheels on the
ground if one of the front tires is
a compact spare tire. Towing with
two different tire sizes on the
front of the vehicle can cause
severe damage to the
transmission.
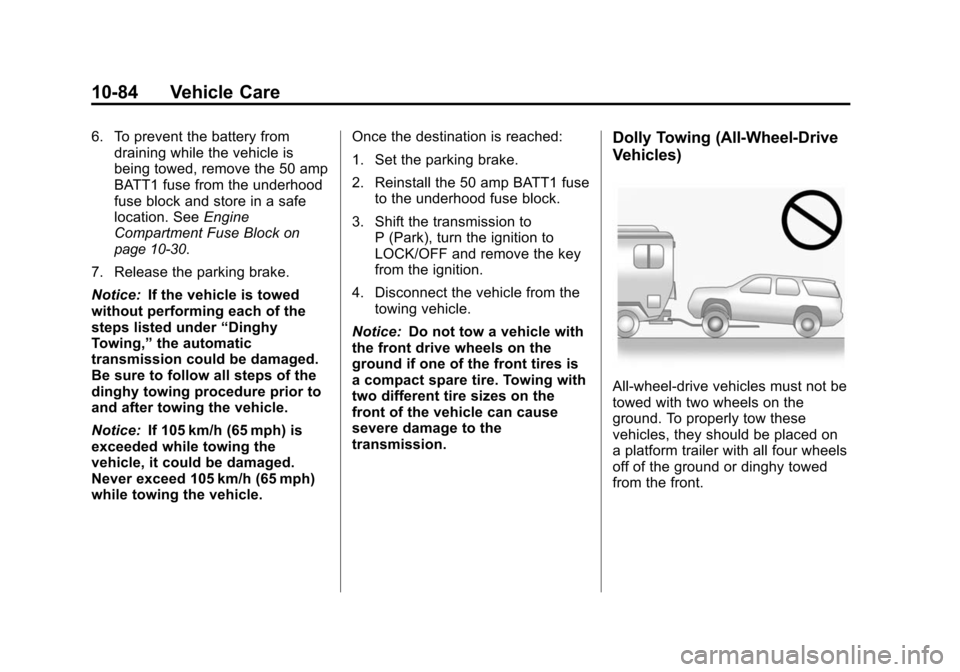
Dolly Towing (All-Wheel‐Drive
Vehicles)
All-wheel‐drive vehicles must not be
towed with two wheels on the
ground. To properly tow these
vehicles, they should be placed on
a platform trailer with all four wheels
off of the ground or dinghy towed
from the front.
Page 444 of 448

i-10 INDEX
ShiftingInto Park . . . . . . . . . . . . . . . . . . . . . . 9-18
Out of Park . . . . . . . . . . . . . . . . . . . 9-19
Sidemarker and Stoplamps Bulb Replacement . . . . . . . . . . 10-25
Signals, Turn and Lane-Change . . . . . . . . . . . . . . . . . 6-3
Spare Tire Compact . . . . . . . . . . . . . . . . . . . . 10-72
Specifications and Capacities . . . . . . . . . . . . . . . . . . . . 12-2
Speedometer . . . . . . . . . . . . . . . . . . 5-12
StabiliTrak System . . . . . . . . . . . . . 9-27
StabiliTrak
®Indicator Light . . . . 5-19
Start Vehicle, Remote . . . . . . . . . . 2-4
Starter Switch Check . . . . . . . . . 10-22
Starting the Engine . . . . . . . . . . . . 9-16
Steering . . . . . . . . . . . . . . . . . . . . . . . . 9-4 Fluid, Power . . . . . . . . . . . . . . . . 10-18
Wheel Adjustment . . . . . . . . . . . . . 5-2
Wheel Controls . . . . . . . . . . . . . . . . 5-3 Storage Areas
Armrest . . . . . . . . . . . . . . . . . . . . . . . . 4-1
Cargo Cover . . . . . . . . . . . . . . . . . . . 4-3
Cargo Management System . . . 4-3
Center Console . . . . . . . . . . . . . . . . 4-1
Convenience Net . . . . . . . . . . . . . . 4-3
Floor Console . . . . . . . . . . . . . . . . . 4-2
Glove Box . . . . . . . . . . . . . . . . . . . . . 4-1
Instrument Panel . . . . . . . . . . . . . . 4-1
Roof Rack System . . . . . . . . . . . . . 4-4
Storing the Tire Sealant
and Compressor Kit . . . . . . . . . 10-61
Stuck Vehicle . . . . . . . . . . . . . . . . . . . 9-9
Sun Visors . . . . . . . . . . . . . . . . . . . . . 2-20
Sunroof . . . . . . . . . . . . . . . . . . . . . . . . 2-20
Symbols . . . . . . . . . . . . . . . . . . . . . . . . . . iv
System Roof Rack . . . . . . . . . . . . . . . . . . . . . 4-4
System Check Automatic TransmissionShiftlock Control . . . . . . . . . . 10-23
T
Tachometer . . . . . . . . . . . . . . . . . . . . 5-12
Taillamps
Bulb Replacement . . . . . . . . . . 10-25
Text Telephone (TTY) Users . . . 13-4
Theft-Deterrent Systems . . . . . . . 2-13 Immobilizer . . . . . . . . . . . . . . . . . . . 2-13
Third-Row Seats . . . . . . . . . . . . . . . 3-11
Time . . . . . . . . . . . . . . . . . . . . . . . . . . . . 5-8
Tires Buying New Tires . . . . . . . . . . . 10-47
Chains . . . . . . . . . . . . . . . . . . . . . . 10-51
Changing . . . . . . . . . . . . . . . . . . . 10-61
Compact Spare . . . . . . . . . . . . . 10-72
Designations . . . . . . . . . . . . . . . 10-36
Different Size . . . . . . . . . . . . . . . 10-48
If a Tire Goes Flat . . . . . . . . . . 10-52
Inflation Monitor System . . . . 10-42
Inspection . . . . . . . . . . . . . . . . . . 10-45
Messages . . . . . . . . . . . . . . . . . . . . 5-37
Pressure Light . . . . . . . . . . . . . . . . 5-20
Pressure Monitor System . . . 10-41
Rotation . . . . . . . . . . . . . . . . . . . . 10-45
Sealant andCompressor Kit . . . . . . . . . . . 10-53