ECO CHEVROLET TRAVERSE 2016 1.G Owners Manual
[x] Cancel search | Manufacturer: CHEVROLET, Model Year: 2016, Model line: TRAVERSE, Model: CHEVROLET TRAVERSE 2016 1.GPages: 392, PDF Size: 6.66 MB
Page 219 of 392
Chevrolet Traverse Owner Manual (GMNA-Localizing-U.S./Canada/Mexico-
9159264) - 2016 - crc - 8/17/15
218 Driving and Operating
Caution
If the steering wheel is turned
until it reaches the end of its
travel, and is held in that position
for more than 15 seconds,
damage may occur to the power
steering system and there may be
loss of power steering assist.
Curve Tips
.Take curves at a reasonable
speed.
. Reduce speed before entering a
curve.
. Maintain a reasonable, steady
speed through the curve.
. Wait until the vehicle is out of
the curve before accelerating
gently into the straightaway.
Steering in Emergencies
.
There are some situations when
steering around a problem may
be more effective than braking. .
Holding both sides of the
steering wheel allows you to turn
180 degrees without removing
a hand.
. Antilock Brake System (ABS)
allows steering while braking.
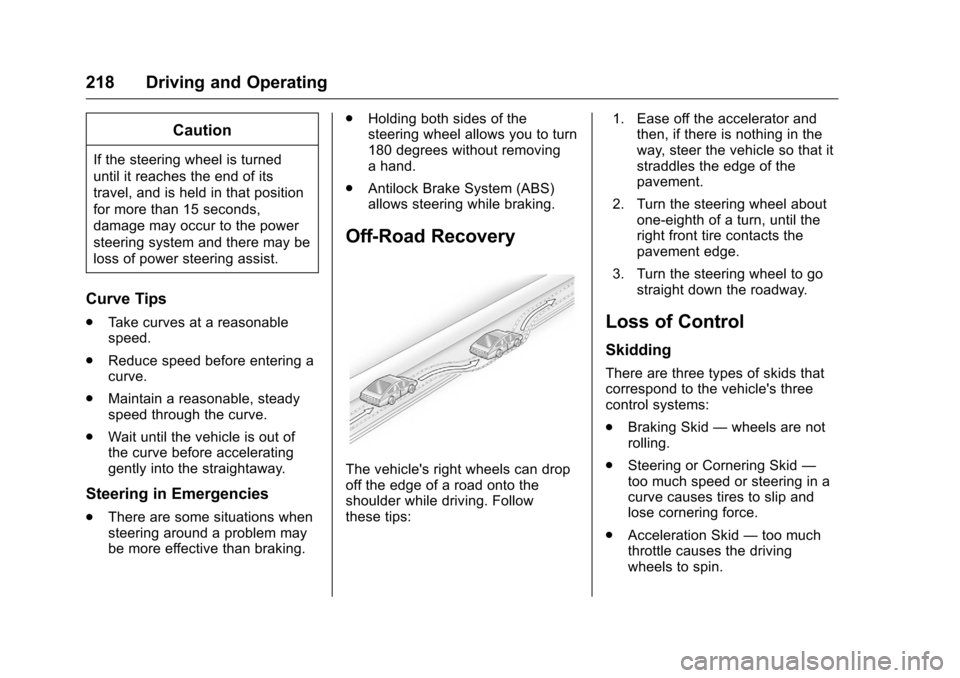
Off-Road Recovery
The vehicle's right wheels can drop
off the edge of a road onto the
shoulder while driving. Follow
these tips: 1. Ease off the accelerator and
then, if there is nothing in the
way, steer the vehicle so that it
straddles the edge of the
pavement.
2. Turn the steering wheel about one-eighth of a turn, until the
right front tire contacts the
pavement edge.
3. Turn the steering wheel to go straight down the roadway.
Loss of Control
Skidding
There are three types of skids that
correspond to the vehicle's three
control systems:
.Braking Skid —wheels are not
rolling.
. Steering or Cornering Skid —
too much speed or steering in a
curve causes tires to slip and
lose cornering force.
. Acceleration Skid —too much
throttle causes the driving
wheels to spin.
Page 220 of 392
Chevrolet Traverse Owner Manual (GMNA-Localizing-U.S./Canada/Mexico-
9159264) - 2016 - crc - 8/17/15
Driving and Operating 219
Defensive drivers avoid most skids
by taking reasonable care suited to
existing conditions, and by not
overdriving those conditions. But
skids are always possible.
If the vehicle starts to slide, follow
these suggestions:
.Ease your foot off the
accelerator pedal and steer the
way you want the vehicle to go.
The vehicle may straighten out.
Be ready for a second skid if it
occurs.
. Slow down and adjust your
driving according to weather
conditions. Stopping distance
can be longer and vehicle
control can be affected when
traction is reduced by water,
snow, ice, gravel, or other
material on the road. Learn to
recognize warning clues —such
as enough water, ice, or packed
snow on the road to make a
mirrored surface —and slow
down when you have any doubt.
. Try to avoid sudden steering,
acceleration, or braking,
including reducing vehicle speed by shifting to a lower gear. Any
sudden changes could cause
the tires to slide.
Remember: Antilock brakes help
avoid only the braking skid.
Driving on Wet Roads
Rain and wet roads can reduce
vehicle traction and affect your
ability to stop and accelerate.
Always drive slower in these types
of driving conditions and avoid
driving through large puddles and
deep-standing or flowing water.
{Warning
Wet brakes can cause crashes.
They might not work as well in a
quick stop and could cause
pulling to one side. You could
lose control of the vehicle.
After driving through a large
puddle of water or a car/vehicle
wash, lightly apply the brake
pedal until the brakes work
normally. (Continued)
Warning (Continued)
Flowing or rushing water creates
strong forces. Driving through
flowing water could cause the
vehicle to be carried away. If this
happens, you and other vehicle
occupants could drown. Do not
ignore police warnings and be
very cautious about trying to drive
through flowing water.
Hydroplaning
Hydroplaning is dangerous. Water
can build up under the vehicle's
tires so they actually ride on the
water. This can happen if the road is
wet enough and you are going fast
enough. When the vehicle is
hydroplaning, it has little or no
contact with the road.
There is no hard and fast rule about
hydroplaning. The best advice is to
slow down when the road is wet.
Page 224 of 392
Chevrolet Traverse Owner Manual (GMNA-Localizing-U.S./Canada/Mexico-
9159264) - 2016 - crc - 8/17/15
Driving and Operating 223
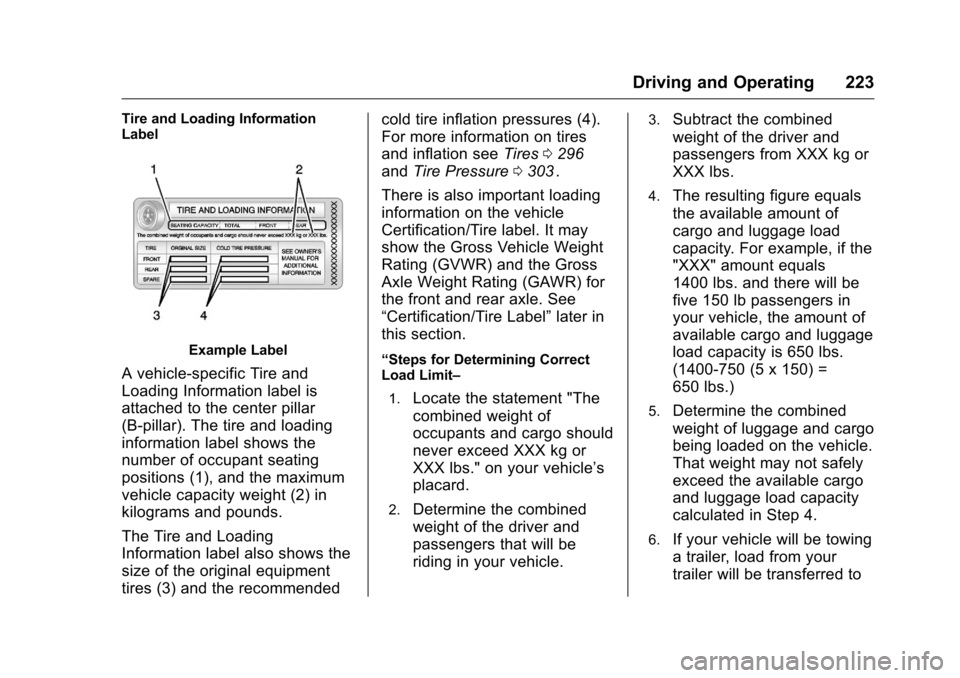
Tire and Loading Information
Label
Example Label
A vehicle-specific Tire and
Loading Information label is
attached to the center pillar
(B-pillar). The tire and loading
information label shows the
number of occupant seating
positions (1), and the maximum
vehicle capacity weight (2) in
kilograms and pounds.
The Tire and Loading
Information label also shows the
size of the original equipment
tires (3) and the recommendedcold tire inflation pressures (4).
For more information on tires
and inflation see
Tires0296
ii
and Tire Pressure 0303ii.
There is also important loading
information on the vehicle
Certification/Tire label. It may
show the Gross Vehicle Weight
Rating (GVWR) and the Gross
Axle Weight Rating (GAWR) for
the front and rear axle. See
“Certification/Tire Label” later in
this section.
“Steps for Determining Correct
Load Limit–
1.
Locate the statement "The
combined weight of
occupants and cargo should
never exceed XXX kg or
XXX lbs." on your vehicle’s
placard.
2.Determine the combined
weight of the driver and
passengers that will be
riding in your vehicle.
3.Subtract the combined
weight of the driver and
passengers from XXX kg or
XXX lbs.
4.The resulting figure equals
the available amount of
cargo and luggage load
capacity. For example, if the
"XXX" amount equals
1400 lbs. and there will be
five 150 lb passengers in
your vehicle, the amount of
available cargo and luggage
load capacity is 650 lbs.
(1400-750 (5 x 150) =
650 lbs.)
5.Determine the combined
weight of luggage and cargo
being loaded on the vehicle.
That weight may not safely
exceed the available cargo
and luggage load capacity
calculated in Step 4.
6.If your vehicle will be towing
a trailer, load from your
trailer will be transferred to
Page 229 of 392
Chevrolet Traverse Owner Manual (GMNA-Localizing-U.S./Canada/Mexico-
9159264) - 2016 - crc - 8/17/15
228 Driving and Operating
Key Lock Release
The vehicle has an electronic key
lock release system. This system is
to prevent ignition key removal
unless the shift lever is in P (Park).
The key lock release will not work if
the battery is charged less than
9-volts, or uncharged. Try charging
or jump starting the battery. See
Jump Starting - North America
0325
ii
Starting the Engine
Move the shift lever to P (Park) or
N (Neutral). The engine will not start
in any other position. To restart the
engine when the vehicle is already
moving, use N (Neutral) only.
Caution
Do not try to shift to P (Park) if the
vehicle is moving. If you do, you
could damage the transmission.
Shift to P (Park) only when the
vehicle is stopped.
Caution
If you add electrical parts or
accessories, you could change
the way the engine operates. Any
resulting damage would not be
covered by the vehicle warranty.
See Add-On Electrical Equipment
0 263
ii.
Caution
If the steering wheel is turned
until it reaches the end of its
travel, and is held in that position
while starting the vehicle, damage
may occur to the hydraulic power
steering system and there may be
loss of power steering assist.
Starting Procedure 1. With your foot off the accelerator pedal, turn the
ignition to START. When the
engine starts, let go of the key.
The idle speed will slow down
as the engine warms. Do not race the engine immediately
after starting it. Operate the
engine and transmission gently
to allow the oil to warm up and
lubricate all moving parts.
Caution
Cranking the engine for long
periods of time, by returning the
ignition to the START position
immediately after cranking has
ended, can overheat and damage
the cranking motor, and drain the
battery. Wait at least 15 seconds
between each try, to let the
cranking motor cool down.
2. If the engine does not start after five to 10 seconds,
especially in very cold weather
(below −18 °C or 0 °F), it could
be flooded with too much
gasoline. Try pushing the
accelerator pedal all the way to
the floor and holding it there as
you hold the key in START for
up to a maximum of
15 seconds. Wait at least
15 seconds between each try,
Page 230 of 392
Chevrolet Traverse Owner Manual (GMNA-Localizing-U.S./Canada/Mexico-
9159264) - 2016 - crc - 8/17/15
Driving and Operating 229
to allow the cranking motor to
cool down. When the engine
starts, let go of the key and
accelerator. If the vehicle starts
briefly but then stops again,
repeat these steps. This clears
the extra gasoline from the
engine. Do not race the engine
immediately after starting it.
Operate the engine and
transmission gently until the oil
warms up and lubricates all
moving parts.
Engine Heater
The engine coolant heater can
provide easier starting and better
fuel economy during engine
warm-up in cold weather conditions
at or below 0 °F (−18 °C). Vehicles
with an engine coolant heater
should be plugged in at least four
hours before starting. Some models
may have an internal thermostat in
the cord which will prevent engine
coolant heater operation at
temperatures above 0 °F (−18 °C).
To Use the Engine Coolant
Heater
1. Turn off the engine.
2. Open the hood and unwrap theelectrical cord. The bundled
cord is located on the driver
side of the engine
compartment, between the
engine air cleaner and the
windshield washer fluid
reservoir. See Engine
Compartment Overview 0268
ii.
Check the heater cord for
damage. If it is damaged, do
not use it. See your dealer for
a replacement. Inspect the
cord for damage yearly.
3. Plug the cord into a normal, grounded 110-volt AC outlet.
{Warning
Improper use of the heater cord
or an extension cord can damage
the cord and may result in
overheating and fire.
. Plug the cord into a
three-prong electrical utility
receptacle that is protected
by a ground fault detection
function. An ungrounded
outlet could cause an
electric shock.
. Use a weatherproof,
heavy-duty, 15 amp-rated
extension cord if needed.
Failure to use the
recommended extension
cord in good operating
condition, or using a
damaged heater or
extension cord, could make
(Continued)
Page 236 of 392
Chevrolet Traverse Owner Manual (GMNA-Localizing-U.S./Canada/Mexico-
9159264) - 2016 - crc - 8/17/15
Driving and Operating 235
D :This position is for normal
driving. It provides the best fuel
economy. If you need more power
for passing, and you are:
. Going less than 56 km/h
(35 mph), push the accelerator
pedal about halfway down.
. Going about 56 km/h (35 mph) or
more, push the accelerator all
the way down.
Caution
If the vehicle accelerates slowly,
or does not shift gears, the
transmission could be damaged.
Have the vehicle serviced
right away.
If the vehicle is stopped on a hill,
with your foot off the brake pedal,
the vehicle may roll. This is normal
and is due to the torque converter
designed to improve fuel economy
and performance. Use the brake to
hold the vehicle on a hill. Do not use
the accelerator pedal. L :
This position gives you access
to gear ranges. This provides more
engine braking but lower fuel
economy than D (Drive). You can
use it on very steep hills, or in deep
snow or mud. See Manual Mode
0 235
ii.
Manual Mode
Electronic Range Select
(ERS) Mode
ERS mode allows you to choose the
top-gear limit of the transmission
and the vehicle's speed while
driving downhill or towing a trailer.
The vehicle has an electronic shift
position indicator within the
instrument panel cluster. When
using the ERS mode a number will
display next to the L, indicating the
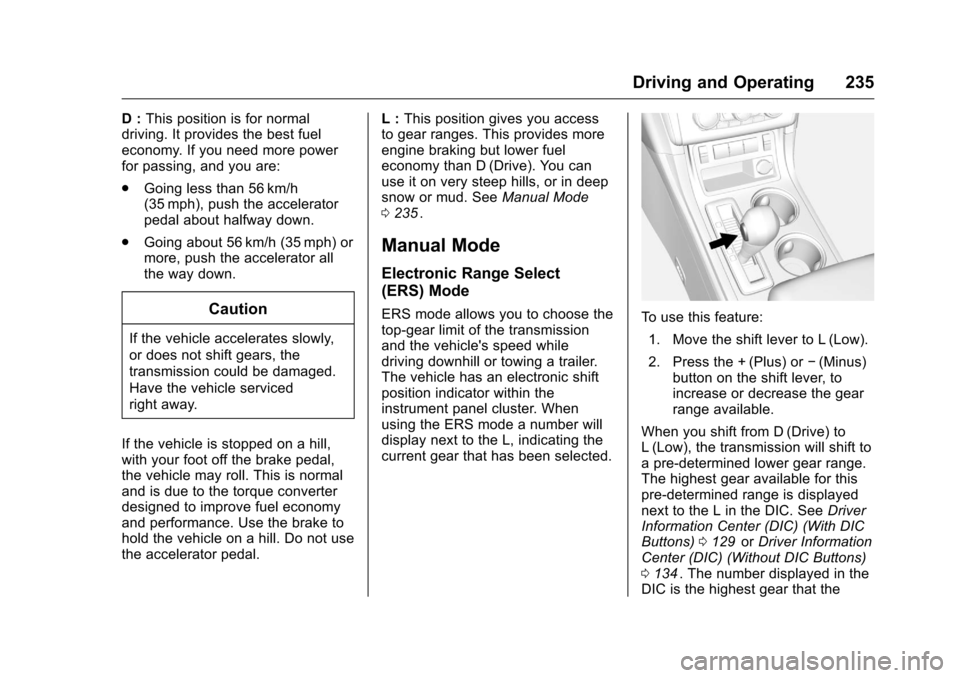
current gear that has been selected.To use this feature:
1. Move the shift lever to L (Low).
2. Press the + (Plus) or −(Minus)
button on the shift lever, to
increase or decrease the gear
range available.
When you shift from D (Drive) to
L (Low), the transmission will shift to
a pre-determined lower gear range.
The highest gear available for this
pre-determined range is displayed
next to the L in the DIC. See Driver
Information Center (DIC) (With DIC
Buttons) 0129
iior Driver Information
Center (DIC) (Without DIC Buttons)
0 134
ii. The number displayed in the
DIC is the highest gear that the
Page 238 of 392
Chevrolet Traverse Owner Manual (GMNA-Localizing-U.S./Canada/Mexico-
9159264) - 2016 - crc - 8/17/15
Driving and Operating 237
Drive Systems
All-Wheel Drive
Vehicles with this feature transfer
engine power, as required, to all
four wheels. It is fully automatic, and
adjusts itself as needed for road
conditions.
When using a compact spare tire on
an AWD vehicle, the system
automatically detects the compact
spare and reduces AWD
performance to protect the system.
To restore full AWD operation and
prevent excessive wear on the
system, replace the compact spare
with a full-size tire as soon as
possible. SeeCompact Spare Tire
0 323
ii.
Brakes
Antilock Brake
System (ABS)
This vehicle has ABS, an advanced
electronic braking system that helps
prevent a braking skid.
When the vehicle begins to drive
away, ABS checks itself.
A momentary motor or clicking noise
might be heard while this test is
going on, and it might even be
noticed that the brake pedal moves
a little. This is normal.
If there is a problem with ABS, this
warning light stays on. See Antilock
Brake System (ABS) Warning Light
0 125
ii.
If driving safely on a wet road and it
becomes necessary to slam on the
brakes and continue braking to avoid a sudden obstacle, a
computer senses the wheels are
slowing down. If one of the wheels
is about to stop rolling, the computer
will separately work the brakes at
each wheel.
ABS can change the brake pressure
to each wheel, as required, faster
than any driver could. This can help
you steer around the obstacle while
braking hard.
As the brakes are applied, the
computer keeps receiving updates
on wheel speed and controls
braking pressure accordingly.
Remember: ABS does not change
the time needed to get a foot up to
the brake pedal or always decrease
stopping distance. If you get too
close to the vehicle in front of you,
there will not be enough time to
apply the brakes if that vehicle
suddenly slows or stops. Always
leave enough room up ahead to
stop, even with ABS.
Page 240 of 392
Chevrolet Traverse Owner Manual (GMNA-Localizing-U.S./Canada/Mexico-
9159264) - 2016 - crc - 8/17/15
Driving and Operating 239
brake pedal is released or brake
pedal pressure is quickly
decreased.
Hill Start Assist (HSA)
This vehicle has an HSA feature,
which may be useful when the
vehicle is stopped on a grade
sufficient enough to activate HSA.
This feature is designed to prevent
the vehicle from rolling, either
forward or rearward, during vehicle
drive off. After the driver completely
stops and holds the vehicle in a
complete standstill on a grade, HSA
will be automatically activated.
During the transition period between
when the driver releases the brake
pedal and starts to accelerate to
drive off on a grade, HSA holds the
braking pressure for a maximum of
two seconds to ensure that there is
no rolling. The brakes will
automatically release when the
accelerator pedal is applied within
the two-second window. It will not
activate if the vehicle is in a drive
gear and facing downhill, or if the
vehicle is facing uphill and in
R (Reverse).
Ride Control Systems
Traction Control/
Electronic Stability
Control
System Operation
The vehicle has a Traction Control
System (TCS) and StabiliTrak®, an
electronic stability control system.
These systems help limit wheel slip
and assist the driver in maintaining
control, especially on slippery road
conditions.
TCS activates if it senses that any
of the drive wheels are spinning or
beginning to lose traction. When this
happens, TCS applies the brakes to
the spinning wheels and reduces
engine power to limit wheel spin.
StabiliTrak activates when the
vehicle senses a difference between
the intended path and the direction
the vehicle is actually traveling.
StabiliTrak selectively applies
braking pressure to any one of the vehicle wheel brakes to assist the
driver in keeping the vehicle on the
intended path.
If cruise control is being used and
traction control or StabiliTrak begins
to limit wheel spin, cruise control will
disengage. Cruise control may be
turned back on when road
conditions allow.
Both systems come on
automatically when the vehicle is
started and begins to move. The
systems may be heard or felt while
they are operating or while
performing diagnostic checks. This
is normal and does not mean there
is a problem with the vehicle.
It is recommended to leave both
systems on for normal driving
conditions, but it may be necessary
to turn TCS off if the vehicle gets
stuck in sand, mud, ice, or snow.
See
If the Vehicle Is Stuck 0222
iiand “Turning the Systems Off and
On” later in this section.
Page 241 of 392
Chevrolet Traverse Owner Manual (GMNA-Localizing-U.S./Canada/Mexico-
9159264) - 2016 - crc - 8/17/15
240 Driving and Operating
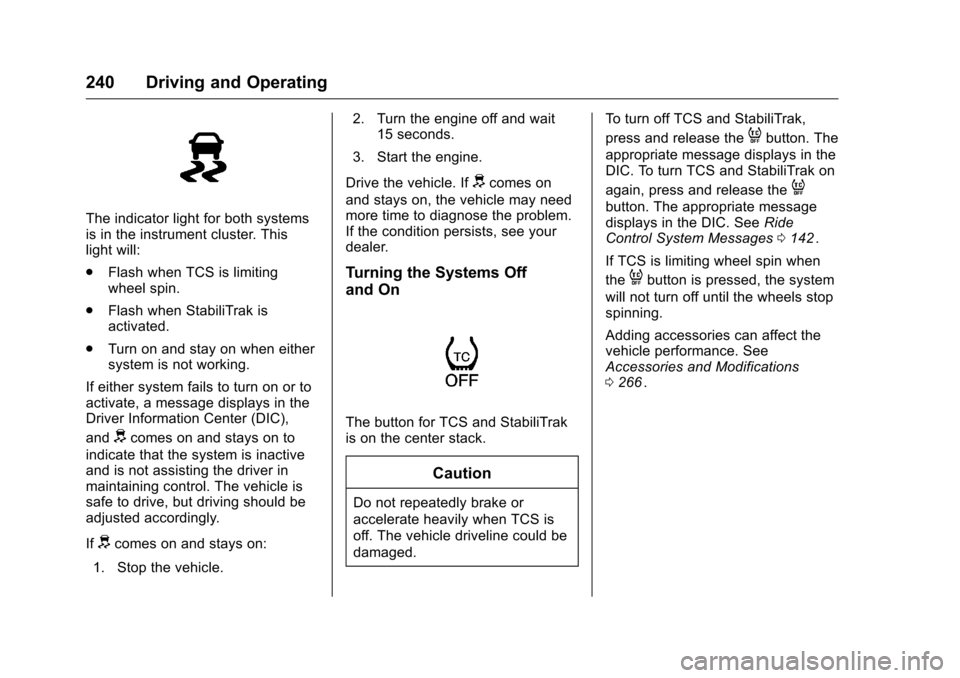
The indicator light for both systems
is in the instrument cluster. This
light will:
.Flash when TCS is limiting
wheel spin.
. Flash when StabiliTrak is
activated.
. Turn on and stay on when either
system is not working.
If either system fails to turn on or to
activate, a message displays in the
Driver Information Center (DIC),
and
dcomes on and stays on to
indicate that the system is inactive
and is not assisting the driver in
maintaining control. The vehicle is
safe to drive, but driving should be
adjusted accordingly.
If
dcomes on and stays on:
1. Stop the vehicle. 2. Turn the engine off and wait
15 seconds.
3. Start the engine.
Drive the vehicle. If
dcomes on
and stays on, the vehicle may need
more time to diagnose the problem.
If the condition persists, see your
dealer.
Turning the Systems Off
and On
The button for TCS and StabiliTrak
is on the center stack.
Caution
Do not repeatedly brake or
accelerate heavily when TCS is
off. The vehicle driveline could be
damaged. To turn off TCS and StabiliTrak,
press and release the
4button. The
appropriate message displays in the
DIC. To turn TCS and StabiliTrak on
again, press and release the
4
button. The appropriate message
displays in the DIC. See Ride
Control System Messages 0142
ii.
If TCS is limiting wheel spin when
the
4button is pressed, the system
will not turn off until the wheels stop
spinning.
Adding accessories can affect the
vehicle performance. See
Accessories and Modifications
0 266
ii.
Page 245 of 392
Chevrolet Traverse Owner Manual (GMNA-Localizing-U.S./Canada/Mexico-
9159264) - 2016 - crc - 8/17/15
244 Driving and Operating
Vehicles with RVC on the
Infotainment System
The RVC system is designed to
help the driver when backing up by
displaying a view of the area behind
the vehicle. When the driver shifts
the vehicle into R (Reverse), the
video image automatically appears
on the infotainment screen. Once
the driver shifts out of R (Reverse),
the screen will go back to the last
screen that had been displayed,
after a delay.
The RVC display remains on after
shifting out of R (Reverse) for
approximately 10 seconds. Return to
the previous screen sooner by
performing one of the following:
.Press a hard key on the
infotainment system.
. Shift into P (Park).
. Reach a vehicle speed of
8 km/h (5 mph).
Symbols and Guidelines
The RVC system may have a
feature that lets the driver view
caution symbols on the RVC screen while using the RVC. The Rear
Parking Assist (RPA) system must
not be disabled to use these
symbols. See
Parking Assist 0246ii.
The caution symbols appear when
an object has been detected by the
RPA system. The symbol may cover
the object when viewing the RVC
screen.
The RVC system may have a
guideline overlay that can help the
driver align the vehicle when
backing into a parking spot.
To turn the symbols and guidelines
on or off: 1. Shift into P (Park).
2. Press Settings on the Home screen of the infotainment
system.
3. Select Display and then Rear Camera.
4. Select Symbols or Guidelines. When a checkmark appears
next to the item, it is on. Rear Cross Traffic Alert (RCTA)
On vehicles with RCTA, a red
warning triangle with an arrow may
also display on the RVC screen to
warn of traffic coming from either
direction, behind the vehicle. When
an object is detected, three beeps
sound on the left or right side,
depending on the direction of the
detected vehicle. This system
detects objects coming from up to
20 m (65 ft) from the left or right side
behind the vehicle.
Use caution while backing up when
towing a trailer, as the RCTA
detection zones that extend out
from the back of your vehicle do not
move further back when a trailer is
towed.
The RCTA system can be disabled
through the Driver Information
Center (DIC). See
Driver
Information Center (DIC) (With DIC
Buttons) 0129
iior Driver Information
Center (DIC) (Without DIC Buttons)
0 134
ii.