tow CHEVROLET TRAVERSE 2016 1.G User Guide
[x] Cancel search | Manufacturer: CHEVROLET, Model Year: 2016, Model line: TRAVERSE, Model: CHEVROLET TRAVERSE 2016 1.GPages: 392, PDF Size: 6.66 MB
Page 61 of 392
Chevrolet Traverse Owner Manual (GMNA-Localizing-U.S./Canada/Mexico-
9159264) - 2016 - crc - 8/17/15
60 Seats and Restraints
6. Check that the safety belt isnot under the seat cushion.
Reclining the Seatbacks
To recline the seatback:
1. Leaning rearward in the seat, pull the reclining seatback
strap (2).
2. Move the seatback to the desired position, and then
release the strap (2) to lock the
seatback in place.
3. Push and pull on the seatback to make sure it is locked.
Folding the Seatback
To fold the second row seatbacks:
1. Remove anything on or under the seat.
2. Place the armrest in the upright position, and unfasten the
safety belt.
3. Pull forward on the reclining seatback strap (2).
The head restraint will fold
down automatically. To return the seatback to the
seating position, lift the seatback
and push it rearward until it locks
into place. Push and pull on the
seatback to make sure it is locked.
Pull up on the head restraint to
return it to the upright, locked
position.
Adjusting the Seats
To adjust the second row seats, pull
outward on the seat adjustment
handle (1). Slide the seat forward or
rearward to the desired position.
Release the handle (1), and push
and pull on the seat to make sure it
is locked.
Third Row Seats
{Warning
Using the third row seating
position while the second row is
folded, or pushed forward in the
entry position, could cause injury
in a sudden stop or crash. Be
sure to return the seat to the
(Continued)
Warning (Continued)
passenger seating position. Push
and pull on the seat to make sure
it is locked into place.
Folding the Seatback
Caution
Folding a rear seat with the safety
belts still fastened may cause
damage to the seat or the safety
belts. Always unbuckle the safety
belts and return them to their
normal stowed position before
folding a rear seat.
To fold the third row seatback: 1. If the second row seat is in the full rear position, adjust it
forward to allow the third row
seat to fold fully flat.
2. Remove anything on or under the seat.
Page 62 of 392
Chevrolet Traverse Owner Manual (GMNA-Localizing-U.S./Canada/Mexico-
9159264) - 2016 - crc - 8/17/15
Seats and Restraints 61
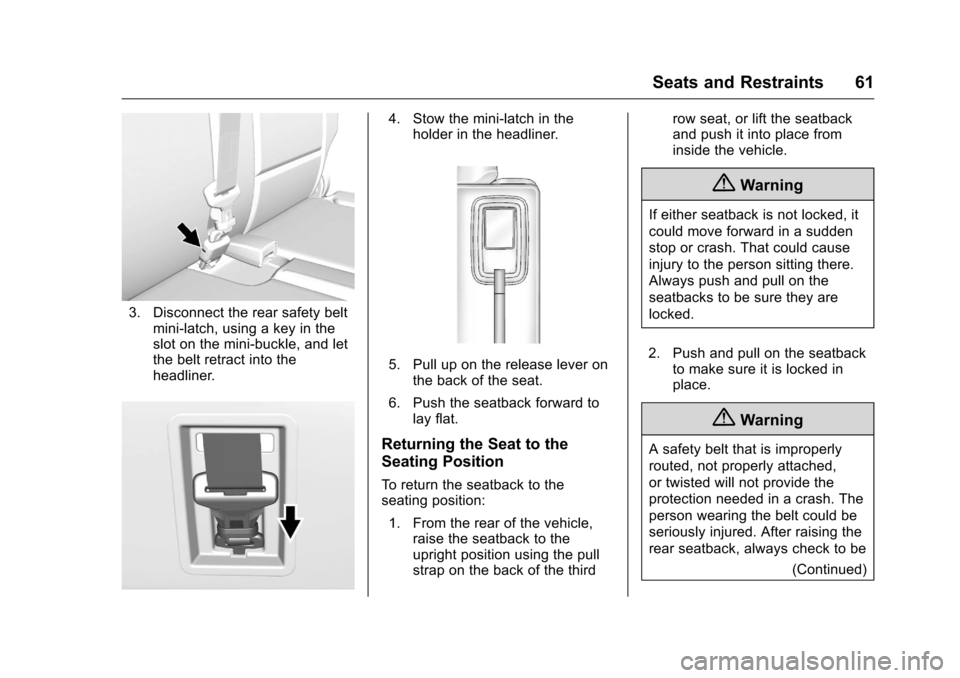
3. Disconnect the rear safety beltmini-latch, using a key in the
slot on the mini-buckle, and let
the belt retract into the
headliner.
4. Stow the mini-latch in theholder in the headliner.
5. Pull up on the release lever onthe back of the seat.
6. Push the seatback forward to lay flat.
Returning the Seat to the
Seating Position
To return the seatback to the
seating position:
1. From the rear of the vehicle, raise the seatback to the
upright position using the pull
strap on the back of the third row seat, or lift the seatback
and push it into place from
inside the vehicle.
{Warning
If either seatback is not locked, it
could move forward in a sudden
stop or crash. That could cause
injury to the person sitting there.
Always push and pull on the
seatbacks to be sure they are
locked.
2. Push and pull on the seatback to make sure it is locked in
place.
{Warning
A safety belt that is improperly
routed, not properly attached,
or twisted will not provide the
protection needed in a crash. The
person wearing the belt could be
seriously injured. After raising the
rear seatback, always check to be
(Continued)
Page 63 of 392
Chevrolet Traverse Owner Manual (GMNA-Localizing-U.S./Canada/Mexico-
9159264) - 2016 - crc - 8/17/15
62 Seats and Restraints
Warning (Continued)
sure that the safety belts are
properly routed and attached, and
are not twisted.
3. Reconnect the center safety belt mini-latch to the
mini-buckle. Do not let it twist.
4. Pull on the safety belt to be sure the mini-latch is secure.
Removing the Third Row Seats
To remove a third row seat:
1. Remove the cargo management system, if it is
installed. See Cargo
Management System 0104
ii.
2. Remove anything on or under the seat.
Caution
Folding a rear seat with the safety
belts still fastened may cause
damage to the seat or the safety
(Continued)
Caution (Continued)
belts. Always unbuckle the safety
belts and return them to their
normal stowed position before
folding a rear seat.
3. Fold the seatback down. See “Folding the Seatback” earlier
in this section.
4. Remove the rear bolts on the floor on each side of the seat.
5. Remove the seat by tilting it slightly upward, and then
pulling it out of the rear of the
vehicle in one motion.
6. Replace the bolts in the floor holes for storage.
Installing the Third Row Seats
To reinstall a third row seat:
1. Before installing the seat, the seatback must be folded
forward. See “Folding the
Seatback” earlier in this
section. The seats must be placed in
the proper locations to attach
correctly. The wider seat must
be installed on the driver side
and the narrower seat on the
passenger side. Remove the
bolts from the holes in the floor
before installing the seats.
2. Place the seat on the vehicle floor so that the front seat
hooks are on the vehicle bars.
3. Reinstall the bolts, and torque to 55 Y(41 lb ft). Pull up on
the seat to make sure it is
locked in place.
4. Raise the seatback to its upright position. Push and pull
on the seatback to make sure it
is locked into place.
5. Reconnect the center safety belt mini-latch to the
mini-buckle. Do not let it twist.
Page 67 of 392
Chevrolet Traverse Owner Manual (GMNA-Localizing-U.S./Canada/Mexico-
9159264) - 2016 - crc - 8/17/15
66 Seats and Restraints
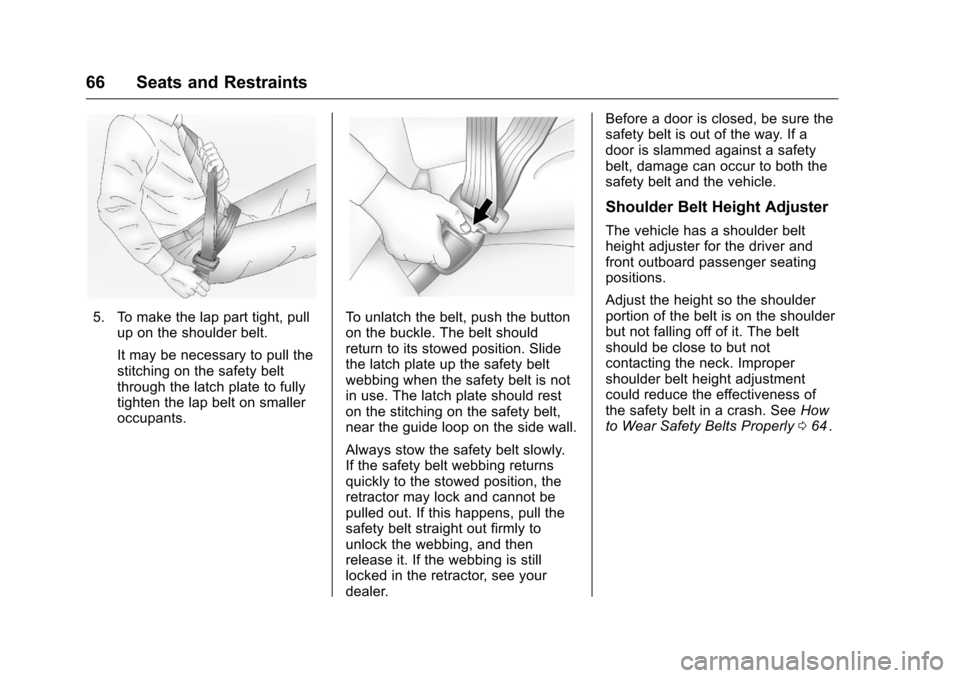
5. To make the lap part tight, pullup on the shoulder belt.
It may be necessary to pull the
stitching on the safety belt
through the latch plate to fully
tighten the lap belt on smaller
occupants.To unlatch the belt, push the button
on the buckle. The belt should
return to its stowed position. Slide
the latch plate up the safety belt
webbing when the safety belt is not
in use. The latch plate should rest
on the stitching on the safety belt,
near the guide loop on the side wall.
Always stow the safety belt slowly.
If the safety belt webbing returns
quickly to the stowed position, the
retractor may lock and cannot be
pulled out. If this happens, pull the
safety belt straight out firmly to
unlock the webbing, and then
release it. If the webbing is still
locked in the retractor, see your
dealer. Before a door is closed, be sure the
safety belt is out of the way. If a
door is slammed against a safety
belt, damage can occur to both the
safety belt and the vehicle.
Shoulder Belt Height Adjuster
The vehicle has a shoulder belt
height adjuster for the driver and
front outboard passenger seating
positions.
Adjust the height so the shoulder
portion of the belt is on the shoulder
but not falling off of it. The belt
should be close to but not
contacting the neck. Improper
shoulder belt height adjustment
could reduce the effectiveness of
the safety belt in a crash. See
How
to Wear Safety Belts Properly 064
ii.
Page 76 of 392
Chevrolet Traverse Owner Manual (GMNA-Localizing-U.S./Canada/Mexico-
9159264) - 2016 - crc - 8/17/15
Seats and Restraints 75
are not designed to inflate in frontal
impacts, near frontal impacts,
rollovers, or rear impacts.
A seat-mounted side impact airbag
is designed to inflate on the side of
the vehicle that is struck.
Roof-rail airbags are designed to
inflate in moderate to severe side
crashes depending on the location
of the impact. In addition, these
roof-rail airbags are designed to
inflate during a rollover or in a
severe frontal impact. Roof-rail
airbags are not designed to inflate in
rear impacts. Both roof-rail airbags
will inflate when either side of the
vehicle is struck, if the sensing
system predicts that the vehicle is
about to roll over on its side, or in a
severe frontal impact.
In any particular crash, no one can
say whether an airbag should have
inflated simply because of the
vehicle damage or the repair costs.What Makes an Airbag
Inflate?
In a deployment event, the sensing
system sends an electrical signal
triggering a release of gas from the
inflator. Gas from the inflator fills the
airbag causing the bag to break out
of the cover. The inflator, the airbag,
and related hardware are all part of
the airbag module.
For airbag locations, seeWhere Are
the Airbags? 072
ii.
How Does an Airbag
Restrain?
In moderate to severe frontal or
near frontal collisions, even belted
occupants can contact the steering
wheel or the instrument panel. In
moderate to severe side collisions,
even belted occupants can contact
the inside of the vehicle.
Airbags supplement the protection
provided by safety belts by
distributing the force of the impact
more evenly over the
occupant's body. Rollover capable roof-rail airbags
are also designed to help contain
the head and chest of occupants in
the outboard seating positions in the
first, second, and third rows. The
rollover capable roof-rail airbags are
designed to help reduce the risk of
full or partial ejection in rollover
events, although no system can
prevent all such ejections.
But airbags would not help in many
types of collisions, primarily
because the occupant's motion is
not toward those airbags. See
When
Should an Airbag Inflate? 074
iifor
more information.
Airbags should never be regarded
as anything more than a supplement
to safety belts.
What Will You See after
an Airbag Inflates?
After the frontal airbags and
seat-mounted side impact airbags
inflate, they quickly deflate, so
quickly that some people may not
even realize an airbag inflated. The
front center airbag, if equipped, and
the roof-rail airbags may still be at
Page 82 of 392
Chevrolet Traverse Owner Manual (GMNA-Localizing-U.S./Canada/Mexico-
9159264) - 2016 - crc - 8/17/15
Seats and Restraints 81
passenger airbag while a child
restraint or child occupant is on
the seat. If the passenger airbag
is turned on, the on indicator will
be lit.
If the passenger seat gets wet, dry
the seat immediately. If the airbag
readiness light is lit, do not install a
child restraint or allow anyone to
occupy the seat. See Airbag
Readiness Light 0121
iifor important
safety information.
The on indicator may be lit if an
object, such as a briefcase,
handbag, grocery bag, laptop or
other electronic device, is put on an
unoccupied seat. If this is not
desired remove the object from
the seat.
{Warning
Stowing of articles under the
passenger seat or between the
passenger seat cushion and
seatback may interfere with the
proper operation of the passenger
sensing system.
Servicing the
Airbag-Equipped Vehicle
Airbags affect how the vehicle
should be serviced. There are parts
of the airbag system in several
places around the vehicle. Your
dealer and the service manual have
information about servicing the
vehicle and the airbag system. To
purchase a service manual, see
Service Publications Ordering
Information 0366
ii.
{Warning
For up to 10 seconds after the
vehicle is turned off and the
battery is disconnected, an airbag
can still inflate during improper
service. You can be injured if you
are close to an airbag when it
inflates. Avoid yellow connectors.
They are probably part of the
airbag system. Be sure to follow
proper service procedures, and
make sure the person performing
work for you is qualified to do so.
Adding Equipment to the
Airbag-Equipped Vehicle
Adding accessories that change the
vehicle's frame, bumper system,
height, front end, or side sheet
metal may keep the airbag system
from working properly.
The operation of the airbag system
can also be affected by changing
any parts of the front seats, safety
belts, airbag sensing and diagnostic
module, steering wheel, instrument
panel, roof-rail airbag modules,
ceiling or pillar garnish trim,
overhead console, front sensors,
side impact sensors, airbag wiring,
or the front center console if the
vehicle has a front center airbag.
Your dealer and the service manual
have information about the location
of the airbag sensors, sensing and
diagnostic module, and airbag
wiring.
In addition, the vehicle has a
passenger sensing system that
includes sensors as part of the front
outboard passenger seat. The
passenger sensing system may not
Page 95 of 392
Chevrolet Traverse Owner Manual (GMNA-Localizing-U.S./Canada/Mexico-
9159264) - 2016 - crc - 8/17/15
94 Seats and Restraints
Warning (Continued)
cannot be loosened if it is locked.
The shoulder belt locks when it is
pulled all the way out of the
retractor. It unlocks when the
shoulder belt is allowed to go all
the way back into the retractor,
but it cannot do this if it is
wrapped around a child’s neck.
If the shoulder belt is locked and
tightened around a child’s neck,
the only way to loosen the belt is
to cut it.
Buckle any unused safety belts
behind the child restraint so
children cannot reach them. Pull
the shoulder belt all the way out
of the retractor to set the lock,
and tighten the belt behind the
child restraint after the child
restraint has been installed.
Caution
Do not let the LATCH
attachments rub against the
vehicle’s safety belts. This may
damage these parts. If necessary,
move buckled safety belts to
avoid rubbing the LATCH
attachments.
Do not fold the empty rear seat
with a safety belt buckled. This
could damage the safety belt or
the seat. Unbuckle and return the
safety belt to its stowed position,
before folding the seat.
The vehicle may be equipped with a
front center airbag in the inboard
side of the driver seat. Even with a
front center airbag, a child restraint
can be installed in any second row
seating position. If a child restraint is
installed in a second row center
seat, move the second row seat to
the rearward position, whenever
possible, to minimize contact with
the front center airbag. If you need to secure more than one
child restraint in the rear seat, see
Where to Put the Restraint
088ii.
This system is designed to make
installation of child restraints easier.
When using lower anchors, do not
use the vehicle's safety belts.
Instead, use the vehicle's anchors
and child restraint attachments to
secure the restraints. Some
restraints also use another vehicle
anchor to secure a top tether. 1. Attach and tighten the lower attachments to the lower
anchors. If the child restraint
does not have lower
attachments or the desired
seating position does not have
lower anchors, secure the child
restraint with the top tether and
the safety belts. Refer to your
child restraint manufacturer
instructions and the
instructions in this manual.
1.1. Find the lower anchors for the desired seating
position.
Page 99 of 392
Chevrolet Traverse Owner Manual (GMNA-Localizing-U.S./Canada/Mexico-
9159264) - 2016 - crc - 8/17/15
98 Seats and Restraints
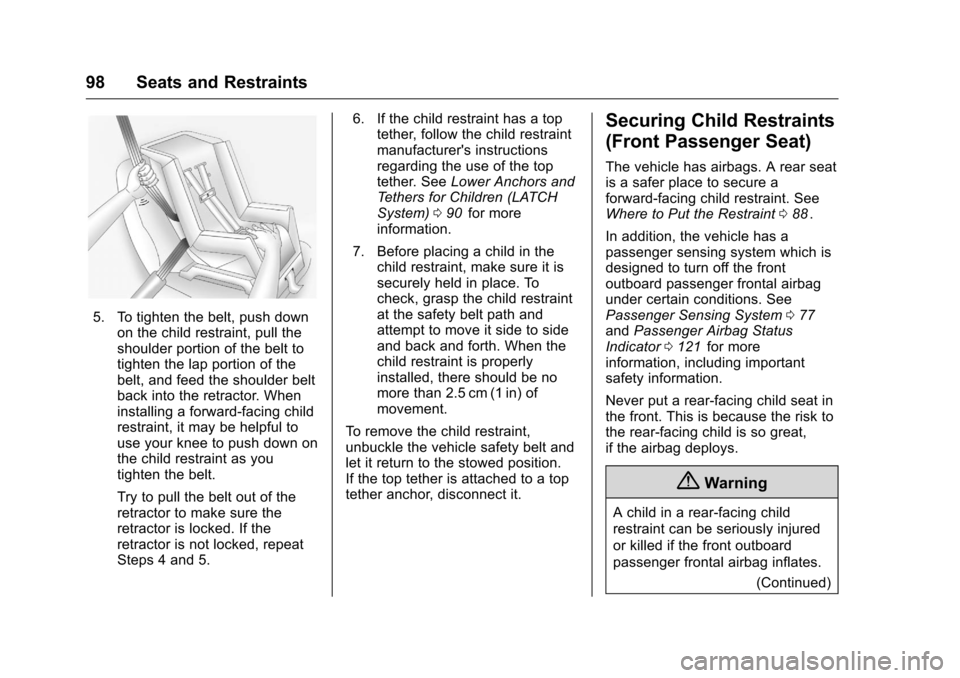
5. To tighten the belt, push downon the child restraint, pull the
shoulder portion of the belt to
tighten the lap portion of the
belt, and feed the shoulder belt
back into the retractor. When
installing a forward-facing child
restraint, it may be helpful to
use your knee to push down on
the child restraint as you
tighten the belt.
Try to pull the belt out of the
retractor to make sure the
retractor is locked. If the
retractor is not locked, repeat
Steps 4 and 5. 6. If the child restraint has a top
tether, follow the child restraint
manufacturer's instructions
regarding the use of the top
tether. See Lower Anchors and
Tethers for Children (LATCH
System) 090
iifor more
information.
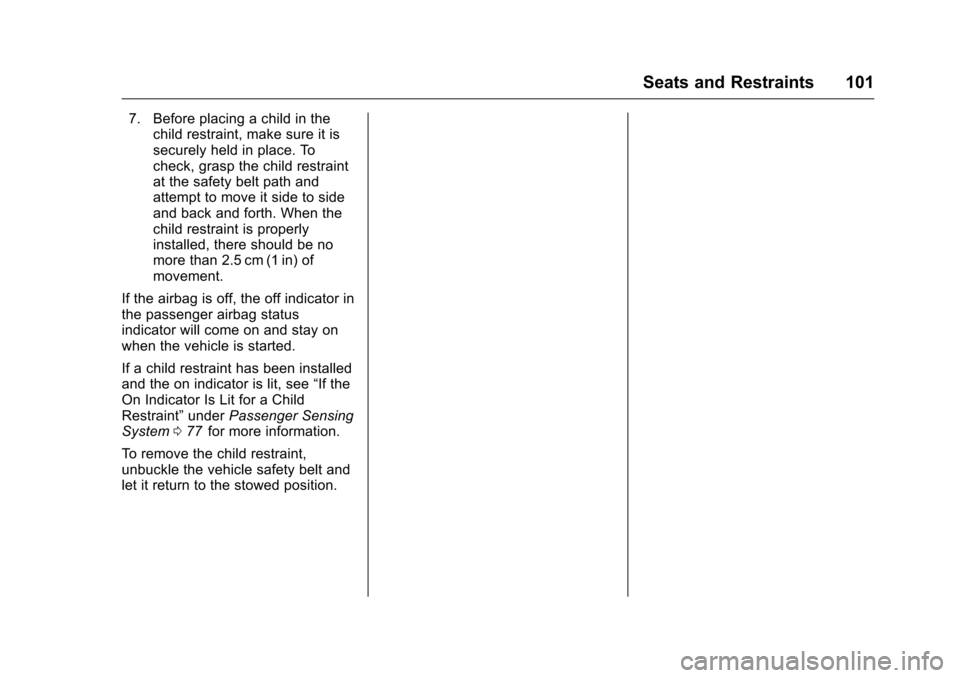
7. Before placing a child in the child restraint, make sure it is
securely held in place. To
check, grasp the child restraint
at the safety belt path and
attempt to move it side to side
and back and forth. When the
child restraint is properly
installed, there should be no
more than 2.5 cm (1 in) of
movement.
To remove the child restraint,
unbuckle the vehicle safety belt and
let it return to the stowed position.
If the top tether is attached to a top
tether anchor, disconnect it.
Securing Child Restraints
(Front Passenger Seat)
The vehicle has airbags. A rear seat
is a safer place to secure a
forward-facing child restraint. See
Where to Put the Restraint 088
ii.
In addition, the vehicle has a
passenger sensing system which is
designed to turn off the front
outboard passenger frontal airbag
under certain conditions. See
Passenger Sensing System 077
iiand Passenger Airbag Status
Indicator 0121iifor more
information, including important
safety information.
Never put a rear-facing child seat in
the front. This is because the risk to
the rear-facing child is so great,
if the airbag deploys.
{Warning
A child in a rear-facing child
restraint can be seriously injured
or killed if the front outboard
passenger frontal airbag inflates.
(Continued)
Page 102 of 392
Chevrolet Traverse Owner Manual (GMNA-Localizing-U.S./Canada/Mexico-
9159264) - 2016 - crc - 8/17/15
Seats and Restraints 101
7. Before placing a child in thechild restraint, make sure it is
securely held in place. To
check, grasp the child restraint
at the safety belt path and
attempt to move it side to side
and back and forth. When the
child restraint is properly
installed, there should be no
more than 2.5 cm (1 in) of
movement.
If the airbag is off, the off indicator in
the passenger airbag status
indicator will come on and stay on
when the vehicle is started.
If a child restraint has been installed
and the on indicator is lit, see “If the
On Indicator Is Lit for a Child
Restraint” underPassenger Sensing
System 077
iifor more information.
To remove the child restraint,
unbuckle the vehicle safety belt and
let it return to the stowed position.
Page 108 of 392
Chevrolet Traverse Owner Manual (GMNA-Localizing-U.S./Canada/Mexico-
9159264) - 2016 - crc - 8/17/15
Instruments and Controls 107
Instruments and
Controls
Controls
Steering Wheel Adjustment . . . 108
Steering Wheel Controls(Radio without
Touchscreen) . . . . . . . . . . . . . . . 108
Steering Wheel Controls (Radio with Touchscreen) . . . 109
Heated Steering Wheel . . . . . . . 110
Horn . . . . . . . . . . . . . . . . . . . . . . . . . . 110
Windshield Wiper/Washer . . . . 110
Rear Window Wiper/ Washer . . . . . . . . . . . . . . . . . . . . . . 111
Compass . . . . . . . . . . . . . . . . . . . . . 111
Clock (Radio without Touchscreen) . . . . . . . . . . . . . . . . 113
Clock (Radio with Touchscreen) . . . . . . . . . . . . . . . . 114
Power Outlets . . . . . . . . . . . . . . . . 114
Warning Lights, Gauges, and
Indicators
Warning Lights, Gauges, and Indicators . . . . . . . . . . . . . . . . . . . 116
Instrument Cluster . . . . . . . . . . . . 117
Speedometer . . . . . . . . . . . . . . . . . 118
Odometer . . . . . . . . . . . . . . . . . . . . . 118 Tachometer . . . . . . . . . . . . . . . . . . . 118
Fuel Gauge . . . . . . . . . . . . . . . . . . . 118
Engine Coolant Temperature
Gauge . . . . . . . . . . . . . . . . . . . . . . 119
Voltmeter Gauge . . . . . . . . . . . . . 120
Safety Belt Reminders . . . . . . . . 120
Airbag Readiness Light . . . . . . . 121
Passenger Airbag Status
Indicator . . . . . . . . . . . . . . . . . . . . 121
Charging System Light . . . . . . . 122
Malfunction Indicator Lamp (Check Engine Light) . . . . . . . . 123
Brake System Warning Light . . . . . . . . . . . . . . . . . . . . . . . . 124
Antilock Brake System (ABS) Warning Light . . . . . . . . . . . . . . . 125
Tow/Haul Mode Light . . . . . . . . . 126
Lane Departure Warning (LDW) Light . . . . . . . . . . . . . . . . . 126
Vehicle Ahead Indicator . . . . . . 126
StabiliTrak
®Indicator Light . . . 126
Engine Coolant Temperature Warning Light . . . . . . . . . . . . . . . 127
Tire Pressure Light . . . . . . . . . . . 127
Engine Oil Pressure Light . . . . 127
Security Light . . . . . . . . . . . . . . . . . 128
High-Beam On Light . . . . . . . . . . 128
Cruise Control Light . . . . . . . . . . 129
Information Displays
Driver Information Center (DIC) (With DIC Buttons) . . . . . . . . . . 129
Driver Information Center (DIC) (Without DIC Buttons) . . . . . . . 134
Vehicle Messages
Vehicle Messages . . . . . . . . . . . . 136
Battery Voltage and ChargingMessages . . . . . . . . . . . . . . . . . . . 137
Brake System Messages . . . . . 137
Cruise Control Messages . . . . . 137
Door Ajar Messages . . . . . . . . . . 137
Engine Cooling System Messages . . . . . . . . . . . . . . . . . . . 138
Engine Oil Messages . . . . . . . . . 139
Engine Power Messages . . . . . 139
Fuel System Messages . . . . . . . 140
Key and Lock Messages . . . . . 140
Lamp Messages . . . . . . . . . . . . . . 140
Object Detection System Messages . . . . . . . . . . . . . . . . . . . 140
Ride Control System Messages . . . . . . . . . . . . . . . . . . . 142
Airbag System Messages . . . . 142
Security Messages . . . . . . . . . . . 142
Service Vehicle Messages . . . . 143
Tire Messages . . . . . . . . . . . . . . . . 143
Transmission Messages . . . . . . 144
Vehicle Reminder Messages . . . . . . . . . . . . . . . . . . . 145