tow CHEVROLET TRAVERSE 2016 1.G Owner's Manual
[x] Cancel search | Manufacturer: CHEVROLET, Model Year: 2016, Model line: TRAVERSE, Model: CHEVROLET TRAVERSE 2016 1.GPages: 392, PDF Size: 6.66 MB
Page 125 of 392
Chevrolet Traverse Owner Manual (GMNA-Localizing-U.S./Canada/Mexico-
9159264) - 2016 - crc - 8/17/15
124 Instruments and Controls
If towing a trailer, reduce the
amount of cargo being hauled as
soon as possible.
If the light continues to flash, find a
safe place to park. Turn the vehicle
off and wait at least 10 seconds
before restarting the engine. If the
light is still flashing, follow the
previous guidelines and see your
dealer for service as soon as
possible.
If the light is on steady :A
malfunction has been detected.
Diagnosis and service may be
required.
Check the following:
. A loose or missing fuel cap may
cause the light to come on. See
Filling the Tank 0254
ii. A few
driving trips with the cap
properly installed may turn the
light off.
. Poor fuel quality can cause
inefficient engine operation and
poor driveability, which may go
away once the engine is warmed
up. If this occurs, change the
fuel brand. It may require at least one full tank of the proper
fuel to turn the light off. See
Fuel
0 252
ii.
If the light remains on, see your
dealer.
Emissions Inspection and
Maintenance Programs
If the vehicle requires an Emissions
Inspection/Maintenance test, the
test equipment will likely connect to
the vehicle's Data Link
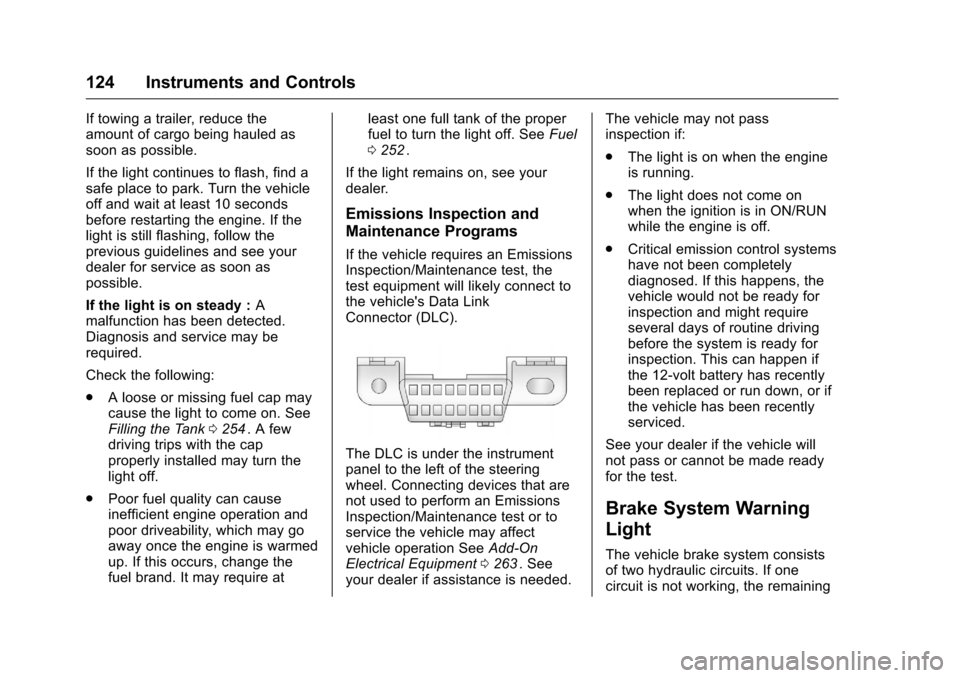
Connector (DLC).
The DLC is under the instrument
panel to the left of the steering
wheel. Connecting devices that are
not used to perform an Emissions
Inspection/Maintenance test or to
service the vehicle may affect
vehicle operation See Add-On
Electrical Equipment 0263
ii. See
your dealer if assistance is needed. The vehicle may not pass
inspection if:
.
The light is on when the engine
is running.
. The light does not come on
when the ignition is in ON/RUN
while the engine is off.
. Critical emission control systems
have not been completely
diagnosed. If this happens, the
vehicle would not be ready for
inspection and might require
several days of routine driving
before the system is ready for
inspection. This can happen if
the 12-volt battery has recently
been replaced or run down, or if
the vehicle has been recently
serviced.
See your dealer if the vehicle will
not pass or cannot be made ready
for the test.
Brake System Warning
Light
The vehicle brake system consists
of two hydraulic circuits. If one
circuit is not working, the remaining
Page 126 of 392
Chevrolet Traverse Owner Manual (GMNA-Localizing-U.S./Canada/Mexico-
9159264) - 2016 - crc - 8/17/15
Instruments and Controls 125
circuit can still work to stop the
vehicle. For normal braking
performance, both circuits need to
be working
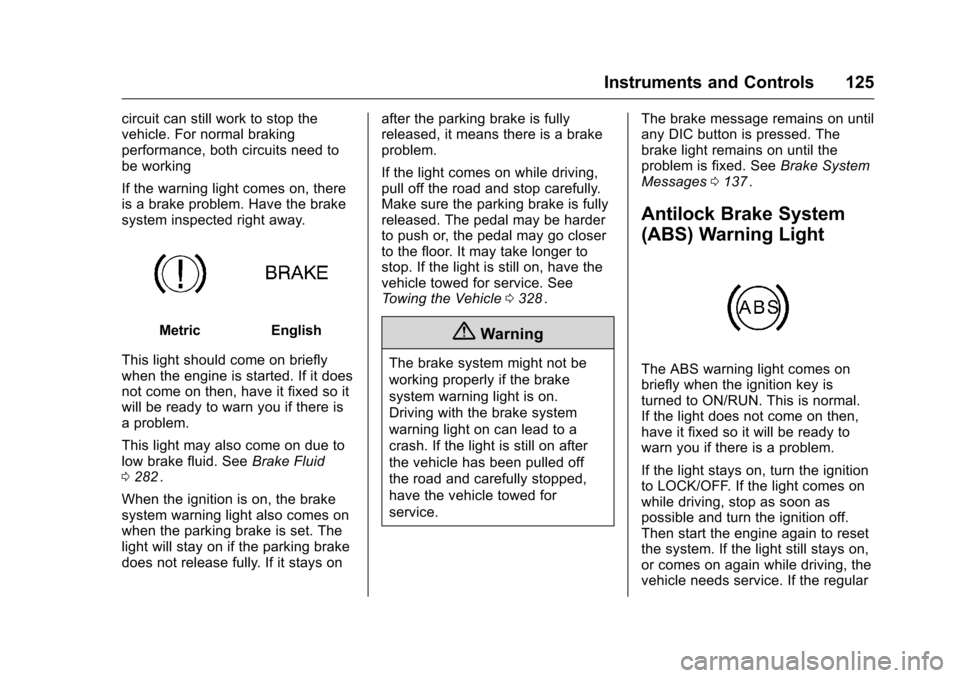
If the warning light comes on, there
is a brake problem. Have the brake
system inspected right away.
MetricEnglish
This light should come on briefly
when the engine is started. If it does
not come on then, have it fixed so it
will be ready to warn you if there is
a problem.
This light may also come on due to
low brake fluid. See Brake Fluid
0 282
ii.
When the ignition is on, the brake
system warning light also comes on
when the parking brake is set. The
light will stay on if the parking brake
does not release fully. If it stays on after the parking brake is fully
released, it means there is a brake
problem.
If the light comes on while driving,
pull off the road and stop carefully.
Make sure the parking brake is fully
released. The pedal may be harder
to push or, the pedal may go closer
to the floor. It may take longer to
stop. If the light is still on, have the
vehicle towed for service. See
Towing the Vehicle
0328
ii.
{Warning
The brake system might not be
working properly if the brake
system warning light is on.
Driving with the brake system
warning light on can lead to a
crash. If the light is still on after
the vehicle has been pulled off
the road and carefully stopped,
have the vehicle towed for
service. The brake message remains on until
any DIC button is pressed. The
brake light remains on until the
problem is fixed. See
Brake System
Messages 0137
ii.
Antilock Brake System
(ABS) Warning Light
The ABS warning light comes on
briefly when the ignition key is
turned to ON/RUN. This is normal.
If the light does not come on then,
have it fixed so it will be ready to
warn you if there is a problem.
If the light stays on, turn the ignition
to LOCK/OFF. If the light comes on
while driving, stop as soon as
possible and turn the ignition off.
Then start the engine again to reset
the system. If the light still stays on,
or comes on again while driving, the
vehicle needs service. If the regular
Page 127 of 392
Chevrolet Traverse Owner Manual (GMNA-Localizing-U.S./Canada/Mexico-
9159264) - 2016 - crc - 8/17/15
126 Instruments and Controls
brake system warning light is not
on, there are still brakes, but no
antilock brakes. If the regular brake
system warning light is also on,
there are no antilock brakes and
there is a problem with the regular
brakes. SeeBrake System Warning
Light 0124
ii.
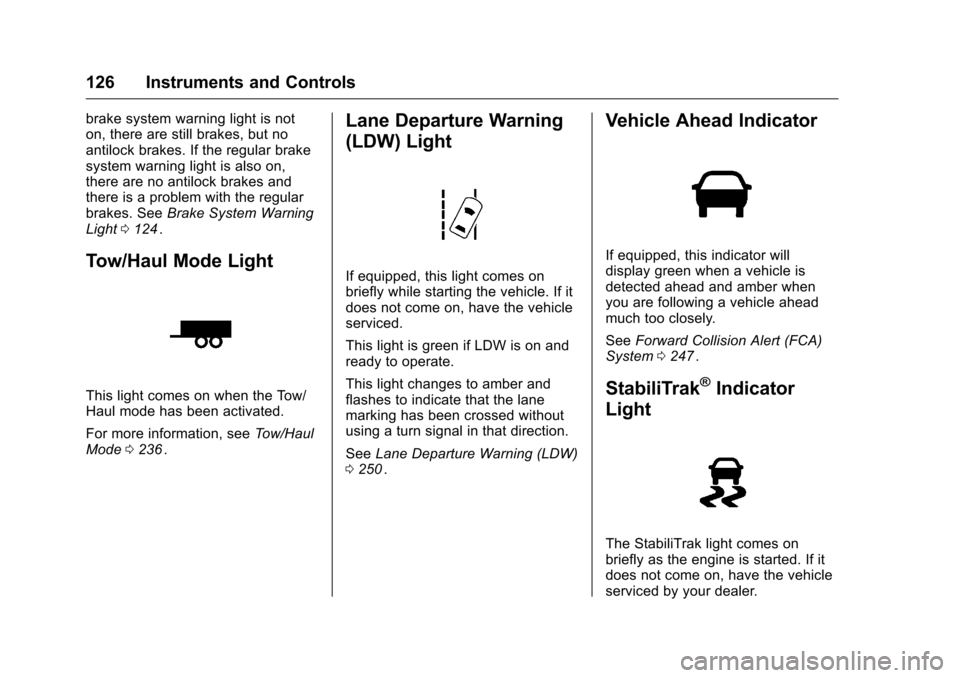
Tow/Haul Mode Light
This light comes on when the Tow/
Haul mode has been activated.
For more information, see Tow/Haul
Mode 0236
ii.
Lane Departure Warning
(LDW) Light
If equipped, this light comes on
briefly while starting the vehicle. If it
does not come on, have the vehicle
serviced.
This light is green if LDW is on and
ready to operate.
This light changes to amber and
flashes to indicate that the lane
marking has been crossed without
using a turn signal in that direction.
See Lane Departure Warning (LDW)
0 250
ii.
Vehicle Ahead Indicator
If equipped, this indicator will
display green when a vehicle is
detected ahead and amber when
you are following a vehicle ahead
much too closely.
See Forward Collision Alert (FCA)
System 0247
ii.
StabiliTrak®Indicator
Light
The StabiliTrak light comes on
briefly as the engine is started. If it
does not come on, have the vehicle
serviced by your dealer.
Page 157 of 392
Chevrolet Traverse Owner Manual (GMNA-Localizing-U.S./Canada/Mexico-
9159264) - 2016 - crc - 8/17/15
156 Lighting
Lighting
Exterior Lighting
Exterior Lamp Controls . . . . . . . 156
Headlamp High/Low-BeamChanger . . . . . . . . . . . . . . . . . . . . 156
Flash-to-Pass . . . . . . . . . . . . . . . . 157
Daytime Running Lamps (DRL)/Automatic Headlamp
System . . . . . . . . . . . . . . . . . . . . . . 157
Delayed Headlamps . . . . . . . . . . 157
Hazard Warning Flashers . . . . . 158
Turn and Lane-Change Signals . . . . . . . . . . . . . . . . . . . . . . 158
Fog Lamps . . . . . . . . . . . . . . . . . . . 159
Interior Lighting
Instrument Panel Illumination Control . . . . . . . . . . . . . . . . . . . . . . 159
Courtesy Lamps . . . . . . . . . . . . . . 160
Dome Lamps . . . . . . . . . . . . . . . . . 160
Reading Lamps . . . . . . . . . . . . . . 160
Lighting Features
Entry Lighting . . . . . . . . . . . . . . . . 161
Delayed Entry Lighting . . . . . . . 161
Delayed Exit Lighting . . . . . . . . . 161
Parade Dimming . . . . . . . . . . . . . 161
Battery Load Management . . . 162
Battery Power Protection . . . . . 162
Exterior Lighting
Exterior Lamp Controls
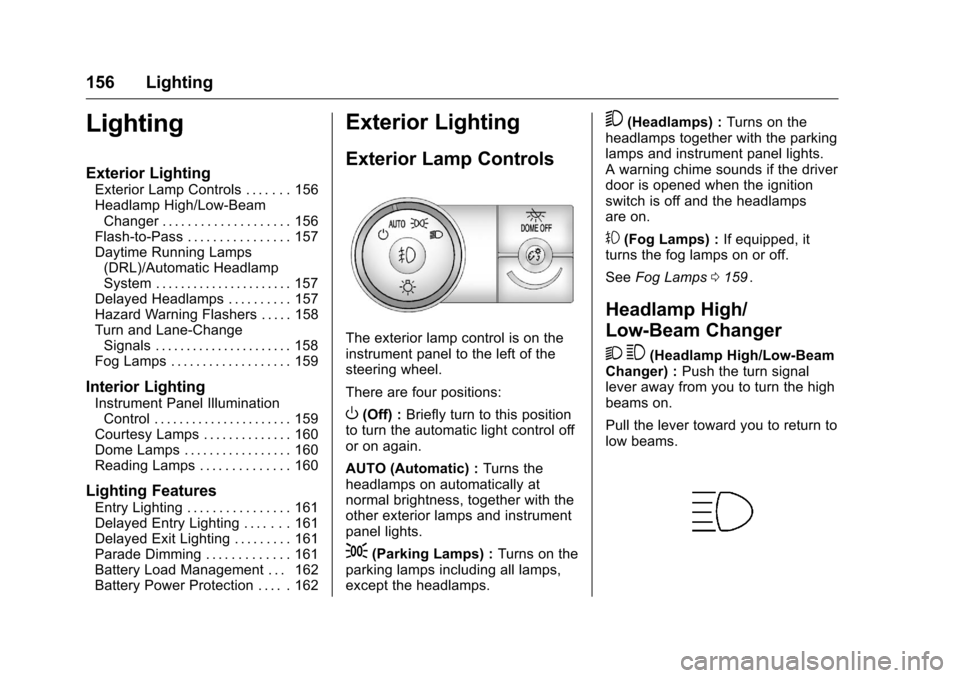
The exterior lamp control is on the
instrument panel to the left of the
steering wheel.
There are four positions:
O(Off) : Briefly turn to this position
to turn the automatic light control off
or on again.
AUTO (Automatic) : Turns the
headlamps on automatically at
normal brightness, together with the
other exterior lamps and instrument
panel lights.
;(Parking Lamps) : Turns on the
parking lamps including all lamps,
except the headlamps.
5(Headlamps) : Turns on the
headlamps together with the parking
lamps and instrument panel lights.
A warning chime sounds if the driver
door is opened when the ignition
switch is off and the headlamps
are on.
#(Fog Lamps) : If equipped, it
turns the fog lamps on or off.
See Fog Lamps 0159
ii.
Headlamp High/
Low-Beam Changer
2 3
(Headlamp High/Low-Beam
Changer) : Push the turn signal
lever away from you to turn the high
beams on.
Pull the lever toward you to return to
low beams.
Page 158 of 392
Chevrolet Traverse Owner Manual (GMNA-Localizing-U.S./Canada/Mexico-
9159264) - 2016 - crc - 8/17/15
Lighting 157
This indicator light turns on in the
instrument cluster when the
high-beam headlamps are on.
Flash-to-Pass
This feature is used to signal to the
vehicle ahead that you want
to pass.
If the headlamps are off or in the
low-beam position, pull the turn
signal lever toward you to
momentarily switch to high beams.
Release the lever to turn the
high-beam headlamps off.
Daytime Running Lamps
(DRL)/Automatic
Headlamp System
DRL can make it easier for others to
see the front of your vehicle during
the day. Fully functional DRL are
required on all vehicles first sold in
Canada.
The DRL system makes the
low-beam headlamps come on at a
reduced brightness when the
following conditions are met:.
The ignition is in the ON/RUN
position.
. The exterior lamp control is
in AUTO.
. The engine is running.
When the DRL are on, the regular
headlamps, taillamps, sidemarker,
and other lamps will not be on. The
instrument cluster will also not be lit.
The headlamps automatically
change from DRL to the regular
headlamps depending on the
darkness of the surroundings. The
other lamps that come on with the
headlamps will also come on.
When it is bright enough outside,
the headlamps will go off and the
DRL will come on.
When the DRL are active and a turn
signal is operated, the DRL on the
side the turn signal is activated, will
turn off until the turn signal is
turned off.
The regular headlamp system
should be turned on when needed. Do not cover the light sensor on top
of the instrument panel because it
works with the DRL.
Lights On with Wipers
If the windshield wipers are
activated in daylight with the engine
on, and the exterior lamp control is
in AUTO, the headlamps, parking
lamps, and other exterior lamps
come on. The transition time for the
lamps coming on varies based on
wiper speed. When the wipers are
not operating, these lamps turn off.
Move the exterior lamp control to
P
or;to disable this feature.
Delayed Headlamps
Delayed headlamps provide a
period of exterior lighting as you
leave the area around the vehicle.
This feature is activated when the
headlamps are on due to the
automatic headlamps control feature
and when the ignition is turned off.
The headlamps remain on until the
exterior lamp control is moved to the
Page 206 of 392
Chevrolet Traverse Owner Manual (GMNA-Localizing-U.S./Canada/Mexico-
9159264) - 2016 - crc - 8/17/15
Climate Controls 205
Air Delivery Mode Control :Turn
clockwise or counterclockwise to
change the current airflow mode.
By positioning the right knob
between two modes, a combination
of those two modes is selected.
H(Vent) : Air is directed to the
instrument panel outlets.
)(Bi-Level) : Air is divided
between the instrument panel and
floor outlets. Some air is directed
toward the windshield and side
window outlets. Cooler air is
directed to the upper outlets and
warmer air to the floor outlets.
6(Floor) : Air is directed to the
floor outlets, with some of the air
directed to the windshield, side
window, and second row floor
outlets. In this mode, the system
automatically selects outside air.
Recirculation cannot be selected
while in floor mode.
-(Defog) : This clears the
windows of fog or moisture. Air is
directed to the windshield, floor
outlets, and side window vents.
When this mode is selected, the system turns off recirculation and
runs the air conditioning unless the
outside temperature is less than 4 °
C (40 °F). Recirculation cannot be
selected while in the defog mode.
Do not drive the vehicle until all the
windows are clear.
0(Defrost) :
This clears the
windshield of fog or frost more
quickly. Air is directed to the
windshield and side window vents,
with some to the floor vents. In this
mode, outside air is pulled inside
the vehicle. Recirculation cannot be
selected while in the defrost mode.
The air conditioning system runs
automatically in this setting, unless
the outside temperature is less than
4 °C (40 °F). Do not drive the
vehicle until all windows are clear.
#(Air Conditioning) : Press to
turn the air conditioning system on
or off. An indicator light comes on
when A/C is on. The air conditioning
system does not operate when the
outside temperature is below 4 °C
(40 °F). The indicator light flashes
three times and turns off when outside conditions affect air
conditioning operation. This is
normal.
For quicker cool down on hot days:
1. Open the windows to let hot air escape.
2. Select
Hmode.
3. Select
#.
4. Select the coolest temperature.
5. Select the highest fan speed.
6. Close the windows after the hot air has escaped.
7. Once the vehicle's interior temperature is below the
outside temperature, select
@mode for faster cooling.
Using recirculation for long periods
of time could cause the air inside
the vehicle to become too dry. To
prevent this from happening, after
the inside of the vehicle has cooled,
turn the recirculation mode off.
Page 210 of 392
Chevrolet Traverse Owner Manual (GMNA-Localizing-U.S./Canada/Mexico-
9159264) - 2016 - crc - 8/17/15
Climate Controls 209
H(Vent) :Air is directed to the
instrument panel outlets.
)(Bi-Level) : Air is divided
between the instrument panel and
floor outlets. Some air is directed
towards the windshield and side
window outlets. Cooler air is
directed to the upper outlets and
warmer air to the floor outlets.
6(Floor) : Air is directed to the
floor outlets, with some of the air
directed to the windshield, side
window, and second row floor
outlets. In this mode, the system
uses outside air.
-(Defog) : This mode clears the
windows of fog or moisture. Air is
directed to the windshield, floor
outlets, and side window vents.
When this mode is selected, the
system turns off recirculation and
runs the air conditioning compressor
unless the outside temperature is
less than 4 °C (40 °F). Do not drive
the vehicle until all the windows are
clear.
0(Defrost) : Press to turn the
defrost on or off. This mode quickly
clears the windshield of fog or frost. Air is directed to the windshield,
side window, and floor vents. In this
mode, outside air is pulled inside
the vehicle. The air conditioning
system runs automatically in this
setting, unless the outside
temperature is less than 4 °C (40
°F).
Do not drive the vehicle until all the
windows are clear.
Air Conditioning
A/C (Air Conditioning) :
Press to
turn the air conditioning on and off.
An indicator light comes on when
A/C is on.
The A/C does not work when the
outside temperature is below 4 °C
(40 °F). If A/C is pressed the
indicator flashes three times and
turns off to show that the A/C mode
is not available. If the A/C is on and
the outside temperature drops
below a temperature which is too
cool for air conditioning to be
effective, the A/C indicator turns off
to show that the A/C mode has
been canceled. On hot days, open the windows
briefly to let hot inside air escape.
This helps reduce the time it takes
for the interior of the vehicle to
cool down.
The air conditioning system
removes moisture from the air, so
water might drip under the vehicle
while idling or after turning off the
engine. This is normal.
@(Recirculation) :
Press to
alternate between recirculating air
inside the vehicle or pulling in
outside air. An indicator light comes
on when recirculation mode is
active. With each ignition cycle, the
recirculation mode is reset to
automatic. When the engine is
turned on, outside air or
recirculation is automatically
selected for better performance.
When recirculation is activated, the
air conditioning compressor comes
on and helps to quickly cool the air
inside the vehicle. This mode also
helps to reduce the outside air and
odors that may enter the vehicle.
Page 216 of 392
Chevrolet Traverse Owner Manual (GMNA-Localizing-U.S./Canada/Mexico-
9159264) - 2016 - crc - 8/17/15
Driving and Operating 215
Driving and
Operating
Driving Information
Distracted Driving . . . . . . . . . . . . 216
Defensive Driving . . . . . . . . . . . . . 216
Drunk Driving . . . . . . . . . . . . . . . . . 216
Control of a Vehicle . . . . . . . . . . . 217
Braking . . . . . . . . . . . . . . . . . . . . . . . 217
Steering . . . . . . . . . . . . . . . . . . . . . . 217
Off-Road Recovery . . . . . . . . . . . 218
Loss of Control . . . . . . . . . . . . . . . 218
Driving on Wet Roads . . . . . . . . 219
Hill and Mountain Roads . . . . . 220
Winter Driving . . . . . . . . . . . . . . . . 220
If the Vehicle Is Stuck . . . . . . . . 222
Vehicle Load Limits . . . . . . . . . . . 222
Starting and Operating
New Vehicle Break-In . . . . . . . . . 226
Ignition Positions . . . . . . . . . . . . . 226
Starting the Engine . . . . . . . . . . . 228
Engine Heater . . . . . . . . . . . . . . . . 229
Retained AccessoryPower (RAP) . . . . . . . . . . . . . . . . 230
Shifting Into Park . . . . . . . . . . . . . 230
Shifting out of Park . . . . . . . . . . . 231
Parking over Things That Burn . . . . . . . . . . . . . . . . . . . 232
Engine Exhaust
Engine Exhaust . . . . . . . . . . . . . . 232
Running the Vehicle WhileParked . . . . . . . . . . . . . . . . . . . . . . 233
Automatic Transmission
Automatic Transmission . . . . . . 233
Manual Mode . . . . . . . . . . . . . . . . . 235
Tow/Haul Mode . . . . . . . . . . . . . . . 236
Drive Systems
All-Wheel Drive . . . . . . . . . . . . . . . 237
Brakes
Antilock BrakeSystem (ABS) . . . . . . . . . . . . . . . 237
Parking Brake . . . . . . . . . . . . . . . . 238
Brake Assist . . . . . . . . . . . . . . . . . . 238
Hill Start Assist (HSA) . . . . . . . . 239
Ride Control Systems
Traction Control/Electronic Stability Control . . . . . . . . . . . . . 239
Cruise Control
Cruise Control . . . . . . . . . . . . . . . . 241
Driver Assistance Systems
Rear Vision Camera (RVC) . . . 243
Parking Assist . . . . . . . . . . . . . . . . 246
Forward Collision Alert (FCA)System . . . . . . . . . . . . . . . . . . . . . . 247 Side Blind Zone
Alert (SBZA) . . . . . . . . . . . . . . . . 249
Lane Departure Warning (LDW) . . . . . . . . . . . . . 250
Fuel
Fuel . . . . . . . . . . . . . . . . . . . . . . . . . . 252
California FuelRequirements . . . . . . . . . . . . . . . 253
Fuels in Foreign Countries . . . 253
Fuel Additives . . . . . . . . . . . . . . . . 253
Filling the Tank . . . . . . . . . . . . . . . 254
Filling a Portable Fuel Container . . . . . . . . . . . . . . . . . . . 255
Trailer Towing
General TowingInformation . . . . . . . . . . . . . . . . . . 256
Driving Characteristics and Towing Tips . . . . . . . . . . . . . . . . . 256
Trailer Towing . . . . . . . . . . . . . . . . 259
Towing Equipment . . . . . . . . . . . . 261
Conversions and Add-Ons
Add-On Electrical Equipment . . . . . . . . . . . . . . . . . . 263
Page 223 of 392
Chevrolet Traverse Owner Manual (GMNA-Localizing-U.S./Canada/Mexico-
9159264) - 2016 - crc - 8/17/15
222 Driving and Operating
If the Vehicle Is Stuck
Slowly and cautiously spin the
wheels to free the vehicle when
stuck in sand, mud, ice, or snow.
If stuck too severely for the traction
system to free the vehicle, turn the
traction system off and use the
rocking method. SeeTraction
Control/Electronic Stability Control
0 239
ii.
{Warning
If the vehicle's tires spin at high
speed, they can explode, and you
or others could be injured. The
vehicle can overheat, causing an
engine compartment fire or other
damage. Spin the wheels as little
as possible and avoid going
above 56 km/h (35 mph).
Rocking the Vehicle to Get
it Out
Turn the steering wheel left and
right to clear the area around the
front wheels. Turn off any traction
system. Shift back and forth between R (Reverse) and a low
forward gear, spinning the wheels
as little as possible. To prevent
transmission wear, wait until the
wheels stop spinning before shifting
gears. Release the accelerator
pedal while shifting, and press
lightly on the accelerator pedal
when the transmission is in gear.
Slowly spinning the wheels in the
forward and reverse directions
causes a rocking motion that could
free the vehicle. If that does not get
the vehicle out after a few tries, it
might need to be towed out. If the
vehicle does need to be towed out,
see
Towing the Vehicle 0328
ii.
Vehicle Load Limits
It is very important to know how
much weight the vehicle can
carry. This weight is called the
vehicle capacity weight and
includes the weight of all
occupants, cargo, and all
nonfactory-installed options.
Two labels on the vehicle may
show how much weight it may properly carry, the Tire and
Loading Information label and
the Certification/Tire label.
{Warning
Do not load the vehicle any
heavier than the Gross
Vehicle Weight Rating
(GVWR), or either the
maximum front or rear Gross
Axle Weight Rating (GAWR).
This can cause systems to
break and change the way the
vehicle handles. This could
cause loss of control and a
crash. Overloading can also
reduce stopping distance,
damage the tires, and shorten
the life of the vehicle.
Page 224 of 392
Chevrolet Traverse Owner Manual (GMNA-Localizing-U.S./Canada/Mexico-
9159264) - 2016 - crc - 8/17/15
Driving and Operating 223
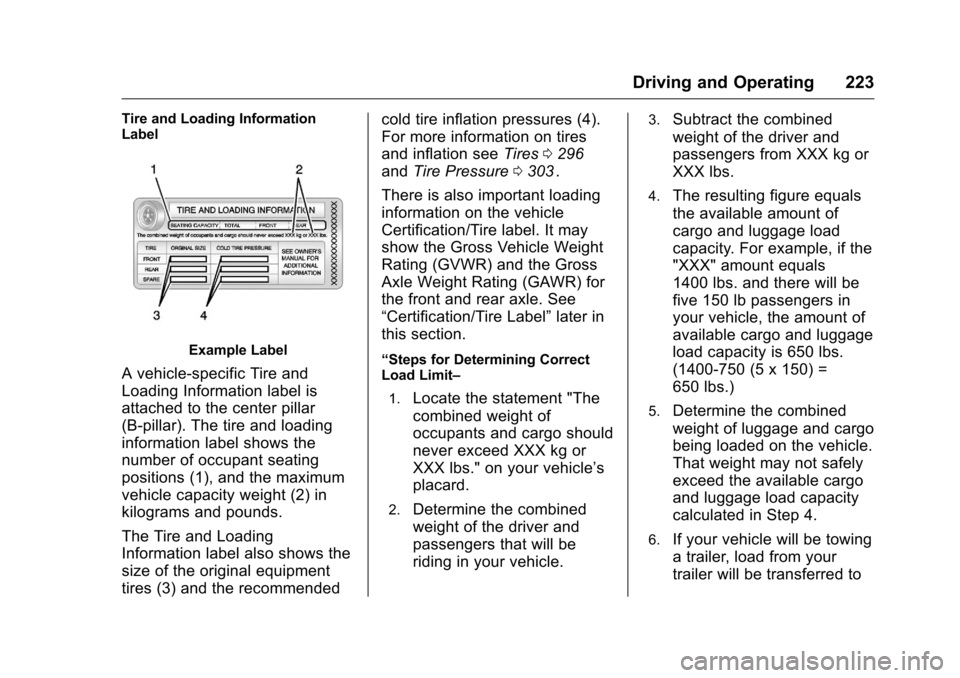
Tire and Loading Information
Label
Example Label
A vehicle-specific Tire and
Loading Information label is
attached to the center pillar
(B-pillar). The tire and loading
information label shows the
number of occupant seating
positions (1), and the maximum
vehicle capacity weight (2) in
kilograms and pounds.
The Tire and Loading
Information label also shows the
size of the original equipment
tires (3) and the recommendedcold tire inflation pressures (4).
For more information on tires
and inflation see
Tires0296
ii
and Tire Pressure 0303ii.
There is also important loading
information on the vehicle
Certification/Tire label. It may
show the Gross Vehicle Weight
Rating (GVWR) and the Gross
Axle Weight Rating (GAWR) for
the front and rear axle. See
“Certification/Tire Label” later in
this section.
“Steps for Determining Correct
Load Limit–
1.
Locate the statement "The
combined weight of
occupants and cargo should
never exceed XXX kg or
XXX lbs." on your vehicle’s
placard.
2.Determine the combined
weight of the driver and
passengers that will be
riding in your vehicle.
3.Subtract the combined
weight of the driver and
passengers from XXX kg or
XXX lbs.
4.The resulting figure equals
the available amount of
cargo and luggage load
capacity. For example, if the
"XXX" amount equals
1400 lbs. and there will be
five 150 lb passengers in
your vehicle, the amount of
available cargo and luggage
load capacity is 650 lbs.
(1400-750 (5 x 150) =
650 lbs.)
5.Determine the combined
weight of luggage and cargo
being loaded on the vehicle.
That weight may not safely
exceed the available cargo
and luggage load capacity
calculated in Step 4.
6.If your vehicle will be towing
a trailer, load from your
trailer will be transferred to