ECO CHEVROLET TRAVERSE 2016 1.G Owner's Manual
[x] Cancel search | Manufacturer: CHEVROLET, Model Year: 2016, Model line: TRAVERSE, Model: CHEVROLET TRAVERSE 2016 1.GPages: 392, PDF Size: 6.66 MB
Page 45 of 392
Chevrolet Traverse Owner Manual (GMNA-Localizing-U.S./Canada/Mexico-
9159264) - 2016 - crc - 8/17/15
44 Keys, Doors, and Windows
See your dealer or a locksmith who
can service PASS-Key III+ to get a
new key blank that is cut exactly as
the ignition key that operates the
system.
To program the new additional key:1. Verify that the new key has a
1stamped on it.
2. Insert the already programmed key in the ignition and start the
engine. If the engine does not
start, see your dealer for
service.
3. After the engine has started, turn the key to LOCK/OFF, and
remove the key.
4. Insert the key to be programmed and turn it to the
ON/RUN position within
five seconds of the original key
being turned to the LOCK/OFF
position.
The security light turns off once
the key has been programmed.
5. Repeat Steps 1–4 if additional keys are to be programmed. If the PASS-Key III+ key is lost or
damaged, see your dealer or a
locksmith to have a new key made.
The SERVICE THEFT
DETERRENT SYSTEM message
displays on the Driver Information
Center (DIC) when there is a
problem with the theft-deterrent
system. See
Security Messages
0 142
iifor additional information.
Do not leave the key or device that
disarms or deactivates the
theft-deterrent system in the vehicle.
Exterior Mirrors
Convex Mirrors
{Warning
A convex mirror can make things,
like other vehicles, look farther
away than they really are. If you
cut too sharply into the right lane,
you could hit a vehicle on the
right. Check the inside mirror or
glance over your shoulder before
changing lanes.
The passenger side mirror is convex
shaped. A convex mirror's surface is
curved so more can be seen from
the driver seat.
Page 47 of 392
Chevrolet Traverse Owner Manual (GMNA-Localizing-U.S./Canada/Mexico-
9159264) - 2016 - crc - 8/17/15
46 Keys, Doors, and Windows
Resetting the Power Folding
Mirrors
Reset the power folding mirrors if:
.The mirrors are accidentally
obstructed while folding.
. They are accidentally manually
folded/unfolded.
. The mirrors vibrate at normal
driving speeds.
To reset the mirrors, fold and unfold
the mirrors one time using the
power folding mirror controls.
A popping noise may be heard
during the resetting. This sound is
normal during the reset operation.
Heated Mirrors
For vehicles with heated mirrors:
1(Rear Window Defogger) :
Press to heat the mirrors.
See “Rear Window Defogger” under
Dual Automatic Climate Control
System 0207
ii.
Park Tilt Mirrors
If equipped with memory seats, the
passenger and/or driver mirror tilts
to a preselected position when the
vehicle is in R (Reverse). This
allows the curb to be seen when
parallel parking.
The mirror(s) return to the original
position when:
.
The vehicle is shifted out of
R (Reverse), or remains in
R (Reverse) for about
30 seconds.
. The ignition is turned off.
. The vehicle is driven in
R (Reverse) above a set speed.
To turn this feature on or off, see
Vehicle Personalization (With DIC
Buttons) 0145
ii.
Interior Mirrors
Interior Rearview Mirrors
Adjust the rearview mirror for a clear
view of the area behind your
vehicle.
If equipped with OnStar, the vehicle
may have three control buttons at
the bottom of the mirror. See your
dealer for more information about
OnStar and how to subscribe to it.
See “OnStar,” if equipped.
Do not spray glass cleaner directly
on the mirror. Use a soft towel
dampened with water.
Manual Rearview Mirror
If equipped, push the tab forward for
daytime use and pull it for nighttime
use to avoid glare from the
headlamps from behind.
Page 48 of 392
Chevrolet Traverse Owner Manual (GMNA-Localizing-U.S./Canada/Mexico-
9159264) - 2016 - crc - 8/17/15
Keys, Doors, and Windows 47
Automatic Dimming
Rearview Mirror
If equipped, automatic dimming
reduces the glare of the headlamps
from behind. This feature comes on
when the vehicle is started.
Windows
{Warning
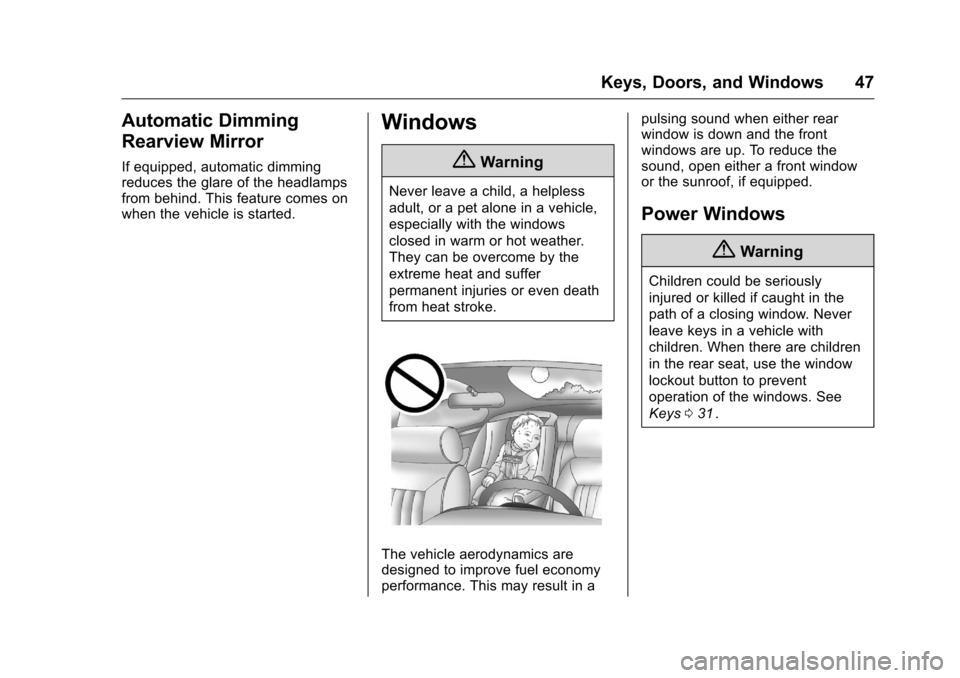
Never leave a child, a helpless
adult, or a pet alone in a vehicle,
especially with the windows
closed in warm or hot weather.
They can be overcome by the
extreme heat and suffer
permanent injuries or even death
from heat stroke.
The vehicle aerodynamics are
designed to improve fuel economy
performance. This may result in apulsing sound when either rear
window is down and the front
windows are up. To reduce the
sound, open either a front window
or the sunroof, if equipped.
Power Windows
{Warning
Children could be seriously
injured or killed if caught in the
path of a closing window. Never
leave keys in a vehicle with
children. When there are children
in the rear seat, use the window
lockout button to prevent
operation of the windows. See
Keys
031
ii.
Page 50 of 392
Chevrolet Traverse Owner Manual (GMNA-Localizing-U.S./Canada/Mexico-
9159264) - 2016 - crc - 8/17/15
Keys, Doors, and Windows 49
Rear Window Lockout
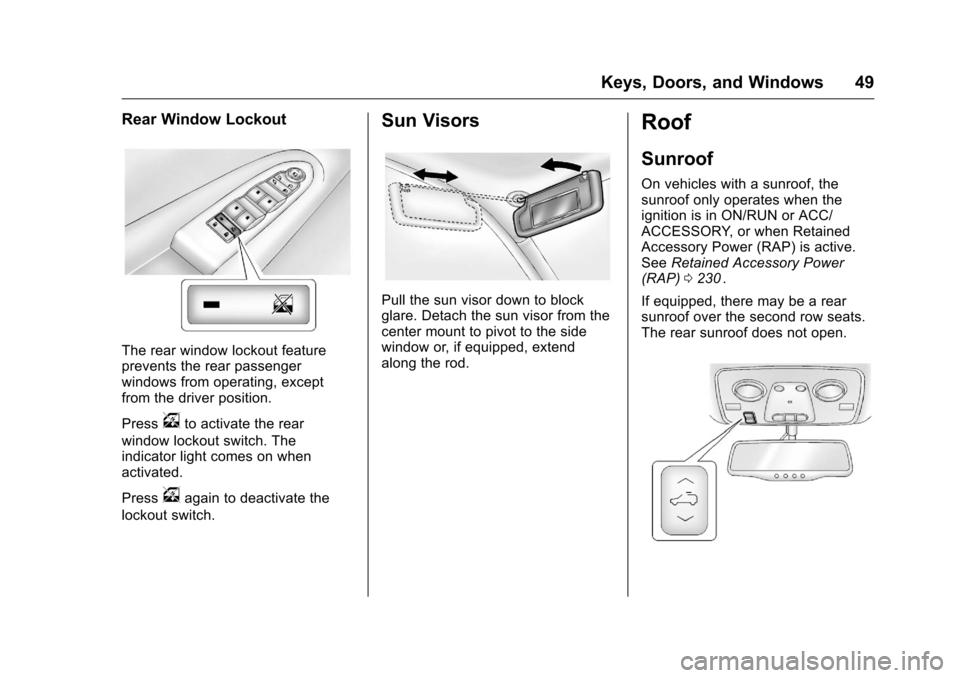
The rear window lockout feature
prevents the rear passenger
windows from operating, except
from the driver position.
Press
vto activate the rear
window lockout switch. The
indicator light comes on when
activated.
Press
vagain to deactivate the
lockout switch.
Sun Visors
Pull the sun visor down to block
glare. Detach the sun visor from the
center mount to pivot to the side
window or, if equipped, extend
along the rod.
Roof
Sunroof
On vehicles with a sunroof, the
sunroof only operates when the
ignition is in ON/RUN or ACC/
ACCESSORY, or when Retained
Accessory Power (RAP) is active.
See Retained Accessory Power
(RAP) 0230
ii.
If equipped, there may be a rear
sunroof over the second row seats.
The rear sunroof does not open.
Page 54 of 392
Chevrolet Traverse Owner Manual (GMNA-Localizing-U.S./Canada/Mexico-
9159264) - 2016 - crc - 8/17/15
Seats and Restraints 53
position is reached. Try to move the
head restraint after the button is
released to make sure that it is
locked in place.
The front seat outboard head
restraints are not removable.
Rear Seats
The vehicle's second row seats
have head restraints in the outboard
seating positions that cannot be
adjusted.
The vehicle's third row seats have
headrests in the outboard seating
positions that cannot be adjusted.
The second row head restraints and
third row headrests are not
removable.
Front Seats
Seat Adjustment
{Warning
You can lose control of the
vehicle if you try to adjust a driver
seat while the vehicle is moving.
Adjust the driver seat only when
the vehicle is not moving.
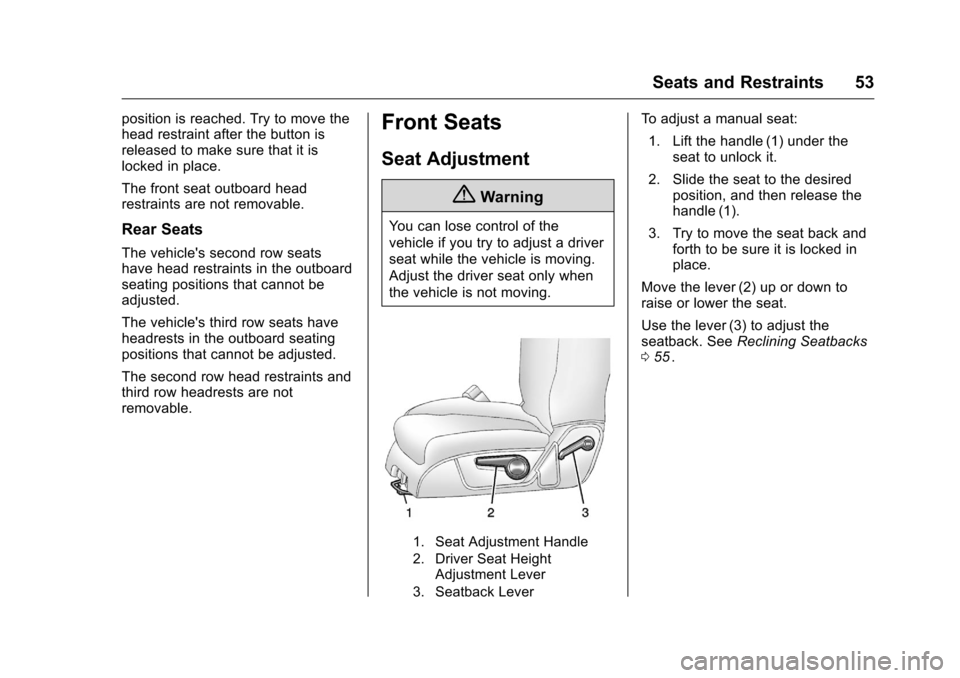
1. Seat Adjustment Handle
2. Driver Seat HeightAdjustment Lever
3. Seatback Lever
To adjust a manual seat:
1. Lift the handle (1) under the seat to unlock it.
2. Slide the seat to the desired position, and then release the
handle (1).
3. Try to move the seat back and forth to be sure it is locked in
place.
Move the lever (2) up or down to
raise or lower the seat.
Use the lever (3) to adjust the
seatback. See Reclining Seatbacks
0 55
ii.
Page 57 of 392
Chevrolet Traverse Owner Manual (GMNA-Localizing-U.S./Canada/Mexico-
9159264) - 2016 - crc - 8/17/15
56 Seats and Restraints
2. Push and pull on the seatbackto make sure it is locked.
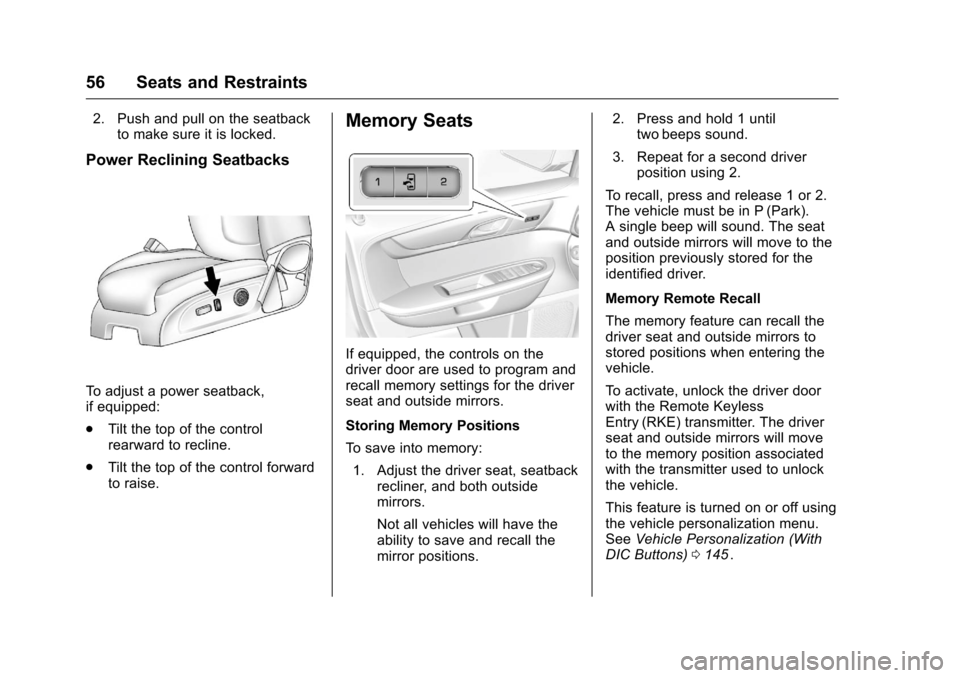
Power Reclining Seatbacks
To adjust a power seatback,
if equipped:
.Tilt the top of the control
rearward to recline.
. Tilt the top of the control forward
to raise.
Memory Seats
If equipped, the controls on the
driver door are used to program and
recall memory settings for the driver
seat and outside mirrors.
Storing Memory Positions
To save into memory:
1. Adjust the driver seat, seatback recliner, and both outside
mirrors.
Not all vehicles will have the
ability to save and recall the
mirror positions. 2. Press and hold 1 until
two beeps sound.
3. Repeat for a second driver position using 2.
To recall, press and release 1 or 2.
The vehicle must be in P (Park).
A single beep will sound. The seat
and outside mirrors will move to the
position previously stored for the
identified driver.
Memory Remote Recall
The memory feature can recall the
driver seat and outside mirrors to
stored positions when entering the
vehicle.
To activate, unlock the driver door
with the Remote Keyless
Entry (RKE) transmitter. The driver
seat and outside mirrors will move
to the memory position associated
with the transmitter used to unlock
the vehicle.
This feature is turned on or off using
the vehicle personalization menu.
See Vehicle Personalization (With
DIC Buttons) 0145
ii.
Page 58 of 392
Chevrolet Traverse Owner Manual (GMNA-Localizing-U.S./Canada/Mexico-
9159264) - 2016 - crc - 8/17/15
Seats and Restraints 57
To stop recall movement, press one
of the power seat controls, memory
buttons, or the power mirror buttons.
If something has blocked the driver
seat while recalling a memory
position, the recall may stop.
Remove the obstruction; then press
and hold the appropriate manual
control for the memory item that is
not recalling for two seconds. Try
recalling the memory position again
by pressing the appropriate memory
button. If the memory position is still
not recalling, see your dealer for
service.
Easy Exit Driver Seat
This feature can move the seat
rearward to allow extra room to exit
the vehicle.
S(Easy Exit Driver Seat) :Press
to activate the recall. The vehicle
must be in P (Park).
If this feature is programmed on in
the vehicle personalization menu,
automatic seat movement occurs
when the ignition key is removed. A single beep sounds. The driver
seat moves back approximately
8 cm (3 in). To move the seat back
farther, press
Sagain until the seat
is all the way back.
If something has blocked the driver
seat while recalling the exit position,
the recall may stop. Remove the
obstruction; then press and hold the
power seat control rearward for
two seconds. Try recalling the exit
position again. If the exit position is
still not recalling, see your dealer for
service.
See Vehicle Personalization (With
DIC Buttons) 0145
ii.
Heated and Cooled Front
Seats
{Warning
If you cannot feel temperature
change or pain to the skin, the
seat heater may cause burns. To
reduce the risk of burns, people
with such a condition should use
(Continued)
Warning (Continued)
care when using the seat heater,
especially for long periods of
time. Do not place anything on
the seat that insulates against
heat, such as a blanket, cushion,
cover, or similar item. This may
cause the seat heater to
overheat. An overheated seat
heater may cause a burn or may
damage the seat.
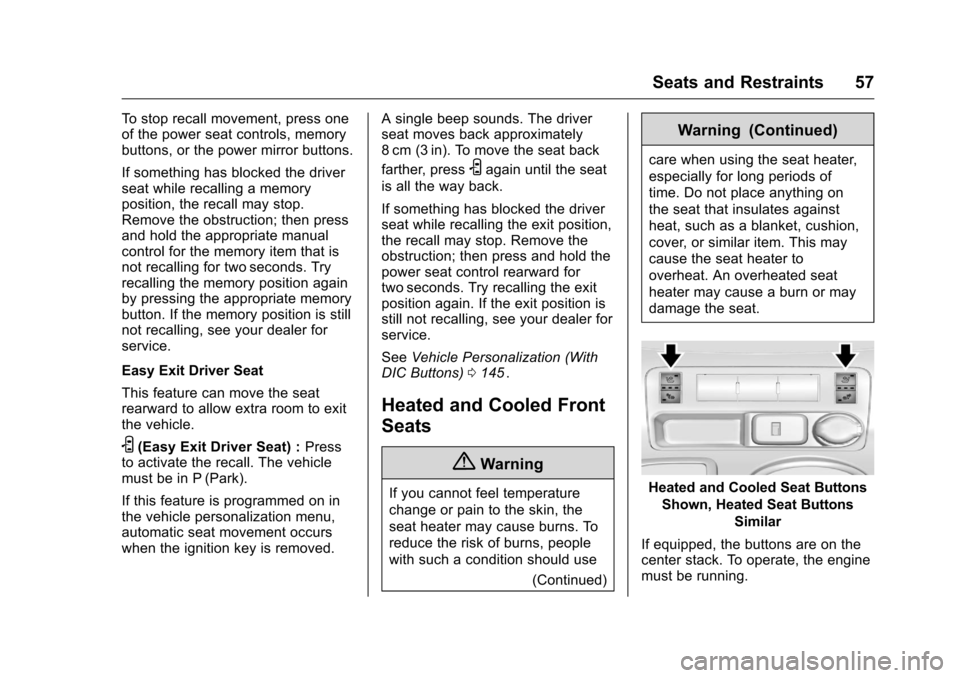
Heated and Cooled Seat ButtonsShown, Heated Seat Buttons Similar
If equipped, the buttons are on the
center stack. To operate, the engine
must be running.
Page 59 of 392
Chevrolet Traverse Owner Manual (GMNA-Localizing-U.S./Canada/Mexico-
9159264) - 2016 - crc - 8/17/15
58 Seats and Restraints
I(Heated Seatback) :If equipped,
press to heat the seatback only.
H(Cooled Seat) : If equipped,
press to cool the entire seat.
J(Heated Seat and Seatback) :
Press to heat the seat and
seatback.
Press the button once for the
highest setting. With each press of
the button, the seat will change to
the next lower setting, and then to
the off setting. The lights indicate
three for the highest setting and one
for the lowest.
The passenger heated seat may
take longer to heat up.
The heated and/or cooled seats are
canceled after the ignition is
turned off. Remote Start Heated Seats
When it is cold outside, the heated
seats may turn on automatically
during a remote vehicle start. The
heated seats will be canceled when
the ignition is turned on. Press the
desired heated seat button to use
the heated seats after the vehicle is
started.
The heated seat button lights will
not turn on during a remote start.
The temperature of an unoccupied
seat may be reduced.
See
Remote Vehicle Start 035
ii.
Rear Seats
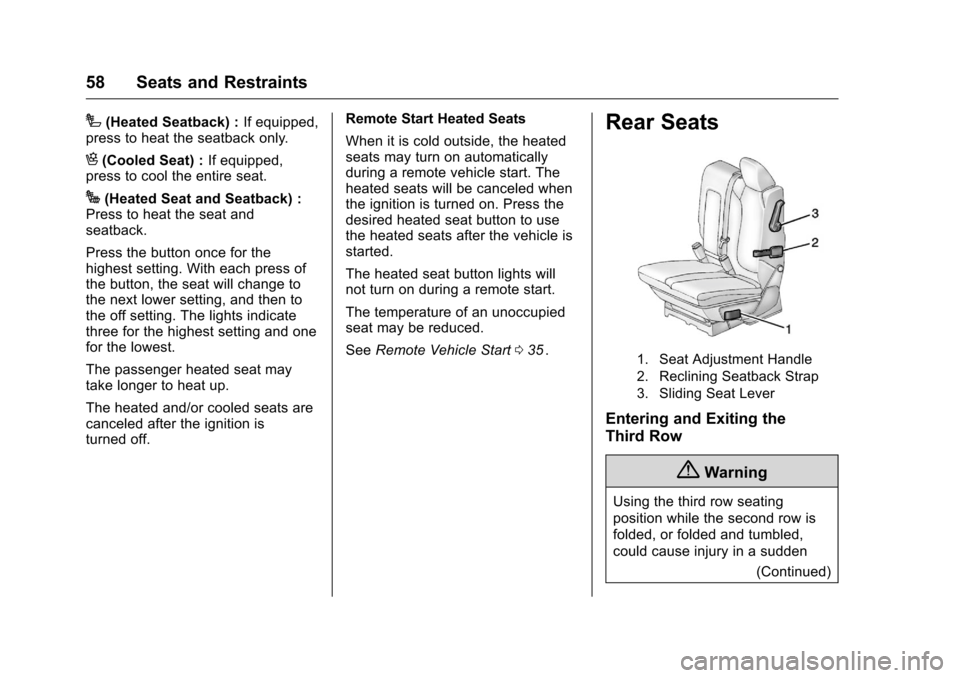
1. Seat Adjustment Handle
2. Reclining Seatback Strap
3. Sliding Seat Lever
Entering and Exiting the
Third Row
{Warning
Using the third row seating
position while the second row is
folded, or folded and tumbled,
could cause injury in a sudden
(Continued)
Page 60 of 392
Chevrolet Traverse Owner Manual (GMNA-Localizing-U.S./Canada/Mexico-
9159264) - 2016 - crc - 8/17/15
Seats and Restraints 59
Warning (Continued)
stop or crash. Be sure to return
the seat to the passenger seating
position. Push and pull on the
seat to make sure it is locked into
place.
Caution
Folding a rear seat with the safety
belts still fastened may cause
damage to the seat or the safety
belts. Always unbuckle the safety
belts and return them to their
normal stowed position before
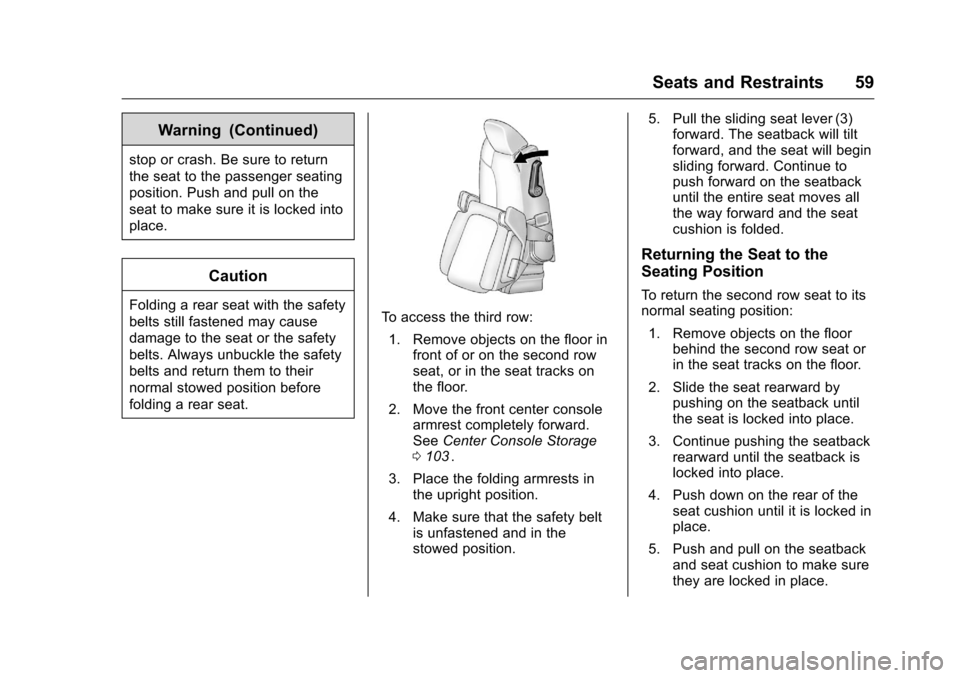
folding a rear seat.To access the third row:1. Remove objects on the floor in front of or on the second row
seat, or in the seat tracks on
the floor.
2. Move the front center console armrest completely forward.
See Center Console Storage
0 103
ii.
3. Place the folding armrests in the upright position.
4. Make sure that the safety belt is unfastened and in the
stowed position. 5. Pull the sliding seat lever (3)
forward. The seatback will tilt
forward, and the seat will begin
sliding forward. Continue to
push forward on the seatback
until the entire seat moves all
the way forward and the seat
cushion is folded.
Returning the Seat to the
Seating Position
To return the second row seat to its
normal seating position:
1. Remove objects on the floor behind the second row seat or
in the seat tracks on the floor.
2. Slide the seat rearward by pushing on the seatback until
the seat is locked into place.
3. Continue pushing the seatback rearward until the seatback is
locked into place.
4. Push down on the rear of the seat cushion until it is locked in
place.
5. Push and pull on the seatback and seat cushion to make sure
they are locked in place.
Page 61 of 392
Chevrolet Traverse Owner Manual (GMNA-Localizing-U.S./Canada/Mexico-
9159264) - 2016 - crc - 8/17/15
60 Seats and Restraints
6. Check that the safety belt isnot under the seat cushion.
Reclining the Seatbacks
To recline the seatback:
1. Leaning rearward in the seat, pull the reclining seatback
strap (2).
2. Move the seatback to the desired position, and then
release the strap (2) to lock the
seatback in place.
3. Push and pull on the seatback to make sure it is locked.
Folding the Seatback
To fold the second row seatbacks:
1. Remove anything on or under the seat.
2. Place the armrest in the upright position, and unfasten the
safety belt.
3. Pull forward on the reclining seatback strap (2).
The head restraint will fold
down automatically. To return the seatback to the
seating position, lift the seatback
and push it rearward until it locks
into place. Push and pull on the
seatback to make sure it is locked.
Pull up on the head restraint to
return it to the upright, locked
position.
Adjusting the Seats
To adjust the second row seats, pull
outward on the seat adjustment
handle (1). Slide the seat forward or
rearward to the desired position.
Release the handle (1), and push
and pull on the seat to make sure it
is locked.
Third Row Seats
{Warning
Using the third row seating
position while the second row is
folded, or pushed forward in the
entry position, could cause injury
in a sudden stop or crash. Be
sure to return the seat to the
(Continued)
Warning (Continued)
passenger seating position. Push
and pull on the seat to make sure
it is locked into place.
Folding the Seatback
Caution
Folding a rear seat with the safety
belts still fastened may cause
damage to the seat or the safety
belts. Always unbuckle the safety
belts and return them to their
normal stowed position before
folding a rear seat.
To fold the third row seatback: 1. If the second row seat is in the full rear position, adjust it
forward to allow the third row
seat to fold fully flat.
2. Remove anything on or under the seat.