CHEVROLET TRAVERSE 2018 Manual PDF
Manufacturer: CHEVROLET, Model Year: 2018, Model line: TRAVERSE, Model: CHEVROLET TRAVERSE 2018Pages: 419, PDF Size: 5.92 MB
Page 71 of 419
Chevrolet Traverse Owner Manual (GMNA-Localizing-U.S./Canada/Mexico-
10603118) - 2018 - CRC - 1/29/18
70 Seats and Restraints
.Power mirror, with the driver or
passenger side mirror selected
. Power steering wheel
Obstructions
If something has blocked the driver
seat and/or power steering wheel
while recalling a memory position,
the recall may stop. Remove the
obstruction and try the recall again.
If the memory position still does not
recall, see your dealer for service.
Heated and Ventilated
Front Seats
{Warning
If temperature change or pain to
the skin cannot be felt, the seat
heater may cause burns. To
reduce the risk of burns, use care
when using the seat heater,
especially for long periods of
time. Do not place anything on
the seat that insulates against
heat, such as a blanket, cushion, (Continued)
Warning (Continued)
cover, or similar item. This may
cause the seat heater to
overheat. An overheated seat
heater may cause a burn or may
damage the seat.
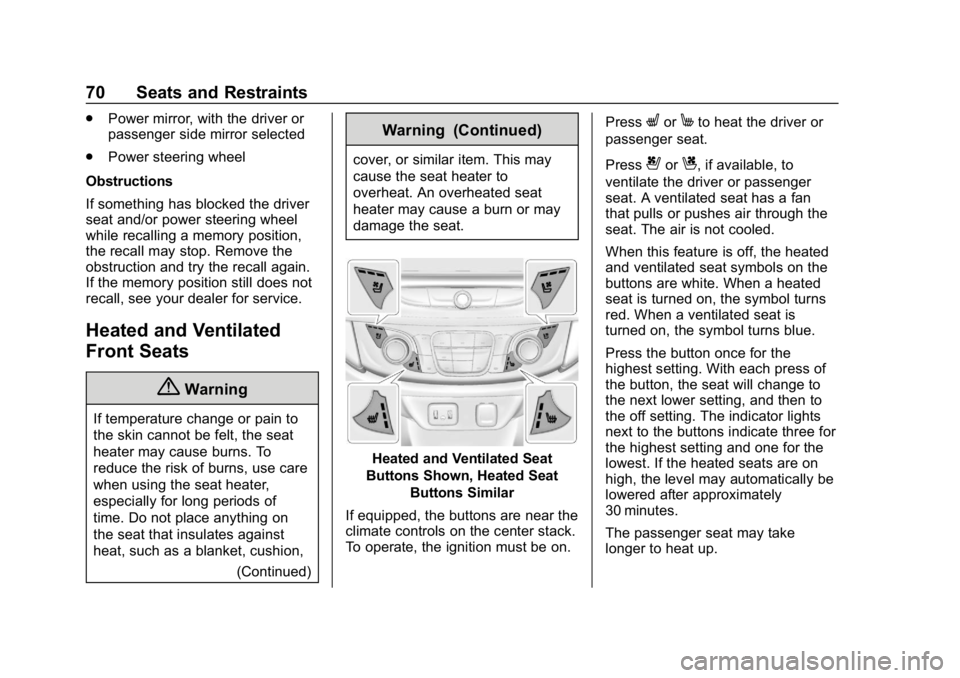
Heated and Ventilated Seat
Buttons Shown, Heated Seat Buttons Similar
If equipped, the buttons are near the
climate controls on the center stack.
To operate, the ignition must be on. Press
LorMto heat the driver or
passenger seat.
Press
{orC, if available, to
ventilate the driver or passenger
seat. A ventilated seat has a fan
that pulls or pushes air through the
seat. The air is not cooled.
When this feature is off, the heated
and ventilated seat symbols on the
buttons are white. When a heated
seat is turned on, the symbol turns
red. When a ventilated seat is
turned on, the symbol turns blue.
Press the button once for the
highest setting. With each press of
the button, the seat will change to
the next lower setting, and then to
the off setting. The indicator lights
next to the buttons indicate three for
the highest setting and one for the
lowest. If the heated seats are on
high, the level may automatically be
lowered after approximately
30 minutes.
The passenger seat may take
longer to heat up.
Page 72 of 419
Chevrolet Traverse Owner Manual (GMNA-Localizing-U.S./Canada/Mexico-
10603118) - 2018 - CRC - 1/29/18
Seats and Restraints 71
Remote Start Heated and
Ventilated Seats
During a remote start, the heated or
ventilated seats, if equipped, can be
turned on automatically. When it is
cold outside, the heated seats will
turn on followed by the heated
steering wheel, if equipped. When it
is hot outside, the ventilated seats
turn on. The heated or ventilated
seats are canceled when the
ignition is turned on. Press the
heated or ventilated seat button to
use the heated or ventilated seats
after the vehicle is started.
The heated or ventilated seat
indicator lights may not turn on
during a remote start.
The temperature performance of an
unoccupied seat may be reduced.
This is normal.
The remote start heated or
ventilated seats may be enabled or
disabled in the vehicle
personalization menu. SeeRemote
Vehicle Start 038 and Vehicle
Personalization 0154.Rear Seats
Rear Seat Reminder
If equipped, the message REAR
SEAT REMINDER LOOK IN REAR
SEAT displays under certain
conditions indicating there may be
an item or passenger in the rear
seat. Check before exiting the
vehicle.
This feature will activate when a
second row door is opened while
the vehicle is on or up to 10 minutes
before the vehicle is turned on.
There will be an alert when the
vehicle is turned off. The alert does
not directly detect objects in the rear
seat; instead, under certain
conditions, it detects when a rear
door is opened and closed,
indicating that there may be
something in the rear seat.
The feature is active only once each
time the vehicle is turned on and off,
and will require reactivation by
opening and closing the second row
doors. There may be an alert even
when there is nothing in the rear
seat; for example, if a child entered the vehicle through the rear door
and left the vehicle without the
vehicle being shut off.
The feature can be turned on or off.
See
Vehicle Personalization 0154.
Rear Seat Adjustment
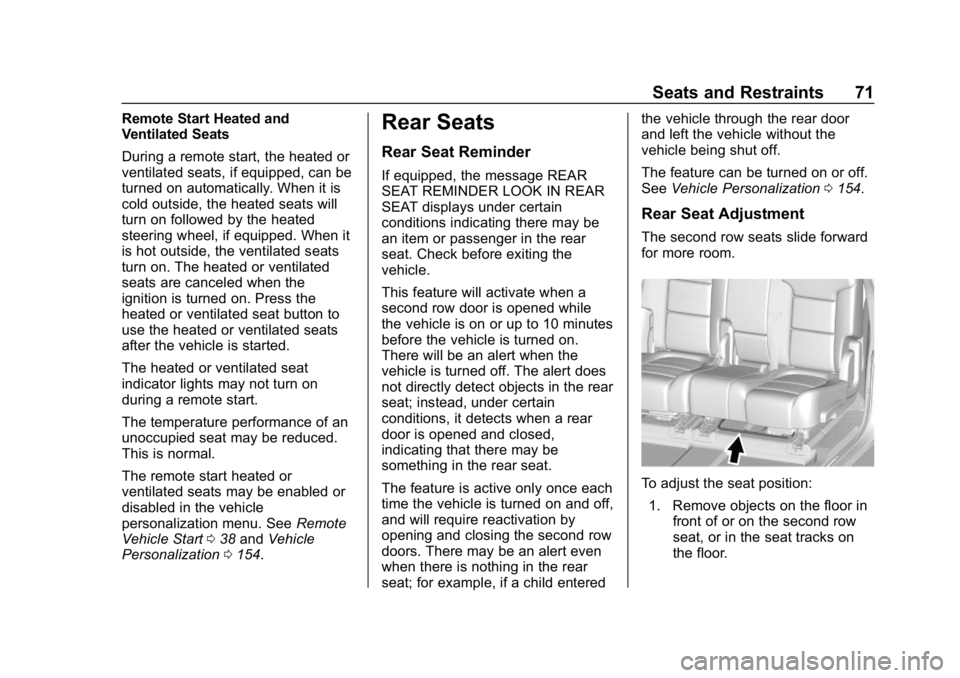
The second row seats slide forward
for more room.
To adjust the seat position:
1. Remove objects on the floor in front of or on the second row
seat, or in the seat tracks on
the floor.
Page 73 of 419
Chevrolet Traverse Owner Manual (GMNA-Localizing-U.S./Canada/Mexico-
10603118) - 2018 - CRC - 1/29/18
72 Seats and Restraints
2. Lift the lever below the seatcushion and slide the seat
forward or backward.
Entering and Exiting the
Third Row
{Warning
Using the third row seating
position while the second row is
folded could cause injury in a
sudden stop or crash. Be sure to
return the seat to the passenger
seating position. Push and pull on
the seat to make sure it is locked
into place.
{Warning
If the seatback and seat base are
not locked, the seat could move
forward in a sudden stop or crash
and injure the occupant. Always
push and pull on the seatbacks to
be sure the seatback and seat
base are locked.
Caution
Folding a rear seat with the seat
belts still fastened may cause
damage to the seat or the seat
belts. Always unbuckle the seat
belts and return them to their
normal stowed position before
folding a rear seat.
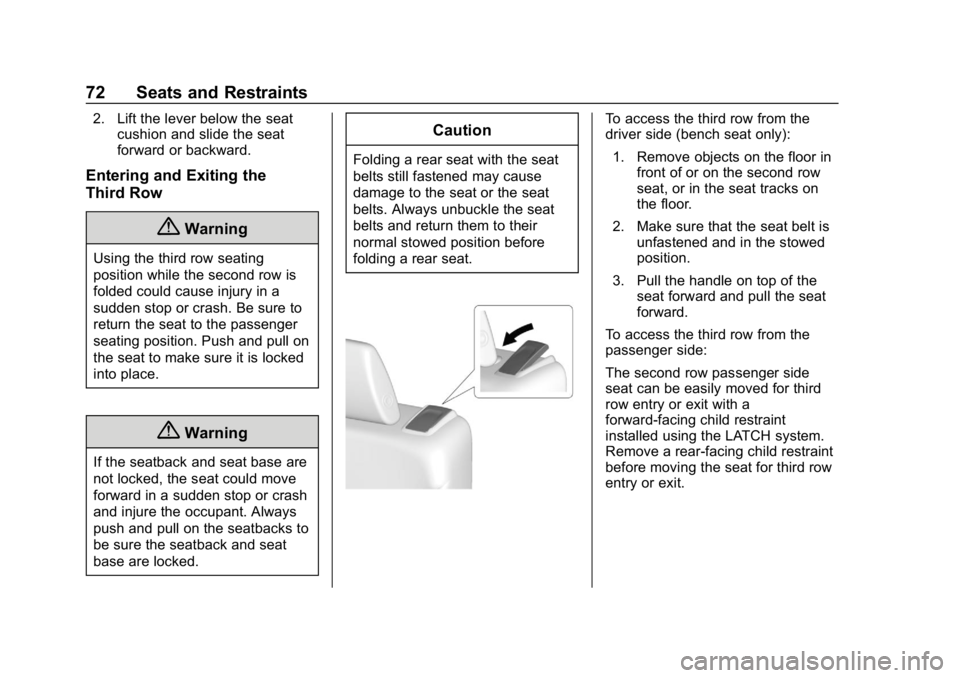
To access the third row from the
driver side (bench seat only):
1. Remove objects on the floor in front of or on the second row
seat, or in the seat tracks on
the floor.
2. Make sure that the seat belt is unfastened and in the stowed
position.
3. Pull the handle on top of the seat forward and pull the seat
forward.
To access the third row from the
passenger side:
The second row passenger side
seat can be easily moved for third
row entry or exit with a
forward-facing child restraint
installed using the LATCH system.
Remove a rear-facing child restraint
before moving the seat for third row
entry or exit.
Page 74 of 419
Chevrolet Traverse Owner Manual (GMNA-Localizing-U.S./Canada/Mexico-
10603118) - 2018 - CRC - 1/29/18
Seats and Restraints 73
{Warning
Remove the child from the child
restraint before moving the seat
forward for third row entry or exit.
Failure to do so may result in
injury to the child.
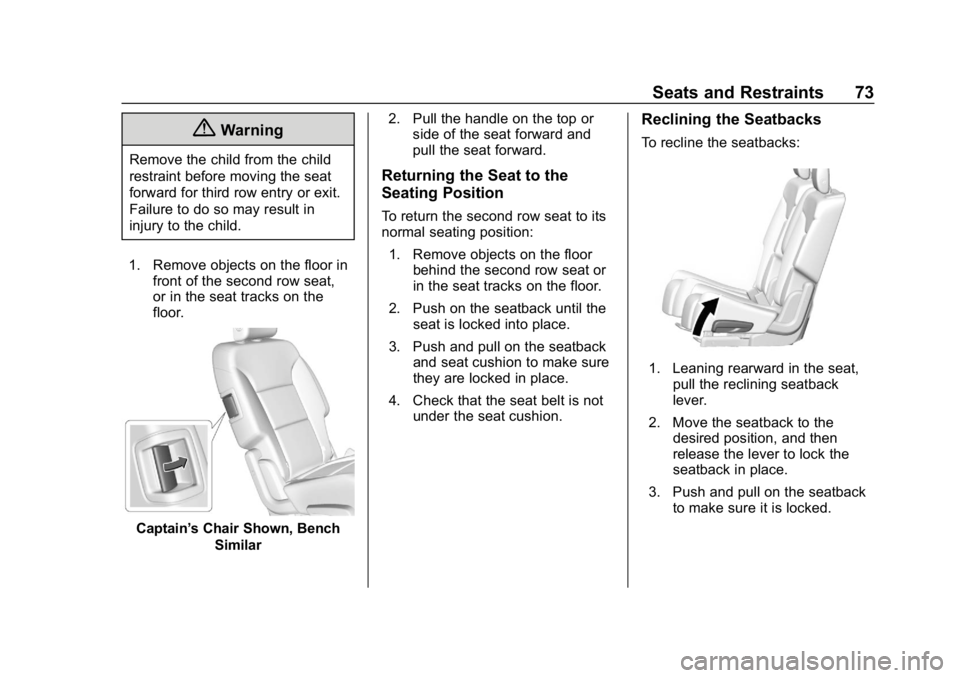
1. Remove objects on the floor in front of the second row seat,
or in the seat tracks on the
floor.
Captain’ s Chair Shown, Bench
Similar 2. Pull the handle on the top or
side of the seat forward and
pull the seat forward.
Returning the Seat to the
Seating Position
To return the second row seat to its
normal seating position:
1. Remove objects on the floor behind the second row seat or
in the seat tracks on the floor.
2. Push on the seatback until the seat is locked into place.
3. Push and pull on the seatback and seat cushion to make sure
they are locked in place.
4. Check that the seat belt is not under the seat cushion.
Reclining the Seatbacks
To recline the seatbacks:
1. Leaning rearward in the seat,
pull the reclining seatback
lever.
2. Move the seatback to the desired position, and then
release the lever to lock the
seatback in place.
3. Push and pull on the seatback to make sure it is locked.
Page 75 of 419
Chevrolet Traverse Owner Manual (GMNA-Localizing-U.S./Canada/Mexico-
10603118) - 2018 - CRC - 1/29/18
74 Seats and Restraints
Folding the Seatbacks
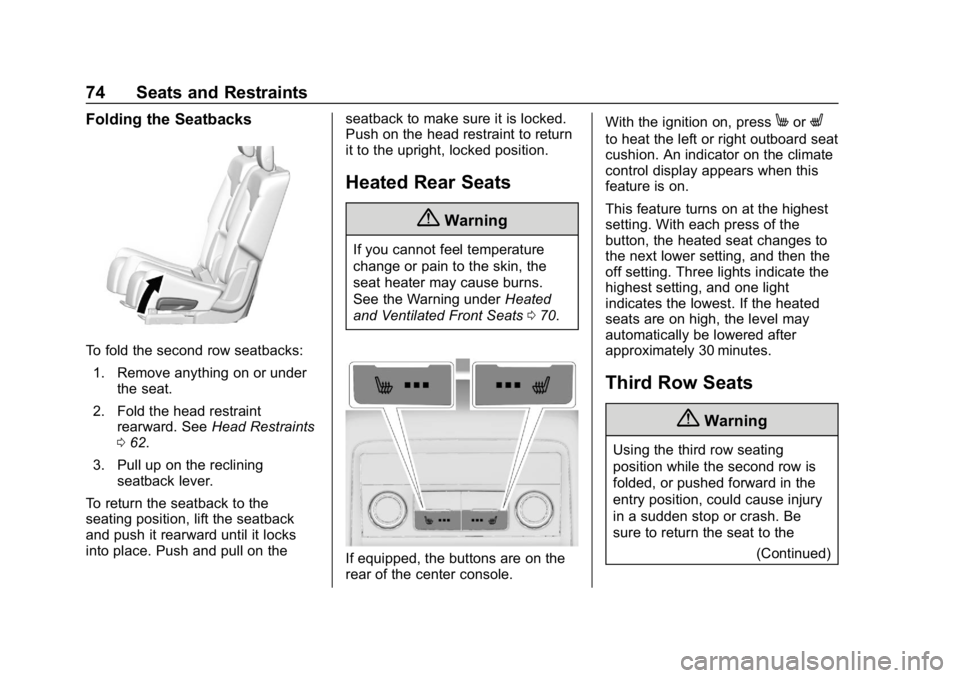
To fold the second row seatbacks:1. Remove anything on or under the seat.
2. Fold the head restraint rearward. See Head Restraints
0 62.
3. Pull up on the reclining seatback lever.
To return the seatback to the
seating position, lift the seatback
and push it rearward until it locks
into place. Push and pull on the seatback to make sure it is locked.
Push on the head restraint to return
it to the upright, locked position.
Heated Rear Seats
{Warning
If you cannot feel temperature
change or pain to the skin, the
seat heater may cause burns.
See the Warning under
Heated
and Ventilated Front Seats 070.
If equipped, the buttons are on the
rear of the center console. With the ignition on, press
MorL
to heat the left or right outboard seat
cushion. An indicator on the climate
control display appears when this
feature is on.
This feature turns on at the highest
setting. With each press of the
button, the heated seat changes to
the next lower setting, and then the
off setting. Three lights indicate the
highest setting, and one light
indicates the lowest. If the heated
seats are on high, the level may
automatically be lowered after
approximately 30 minutes.
Third Row Seats
{Warning
Using the third row seating
position while the second row is
folded, or pushed forward in the
entry position, could cause injury
in a sudden stop or crash. Be
sure to return the seat to the
(Continued)
Page 76 of 419
Chevrolet Traverse Owner Manual (GMNA-Localizing-U.S./Canada/Mexico-
10603118) - 2018 - CRC - 1/29/18
Seats and Restraints 75
Warning (Continued)
passenger seating position. Push
and pull on the seat to make sure
it is locked into place.
Folding the SeatbackCaution
Folding a rear seat with the seat
belts still fastened may cause
damage to the seat or the seat
belts. Always unbuckle the seat
belts and return them to their
normal stowed position before
folding a rear seat.
To fold the third row seatback: 1. Remove objects on the floor in front of or on the second row
seat, or in the seat tracks on
the floor.
2. If the second row seat is in the full rear position, adjust it
forward to allow the third row
seat to fold fully flat. 3. Remove anything on or under
the seat.
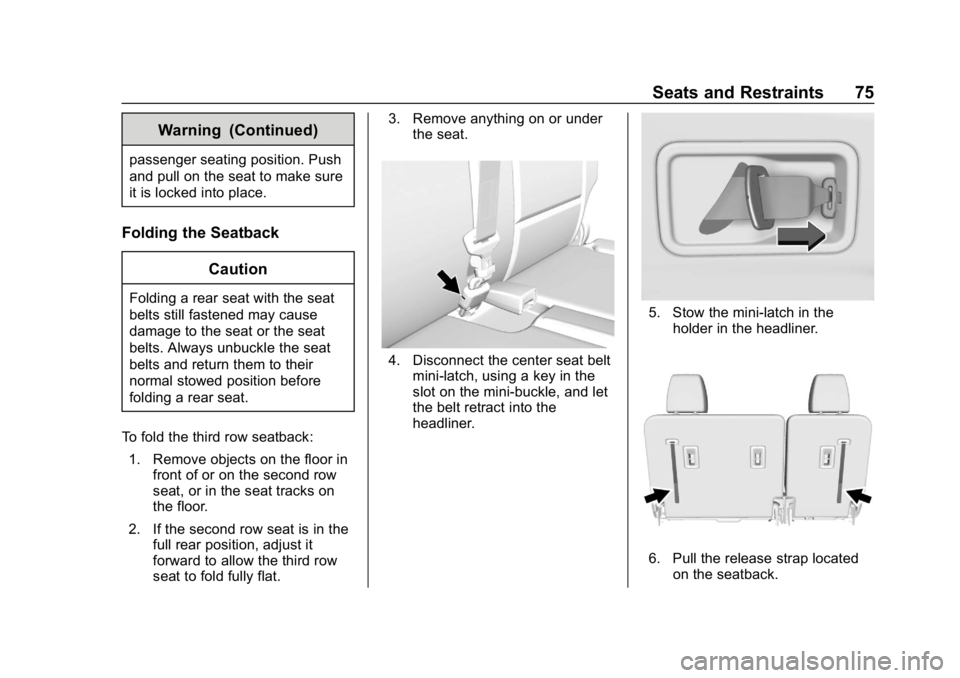
4. Disconnect the center seat beltmini-latch, using a key in the
slot on the mini-buckle, and let
the belt retract into the
headliner.
5. Stow the mini-latch in the
holder in the headliner.
6. Pull the release strap locatedon the seatback.
Page 77 of 419
Chevrolet Traverse Owner Manual (GMNA-Localizing-U.S./Canada/Mexico-
10603118) - 2018 - CRC - 1/29/18
76 Seats and Restraints
7. Push the seatback forward tolay flat.
8. Repeat for the other seatback, if necessary.
Returning the Seat to the
Seating Position
To return the seatback to the
seating position:
1. From the rear of the vehicle, raise the seatback to the
upright position using the pull
strap on the back of the third
row seat, or lift the seatback
and push it into place from
inside the vehicle.
{Warning
If either seatback is not locked, it
could move forward in a sudden
stop or crash. That could cause
injury to the person sitting there.
Always push and pull on the
seatbacks to be sure they are
locked. 2. Push and pull on the seatback
to make sure it is locked in
place.
{Warning
A seat belt that is improperly
routed, not properly attached,
or twisted will not provide the
protection needed in a crash. The
person wearing the belt could be
seriously injured. After raising the
rear seatback, always check to be
sure that the seat belts are
properly routed and attached, and
are not twisted.
3. Reconnect the center seat belt mini-latch to the mini-buckle.
Do not let it twist.
4. Pull on the seat belt to be sure the mini-latch is secure.
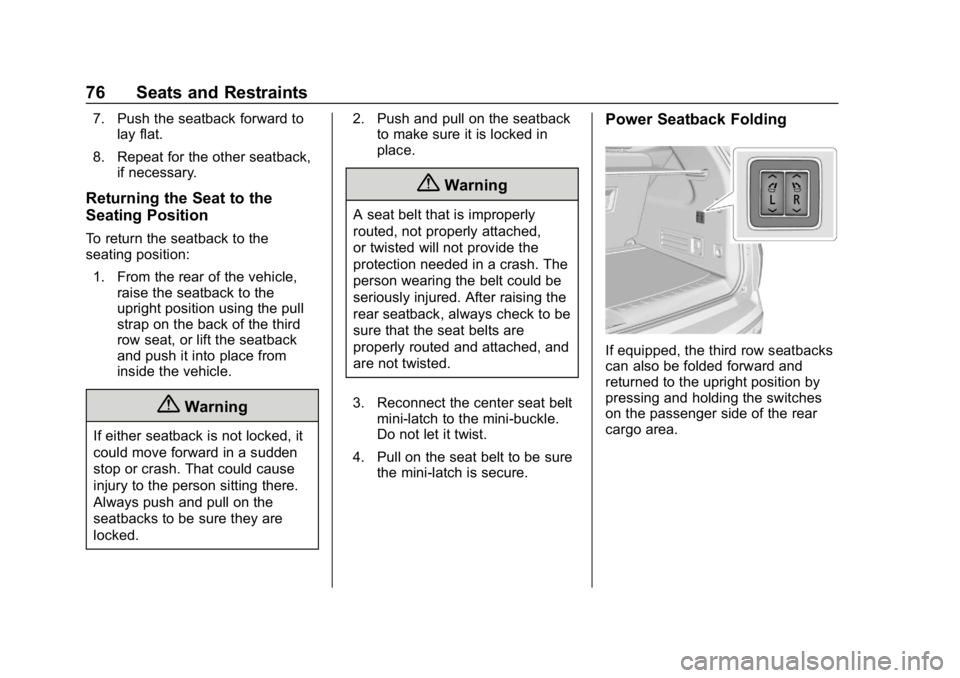
Power Seatback Folding
If equipped, the third row seatbacks
can also be folded forward and
returned to the upright position by
pressing and holding the switches
on the passenger side of the rear
cargo area.
Page 78 of 419
Chevrolet Traverse Owner Manual (GMNA-Localizing-U.S./Canada/Mexico-
10603118) - 2018 - CRC - 1/29/18
Seats and Restraints 77
Seat Belts
This section describes how to use
seat belts properly, and some things
not to do.
{Warning
Do not let anyone ride where a
seat belt cannot be worn properly.
In a crash, if you or your
passenger(s) are not wearing
seat belts, injuries can be much
worse than if you are wearing
seat belts. You can be seriously
injured or killed by hitting things
inside the vehicle harder or by
being ejected from the vehicle. In
addition, anyone who is not
buckled up can strike other
passengers in the vehicle.
It is extremely dangerous to ride
in a cargo area, inside or outside
of a vehicle. In a collision,
passengers riding in these areas
are more likely to be seriously
injured or killed. Do not allow(Continued)
Warning (Continued)
passengers to ride in any area of
the vehicle that is not equipped
with seats and seat belts.
Always wear a seat belt, and
check that all passenger(s) are
restrained properly too.
This vehicle has indicators as a
reminder to buckle the seat belts.
See Seat Belt Reminders 0139.
Why Seat Belts Work
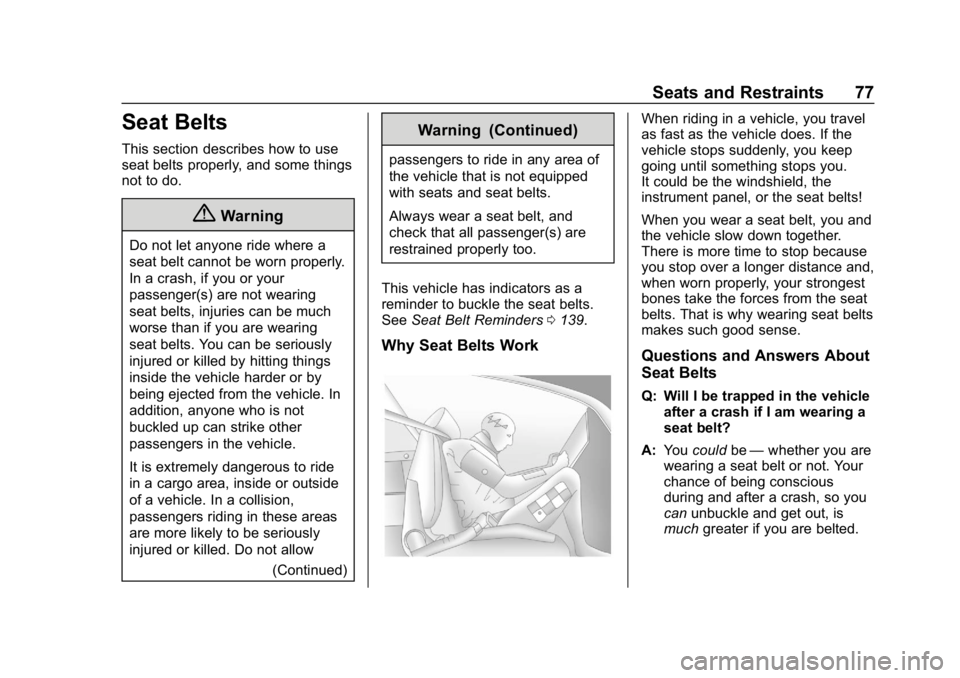
When riding in a vehicle, you travel
as fast as the vehicle does. If the
vehicle stops suddenly, you keep
going until something stops you.
It could be the windshield, the
instrument panel, or the seat belts!
When you wear a seat belt, you and
the vehicle slow down together.
There is more time to stop because
you stop over a longer distance and,
when worn properly, your strongest
bones take the forces from the seat
belts. That is why wearing seat belts
makes such good sense.
Questions and Answers About
Seat Belts
Q: Will I be trapped in the vehicle
after a crash if I am wearing a
seat belt?
A: You could be—whether you are
wearing a seat belt or not. Your
chance of being conscious
during and after a crash, so you
can unbuckle and get out, is
much greater if you are belted.
Page 79 of 419
Chevrolet Traverse Owner Manual (GMNA-Localizing-U.S./Canada/Mexico-
10603118) - 2018 - CRC - 1/29/18
78 Seats and Restraints
Q: If my vehicle has airbags, whyshould I have to wear seat
belts?
A: Airbags are supplemental
systems only. They work with
seat belts —not instead of them.
Whether or not an airbag is
provided, all occupants still have
to buckle up to get the most
protection.
Also, in nearly all states and in
all Canadian provinces, the law
requires wearing seat belts.
How to Wear Seat Belts
Properly
This section is only for people of
adult size.
There are special things to know
about seat belts and children, and
there are different rules for smaller
children and infants. If a child will be
riding in the vehicle, see Older
Children 097 orInfants and Young
Children 099. Follow those rules for
everyone's protection. It is very important for all occupants
to buckle up. Statistics show that
unbelted people are hurt more often
in crashes than those who are
wearing seat belts.
There are important things to know
about wearing a seat belt properly.
.
Sit up straight and always keep
your feet on the floor in front
of you.
. Always use the correct buckle
for your seating position.
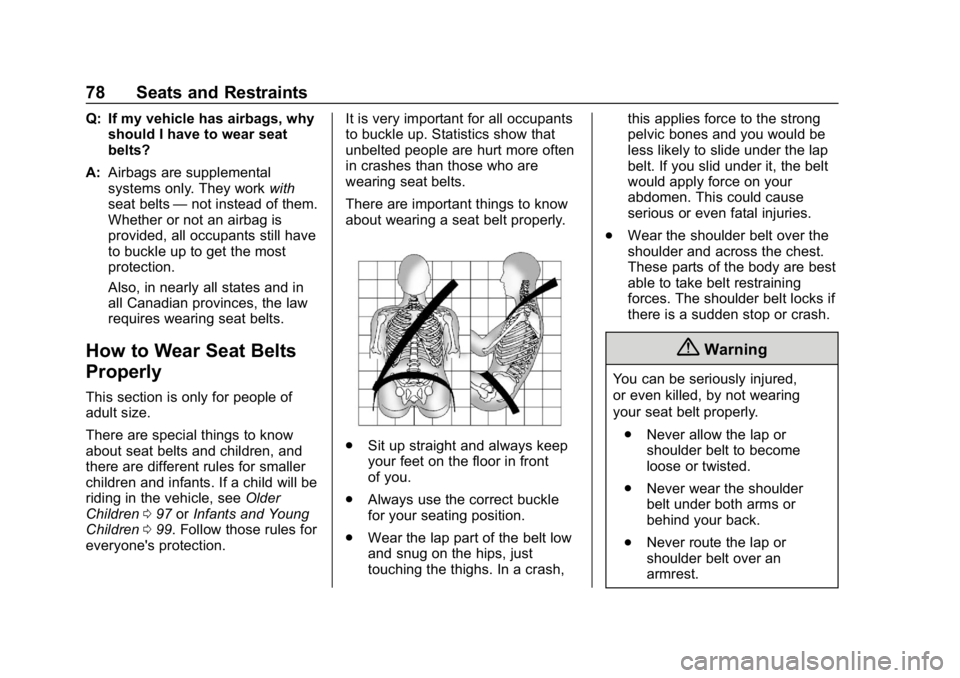
. Wear the lap part of the belt low
and snug on the hips, just
touching the thighs. In a crash, this applies force to the strong
pelvic bones and you would be
less likely to slide under the lap
belt. If you slid under it, the belt
would apply force on your
abdomen. This could cause
serious or even fatal injuries.
. Wear the shoulder belt over the
shoulder and across the chest.
These parts of the body are best
able to take belt restraining
forces. The shoulder belt locks if
there is a sudden stop or crash.
{Warning
You can be seriously injured,
or even killed, by not wearing
your seat belt properly.
. Never allow the lap or
shoulder belt to become
loose or twisted.
. Never wear the shoulder
belt under both arms or
behind your back.
. Never route the lap or
shoulder belt over an
armrest.
Page 80 of 419
Chevrolet Traverse Owner Manual (GMNA-Localizing-U.S./Canada/Mexico-
10603118) - 2018 - CRC - 1/29/18
Seats and Restraints 79
Lap-Shoulder Belt
All seating positions in the vehicle
have a lap-shoulder belt.
If you are using a rear seating
position with a detachable seat belt
and the seat belt is not attached,
seeThird Row Seats 074 for
instructions on reconnecting the
seat belt to the mini-buckle.
The following instructions explain
how to wear a lap-shoulder belt
properly.
1. Adjust the seat, if the seat is adjustable, so you can sit up
straight. To see how, see
“Seats” in the Index.
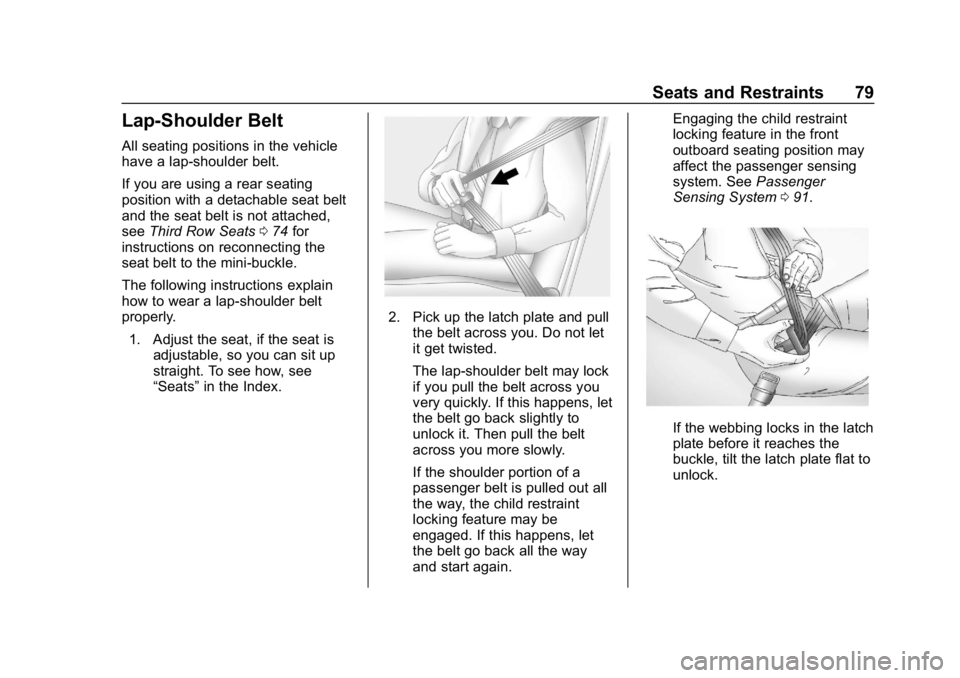
2. Pick up the latch plate and pull
the belt across you. Do not let
it get twisted.
The lap-shoulder belt may lock
if you pull the belt across you
very quickly. If this happens, let
the belt go back slightly to
unlock it. Then pull the belt
across you more slowly.
If the shoulder portion of a
passenger belt is pulled out all
the way, the child restraint
locking feature may be
engaged. If this happens, let
the belt go back all the way
and start again. Engaging the child restraint
locking feature in the front
outboard seating position may
affect the passenger sensing
system. See
Passenger
Sensing System 091.
If the webbing locks in the latch
plate before it reaches the
buckle, tilt the latch plate flat to
unlock.