display CHEVROLET TRAVERSE 2019 Owner's Guide
[x] Cancel search | Manufacturer: CHEVROLET, Model Year: 2019, Model line: TRAVERSE, Model: CHEVROLET TRAVERSE 2019Pages: 428, PDF Size: 6.28 MB
Page 120 of 428
Chevrolet Traverse Owner Manual (GMNA-Localizing-U.S./Canada/Mexico-
12146157) - 2019 - CRC - 10/31/18
Storage 119
Storage
Storage Compartments
Storage Compartments . . . . . . . 119
Instrument Panel Storage . . . . . 119
Glove Box . . . . . . . . . . . . . . . . . . . . 119
Center Console Storage . . . . . . 120
Additional Storage Features
Cargo ManagementSystem . . . . . . . . . . . . . . . . . . . . . . 120
Roof Rack System
Roof Rack System . . . . . . . . . . . 122
Storage
Compartments
{Warning
Do not store heavy or sharp
objects in storage compartments.
In a crash, these objects may
cause the cover to open and
could result in injury.
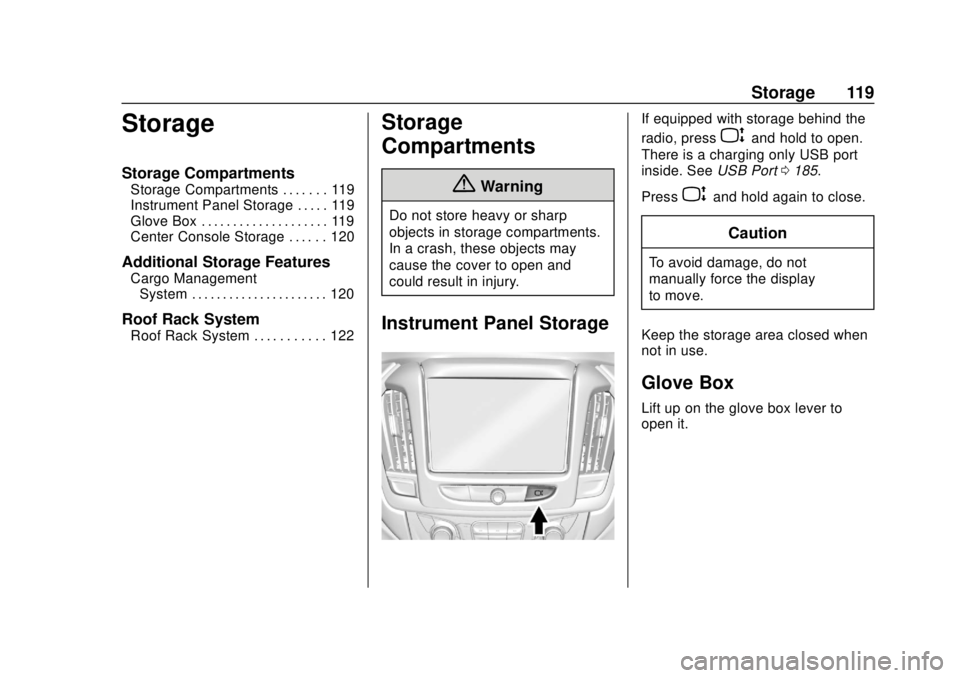
Instrument Panel Storage
If equipped with storage behind the
radio, press
Pand hold to open.
There is a charging only USB port
inside. See USB Port0185.
Press
Pand hold again to close.
Caution
To avoid damage, do not
manually force the display
to move.
Keep the storage area closed when
not in use.
Glove Box
Lift up on the glove box lever to
open it.
Page 125 of 428
Chevrolet Traverse Owner Manual (GMNA-Localizing-U.S./Canada/Mexico-
12146157) - 2019 - CRC - 10/31/18
124 Instruments and Controls
Instruments and
Controls
Controls
Steering Wheel Adjustment . . . 125
Steering Wheel Controls . . . . . . 125
Heated Steering Wheel . . . . . . . 126
Horn . . . . . . . . . . . . . . . . . . . . . . . . . . 126
Windshield Wiper/Washer . . . . 127
Rear Window Wiper/Washer . . . . . . . . . . . . . . . . . . . . . 128
Compass . . . . . . . . . . . . . . . . . . . . . 128
Clock . . . . . . . . . . . . . . . . . . . . . . . . . 129
Power Outlets . . . . . . . . . . . . . . . . 130
Wireless Charging . . . . . . . . . . . . 132
Warning Lights, Gauges, and
Indicators
Warning Lights, Gauges, and Indicators . . . . . . . . . . . . . . . . . . . 134
Instrument Cluster . . . . . . . . . . . . 135
Speedometer . . . . . . . . . . . . . . . . . 138
Odometer . . . . . . . . . . . . . . . . . . . . . 138
Trip Odometer . . . . . . . . . . . . . . . . 138
Tachometer . . . . . . . . . . . . . . . . . . . 138
Fuel Gauge . . . . . . . . . . . . . . . . . . . 139
Engine Coolant Temperature
Gauge . . . . . . . . . . . . . . . . . . . . . . 139 Seat Belt Reminders . . . . . . . . . 140
Airbag Readiness Light . . . . . . . 141
Passenger Airbag Status
Indicator . . . . . . . . . . . . . . . . . . . . 141
Charging System Light . . . . . . . 142
Malfunction Indicator Lamp
(Check Engine Light) . . . . . . . . 142
Brake System Warning Light . . . . . . . . . . . . . . . . . . . . . . . . 144
Electric Parking Brake Light . . . . . . . . . . . . . . . . . . . . . . . . 145
Service Electric Parking Brake Light . . . . . . . . . . . . . . . . . . . . . . . . 145
Antilock Brake System (ABS) Warning Light . . . . . . . . . . . . . . . 145
Lane Keep Assist (LKA) Light . . . . . . . . . . . . . . . . . . . . . . . . 146
Vehicle Ahead Indicator . . . . . . 146
Pedestrian Ahead Indicator . . . 146
Traction Off Light . . . . . . . . . . . . . 146
StabiliTrak OFF Light . . . . . . . . . 147
Traction Control System (TCS)/ StabiliTrak Light . . . . . . . . . . . . . 147
Tire Pressure Light . . . . . . . . . . . 148
Engine Oil Pressure Light . . . . 148
Low Fuel Warning Light (Base Level) . . . . . . . . . . . . . . . . . . . . . . . 149
Low Fuel Warning Light (Uplevel) . . . . . . . . . . . . . . . . . . . . 149
Security Light . . . . . . . . . . . . . . . . . 149 High-Beam On Light . . . . . . . . . . 150
Front Fog Lamp Light . . . . . . . . . 150
Lamps On Reminder . . . . . . . . . 150
Cruise Control Light . . . . . . . . . . 150
Door Ajar Light . . . . . . . . . . . . . . . 151
Information Displays
Driver Information
Center (DIC) . . . . . . . . . . . . . . . . 151
Vehicle Messages
Vehicle Messages . . . . . . . . . . . . 154
Engine Power Messages . . . . . 154
Vehicle Speed Messages . . . . . 155
Vehicle Personalization
Vehicle Personalization . . . . . . . 155
Universal Remote System
Universal Remote System . . . . 164
Universal Remote SystemProgramming . . . . . . . . . . . . . . . 164
Universal Remote System Operation . . . . . . . . . . . . . . . . . . . 166
Page 127 of 428
Chevrolet Traverse Owner Manual (GMNA-Localizing-U.S./Canada/Mexico-
12146157) - 2019 - CRC - 10/31/18
126 Instruments and Controls
i:Press to reject an incoming
call or end a current call. Press to
mute or unmute the infotainment
system when not on a call.
oorp: Press to go to the
previous or next menu option.
worx: Press to go to the next or
previous selection.
V: Press to select a highlighted
menu option.
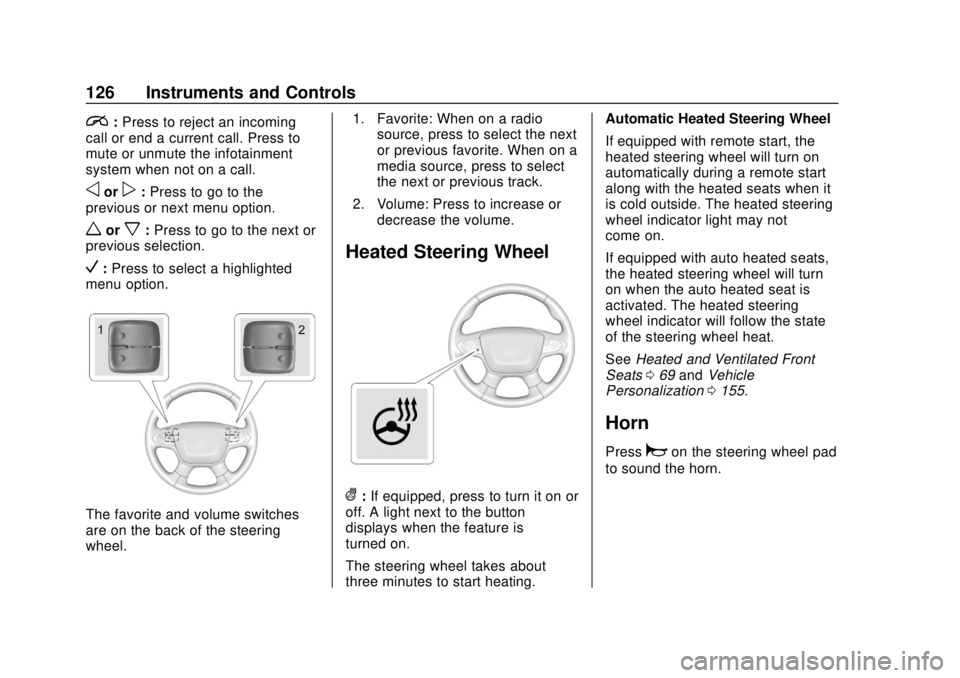
The favorite and volume switches
are on the back of the steering
wheel. 1. Favorite: When on a radio
source, press to select the next
or previous favorite. When on a
media source, press to select
the next or previous track.
2. Volume: Press to increase or decrease the volume.
Heated Steering Wheel
(:If equipped, press to turn it on or
off. A light next to the button
displays when the feature is
turned on.
The steering wheel takes about
three minutes to start heating. Automatic Heated Steering Wheel
If equipped with remote start, the
heated steering wheel will turn on
automatically during a remote start
along with the heated seats when it
is cold outside. The heated steering
wheel indicator light may not
come on.
If equipped with auto heated seats,
the heated steering wheel will turn
on when the auto heated seat is
activated. The heated steering
wheel indicator will follow the state
of the steering wheel heat.
See
Heated and Ventilated Front
Seats 069 and Vehicle
Personalization 0155.
Horn
Pressaon the steering wheel pad
to sound the horn.
Page 129 of 428
Chevrolet Traverse Owner Manual (GMNA-Localizing-U.S./Canada/Mexico-
12146157) - 2019 - CRC - 10/31/18
128 Instruments and Controls
If the ignition is turned off while the
wipers are performing wipes due to
windshield washing, the wipers
continue to run until they reach the
base of the windshield.
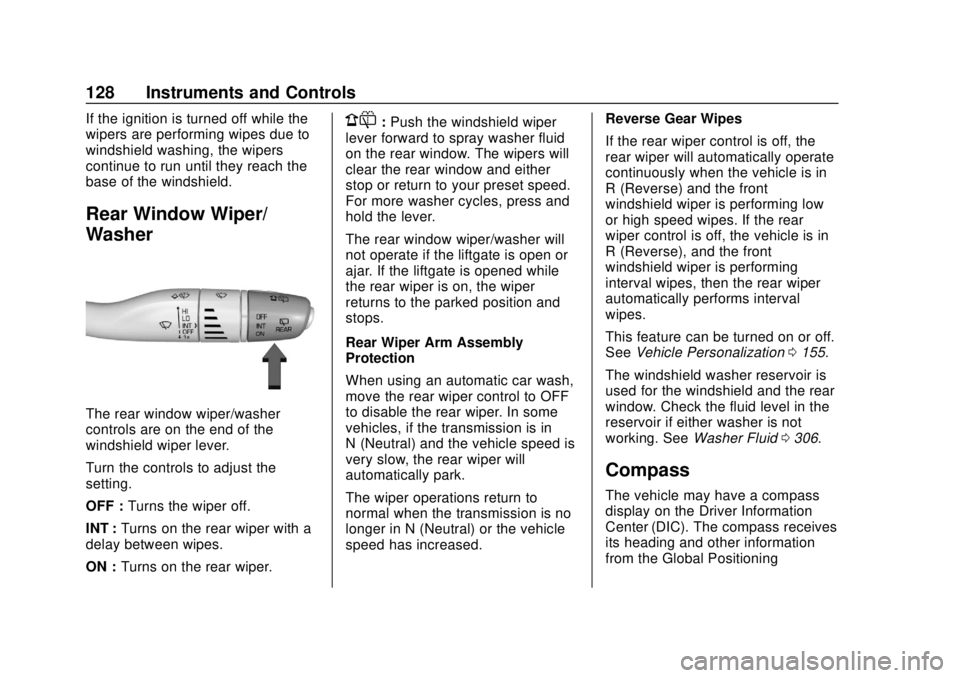
Rear Window Wiper/
Washer
The rear window wiper/washer
controls are on the end of the
windshield wiper lever.
Turn the controls to adjust the
setting.
OFF :Turns the wiper off.
INT : Turns on the rear wiper with a
delay between wipes.
ON : Turns on the rear wiper.
1:Push the windshield wiper
lever forward to spray washer fluid
on the rear window. The wipers will
clear the rear window and either
stop or return to your preset speed.
For more washer cycles, press and
hold the lever.
The rear window wiper/washer will
not operate if the liftgate is open or
ajar. If the liftgate is opened while
the rear wiper is on, the wiper
returns to the parked position and
stops.
Rear Wiper Arm Assembly
Protection
When using an automatic car wash,
move the rear wiper control to OFF
to disable the rear wiper. In some
vehicles, if the transmission is in
N (Neutral) and the vehicle speed is
very slow, the rear wiper will
automatically park.
The wiper operations return to
normal when the transmission is no
longer in N (Neutral) or the vehicle
speed has increased. Reverse Gear Wipes
If the rear wiper control is off, the
rear wiper will automatically operate
continuously when the vehicle is in
R (Reverse) and the front
windshield wiper is performing low
or high speed wipes. If the rear
wiper control is off, the vehicle is in
R (Reverse), and the front
windshield wiper is performing
interval wipes, then the rear wiper
automatically performs interval
wipes.
This feature can be turned on or off.
See
Vehicle Personalization 0155.
The windshield washer reservoir is
used for the windshield and the rear
window. Check the fluid level in the
reservoir if either washer is not
working. See Washer Fluid 0306.
Compass
The vehicle may have a compass
display on the Driver Information
Center (DIC). The compass receives
its heading and other information
from the Global Positioning
Page 130 of 428
Chevrolet Traverse Owner Manual (GMNA-Localizing-U.S./Canada/Mexico-
12146157) - 2019 - CRC - 10/31/18
Instruments and Controls 129
System (GPS) antenna, StabiliTrak/
Electronic Stability Control (ESC),
and vehicle speed information.
The compass system is designed to
operate for a certain number of
miles or degrees of turn before
needing a signal from the GPS
satellites. When the compass
display shows CAL, drive the
vehicle for a short distance in an
open area where it can receive a
GPS signal. The compass system
will automatically determine when a
GPS signal is restored and provide
a heading again.
Clock
Base Radio
The infotainment system controls
are used to access the time and
date settings through the menu
system. SeeOperation0179 on
how to use the menu system.
Setting the Time and Date
When Auto Set is enabled the time
cannot be manually set. 1. Press
{, then touch
SETTINGS.
2. Touch Time and Date, then Set Time or Set Date.
3. Touch + or −to adjust the
value.
4. Touch
RorQto adjust AM or
PM for 12 hour format.
5. Touch
0.
Auto Set
Auto Set requires an active OnStar
or connected service plan.
If auto set is on, the time displayed
on the clock may not update
immediately when driving into a new
time zone.
1. Press
{, then touch
SETTINGS.
2. Touch Time and Date, then Auto Set.
3. Choose from the available selections.
4. Touch
0.
Setting the 12/24 Hour Format
1. Press{, then touch
SETTINGS.
2. Touch Time and Date, then select 12h or 24h format.
3. Touch
0.
Setting the Month and Day
Format
1. Press{, then touch
SETTINGS.
2. Touch Time and Date, then Set Date Format.
3. Select DD/MM/YYYY (day/ month/year), MM/DD/YYYY
(month/day/year), or YYYY/
MM/DD (year/month/day)
format.
4. Touch
0.
Uplevel Radio
The infotainment system controls
are used to access the time and
date settings through the menu
Page 131 of 428
Chevrolet Traverse Owner Manual (GMNA-Localizing-U.S./Canada/Mexico-
12146157) - 2019 - CRC - 10/31/18
130 Instruments and Controls
system. See“Using the System”
under “Introduction” in the
infotainment manual.
To set the time:
1. Touch SETTINGS from the Home Page, then touch Time
and Date.
2. Touch Set Time and touch
«
orªto increase or decrease
hours, minutes, and AM or PM.
Touch 12–24 Hr for 12 or
24 hour clock.
3. Touch the back icon to go back to the previous menu.
Auto Set requires an active OnStar
or connected service plan.
If auto set is on, the time displayed
on the clock may not update
immediately when driving into a new
time zone.
To set the date: 1. Touch SETTINGS from the Home Page, then touch Time
and Date. 2. Touch Set Date and touch
«
orªto increase or decrease
month, day, or year.
3. Touch the back icon to go back to the previous menu.
To set the clock display: 1. Touch SETTINGS and touch Time and Date.
2. Touch Clock Display and touch Off or On to turn the clock
display off or on.
3. Touch the back icon to go back to the previous menu.
The clock settings can also be
accessed by touching the time
display, then touching Set.
Power Outlets
Power Outlets 12-Volt Direct
Current
The vehicle has two 12-volt outlets
that can be used to plug in electrical
equipment, such as a cell phone or
MP3 player. The power outlets are located:
.
On the center stack below the
climate controls.
. In the rear cargo area.
Lift the cover to access the outlet
and replace when not in use.
There are also charging only USB
ports on the rear of the center
console and in the third row
seating area.
{Warning
Power is always supplied to the
rear cargo power outlet. Do not
leave electrical equipment
plugged in when the vehicle is not
in use because the vehicle could
catch fire and cause injury or
death.
Page 134 of 428
Chevrolet Traverse Owner Manual (GMNA-Localizing-U.S./Canada/Mexico-
12146157) - 2019 - CRC - 10/31/18
Instruments and Controls 133
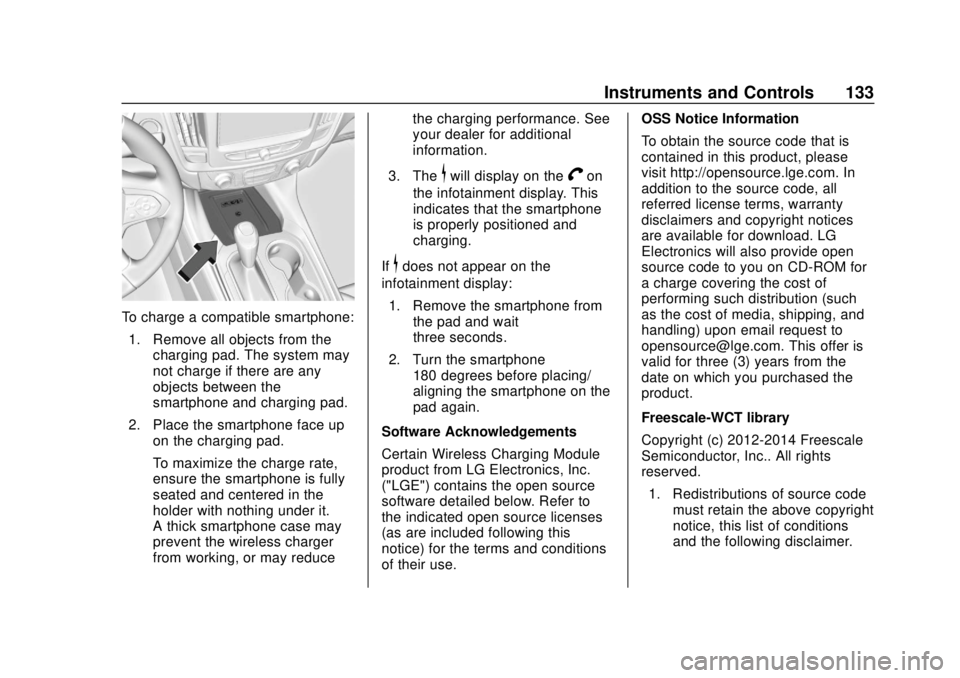
To charge a compatible smartphone:1. Remove all objects from the charging pad. The system may
not charge if there are any
objects between the
smartphone and charging pad.
2. Place the smartphone face up on the charging pad.
To maximize the charge rate,
ensure the smartphone is fully
seated and centered in the
holder with nothing under it.
A thick smartphone case may
prevent the wireless charger
from working, or may reduce the charging performance. See
your dealer for additional
information.
3. The
$will display on theVon
the infotainment display. This
indicates that the smartphone
is properly positioned and
charging.
If
$does not appear on the
infotainment display:
1. Remove the smartphone from the pad and wait
three seconds.
2. Turn the smartphone 180 degrees before placing/
aligning the smartphone on the
pad again.
Software Acknowledgements
Certain Wireless Charging Module
product from LG Electronics, Inc.
("LGE") contains the open source
software detailed below. Refer to
the indicated open source licenses
(as are included following this
notice) for the terms and conditions
of their use. OSS Notice Information
To obtain the source code that is
contained in this product, please
visit http://opensource.lge.com. In
addition to the source code, all
referred license terms, warranty
disclaimers and copyright notices
are available for download. LG
Electronics will also provide open
source code to you on CD-ROM for
a charge covering the cost of
performing such distribution (such
as the cost of media, shipping, and
handling) upon email request to
[email protected]. This offer is
valid for three (3) years from the
date on which you purchased the
product.
Freescale-WCT library
Copyright (c) 2012-2014 Freescale
Semiconductor, Inc.. All rights
reserved.
1. Redistributions of source code must retain the above copyright
notice, this list of conditions
and the following disclaimer.
Page 138 of 428
Chevrolet Traverse Owner Manual (GMNA-Localizing-U.S./Canada/Mexico-
12146157) - 2019 - CRC - 10/31/18
Instruments and Controls 137
Cluster Menu
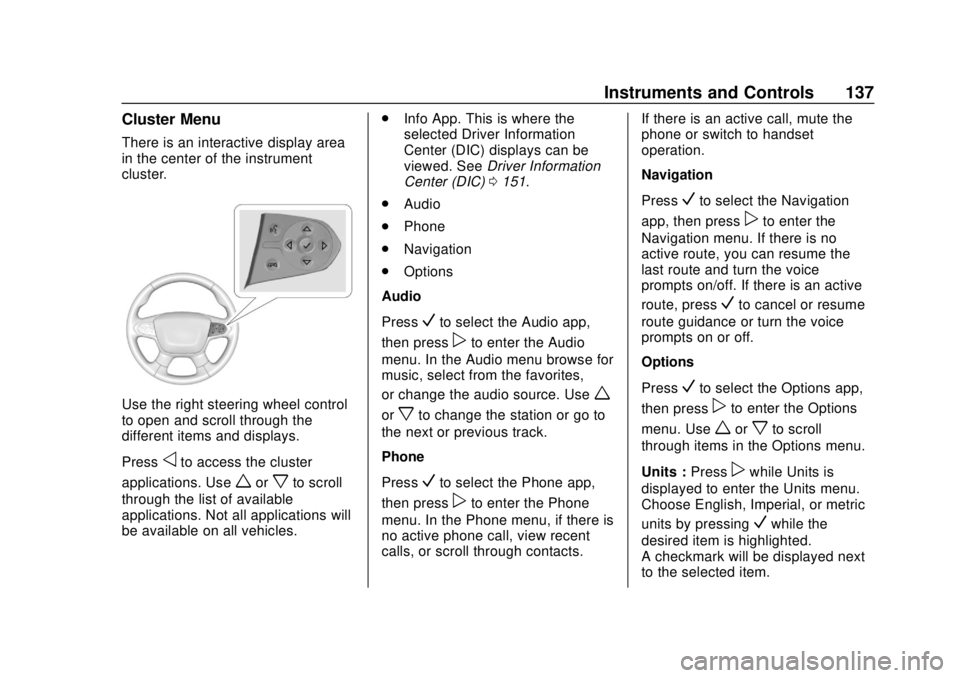
There is an interactive display area
in the center of the instrument
cluster.
Use the right steering wheel control
to open and scroll through the
different items and displays.
Press
oto access the cluster
applications. Use
worxto scroll
through the list of available
applications. Not all applications will
be available on all vehicles. .
Info App. This is where the
selected Driver Information
Center (DIC) displays can be
viewed. See Driver Information
Center (DIC) 0151.
. Audio
. Phone
. Navigation
. Options
Audio
Press
Vto select the Audio app,
then press
pto enter the Audio
menu. In the Audio menu browse for
music, select from the favorites,
or change the audio source. Use
w
orxto change the station or go to
the next or previous track.
Phone
Press
Vto select the Phone app,
then press
pto enter the Phone
menu. In the Phone menu, if there is
no active phone call, view recent
calls, or scroll through contacts. If there is an active call, mute the
phone or switch to handset
operation.
Navigation
Press
Vto select the Navigation
app, then press
pto enter the
Navigation menu. If there is no
active route, you can resume the
last route and turn the voice
prompts on/off. If there is an active
route, press
Vto cancel or resume
route guidance or turn the voice
prompts on or off.
Options
Press
Vto select the Options app,
then press
pto enter the Options
menu. Use
worxto scroll
through items in the Options menu.
Units : Press
pwhile Units is
displayed to enter the Units menu.
Choose English, Imperial, or metric
units by pressing
Vwhile the
desired item is highlighted.
A checkmark will be displayed next
to the selected item.
Page 139 of 428
Chevrolet Traverse Owner Manual (GMNA-Localizing-U.S./Canada/Mexico-
12146157) - 2019 - CRC - 10/31/18
138 Instruments and Controls
Info Pages :Presspwhile Info
Pages is displayed to enter the Info
Pages menu and select the items to
be displayed in the Info app. See
Driver Information Center (DIC)
0 151.
Speed Warning : The Speed
Warning display allows the driver to
set a speed that they do not want to
exceed. To set the Speed Warning
press
pwhen Speed Warning is
displayed.
Press
worxto adjust the value.
Press
Vto set the speed.
Once the speed is set, this feature
can be turned off by pressing
V
while viewing this page. If the
selected speed limit is exceeded, a
pop-up warning is displayed with a
chime.
Software Information : Displays
open source software information.
Speedometer
The speedometer shows the
vehicle's speed in either kilometers
per hour (km/h) or miles per
hour (mph).
Odometer
The odometer shows how far the
vehicle has been driven, in either
kilometers or miles.
Trip Odometer
The trip odometer shows how far
the vehicle has been driven since
the trip odometer was last reset.
The trip odometer is accessed and
reset through the Driver Information
Center (DIC). See Driver
Information Center (DIC) 0151.
Tachometer
The tachometer displays the engine
speed in revolutions per
minute (rpm).
For vehicles with the Stop/Start
system, when the ignition is on, the
tachometer indicates the vehicle
status. When pointing to AUTO
STOP, the engine is off but the
vehicle is on and can move. The
engine could auto start at any time.
When the indicator points to OFF,
the vehicle is off.
When the engine is on, the
tachometer will indicate the engine’s
revolutions per minute (rpm). The
tachometer may vary by several
hundred rpm’s, during Auto Stop
mode, when the engine is shutting
off and restarting.
Page 143 of 428
Chevrolet Traverse Owner Manual (GMNA-Localizing-U.S./Canada/Mexico-
12146157) - 2019 - CRC - 10/31/18
142 Instruments and Controls
If the word OFF is lit on the
passenger airbag status indicator, it
means that the passenger sensing
system has turned off the front
outboard passenger frontal airbag.
If, after several seconds, both status
indicator lights remain on, or if there
are no lights at all, there may be a
problem with the lights or the
passenger sensing system. See
your dealer for service.
{Warning
If the airbag readiness light ever
comes on and stays on, it means
that something may be wrong
with the airbag system. To help
avoid injury to yourself or others,
have the vehicle serviced right
away. SeeAirbag Readiness
Light 0141 for more information,
including important safety
information.
Charging System Light
The charging system light comes on
briefly when the ignition is turned
on, but the engine is not running, as
a check to show the light is working.
The light turns off when the engine
is started. If it does not, have the
vehicle serviced by your dealer.
If the light stays on, or comes on
while driving, there may be a
problem with the electrical charging
system. Have it checked by your
dealer. Driving while this light is on
could drain the battery.
When this light comes on, the Driver
Information Center (DIC) also
displays a message.
If a short distance must be driven
with the light on, be sure to turn off
all accessories, such as the radio
and air conditioner.
Malfunction Indicator
Lamp (Check Engine
Light)
This light is part of the vehicle’s
emission control on-board
diagnostic system. If this light is on
while the engine is running, a
malfunction has been detected and
the vehicle may require service. The
light should come on to show that it
is working when the ignition is in
Service Mode. See Ignition
Positions 0225.
Malfunctions are often indicated by
the system before any problem is
noticeable. Being aware of the light
and seeking service promptly when
it comes on may prevent damage.