four wheel drive CHEVROLET TRAVERSE 2020 Owners Manual
[x] Cancel search | Manufacturer: CHEVROLET, Model Year: 2020, Model line: TRAVERSE, Model: CHEVROLET TRAVERSE 2020Pages: 382, PDF Size: 5.87 MB
Page 17 of 382
Chevrolet Traverse Owner Manual (GMNA-Localizing-U.S./Canada/Mexico-
13527526) - 2020 - CRC - 9/5/19
16 Keys, Doors, and Windows
Remote Vehicle Start
If equipped, this feature allows the
engine to be started from outside of
the vehicle.
/:This button will be on the RKE
transmitter if the vehicle has remote
start.
The climate control system will use
the previous settings during a
remote start. The rear defog may
come on during a remote start
based on cold ambient conditions.
The rear fog indicator light does not
come on during a remote start.
If the vehicle has auto heated or
ventilated seats, they may come on
during a remote start. See Heated
and Ventilated Front Seats 048.
If equipped with a remote start
heated steering wheel, it may come
on during a remote start when it is
cold outside, if enabled. See Heated
Steering Wheel 0106 and
Vehicle Personalization 0138.
Laws in some local communities
may restrict the use of remote
starters. For example, some laws may require a person using remote
start to have the vehicle in view.
Check local regulations for any
requirements.
Do not use the remote start feature
if the vehicle is low on fuel. The
vehicle could run out of fuel.
Other conditions can affect the
performance of the transmitter. See
Remote Keyless Entry (RKE)
System
08.
Starting the Engine Using Remote
Start
1. Press and release
Qon the
RKE transmitter.
2. Immediately press and hold
/
for at least four seconds or until
the turn signal lamps flash. The
turn signal lamps flashing
confirms the request to remote
start the vehicle has been
received.
During the remote start the
doors will be locked and the
parking lamps will remain on as
long as the engine is running. The engine will shut off after
15 minutes unless a time
extension is done or the
vehicle is started.
3. With the RKE transmitter in the vehicle, press the brake pedal
and start the vehicle to drive.
Extending Engine Run Time
The engine run time can also be
extended by another 15 minutes,
if during the first 15 minutes
Steps 1 and 2 are repeated while
the engine is still running. An
extension can be requested
30 seconds after starting. This
provides a total of 30 minutes.
The remote start can only be
extended once.
When the remote start is extended,
the second 15-minute period is
added on to the first 15 minutes for
a total of 30 minutes.
A maximum of two remote starts,
or a remote start with an extension,
are allowed between ignition cycles.
Page 138 of 382

Chevrolet Traverse Owner Manual (GMNA-Localizing-U.S./Canada/Mexico-
13527526) - 2020 - CRC - 9/5/19
Instruments and Controls 137
Off Road Page :This page shows
the traction, four wheel drive, and
steering angle states. When the
front or rear axles are locked, a lock
icon is displayed.
Blank Page : Shows no
information.Vehicle Messages
Messages displayed on the DIC
indicate the status of the vehicle or
some action that may be needed to
correct a condition. Multiple
messages may appear one after
another.
The messages that do not require
immediate action can be
acknowledged and cleared by
pressing
V. The messages that
require immediate action cannot be
cleared until that action is
performed.
All messages should be taken
seriously; clearing the message
does not correct the problem.
If a SERVICE message appears,
see your dealer.
Follow the instructions given in the
messages. The system displays
messages regarding the following
topics:
. Service Messages
. Fluid Levels
. Vehicle Security .
Brakes
. Steering
. Ride Control Systems
. Driver Assistance Systems
. Cruise Control
. Lighting and Bulb Replacement
. Wiper/Washer Systems
. Doors and Windows
. Seat Belts
. Airbag Systems
. Engine and Transmission
. Tire Pressure
. Battery
Engine Power Messages
ENGINE POWER IS REDUCED
This message displays when the
vehicle's propulsion power is
reduced. A reduction in propulsion
power can affect the vehicle's ability
to accelerate. If this message is on,
but there is no observed reduction
in performance, proceed to your
destination. The performance may
Page 143 of 382
Chevrolet Traverse Owner Manual (GMNA-Localizing-U.S./Canada/Mexico-
13527526) - 2020 - CRC - 9/5/19
142 Instruments and Controls
SeeHeated and Ventilated Front
Seats 048 and
Remote Vehicle Start 016.
If equipped with Auto Heated
Steering Wheel, this feature will turn
on when the Remote Start Auto
Heated Seats turn on.
Touch Off or On.
Remote Window Operation
If equipped, this feature enables
remote operation of the windows
with the RKE transmitter. See
Remote Keyless Entry (RKE)
System Operation 08.
Touch Off or On.
Passive Door Unlock
This setting specifies which doors
unlock when using the button on the
driver door handle to unlock the
vehicle.
Touch Off, All Doors or Driver
Door Only. Passive Door Lock
This setting specifies if the vehicle
will automatically lock, or lock and
provide an alert after all the doors
are closed, and you walk away from
the vehicle with the RKE transmitter.
See
Remote Keyless Entry (RKE)
System Operation 08.
Touch Off, On with Horn
Chirp, or On.
Remote Left in Vehicle Alert
This feature sounds an alert when
the RKE transmitter is left in the
vehicle. This menu also enables
Remote No Longer in Vehicle Alert.
Touch Off or On.
Seating Position
Touch and the following may
display:
. Seat Entry Memory
. Seat Exit Memory
Seat Entry Memory
This feature automatically recalls
the previously stored 1 or 2 button
positions when the ignition is changed from off to on or ACC/
ACCESSORY. See
Memory Seats
0 45.
Touch Off or On.
Seat Exit Memory
This feature automatically recalls
the previously stored exit button
positions when the ignition is
changed from on or ACC/
ACCESSORY to off if the driver
door is open or opened. See
Memory Seats 045.
Touch Off or On.
Teen Driver
See “Teen Driver” under“Settings”
in the infotainment manual.
Valet Mode
This will lock the infotainment
system and steering wheel controls.
It may also limit access to vehicle
storage locations, if equipped.
To enable valet mode:
1. Enter a four-digit code on the keypad.
Page 201 of 382
Chevrolet Traverse Owner Manual (GMNA-Localizing-U.S./Canada/Mexico-
13527526) - 2020 - CRC - 9/5/19
200 Driving and Operating
Driver Mode Control
If equipped with Front-Wheel Drive
(FWD), the Driver Mode Control
may have the following modes:
FWD, Snow, and Tow/Haul.
If equipped with All-Wheel Drive
(AWD), the Driver Mode Control
may have AWD, Two-Wheel Drive
(2WD), Off-Road, and Tow/Haul.
There may be Driver Information
Center (DIC) messages displayed
for each drive mode.
Driver Mode Control Knobfor FWD
Driver Mode Control Knobfor AWD
Rotate the Driver Mode Control
knob to make a mode selection. The
icons on the knob will illuminate to
indicate which mode is active.
A Driver Information Center (DIC)
message will indicate that the mode
is on when switching to different
modes.
5(AWD Only) orq(FWD
Only) : Vehicle is in either
Front-Wheel Drive for non AWD
vehicles, or Two-Wheel Drive for
AWD vehicles. This mode will
remain active through future ignition
cycles. This setting either puts the vehicle in Two-Wheel Drive (AWD
vehicles) or is the normal drive
mode (FWD vehicles). Use this
mode for normal driving conditions.
This is the most fuel efficient drive
mode. See
Driving for Better Fuel
Economy 0166.
4(AWD Only) : Vehicle is in AWD
Mode. This mode will remain active
through future ignition cycles. AWD
Mode provides drive torque to all
four wheels. Use this mode for
driving conditions that require
improved traction such as gravel,
sand, wet pavement, snow, and ice.
AWD may turn off and display a
message on the DIC in instances of
extensive use or overheating.
When in AWD Mode, the AWD
Mode indicator will be on. For more
information on AWD Mode, see
All-Wheel Drive 0194.
6(FWD Only) : Vehicle is in Snow
Mode. This mode will not remain
active through future ignition cycles.
The vehicle will be in Front-Wheel
Drive when the engine is restarted.
Snow Mode improves vehicle
acceleration on snow and ice
Page 296 of 382
Chevrolet Traverse Owner Manual (GMNA-Localizing-U.S./Canada/Mexico-
13527526) - 2020 - CRC - 9/5/19
Vehicle Care 295
Warning (Continued)
listed on the tire sidewall. See
Tire Sidewall Labeling0284 and
Vehicle Load Limits 0178.
If the tire is overinflated by more
than 35 kPa (5 psi), the horn will
sound multiple times and the turn
signal lamp will continue to flash for
several seconds after filling stops.
To release and correct the pressure,
while the turn signal lamp is still
flashing, briefly press the center of
the valve stem. When the
recommended pressure is reached,
the horn sounds once.
If the turn signal lamp does not flash
within 15 seconds after starting to
inflate the tire, the tire fill alert has
not been activated or is not working.
If the hazard warning flashers are
on, the tire fill alert visual feedback
will not work properly.
The TPMS will not activate the tire
fill alert properly under the following
conditions: .
There is interference from an
external device or transmitter.
. The air pressure from the
inflation device is not sufficient
to inflate the tire.
. There is a malfunction in
the TPMS.
. There is a malfunction in the
horn or turn signal lamps.
. The identification code of the
TPMS sensor is not registered to
the system.
. The battery of the TPMS sensor
is low.
If the tire fill alert does not operate
due to TPMS interference, move the
vehicle about 1 m (3 ft) back or
forward and try again. If the tire fill
alert feature is not working, use a
tire pressure gauge.
TPMS Sensor Matching
Process
Each TPMS sensor has a unique
identification code. The identification
code needs to be matched to a new
tire/wheel position after rotating the vehicle’s tires or replacing one or
more of the TPMS sensors. The
TPMS sensor matching process
should also be performed after
replacing a spare tire with a road
tire containing the TPMS sensor.
The malfunction light and the DIC
message should go off at the next
ignition cycle. The sensors are
matched to the tire/wheel positions,
using a TPMS relearn tool, in the
following order: driver side front tire,
passenger side front tire, passenger
side rear tire, and driver side rear.
See your dealer for service or to
purchase a relearn tool. A TPMS
relearn tool can also be purchased.
See Tire Pressure Monitor Sensor
Activation Tool at
www.gmtoolsandequipment.com or
call 1-800-GM TOOLS
(1-800-468-6657).
There are two minutes to match the
first tire/wheel position, and
five minutes overall to match all four
tire/wheel positions. If it takes
longer, the matching process stops
and must be restarted.
Page 297 of 382
Chevrolet Traverse Owner Manual (GMNA-Localizing-U.S./Canada/Mexico-
13527526) - 2020 - CRC - 9/5/19
296 Vehicle Care
The TPMS sensor matching
process is:1. Set the parking brake.
2. Place the vehicle in Service Mode. See Ignition Positions
0 182.
3. Make sure the Tire Pressure info page option is turned on.
The info pages on the DIC can
be turned on and off through
the Options menu. See Driver
Information Center (DIC) 0134.
4. Use the DIC controls on the right side of the steering wheel
to scroll to the Tire Pressure
screen under the DIC
info page.
5. Press and hold
Vin the center
of the DIC controls.
The horn sounds twice to
signal the receiver is in relearn
mode and the TIRE
LEARNING ACTIVE message
displays on the DIC screen.
6. Start with the driver side front tire. 7. Place the relearn tool against
the tire sidewall, near the valve
stem. Then press the button to
activate the TPMS sensor.
A horn chirp confirms that the
sensor identification code has
been matched to this tire and
wheel position.
8. Proceed to the passenger side front tire, and repeat the
procedure in Step 7.
9. Proceed to the passenger side rear tire, and repeat the
procedure in Step 7.
10. Proceed to the driver side rear tire, and repeat the procedure
in Step 7. The horn sounds two
times to indicate the sensor
identification code has been
matched to the driver side rear
tire, and the TPMS sensor
matching process is no longer
active. The TIRE LEARNING
ACTIVE message on the DIC
display screen goes off.
11. Turn the vehicle off. 12. Set all four tires to the
recommended air pressure
level as indicated on the Tire
and Loading Information label.
Tire Inspection
We recommend that the tires,
including the spare tire, if the
vehicle has one, be inspected
for signs of wear or damage at
least once a month.
Replace the tire if:
.The indicators at three or
more places around the tire
can be seen.
.There is cord or fabric
showing through the tire's
rubber.
.The tread or sidewall is
cracked, cut, or snagged
deep enough to show cord or
fabric.
.The tire has a bump, bulge,
or split.
Page 316 of 382
Chevrolet Traverse Owner Manual (GMNA-Localizing-U.S./Canada/Mexico-
13527526) - 2020 - CRC - 9/5/19
Vehicle Care 315
Towing the Vehicle
Caution
Incorrectly towing a disabled
vehicle may cause damage. The
damage would not be covered by
the vehicle warranty. Do not lash
or hook to suspension
components. Use the proper
straps around the tires to secure
the vehicle. Do not drag a locked
wheel/tire. Use tire skates or
dollies under any locked wheel/
tire while loading the vehicle. Do
not use a sling type lift to tow the
vehicle. This could damage the
vehicle.
Caution
If the vehicle cannot be shifted
into Neutral (N), do not use the
tow eye to tow the vehicle.
Vehicle damage may occur.GM recommends a flatbed tow truck
to transport a disabled vehicle. Use
ramps to help reduce approach
angles, if necessary. A towed
vehicle should have its drive wheels
off the ground. Contact Roadside
Assistance or a professional towing
service if the disabled vehicle must
be towed.
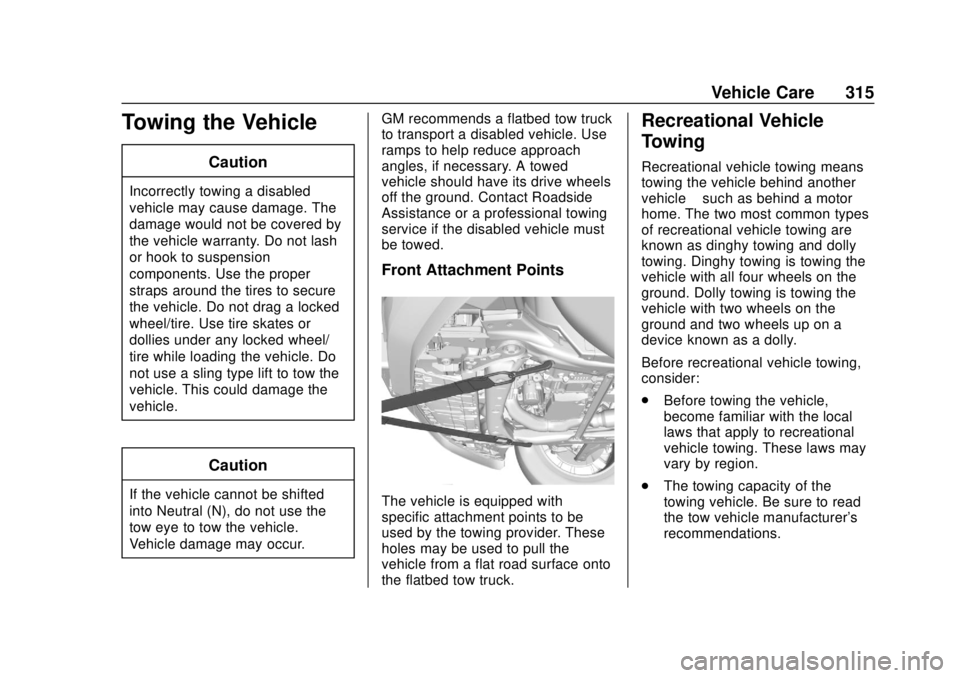
Front Attachment Points
The vehicle is equipped with
specific attachment points to be
used by the towing provider. These
holes may be used to pull the
vehicle from a flat road surface onto
the flatbed tow truck.
Recreational Vehicle
Towing
Recreational vehicle towing means
towing the vehicle behind another
vehicle
–such as behind a motor
home. The two most common types
of recreational vehicle towing are
known as dinghy towing and dolly
towing. Dinghy towing is towing the
vehicle with all four wheels on the
ground. Dolly towing is towing the
vehicle with two wheels on the
ground and two wheels up on a
device known as a dolly.
Before recreational vehicle towing,
consider:
. Before towing the vehicle,
become familiar with the local
laws that apply to recreational
vehicle towing. These laws may
vary by region.
. The towing capacity of the
towing vehicle. Be sure to read
the tow vehicle manufacturer's
recommendations.
Page 317 of 382
Chevrolet Traverse Owner Manual (GMNA-Localizing-U.S./Canada/Mexico-
13527526) - 2020 - CRC - 9/5/19
316 Vehicle Care
.How far the vehicle will be
towed. Some vehicles have
restrictions on how far and how
long they can be towed.
. The proper towing equipment.
See your dealer or trailering
professional for additional advice
and equipment
recommendations.
. Whether the vehicle is ready to
be towed. Just as preparing the
vehicle for a long trip, make sure
the vehicle is prepared to be
towed.
Caution
Use of a shield mounted in front
of the vehicle grille could restrict
airflow and cause damage to the
transmission. The repairs would
not be covered by the vehicle
warranty. If using a shield, only
use one that attaches to the
towing vehicle.
Dinghy Towing
For vehicles being dinghy towed,
the vehicle should be run at the
beginning of each day and at each
RV fuel stop for about five minutes.
This will ensure proper lubrication of
transmission components. Reinstall
the fuses to start the vehicle.
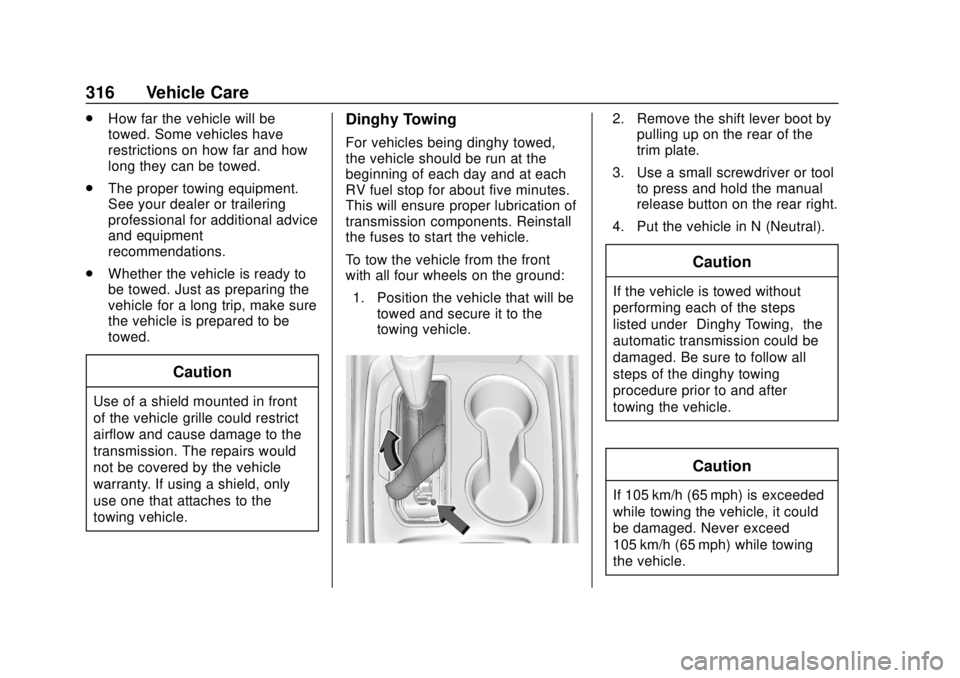
To tow the vehicle from the front
with all four wheels on the ground:
1. Position the vehicle that will be towed and secure it to the
towing vehicle.
2. Remove the shift lever boot bypulling up on the rear of the
trim plate.
3. Use a small screwdriver or tool to press and hold the manual
release button on the rear right.
4. Put the vehicle in N (Neutral).
Caution
If the vehicle is towed without
performing each of the steps
listed under “Dinghy Towing,” the
automatic transmission could be
damaged. Be sure to follow all
steps of the dinghy towing
procedure prior to and after
towing the vehicle.
Caution
If 105 km/h (65 mph) is exceeded
while towing the vehicle, it could
be damaged. Never exceed
105 km/h (65 mph) while towing
the vehicle.
Page 318 of 382
Chevrolet Traverse Owner Manual (GMNA-Localizing-U.S./Canada/Mexico-
13527526) - 2020 - CRC - 9/5/19
Vehicle Care 317
Once the destination is reached:1. Shift the vehicle to P (Park).
2. Reinstall the shift lever boot by inserting the front edge and
pressing the rear of the trim
plate until it snaps into place.
3. Start the engine and let it idle for more than three minutes
before driving the vehicle.
Caution
Too much or too little fluid can
damage the transmission. Be
sure that the transmission fluid is
at the proper level before towing
with all four wheels on the
ground.
Caution
Do not tow a vehicle with the front
drive wheels on the ground if one
of the front tires is a compact
spare tire. Towing with two
(Continued)
Caution (Continued)
different tire sizes on the front of
the vehicle can cause severe
damage to the transmission.
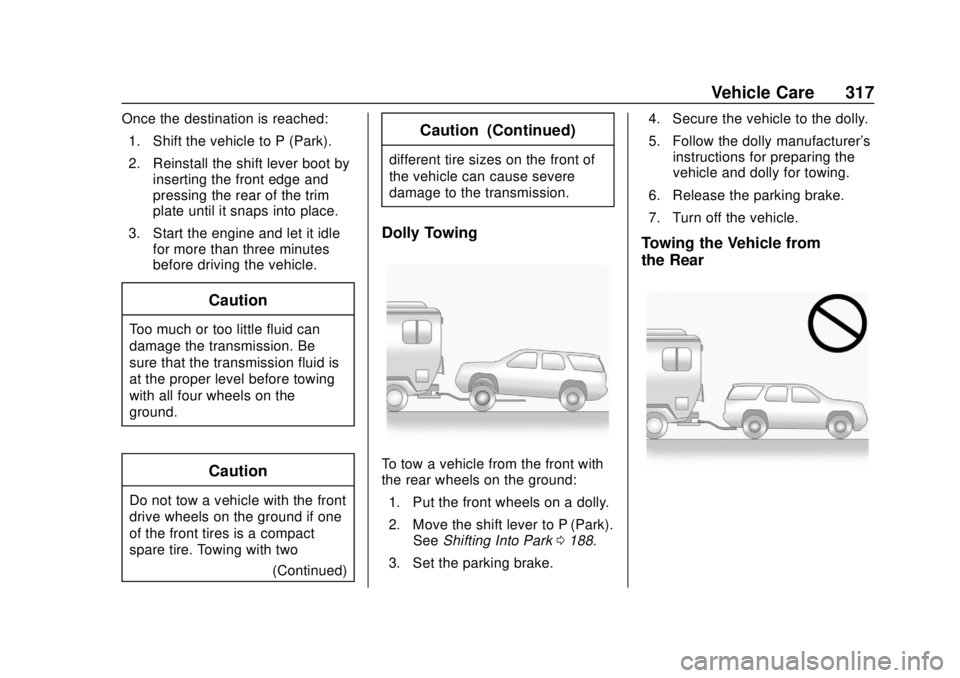
Dolly Towing
To tow a vehicle from the front with
the rear wheels on the ground:
1. Put the front wheels on a dolly.
2. Move the shift lever to P (Park). See Shifting Into Park 0188.
3. Set the parking brake. 4. Secure the vehicle to the dolly.
5. Follow the dolly manufacturer's
instructions for preparing the
vehicle and dolly for towing.
6. Release the parking brake.
7. Turn off the vehicle.
Towing the Vehicle from
the Rear