change time CHEVROLET TRAVERSE 2021 User Guide
[x] Cancel search | Manufacturer: CHEVROLET, Model Year: 2021, Model line: TRAVERSE, Model: CHEVROLET TRAVERSE 2021Pages: 369, PDF Size: 8.12 MB
Page 125 of 369
Chevrolet Traverse Owner Manual (GMNA-Localizing-U.S./Canada/Mexico-
14637844) - 2021 - CRC - 3/26/21
124 Lighting
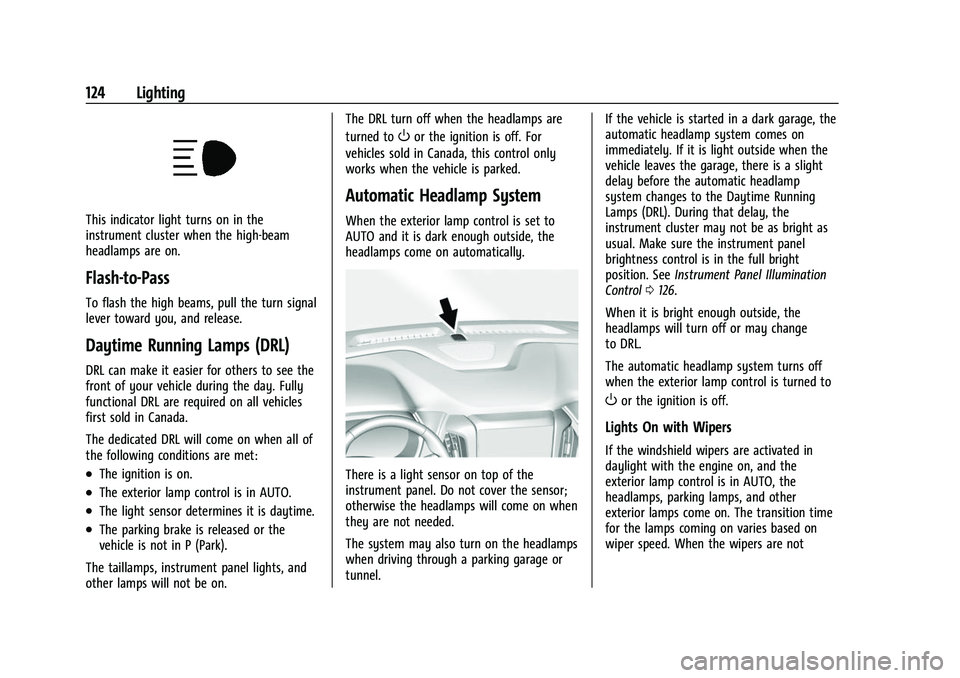
This indicator light turns on in the
instrument cluster when the high-beam
headlamps are on.
Flash-to-Pass
To flash the high beams, pull the turn signal
lever toward you, and release.
Daytime Running Lamps (DRL)
DRL can make it easier for others to see the
front of your vehicle during the day. Fully
functional DRL are required on all vehicles
first sold in Canada.
The dedicated DRL will come on when all of
the following conditions are met:
.The ignition is on.
.The exterior lamp control is in AUTO.
.The light sensor determines it is daytime.
.The parking brake is released or the
vehicle is not in P (Park).
The taillamps, instrument panel lights, and
other lamps will not be on. The DRL turn off when the headlamps are
turned to
Oor the ignition is off. For
vehicles sold in Canada, this control only
works when the vehicle is parked.
Automatic Headlamp System
When the exterior lamp control is set to
AUTO and it is dark enough outside, the
headlamps come on automatically.
There is a light sensor on top of the
instrument panel. Do not cover the sensor;
otherwise the headlamps will come on when
they are not needed.
The system may also turn on the headlamps
when driving through a parking garage or
tunnel. If the vehicle is started in a dark garage, the
automatic headlamp system comes on
immediately. If it is light outside when the
vehicle leaves the garage, there is a slight
delay before the automatic headlamp
system changes to the Daytime Running
Lamps (DRL). During that delay, the
instrument cluster may not be as bright as
usual. Make sure the instrument panel
brightness control is in the full bright
position. See
Instrument Panel Illumination
Control 0126.
When it is bright enough outside, the
headlamps will turn off or may change
to DRL.
The automatic headlamp system turns off
when the exterior lamp control is turned to
Oor the ignition is off.
Lights On with Wipers
If the windshield wipers are activated in
daylight with the engine on, and the
exterior lamp control is in AUTO, the
headlamps, parking lamps, and other
exterior lamps come on. The transition time
for the lamps coming on varies based on
wiper speed. When the wipers are not
Page 126 of 369

Chevrolet Traverse Owner Manual (GMNA-Localizing-U.S./Canada/Mexico-
14637844) - 2021 - CRC - 3/26/21
Lighting 125
operating, these lamps turn off. Move the
exterior lamp control to
Oor;to disable
this feature.
Hazard Warning Flashers
|: Press to make the front and rear turn
signal lamps flash on and off. This warns
others that you are having trouble.
Press
|again to turn the flashers off.
Turn and Lane-Change Signals
Move the lever all the way up or down to
signal a turn.
An arrow on the instrument cluster will
flash in the direction of the turn or lane
change.
Raise or lower the lever until the arrow
starts to flash to signal a lane change. Hold
it there until the lane change is complete.
If the lever is moved momentarily to the
lane change position, the arrow will flash
three times. It will flash six times if Tow/
Haul Mode is active.
The lever returns to its starting position
when it is released.
If after signaling a turn or lane change, the
arrow flashes rapidly or does not come on, a
signal bulb may be burned out. Have any burned out bulbs replaced. If a
bulb is not burned out, check the fuse. See
Instrument Panel Fuse Block
0280.
Fog Lamps
The ignition and parking lamps or
headlamps must be on for the front fog
lamps to work.
If equipped, the front fog lamps provide
extra illumination to the sides of the road
and improve visibility in fog or snow.
#:Press to turn the fog lamps on or off.
An indicator light on the instrument cluster
comes on when the fog lamps are on.
Some localities have laws that require the
headlamps to be on along with the fog
lamps.
Page 128 of 369
Chevrolet Traverse Owner Manual (GMNA-Localizing-U.S./Canada/Mexico-
14637844) - 2021 - CRC - 3/26/21
Lighting 127
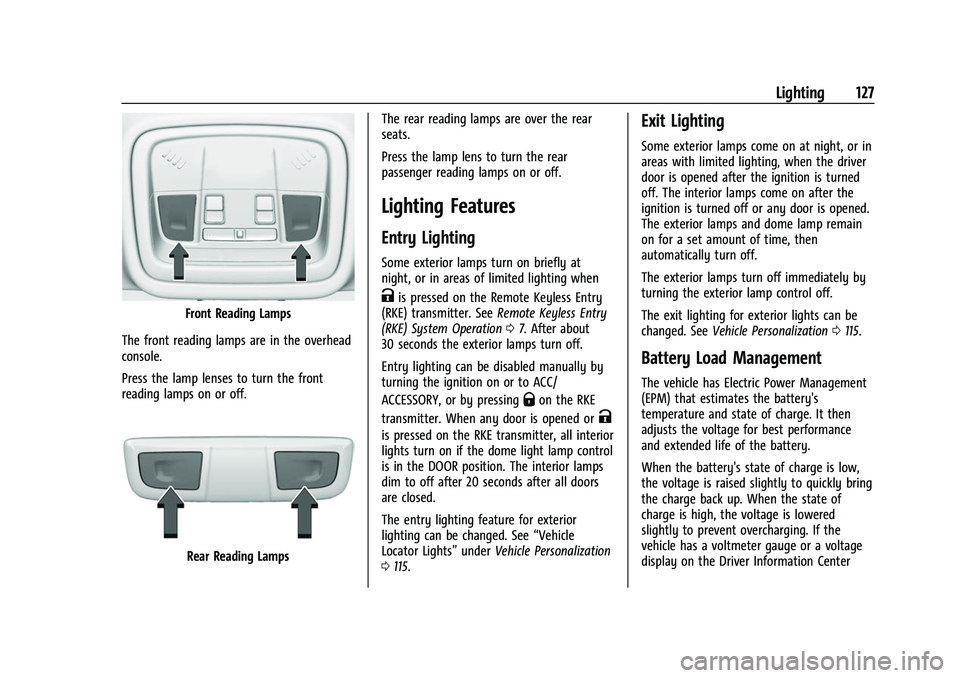
Front Reading Lamps
The front reading lamps are in the overhead
console.
Press the lamp lenses to turn the front
reading lamps on or off.
Rear Reading Lamps The rear reading lamps are over the rear
seats.
Press the lamp lens to turn the rear
passenger reading lamps on or off.
Lighting Features
Entry Lighting
Some exterior lamps turn on briefly at
night, or in areas of limited lighting when
Kis pressed on the Remote Keyless Entry
(RKE) transmitter. See Remote Keyless Entry
(RKE) System Operation 07. After about
30 seconds the exterior lamps turn off.
Entry lighting can be disabled manually by
turning the ignition on or to ACC/
ACCESSORY, or by pressing
Qon the RKE
transmitter. When any door is opened or
K
is pressed on the RKE transmitter, all interior
lights turn on if the dome light lamp control
is in the DOOR position. The interior lamps
dim to off after 20 seconds after all doors
are closed.
The entry lighting feature for exterior
lighting can be changed. See “Vehicle
Locator Lights” underVehicle Personalization
0 115.
Exit Lighting
Some exterior lamps come on at night, or in
areas with limited lighting, when the driver
door is opened after the ignition is turned
off. The interior lamps come on after the
ignition is turned off or any door is opened.
The exterior lamps and dome lamp remain
on for a set amount of time, then
automatically turn off.
The exterior lamps turn off immediately by
turning the exterior lamp control off.
The exit lighting for exterior lights can be
changed. See Vehicle Personalization 0115.
Battery Load Management
The vehicle has Electric Power Management
(EPM) that estimates the battery's
temperature and state of charge. It then
adjusts the voltage for best performance
and extended life of the battery.
When the battery's state of charge is low,
the voltage is raised slightly to quickly bring
the charge back up. When the state of
charge is high, the voltage is lowered
slightly to prevent overcharging. If the
vehicle has a voltmeter gauge or a voltage
display on the Driver Information Center
Page 143 of 369
Chevrolet Traverse Owner Manual (GMNA-Localizing-U.S./Canada/Mexico-
14637844) - 2021 - CRC - 3/26/21
142 Infotainment System
OnStar System
4G LTE
If equipped with 4G LTE, up to seven
devices, such as smartphones, tablets, and
laptops, can be connected to high-speed
Internet through the vehicle’s built-in Wi-Fi
hotspot.
Call 1-888-4ONSTAR (1-888-466-7827) to
connect to an OnStar Advisor for assistance.
See www.onstar.com for vehicle availability,
details, and system limitations. Service and
connectivity may vary by make, model,
year, carrier, availability, and conditions. 4G
LTE service is available in select markets. 4G
LTE performance is based on industry
averages and vehicle systems design. Some
services require a data plan.
The OnStar App
If equipped, the infotainment system has
OnStar controls in the embedded OnStar app
on the Home Page. Most OnStar functions
that can be performed with the buttons can
be done using the app. To open the app,
touch the OnStar icon on the Home Page.
App updates require a corresponding service
plan. Features vary by region and model.Features are subject to change. For more
information, see my.chevrolet.com/learn or
press
Q.
Services
The Services tab displays the default view
for the app. Use this page to launch the
available OnStar services. Touch a service to
open its display. Touch Wi-Fi to launch the
connections manager. Turn-by-Turn and
Advisor Call are the other tiled options.
Account
The Account tab displays a snapshot of the
account linked with the vehicle. If there is
no such account, this tab will show all
values as ——. The advisor call icon will be
active even if there is no active account.
Advisor Call
Selecting Advisor Call is the same as
pressing
Qor calling 1-888-4ONSTAR
(1-888-466-7827). The X option in the upper
right corner of the screen does not end the
call, but returns to the previous screen.
Turn-by-Turn Directions
With a connected plan, an OnStar Advisor
can download a destination to the vehicle or
its embedded navigation system, if equipped. Select Turn-by-Turn Directions
from the Services tab of the OnStar app to
call an Advisor or select a recent or favorite
destination. Touch the navigation icons to
select home, address or place. A destination
transfer from OnStar will show the detail
view of the destination when it is
transferred from OnStar to the Navigation
application. See www.onstar.com for a
coverage map. Services vary by model. Map
coverage is available in the United States,
Puerto Rico, and Canada.
Wi-Fi Hotspot
Touch to display the Settings page, which
shows the configurations for the vehicle
hotspot and allows them to be changed.
For more information, see www.onstar.com.
Navigation
Using the Navigation System
If equipped, launch the Nav application by
touching the Nav icon on the Home Page or
on the shortcut tray near the bottom of the
infotainment display.
When the Nav application is launched for
the first time, a product walkthrough is
available. Use of the feature requires the
Page 145 of 369
Chevrolet Traverse Owner Manual (GMNA-Localizing-U.S./Canada/Mexico-
14637844) - 2021 - CRC - 3/26/21
144 Infotainment System
.Avoid on Route (if a route has been set)
Touch Settings to view Map and Navigation
Settings. The following may display:
.Destination Card Preferences
.Map Preferences
.Route Preferences
.Navigation Voice Control
.Traffic Preferences
.Alert Preferences
.Fuel Grade Preferences
.Manage History
.Predictive Navigation: See “Predictive
Navigation (If Equipped)” previously in
this section.
.About
To exit a list, touch
zin the top right
corner to return to the main map view.
Make sure to set up preferences before
setting a destination and starting active
guidance.
Map Preferences
Touch to choose between basic map feature
configurations: Map Colors
.Auto
–Touch to automatically change
modes based on lighting conditions.
.Day (Light)
.Night (Dark)
3D Landmark (Default is On) : Touch On or
Off. When turned on, the system will
display all 3D Landmarks on the map
depending on the zoom level.
3D Building (Default is Off) : Touch On or
Off. When turned on, the system will
display all of the possible 3D building shapes
on the map depending on the zoom level.
Show Terrain in 3D (Default is Off) :
If equipped, touch On or Off. When turned
on, the system will display terrain
information on the map in 3D view.
Auto-Zoom (Default is On) : Touch On or
Off. When turned on, the system will
automatically adjust the zoom level when
the vehicle is approaching a turn. After the
turn is completed, the system automatically
brings the zoom back to the originally set
level. If the vehicle is approaching a turn
with the next turn occurring shortly after,
the Auto-Zoom will remain on until both
turns are completed. Route Preferences
Touch to access the Route Preferences. The
choices are:
.Preferred Route
–Choose from two
different route options: Fastest or
Eco-Friendly.
‐ Fastest would be the route with the
shortest drive time.
‐ Eco-Friendly would be the most
fuel-efficient route.
.Avoid on Current Route –Choose any of
the road features to avoid while on route:
‐ Highways
‐ Unpaved Roads
‐ Ferries
‐ Carpool Lanes
‐ Toll Roads
‐ Tunnels
‐ Country Borders
Navigation Voice Control
Touch to access the voice control setting
display.
.Navigation Volume –To adjust the
volume level, touch the up and down
arrows. If the voice guidance prompt is
Page 148 of 369
Chevrolet Traverse Owner Manual (GMNA-Localizing-U.S./Canada/Mexico-
14637844) - 2021 - CRC - 3/26/21
Infotainment System 147
Current Location
When the vehicle is parked and not in a
Navigation session, the user icon is centered
on the map view, highlighting the current
location.
Destination
Receiving Destination Directions from
Different Sources
Destinations can be received or transferred
from different sources to the Nav application
for route guidance. If equipped, some of
these sources may include:
.Navigation from search results.
.OnStar Advisor destination download.
.An address from the Contacts list.
.An application on the smartphone that
can send destinations to the vehicle.
.An application downloaded to the vehicle
such as OnStar Services that can send
destinations to the navigation system.
Waypoints
Add up to five waypoints, which are
additional destinations, along the route. To
add an additional stop or waypoint:1. From active guidance, touch
}. 2. Search for the destination using One-Box,
Voice search, or the Quick Category
icons.
3. Choose search results Along Route, Nearby, or Near Destination.
4. Choose the desired waypoint and touch Add to Trip or replace the current
destination by touching New Destination.
Route options are not available for
waypoints.
Arriving at a Waypoint
When approaching a waypoint, the system
will display a Destination Arrival view. To
continue on to the next destination touch
the Drive to message on the infotainment
display.
If the vehicle passes the waypoint or gets
out of the current route, the system will
automatically reroute back to this waypoint.
At the same time, it will show a Drive to
icon along with the next waypoint address
so the current waypoint can be skipped and
guidance can resume to the next waypoint
or destination. Editing a Waypoint
When waypoints are added during active
guidance, the system allows a stop to be
deleted or the order to be changed. To edit
a waypoint:
1. Touch
A.
2. Touch Edit Destinations.
.Modify destination order by touching
and holding the arrow until it is
highlighted. Drag to move the
waypoint up or down the list.
.Delete a waypoint by touchingY.
A pop-up will appear to confirm
waypoint removal. Once the request
is confirmed, the system will remove
the address from the destinations list.
Touch
zon the top right corner so
the system can recalculate the route.
If there is only one address in the
destinations list, the system will
disable the move and delete
functions. The system will not allow
the final destination to be deleted.
Map Information
Road network attributes are contained in the
map database for map information.
Attributes include information such as street
Page 154 of 369

Chevrolet Traverse Owner Manual (GMNA-Localizing-U.S./Canada/Mexico-
14637844) - 2021 - CRC - 3/26/21
Infotainment System 153
When available, the system will show the
best lane(s) to be in for the next maneuver.
Cancel a Route
If a route is in progress using either the
vehicle navigation system or the
Turn-by-Turn route, and a new route is
requested, the current route in progress will
be canceled.
Global Positioning System (GPS)
If equipped, the position of the vehicle is
determined by using satellite signals, various
vehicle signals, and map data.
At times, other interference such as the
satellite condition, road configuration,
condition of the vehicle, and/or other
circumstances can affect the navigation
system's ability to determine the accurate
position of the vehicle.
The GPS shows the current position of the
vehicle using signals sent by GPS satellites.
When the vehicle is not receiving signals
from the satellites, a symbol appears in the
status bar.
This system might not be available or
interference can occur if any of the
following are true:
.Signals are obstructed by tall buildings,
trees, large trucks, or a tunnel.
.Satellites are being repaired or improved.
For more information if the GPS is not
functioning properly, see Problems with
Route Guidance 0153 and
If the System Needs Service 0154.
Vehicle Positioning
At times, the position of the vehicle on the
map could be inaccurate due to one or more
of the following reasons:
.The road system has changed.
.The vehicle is driving on slippery road
surfaces such as sand, gravel, or snow.
.The vehicle is traveling on winding roads
or long, straight roads.
.The vehicle is approaching a tall building
or a large vehicle.
.The surface streets run parallel to a
freeway.
.The vehicle has been transferred by a
vehicle carrier or a ferry.
.The current position calibration is set
incorrectly.
.The vehicle is traveling at high speed.
.The vehicle changes directions more than
once, or the vehicle is turning on a turn
table in a parking lot.
.The vehicle is entering and/or exiting a
parking lot, garage, or a lot with a roof.
.The GPS signal is not received.
.A roof carrier is installed on the vehicle.
.Tire chains are installed on the vehicle.
.The tires are replaced or worn.
.The tire pressure for the tires is incorrect.
.This is the first navigation use after the
map data is updated.
.The 12-volt battery has been disconnected
for several days.
.The vehicle is driving in heavy traffic
where driving is at low speeds, and the
vehicle is stopped and started repeatedly.
Problems with Route Guidance
Inappropriate route guidance can occur
under one or more of the following
conditions:
.The turn was not made on the road
indicated.
.Route guidance might not be available
when using automatic rerouting for the
next right or left turn.
Page 155 of 369
Chevrolet Traverse Owner Manual (GMNA-Localizing-U.S./Canada/Mexico-
14637844) - 2021 - CRC - 3/26/21
154 Infotainment System
.The route might not be changed when
using automatic rerouting.
.There is no route guidance when turning
at an intersection.
.Plural names of places might be
announced occasionally.
.It could take a long time to operate
automatic rerouting during high-speed
driving.
.Automatic rerouting might display a route
returning to the set waypoint if heading
for a destination without passing through
a set waypoint.
.The route prohibits the entry of a vehicle
due to a regulation by time or season or
any other regulation which may be given.
.Some routes might not be searched.
.The route to the destination might not be
shown if there are new roads, if roads
have recently changed, or if certain roads
are not listed in the map data. SeeMaps
0 145.
To recalibrate the vehicle's position on the
map, park with the vehicle running for two
to five minutes, until the vehicle position
updates. Make sure the vehicle is parked in a location that is safe and has a clear view
of the sky and away from large
obstructions.
If the System Needs Service
If the navigation system needs service, see
your dealer.
Map Data Updates
The map data in the vehicle is the most
up-to-date information available when the
vehicle was produced. The map data is
updated periodically, provided that the map
information has changed and the vehicle has
a relevant service plan.
See www.gmnavdisc.com for details on
ordering, purchasing, and installing a new or
replacement SD card. Features are subject to
change. For more information on this
feature, see my.chevrolet.com/learn.
If the vehicle is equipped with Connected
Navigation, which is a subscription service
that enables certain features of the
navigation system, such as Traffic, Smart
Search/Routing, and Predictive Navigation,
then the system will download the latest
map data from the cloud.
Database Coverage Explanations
Coverage areas vary with respect to the
level of map detail available for any given
area. Some areas feature greater levels of
detail than others. If this happens, it does
not mean there is a problem with the
system. As the map data is updated, more
detail can become available for areas that
previously had limited detail. See
Map Data
Updates 0154.
Voice Recognition
If equipped, voice recognition allows for
hands-free operation within the navigation,
audio, phone, and weather applications. This
feature can be started by pressing
gon the
steering wheel or touching
gon the
infotainment display.
However, not all features within these areas
are supported by voice commands.
Generally, only complex tasks that require
multiple manual interactions to complete
are supported by voice commands.
For example, tasks that take more than one
or two touches, such as a song or artist to
play from a media device, would be
supported by voice commands. Other tasks,
Page 162 of 369

Chevrolet Traverse Owner Manual (GMNA-Localizing-U.S./Canada/Mexico-
14637844) - 2021 - CRC - 3/26/21
Infotainment System 161
Another way to connect is to touch the
Phones tab at the top right of the display
and then touch Add Phone.
.A Bluetooth smartphone with music
capability can be paired to the vehicle as
a smartphone and a music player at the
same time.
.Up to 10 devices can be paired to the
Bluetooth system.
.The pairing process is disabled when the
vehicle is moving.
.Pairing only needs to be completed once,
unless the pairing information on the cell
phone changes or the cell phone is
deleted from the system.
.If multiple paired cell phones are within
range of the system, the system connects
to the paired cell phone that is set to
First to Connect. If there is no cell phone
set to First to Connect, it will link to the
cell phone which was used last. To link to
a different paired cell phone, see“Linking
to a Different Phone” later in this section.
Pairing a Phone 1. Make sure Bluetooth has been enabled on the cell phone before the pairing
process is started. 2. Touch the Phone icon on the Home Page
or the phone icon on the shortcut tray
near the bottom of the display.
3. Touch Phones at the top of the infotainment display. There is also a
Connect Phones option in the middle of
the Phone display which will shortcut to
the Phone List menu.
4. Touch Add Phone.
5. Select the vehicle name shown on the infotainment display from your cell
phone’s Bluetooth Settings list.
6. Follow the instructions on the cell phone to confirm the six-digit code showing on
the infotainment display and touch Pair.
The code on the cell phone and
infotainment display will need to be
acknowledged for a successful pair.
7. Start the pairing process on the cell phone to be paired to the vehicle. See
the cell phone manufacturer's user guide
for information on this process. Once the
cell phone is paired, it will show under
Connected. 8. If the vehicle name does not appear on
your cell phone, there are a few ways to
start the pairing process over:
.Turn the cell phone off and then
back on.
.Go back to the beginning of the
Phone menus on the infotainment
display and restart the pairing
process.
.Reset the cell phone, but this step
should be done as a last effort.
9. If the cell phone prompts to accept connection or allow phone book
download, touch Always Accept and
Allow. The phone book may not be
available if not accepted.
10. Repeat Steps 1−8 to pair additional cell phones.
First to Connect Paired Phones
If multiple paired cell phones are within
range of the system, the system connects to
the paired cell phone that is set as First to
Connect. To enable a paired cell phone as
the First to Connect phone: 1. Make sure the cell phone is turned on.
2. Touch Settings, then touch System.
Page 166 of 369

Chevrolet Traverse Owner Manual (GMNA-Localizing-U.S./Canada/Mexico-
14637844) - 2021 - CRC - 3/26/21
Infotainment System 165
support see https://support.google.com/
androidauto. For Apple CarPlay support see
www.apple.com/ios/carplay/. Apple or
Google may change or suspend availability
at any time. Android Auto, Android, Google,
Google Play, and other marks are
trademarks of Google Inc.; Apple CarPlay is a
trademark of Apple Inc.
Press
{on the center stack to exit Android
Auto or Apple CarPlay. To enter back into
Android Auto or Apple CarPlay, press and
hold
{on the center stack.
Apple CarPlay and Android Auto can be
disabled from the infotainment system. To
do this, touch Home, Settings, and then
touch the Apps tab along the top of the
display. Use the On/Off toggled to turn off
Apple CarPlay or Android Auto.
Settings
Certain settings can be managed in the
Owner Center sites when an account is
established, and may be modified if other
users have accessed the vehicle or created
accounts. This may result in changes to the
security or functionality of the infotainment
system. Some settings may also be
transferred to a new vehicle, if equipped. For instructions, in the U.S. see
my.chevrolet.com or in Canada see
mychevrolet.ca or monchevrolet.ca.
Refer to the User Terms and Privacy
Statement for important details. To view,
touch the Settings icon on the Home Page
of the infotainment display.
The settings menu may be organized into
four categories. Select the desired category
by touching System, Apps, Vehicle,
or Personal.
To access the personalization menus:
1. Touch Settings on the Home Page on the infotainment display.
2. Touch the desired category to display a list of available options.
3. Touch to select the desired feature setting.
4. Touch the options on the infotainment display to disable or enable a feature.
5. Touchzto go to the top level of the
Settings menu.
System
The menu may contain the following:
Time / Date
Use the following features to set the clock:
.Automatic Time and Date: Touch Off or
On to enable or disable automatic update
of the time and date. When this feature
is on, the time and date cannot be
manually set.
.Set Time: Touch to manually set the time
using the controls on the infotainment
display.
.Set Date: Touch to manually set the date
using the controls on the infotainment
display.
.Automatic Time Zone (If Equipped): Touch
Off or On to disable or enable automatic
update of the time zone based on vehicle
location. When this feature is on, the
time zone cannot be manually set.
.Select Time Zone: Touch to manually set
the time zone. Touch a time zone from
the list.
.Use 24-hour Format: Touch to specify the
clock format shown.
Touch Off or On to disable or enable.