display CHEVROLET TRAVERSE 2023 User Guide
[x] Cancel search | Manufacturer: CHEVROLET, Model Year: 2023, Model line: TRAVERSE, Model: CHEVROLET TRAVERSE 2023Pages: 369, PDF Size: 16.89 MB
Page 22 of 369
Chevrolet Traverse Owner Manual (GMNA-Localizing-U.S./Canada/Mexico-
16411537) - 2023 - CRC - 3/28/22
Keys, Doors, and Windows 21
the liftgate to complete its operation and
wait a few seconds before manually closing
the liftgate.
Obstacle Detection Features
If the liftgate encounters an obstacle during
a power open or close cycle, the liftgate will
automatically reverse direction and move a
short distance away from the obstacle. After
removing the obstruction, the power liftgate
operation can be used again. If the liftgate
encounters multiple obstacles on the same
power cycle, the power function will
deactivate. After removing the obstructions,
manually close the liftgate which will allow
normal power operation functions to
resume.
If the vehicle is locked while the liftgate is
closing, and an obstacle is encountered that
prevents the liftgate from completely
closing, the horn will sound as an alert that
the liftgate did not close.
Setting the 3/4 Mode
To change the position the liftgate stops at
when opening:1. Select MAX or 3/4 mode and power open the liftgate. 2. Stop the liftgate movement at the
desired height by pressing any liftgate
button. Manually adjust the liftgate
position if needed.
3. Press and hold
lat the bottom of the
liftgate until the turn signals flash and a
beep sounds. This indicates the setting
has been recorded.
The liftgate cannot be set below a minimum
programmable height. If there is no light
flash or sound, then the height adjustment
may be too low.
Manual Operation
Select OFF to manually operate the liftgate.
See “Manual Liftgate” at the beginning of
this section.
Caution
Attempting to move the liftgate too
quickly and with excessive force may
result in damage to the vehicle.
Operate the liftgate manually with a
smooth motion and moderate speed. The
system includes a feature which limits the
manual closing speed to protect the
components.
Hands-Free Operation
If equipped, the liftgate may be operated
with a kicking motion under the left side of
the rear bumper at the location of the
projected logo. The remote key must be
within 1 m (3 ft) of the rear bumper to
operate the power liftgate hands-free.
The hands-free feature will not work while
the liftgate is moving. To stop the liftgate
while in motion use one of the liftgate
switches.
The hands-free feature can be customized.To
view available settings for this feature,
touch the Settings icon on the infotainment
home page. Select “Vehicle”to display the
list of available options and select “Comfort
and Convenience”. Choose from the
following:
On-Open and Close : The kicking motion is
activated to both open and close the
liftgate.
On-Open Only : The kicking motion is
activated to only open the liftgate.
Off : The feature is disabled.
Page 24 of 369
Chevrolet Traverse Owner Manual (GMNA-Localizing-U.S./Canada/Mexico-
16411537) - 2023 - CRC - 3/28/22
Keys, Doors, and Windows 23
The projected logo will not work under
these conditions:
.The vehicle battery is low.
.The transmission is not in P (Park).
.Hands Free Liftgate Control is set to off in
vehicle settings. To view available settings
for this feature, touch the Settings icon
on the infotainment home page. Select
“Vehicle”to display the list of available
options and select “Comfort and
Convenience”.
.Power liftgate is turned off.
.The vehicle remains parked for 72 hours
or more, with no remote key use or
Keyless Access operation. To re-enable,
press any button on the remote key or
open and close a vehicle door. The projected logo will not work for a single
remote key when a remote key:
.Has been left within approximately 5 m
(15 ft) of the liftgate for several minutes.
.Has been left inside the vehicle and all
vehicle doors are closed.
.Has approached the area outside of the
liftgate five times within 10 minutes.
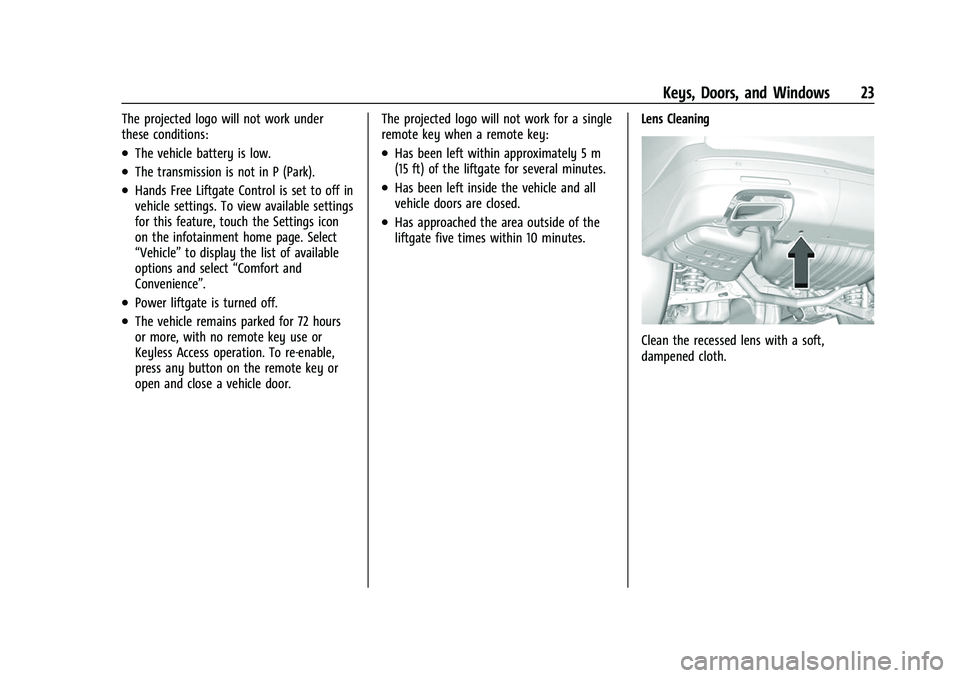
Lens Cleaning
Clean the recessed lens with a soft,
dampened cloth.
Page 29 of 369
Chevrolet Traverse Owner Manual (GMNA-Localizing-U.S./Canada/Mexico-
16411537) - 2023 - CRC - 3/28/22
28 Keys, Doors, and Windows
Fold and unfold the mirrors one time using
the mirror controls to reset them to their
normal position. A noise may be heard
during the resetting of the power folding
mirrors. This sound is normal after a manual
folding operation.
Remote Mirror Folding
If equipped, press and holdQon the
remote key for approximately one second to
remotely fold the exterior mirrors. Press and
hold
Kon the remote key for
approximately one second to unfold. See
Remote Key Operation 07.
This feature is turned on or off through
vehicle settings. To view available settings
for this feature, touch the Settings icon on
the infotainment home page. Select
“Vehicle” to display the list of available
options and select “Comfort and
Convenience”.
Heated Mirrors
If equipped, the heated outside mirrors turn
on when the rear window defogger is on
and help to clear fog or frost from the
surface of the mirrors.
K: This button is on the climate control
panel.
See “Rear Window Defogger” underDual
Automatic Climate Control System 0180.
Automatic Dimming Mirror
The vehicle has an automatic dimming
outside mirror on the driver side. The mirror
will adjust for the glare of headlamps
behind you.
Reverse Tilt Mirrors
If equipped with reverse tilt mirrors and
memory seats, the passenger and/or driver
mirror tilts to a preselected position when
the vehicle is in R (Reverse). This allows the
curb to be seen when parallel parking.
The mirror(s) may move from their tilted
position when:
.The vehicle is shifted out of R (Reverse),
or remains in R (Reverse) for about
30 seconds.
.The vehicle is turned off.
.The vehicle is driven in R (Reverse) above
a set speed.
To view available settings from the
infotainment screen, touch Settings >
Vehicle > Comfort and Convenience.
Interior Mirrors
Interior Rearview Mirrors
Adjust the rearview mirror for a clear view
of the area behind your vehicle.
Do not spray glass cleaner directly on the
mirror. Use a soft towel dampened with
water.
Manual Rearview Mirror
If equipped, push the tab forward for
daytime use and pull it rearward for
nighttime use to avoid glare of the
headlamps from behind.
Automatic Dimming Rearview
Mirror
If equipped, automatic dimming reduces the
glare of headlamps from behind. The
dimming feature comes on when the vehicle
is started.
Rear Camera Mirror
If equipped, this automatic dimming mirror
provides a wide angle camera view of the
area behind the vehicle.
Page 30 of 369
Chevrolet Traverse Owner Manual (GMNA-Localizing-U.S./Canada/Mexico-
16411537) - 2023 - CRC - 3/28/22
Keys, Doors, and Windows 29
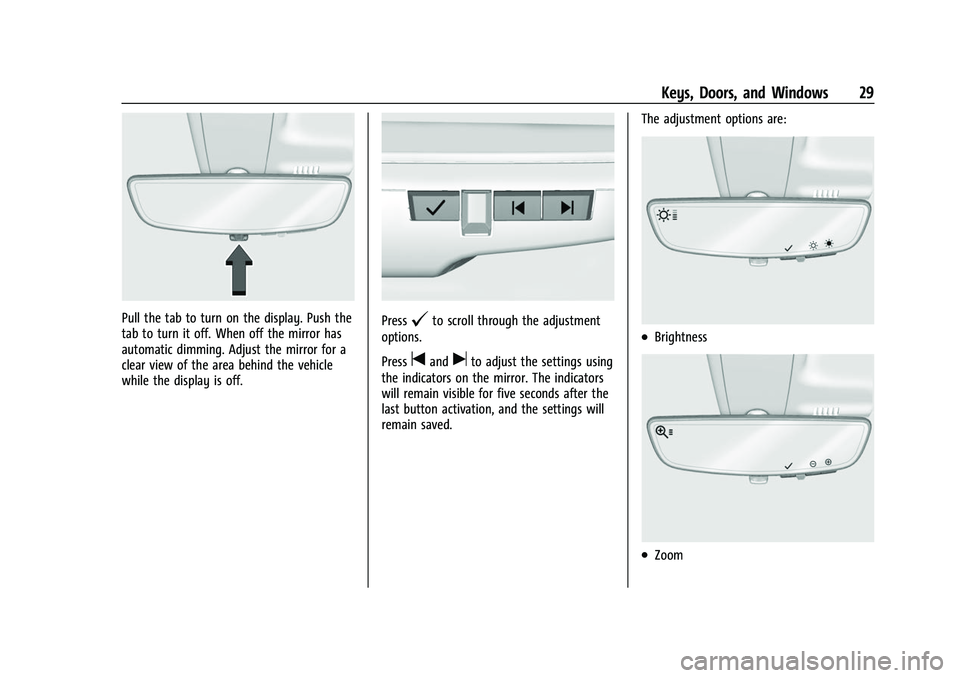
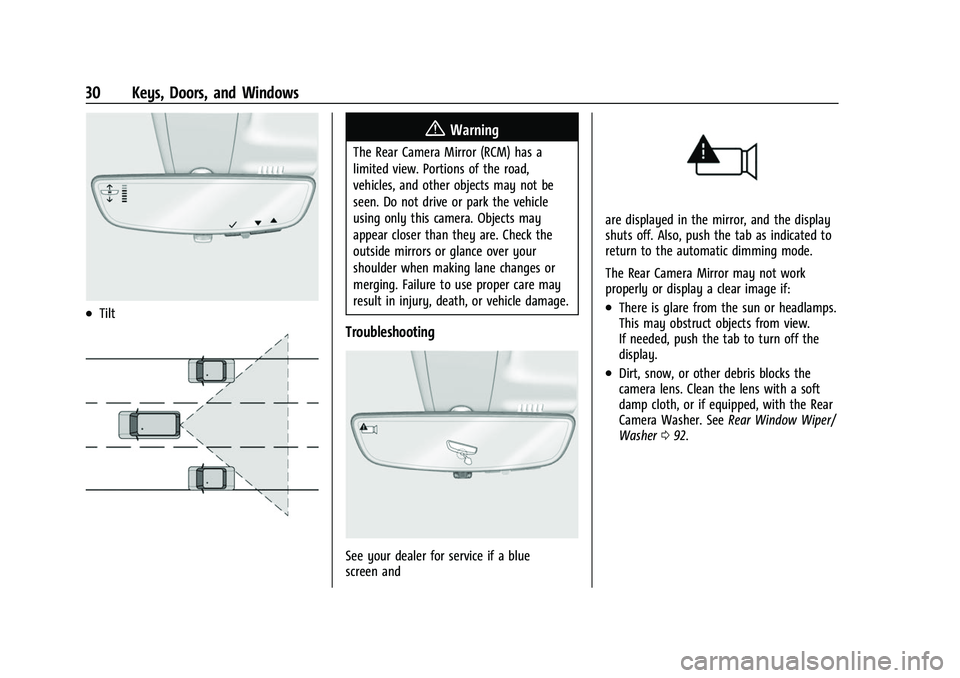
Pull the tab to turn on the display. Push the
tab to turn it off. When off the mirror has
automatic dimming. Adjust the mirror for a
clear view of the area behind the vehicle
while the display is off.Press@to scroll through the adjustment
options.
Press
tanduto adjust the settings using
the indicators on the mirror. The indicators
will remain visible for five seconds after the
last button activation, and the settings will
remain saved. The adjustment options are:
.Brightness
.Zoom
Page 31 of 369
Chevrolet Traverse Owner Manual (GMNA-Localizing-U.S./Canada/Mexico-
16411537) - 2023 - CRC - 3/28/22
30 Keys, Doors, and Windows
.Tilt
{Warning
The Rear Camera Mirror (RCM) has a
limited view. Portions of the road,
vehicles, and other objects may not be
seen. Do not drive or park the vehicle
using only this camera. Objects may
appear closer than they are. Check the
outside mirrors or glance over your
shoulder when making lane changes or
merging. Failure to use proper care may
result in injury, death, or vehicle damage.
Troubleshooting
See your dealer for service if a blue
screen and
are displayed in the mirror, and the display
shuts off. Also, push the tab as indicated to
return to the automatic dimming mode.
The Rear Camera Mirror may not work
properly or display a clear image if:
.There is glare from the sun or headlamps.
This may obstruct objects from view.
If needed, push the tab to turn off the
display.
.Dirt, snow, or other debris blocks the
camera lens. Clean the lens with a soft
damp cloth, or if equipped, with the Rear
Camera Washer. SeeRear Window Wiper/
Washer 092.
Page 33 of 369
Chevrolet Traverse Owner Manual (GMNA-Localizing-U.S./Canada/Mexico-
16411537) - 2023 - CRC - 3/28/22
32 Keys, Doors, and Windows
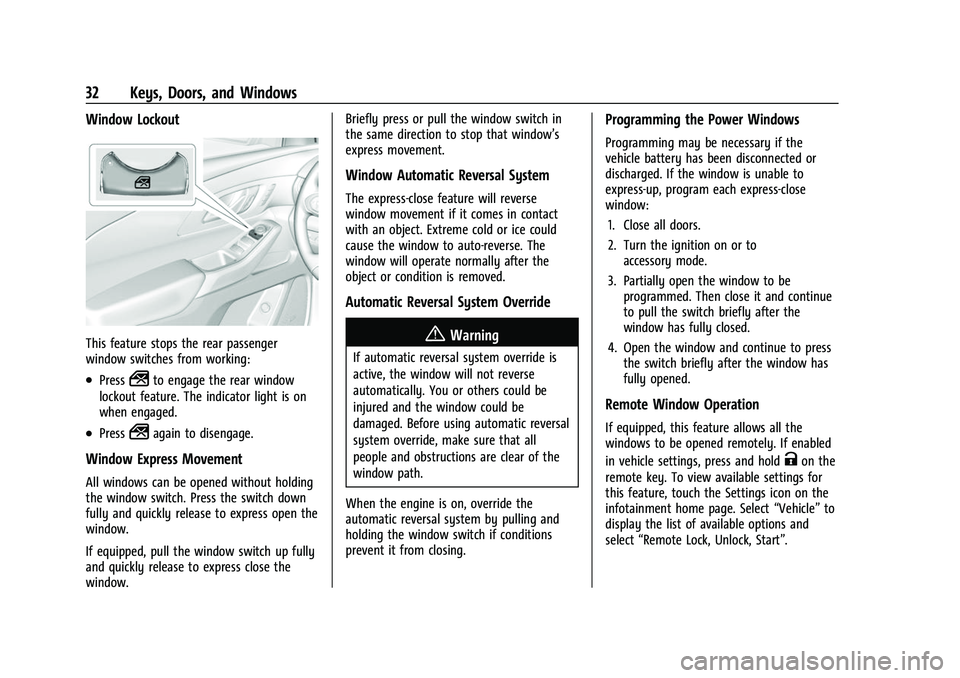
Window Lockout
This feature stops the rear passenger
window switches from working:
.Press2to engage the rear window
lockout feature. The indicator light is on
when engaged.
.Press2again to disengage.
Window Express Movement
All windows can be opened without holding
the window switch. Press the switch down
fully and quickly release to express open the
window.
If equipped, pull the window switch up fully
and quickly release to express close the
window. Briefly press or pull the window switch in
the same direction to stop that window’s
express movement.
Window Automatic Reversal System
The express-close feature will reverse
window movement if it comes in contact
with an object. Extreme cold or ice could
cause the window to auto-reverse. The
window will operate normally after the
object or condition is removed.
Automatic Reversal System Override
{Warning
If automatic reversal system override is
active, the window will not reverse
automatically. You or others could be
injured and the window could be
damaged. Before using automatic reversal
system override, make sure that all
people and obstructions are clear of the
window path.
When the engine is on, override the
automatic reversal system by pulling and
holding the window switch if conditions
prevent it from closing.
Programming the Power Windows
Programming may be necessary if the
vehicle battery has been disconnected or
discharged. If the window is unable to
express-up, program each express-close
window: 1. Close all doors.
2. Turn the ignition on or to accessory mode.
3. Partially open the window to be programmed. Then close it and continue
to pull the switch briefly after the
window has fully closed.
4. Open the window and continue to press the switch briefly after the window has
fully opened.
Remote Window Operation
If equipped, this feature allows all the
windows to be opened remotely. If enabled
in vehicle settings, press and hold
Kon the
remote key. To view available settings for
this feature, touch the Settings icon on the
infotainment home page. Select “Vehicle”to
display the list of available options and
select “Remote Lock, Unlock, Start”.
Page 41 of 369
Chevrolet Traverse Owner Manual (GMNA-Localizing-U.S./Canada/Mexico-
16411537) - 2023 - CRC - 3/28/22
40 Seats and Restraints
section. The memory recalls may be
cancelled at any time during the recall. See
“Cancel Memory Seating Recalls”later in this
section.
Identifying Driver Number
The vehicle identifies the current driver by
their remote key number 1–8. The current
remote key number may be identified by
Driver Information Center (DIC) welcome
message, “You are driver x for memory
recalls.” This message is displayed the first
few times the vehicle is turned on when a
different remote key is used. For Seat Entry
Memory to work properly, save positions to
the 1 or 2 memory button matching the
driver number of this welcome message. To
aid in identifying remote key IDs, it is
recommended to only carry one remote key
when entering the vehicle. Perform the
following if the welcome message is not
displayed:
1. Move all keys and remote keys away from the vehicle.
2. Start the vehicle with another remote key. A DIC welcome message should
display indicating the driver number of
the other remote key. Turn the vehicle
off and remove the other key or remote
key from the vehicle. 3. Start the vehicle with the initial key or
remote key. The DIC welcome message
should display the driver number of the
initial remote key.
Saving Seating Positions
Read these instructions completely before
saving memory positions.
To save preferred driving positions to
1 and 2: 1. Turn the vehicle on or to accessory mode. A DIC welcome message may
indicate the driver number of the current
remote key. See “Identifying Driver
Number” previously in this section.
2. Adjust all available memory features to the desired driving position.
3. Press and release SET; a beep will sound.
4. Immediately upon releasing SET, press and hold memory button 1 or 2 matching
the current Driver’s remote key number
until two beeps sound. If too much time
passes between releasing SET and
pressing 1 or 2, the two beeps will not
sound indicating memory position were
not saved. Repeat Steps 3 and 4 to try
again. 5. Repeat Steps 1–4 for the other remote
key 1 or 2 using the other 1 or 2 memory
button.
It is recommended to save the preferred
driving positions to both 1 and 2 if you are
the only driver.
To save the common exit seating position to
Bthat is used by all drivers for Manually
Recalling Seating Positions and Auto Seat
Exit Memory Recall features, repeat Steps 1–
4 using
B, the exit button.
Manually Recalling Seating Positions
Press and hold 1, 2, or
Bbutton until the
recall is complete, to recall the positions
previously saved to that button.
Manual Memory recall movement for 1, 2 or
Bbuttons may be initiated and will
complete to the saved memory position if
the vehicle is in or out of P (Park).
Enabling Automatic Recalls
.Seat Entry Memory moves the driver seat
to the selected 1 or 2 position when the
vehicle is started. Select Settings > Vehicle
> Seating Position > Seat Entry Memory >
ON or OFF. See “Auto Seat Entry Memory
Recall” later in this section.
Page 44 of 369
Chevrolet Traverse Owner Manual (GMNA-Localizing-U.S./Canada/Mexico-
16411537) - 2023 - CRC - 3/28/22
Seats and Restraints 43
Remote Start Heated and Ventilated Seats
During a remote start, the heated or
ventilated seats, if equipped, can be turned
on automatically. When it is cold outside,
the heated seats will turn on followed by
the heated steering wheel, if equipped.
When it is hot outside, the ventilated seats
turn on. The remote start heated or
ventilated seats may be canceled when the
vehicle is turned on. Press the heated or
ventilated seat button to use the heated or
ventilated seats after the vehicle is started.
The heated or ventilated seat indicator lights
may not turn on during a remote start.
The temperature performance of an
unoccupied seat may be reduced. This is
normal.
To enable or disable remote start heated or
ventilated seats, select Settings > Vehicle >
Remote Lock, Unlock, and Start > Remote
Start Auto Heat Seats or Remote Start Auto
Cool Seats > ON or OFF. SeeRemote Vehicle
Start 014.Rear Seats
Rear Seat Reminder
If equipped, the message REAR SEAT
REMINDER LOOK IN REAR SEAT displays
under certain conditions indicating there
may be an item or passenger in the rear
seat. Check before exiting the vehicle.
This feature will activate when a second row
door is opened while the vehicle is on or up
to 10 minutes before the vehicle is turned
on. There will be an alert when the vehicle
is turned off. The alert does not directly
detect objects in the rear seat; instead,
under certain conditions, it detects when a
rear door is opened and closed, indicating
that there may be something in the
rear seat.
The feature is active only once each time
the vehicle is turned on and off, and will
require reactivation by opening and closing
the second row doors. There may be an
alert even when there is nothing in the rear
seat; for example, if a child entered the
vehicle through the rear door and left the
vehicle without the vehicle being shut off.
The feature can be turned on or off. Select
Settings > Rear Seat Reminder > ON or OFF.
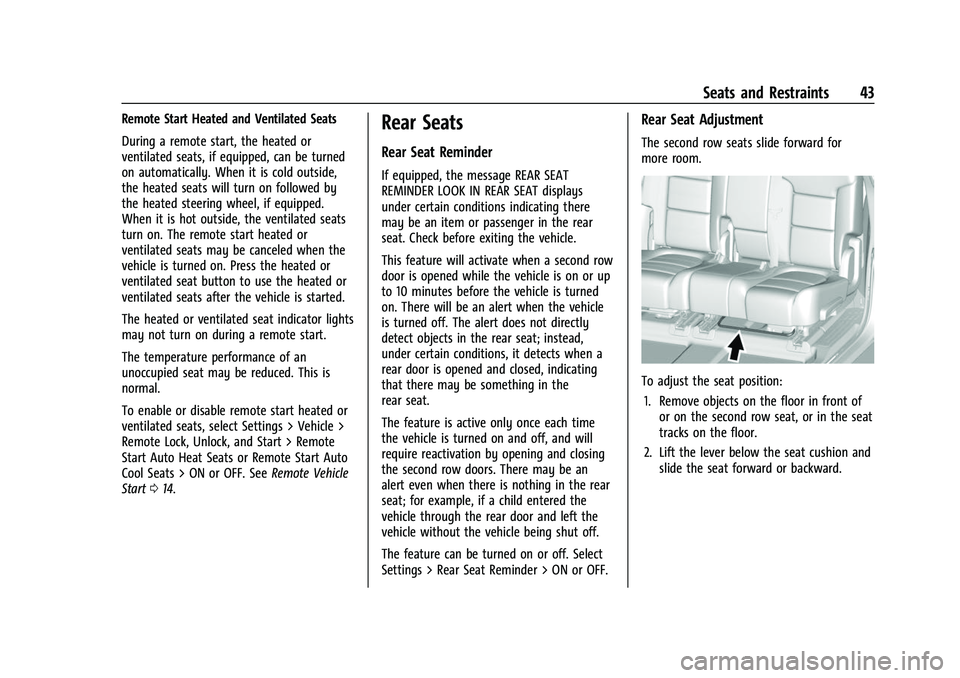
Rear Seat Adjustment
The second row seats slide forward for
more room.
To adjust the seat position:
1. Remove objects on the floor in front of or on the second row seat, or in the seat
tracks on the floor.
2. Lift the lever below the seat cushion and slide the seat forward or backward.
Page 47 of 369
Chevrolet Traverse Owner Manual (GMNA-Localizing-U.S./Canada/Mexico-
16411537) - 2023 - CRC - 3/28/22
46 Seats and Restraints
Heated Rear Seats
{Warning
If temperature change or pain to the skin
cannot be felt, the seat heater may cause
burns. See the Warning underHeated
and Ventilated Front Seats 042.
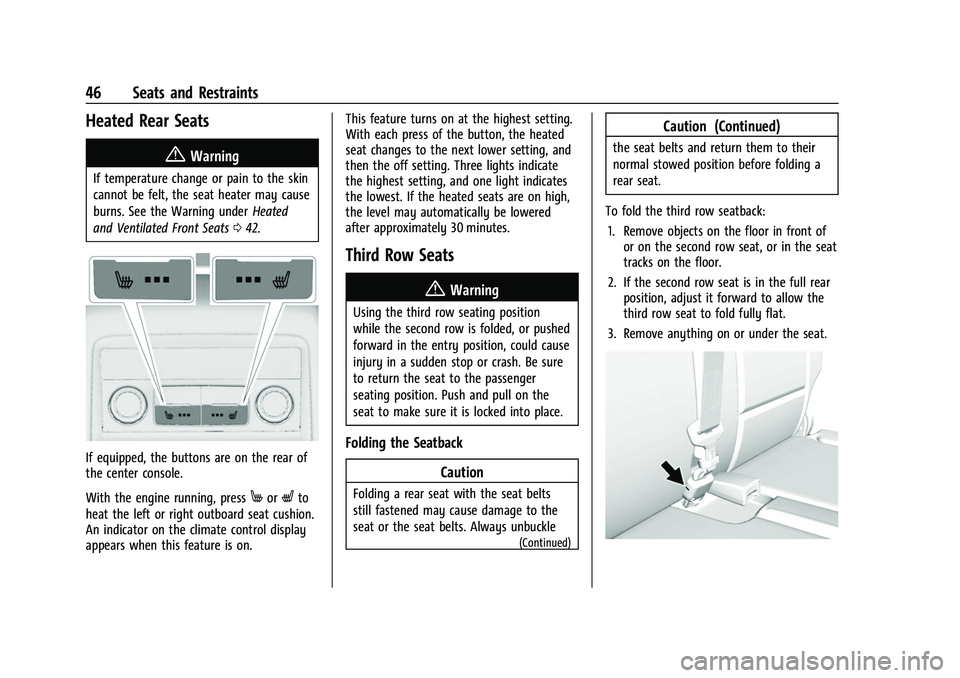
If equipped, the buttons are on the rear of
the center console.
With the engine running, press
MorLto
heat the left or right outboard seat cushion.
An indicator on the climate control display
appears when this feature is on. This feature turns on at the highest setting.
With each press of the button, the heated
seat changes to the next lower setting, and
then the off setting. Three lights indicate
the highest setting, and one light indicates
the lowest. If the heated seats are on high,
the level may automatically be lowered
after approximately 30 minutes.
Third Row Seats
{Warning
Using the third row seating position
while the second row is folded, or pushed
forward in the entry position, could cause
injury in a sudden stop or crash. Be sure
to return the seat to the passenger
seating position. Push and pull on the
seat to make sure it is locked into place.
Folding the Seatback
Caution
Folding a rear seat with the seat belts
still fastened may cause damage to the
seat or the seat belts. Always unbuckle
(Continued)
Caution (Continued)
the seat belts and return them to their
normal stowed position before folding a
rear seat.
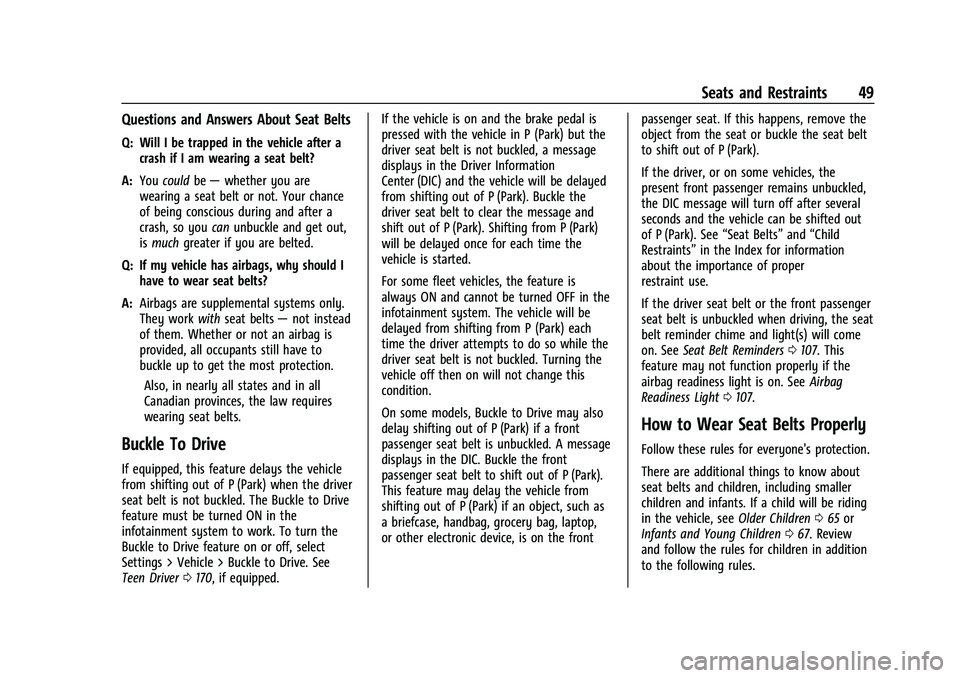
To fold the third row seatback: 1. Remove objects on the floor in front of or on the second row seat, or in the seat
tracks on the floor.
2. If the second row seat is in the full rear position, adjust it forward to allow the
third row seat to fold fully flat.
3. Remove anything on or under the seat.
Page 50 of 369
Chevrolet Traverse Owner Manual (GMNA-Localizing-U.S./Canada/Mexico-
16411537) - 2023 - CRC - 3/28/22
Seats and Restraints 49
Questions and Answers About Seat Belts
Q: Will I be trapped in the vehicle after acrash if I am wearing a seat belt?
A: You could be— whether you are
wearing a seat belt or not. Your chance
of being conscious during and after a
crash, so you canunbuckle and get out,
is much greater if you are belted.
Q: If my vehicle has airbags, why should I have to wear seat belts?
A: Airbags are supplemental systems only.
They work withseat belts —not instead
of them. Whether or not an airbag is
provided, all occupants still have to
buckle up to get the most protection.
Also, in nearly all states and in all
Canadian provinces, the law requires
wearing seat belts.
Buckle To Drive
If equipped, this feature delays the vehicle
from shifting out of P (Park) when the driver
seat belt is not buckled. The Buckle to Drive
feature must be turned ON in the
infotainment system to work. To turn the
Buckle to Drive feature on or off, select
Settings > Vehicle > Buckle to Drive. See
Teen Driver 0170, if equipped. If the vehicle is on and the brake pedal is
pressed with the vehicle in P (Park) but the
driver seat belt is not buckled, a message
displays in the Driver Information
Center (DIC) and the vehicle will be delayed
from shifting out of P (Park). Buckle the
driver seat belt to clear the message and
shift out of P (Park). Shifting from P (Park)
will be delayed once for each time the
vehicle is started.
For some fleet vehicles, the feature is
always ON and cannot be turned OFF in the
infotainment system. The vehicle will be
delayed from shifting from P (Park) each
time the driver attempts to do so while the
driver seat belt is not buckled. Turning the
vehicle off then on will not change this
condition.
On some models, Buckle to Drive may also
delay shifting out of P (Park) if a front
passenger seat belt is unbuckled. A message
displays in the DIC. Buckle the front
passenger seat belt to shift out of P (Park).
This feature may delay the vehicle from
shifting out of P (Park) if an object, such as
a briefcase, handbag, grocery bag, laptop,
or other electronic device, is on the front
passenger seat. If this happens, remove the
object from the seat or buckle the seat belt
to shift out of P (Park).
If the driver, or on some vehicles, the
present front passenger remains unbuckled,
the DIC message will turn off after several
seconds and the vehicle can be shifted out
of P (Park). See
“Seat Belts”and“Child
Restraints” in the Index for information
about the importance of proper
restraint use.
If the driver seat belt or the front passenger
seat belt is unbuckled when driving, the seat
belt reminder chime and light(s) will come
on. See Seat Belt Reminders 0107. This
feature may not function properly if the
airbag readiness light is on. See Airbag
Readiness Light 0107.
How to Wear Seat Belts Properly
Follow these rules for everyone's protection.
There are additional things to know about
seat belts and children, including smaller
children and infants. If a child will be riding
in the vehicle, see Older Children065 or
Infants and Young Children 067. Review
and follow the rules for children in addition
to the following rules.