remove seats CHEVROLET TRAVERSE 2023 User Guide
[x] Cancel search | Manufacturer: CHEVROLET, Model Year: 2023, Model line: TRAVERSE, Model: CHEVROLET TRAVERSE 2023Pages: 369, PDF Size: 16.89 MB
Page 64 of 369
Chevrolet Traverse Owner Manual (GMNA-Localizing-U.S./Canada/Mexico-
16411537) - 2023 - CRC - 3/28/22
Seats and Restraints 63
The passenger sensing system may or may
not turn off the airbag for a child in a child
restraint depending upon the child’s size.
It is better to secure the child restraint in a
rear seat. Never put a rear-facing child
restraint in the front seat, even if the ON
indicator is not lit.
If the Off Indicator Is Lit for an
Adult-Sized Occupant
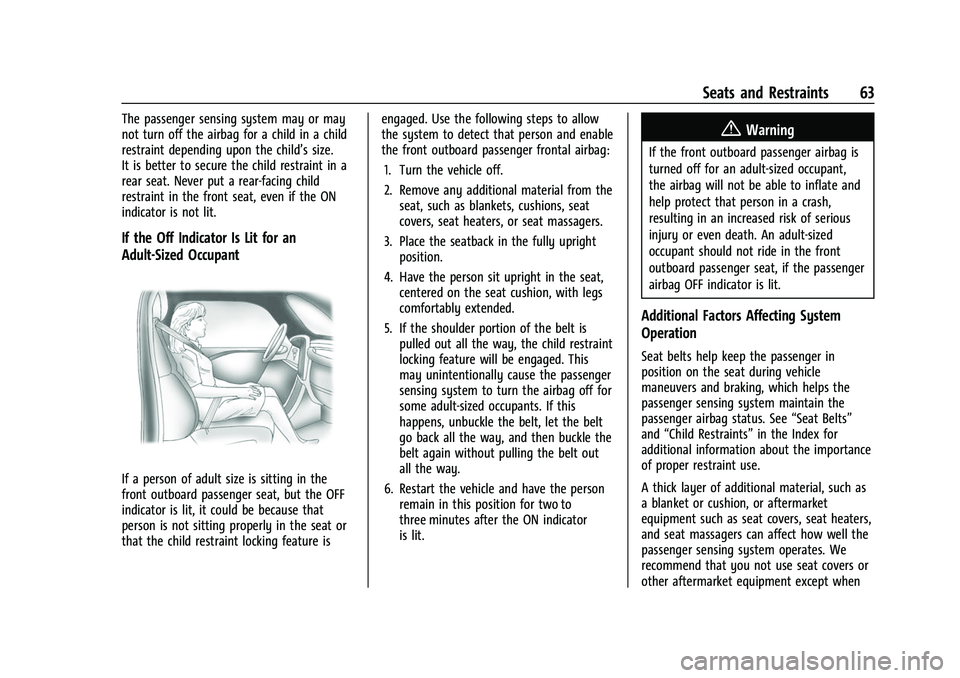
If a person of adult size is sitting in the
front outboard passenger seat, but the OFF
indicator is lit, it could be because that
person is not sitting properly in the seat or
that the child restraint locking feature isengaged. Use the following steps to allow
the system to detect that person and enable
the front outboard passenger frontal airbag:
1. Turn the vehicle off.
2. Remove any additional material from the seat, such as blankets, cushions, seat
covers, seat heaters, or seat massagers.
3. Place the seatback in the fully upright position.
4. Have the person sit upright in the seat, centered on the seat cushion, with legs
comfortably extended.
5. If the shoulder portion of the belt is pulled out all the way, the child restraint
locking feature will be engaged. This
may unintentionally cause the passenger
sensing system to turn the airbag off for
some adult-sized occupants. If this
happens, unbuckle the belt, let the belt
go back all the way, and then buckle the
belt again without pulling the belt out
all the way.
6. Restart the vehicle and have the person remain in this position for two to
three minutes after the ON indicator
is lit.
{Warning
If the front outboard passenger airbag is
turned off for an adult-sized occupant,
the airbag will not be able to inflate and
help protect that person in a crash,
resulting in an increased risk of serious
injury or even death. An adult-sized
occupant should not ride in the front
outboard passenger seat, if the passenger
airbag OFF indicator is lit.
Additional Factors Affecting System
Operation
Seat belts help keep the passenger in
position on the seat during vehicle
maneuvers and braking, which helps the
passenger sensing system maintain the
passenger airbag status. See “Seat Belts”
and “Child Restraints” in the Index for
additional information about the importance
of proper restraint use.
A thick layer of additional material, such as
a blanket or cushion, or aftermarket
equipment such as seat covers, seat heaters,
and seat massagers can affect how well the
passenger sensing system operates. We
recommend that you not use seat covers or
other aftermarket equipment except when
Page 65 of 369
Chevrolet Traverse Owner Manual (GMNA-Localizing-U.S./Canada/Mexico-
16411537) - 2023 - CRC - 3/28/22
64 Seats and Restraints
approved by GM for your specific vehicle.
SeeAdding Equipment to the
Airbag-Equipped Vehicle 064 for more
information about modifications that can
affect how the system operates.
The ON indicator may be lit if an object,
such as a briefcase, handbag, grocery bag,
laptop, or other electronic device, is put on
an unoccupied seat. If this is not desired,
remove the object from the seat.
{Warning
Stowing articles under the passenger seat
or between the passenger seat cushion
and seatback may interfere with the
proper operation of the passenger
sensing system.
Servicing the Airbag-Equipped
Vehicle
Airbags affect how the vehicle should be
serviced. There are parts of the airbag
system in several places around the vehicle.
Your dealer and the service manual have
information about servicing the vehicle and
the airbag system. To purchase a service
manual, see Publication Ordering
Information 0345.
{Warning
For up to 10 seconds after the vehicle is
turned off and the battery is
disconnected, an airbag can still inflate
during improper service. You can be
injured if you are close to an airbag
when it inflates. Avoid yellow connectors.
They are probably part of the airbag
system. Be sure to follow proper service
procedures, and make sure the person
performing work for you is qualified to
do so.
Adding Equipment to the
Airbag-Equipped Vehicle
Adding accessories that change the vehicle's
frame, bumper system, height, front end,
or side sheet metal may keep the airbag
system from working properly.
The operation of the airbag system can also
be affected by changing, including
improperly repairing or replacing, any parts
of the following:
.Airbag system, including airbag modules,
front or side impact sensors, sensing and
diagnostic module, airbag wiring, or front
center console
.Front seats, including stitching, seams or
zippers
.Seat belts
.Steering wheel, instrument panel,
overhead console, ceiling trim, or pillar
garnish trim
.Inner door seals, including speakers
Your dealer and the service manual have
information about the location of the airbag
modules and sensors, sensing and diagnostic
module, and airbag wiring along with the
proper replacement procedures.
In addition, the vehicle has a passenger
sensing system for the front outboard
passenger position, which includes sensors
that are part of the passenger's seat. The
passenger sensing system may not operate
properly if the original seat trim is replaced
with non-GM covers, upholstery, or trim,
or with GM covers, upholstery, or trim
designed for a different vehicle. Any object,
such as an aftermarket seat heater or a
comfort enhancing pad or device, installed
under or on top of the seat fabric, could
also interfere with the operation of the
passenger sensing system. This could either
prevent proper deployment of the passenger
airbag(s) or prevent the passenger sensing
Page 77 of 369
Chevrolet Traverse Owner Manual (GMNA-Localizing-U.S./Canada/Mexico-
16411537) - 2023 - CRC - 3/28/22
76 Seats and Restraints
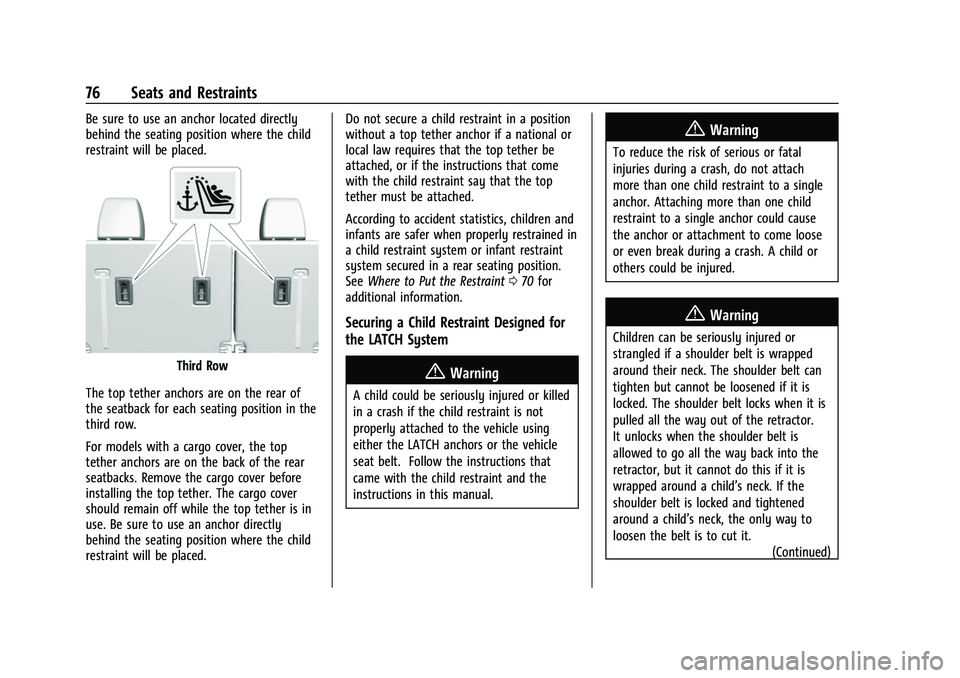
Be sure to use an anchor located directly
behind the seating position where the child
restraint will be placed.
Third Row
The top tether anchors are on the rear of
the seatback for each seating position in the
third row.
For models with a cargo cover, the top
tether anchors are on the back of the rear
seatbacks. Remove the cargo cover before
installing the top tether. The cargo cover
should remain off while the top tether is in
use. Be sure to use an anchor directly
behind the seating position where the child
restraint will be placed. Do not secure a child restraint in a position
without a top tether anchor if a national or
local law requires that the top tether be
attached, or if the instructions that come
with the child restraint say that the top
tether must be attached.
According to accident statistics, children and
infants are safer when properly restrained in
a child restraint system or infant restraint
system secured in a rear seating position.
See
Where to Put the Restraint 070 for
additional information.
Securing a Child Restraint Designed for
the LATCH System
{Warning
A child could be seriously injured or killed
in a crash if the child restraint is not
properly attached to the vehicle using
either the LATCH anchors or the vehicle
seat belt. Follow the instructions that
came with the child restraint and the
instructions in this manual.
{Warning
To reduce the risk of serious or fatal
injuries during a crash, do not attach
more than one child restraint to a single
anchor. Attaching more than one child
restraint to a single anchor could cause
the anchor or attachment to come loose
or even break during a crash. A child or
others could be injured.
{Warning
Children can be seriously injured or
strangled if a shoulder belt is wrapped
around their neck. The shoulder belt can
tighten but cannot be loosened if it is
locked. The shoulder belt locks when it is
pulled all the way out of the retractor.
It unlocks when the shoulder belt is
allowed to go all the way back into the
retractor, but it cannot do this if it is
wrapped around a child’s neck. If the
shoulder belt is locked and tightened
around a child’s neck, the only way to
loosen the belt is to cut it.
(Continued)
Page 82 of 369
Chevrolet Traverse Owner Manual (GMNA-Localizing-U.S./Canada/Mexico-
16411537) - 2023 - CRC - 3/28/22
Seats and Restraints 81
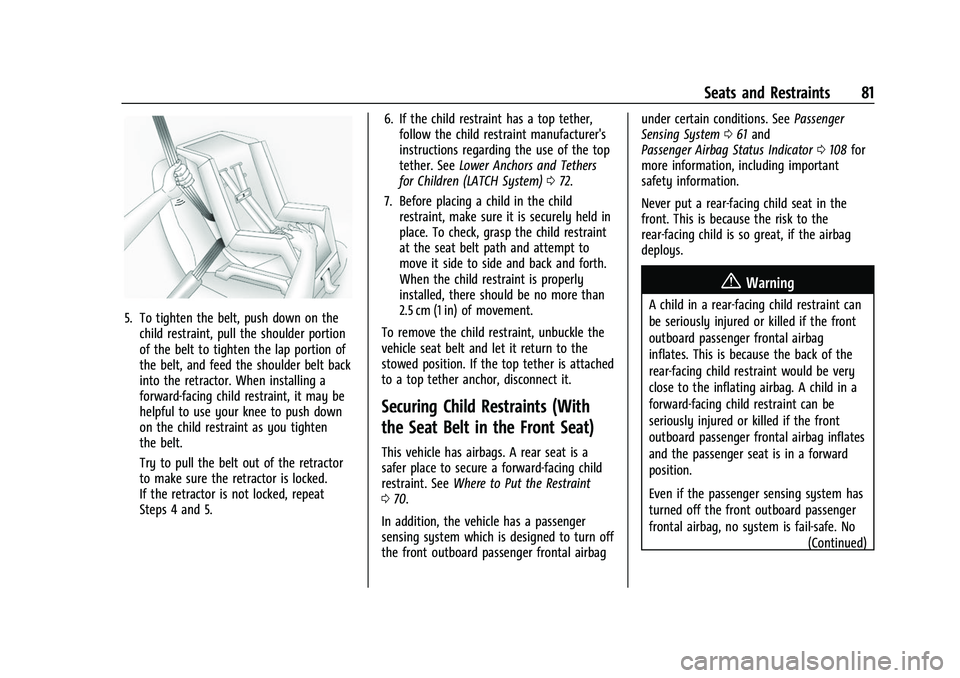
5. To tighten the belt, push down on thechild restraint, pull the shoulder portion
of the belt to tighten the lap portion of
the belt, and feed the shoulder belt back
into the retractor. When installing a
forward-facing child restraint, it may be
helpful to use your knee to push down
on the child restraint as you tighten
the belt.
Try to pull the belt out of the retractor
to make sure the retractor is locked.
If the retractor is not locked, repeat
Steps 4 and 5. 6. If the child restraint has a top tether,
follow the child restraint manufacturer's
instructions regarding the use of the top
tether. See Lower Anchors and Tethers
for Children (LATCH System) 072.
7. Before placing a child in the child restraint, make sure it is securely held in
place. To check, grasp the child restraint
at the seat belt path and attempt to
move it side to side and back and forth.
When the child restraint is properly
installed, there should be no more than
2.5 cm (1 in) of movement.
To remove the child restraint, unbuckle the
vehicle seat belt and let it return to the
stowed position. If the top tether is attached
to a top tether anchor, disconnect it.
Securing Child Restraints (With
the Seat Belt in the Front Seat)
This vehicle has airbags. A rear seat is a
safer place to secure a forward-facing child
restraint. See Where to Put the Restraint
0 70.
In addition, the vehicle has a passenger
sensing system which is designed to turn off
the front outboard passenger frontal airbag under certain conditions. See
Passenger
Sensing System 061 and
Passenger Airbag Status Indicator 0108 for
more information, including important
safety information.
Never put a rear-facing child seat in the
front. This is because the risk to the
rear-facing child is so great, if the airbag
deploys.
{Warning
A child in a rear-facing child restraint can
be seriously injured or killed if the front
outboard passenger frontal airbag
inflates. This is because the back of the
rear-facing child restraint would be very
close to the inflating airbag. A child in a
forward-facing child restraint can be
seriously injured or killed if the front
outboard passenger frontal airbag inflates
and the passenger seat is in a forward
position.
Even if the passenger sensing system has
turned off the front outboard passenger
frontal airbag, no system is fail-safe. No
(Continued)
Page 84 of 369
Chevrolet Traverse Owner Manual (GMNA-Localizing-U.S./Canada/Mexico-
16411537) - 2023 - CRC - 3/28/22
Seats and Restraints 83
Position the release button on the
buckle, away from the child restraint, so
that the seat belt could be quickly
unbuckled if necessary.
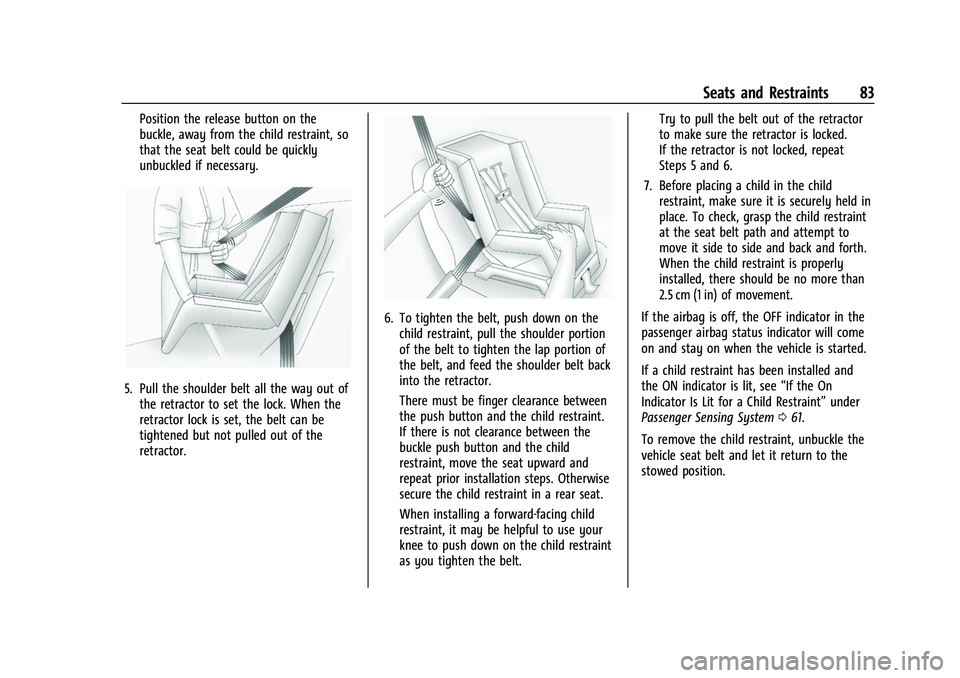
5. Pull the shoulder belt all the way out ofthe retractor to set the lock. When the
retractor lock is set, the belt can be
tightened but not pulled out of the
retractor.
6. To tighten the belt, push down on thechild restraint, pull the shoulder portion
of the belt to tighten the lap portion of
the belt, and feed the shoulder belt back
into the retractor.
There must be finger clearance between
the push button and the child restraint.
If there is not clearance between the
buckle push button and the child
restraint, move the seat upward and
repeat prior installation steps. Otherwise
secure the child restraint in a rear seat.
When installing a forward-facing child
restraint, it may be helpful to use your
knee to push down on the child restraint
as you tighten the belt. Try to pull the belt out of the retractor
to make sure the retractor is locked.
If the retractor is not locked, repeat
Steps 5 and 6.
7. Before placing a child in the child restraint, make sure it is securely held in
place. To check, grasp the child restraint
at the seat belt path and attempt to
move it side to side and back and forth.
When the child restraint is properly
installed, there should be no more than
2.5 cm (1 in) of movement.
If the airbag is off, the OFF indicator in the
passenger airbag status indicator will come
on and stay on when the vehicle is started.
If a child restraint has been installed and
the ON indicator is lit, see “If the On
Indicator Is Lit for a Child Restraint” under
Passenger Sensing System 061.
To remove the child restraint, unbuckle the
vehicle seat belt and let it return to the
stowed position.
Page 87 of 369
Chevrolet Traverse Owner Manual (GMNA-Localizing-U.S./Canada/Mexico-
16411537) - 2023 - CRC - 3/28/22
86 Storage
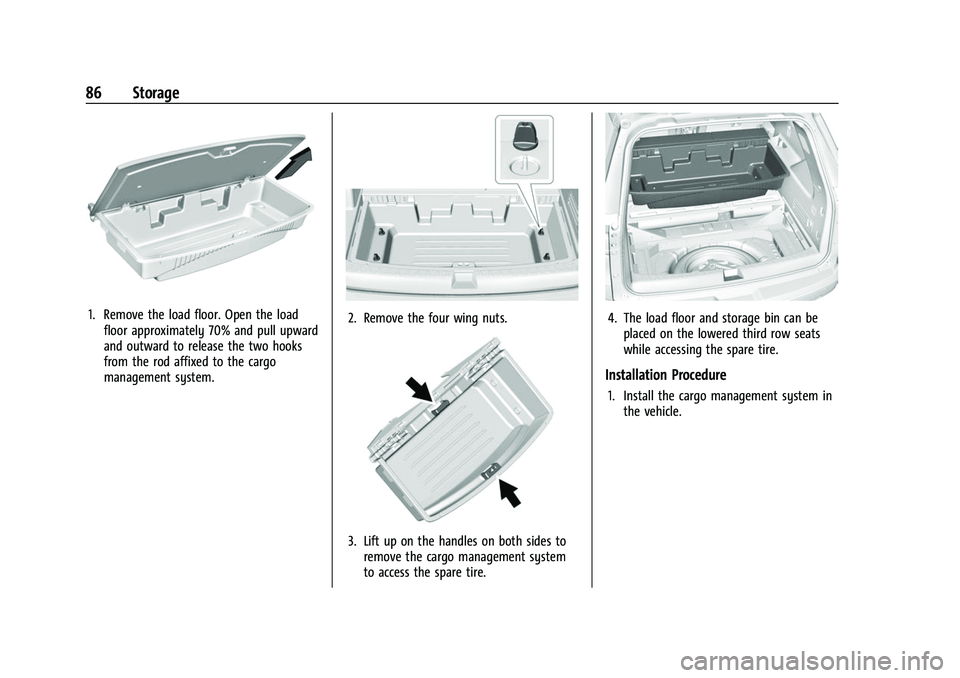
1. Remove the load floor. Open the loadfloor approximately 70% and pull upward
and outward to release the two hooks
from the rod affixed to the cargo
management system.2. Remove the four wing nuts.
3. Lift up on the handles on both sides toremove the cargo management system
to access the spare tire.
4. The load floor and storage bin can beplaced on the lowered third row seats
while accessing the spare tire.
Installation Procedure
1. Install the cargo management system inthe vehicle.
Page 283 of 369

Chevrolet Traverse Owner Manual (GMNA-Localizing-U.S./Canada/Mexico-
16411537) - 2023 - CRC - 3/28/22
282 Vehicle Care
FusesUsage
F66 Engine Control Module Powertrain 2
F67 Engine Control Module–Odd
F68 –
F69 –
F70 –
F71 –
F72 –
F73 –
F74 –
F75 –
F76 –
F77 –
Relays Usage
K1 Starter 1
K2 Run/Crank
K3 Vacuum Pump
K4 –
K5 Air Conditioning Relays
Usage
K6 –
K7 Engine Control Module
K8 Folding Seats
K9 –
K10 Starter 2
Instrument Panel Fuse Block
The instrument panel fuse block is inside the
center console on the passenger side of the
vehicle.
Remove the fuse access door by inserting a
coin or tool into the slot of the access door. To remove a fuse, use the fuse puller
located in the Engine Compartment Fuse
block.
Page 285 of 369
Chevrolet Traverse Owner Manual (GMNA-Localizing-U.S./Canada/Mexico-
16411537) - 2023 - CRC - 3/28/22
284 Vehicle Care
Rear Compartment Fuse Block
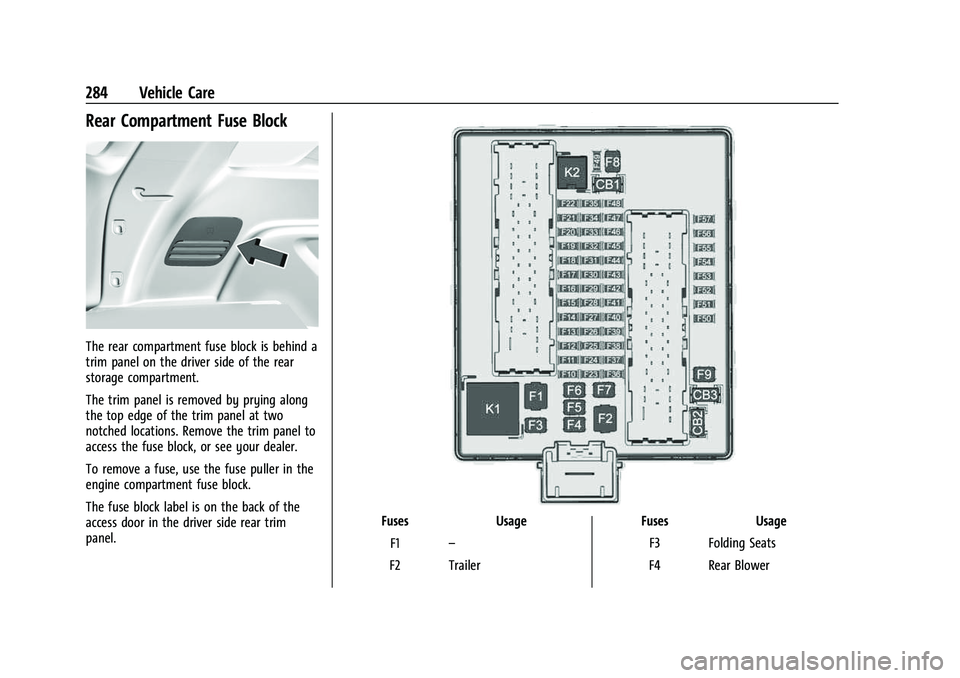
The rear compartment fuse block is behind a
trim panel on the driver side of the rear
storage compartment.
The trim panel is removed by prying along
the top edge of the trim panel at two
notched locations. Remove the trim panel to
access the fuse block, or see your dealer.
To remove a fuse, use the fuse puller in the
engine compartment fuse block.
The fuse block label is on the back of the
access door in the driver side rear trim
panel.
FusesUsage
F1 –
F2 Trailer Fuses
Usage
F3 Folding Seats
F4 Rear Blower
Page 300 of 369
Chevrolet Traverse Owner Manual (GMNA-Localizing-U.S./Canada/Mexico-
16411537) - 2023 - CRC - 3/28/22
Vehicle Care 299
Check that all wheel nuts are properly
tightened. See“Wheel Nut Torque”
under Capacities and Specifications
0 335, and “Removing the Flat Tire and
Installing the Spare Tire” underTire
Changing 0305.
{Warning
Rust or dirt on a wheel, or on the
parts to which it is fastened, can
cause wheel nuts to become loose
over time. The wheel could come off
and cause a crash. When changing a
wheel, remove any rust or dirt from
places where the wheel attaches to
the vehicle. In an emergency, a cloth
or paper towel can be used; however,
use a scraper or wire brush later to
remove all rust or dirt.
Lightly coat the inner diameter of the
wheel hub opening with wheel bearing
grease after a wheel change or tire
rotation to prevent corrosion or rust
buildup.
{Warning
Do not apply grease to the wheel
mounting surface, wheel conical
seats, or the wheel nuts or bolts.
Grease applied to these areas could
cause a wheel to become loose or
come off, resulting in a crash.
When It Is Time for New Tires
Factors, such as maintenance, temperatures,
driving speeds, vehicle loading, and road
conditions affect the wear rate of the tires.
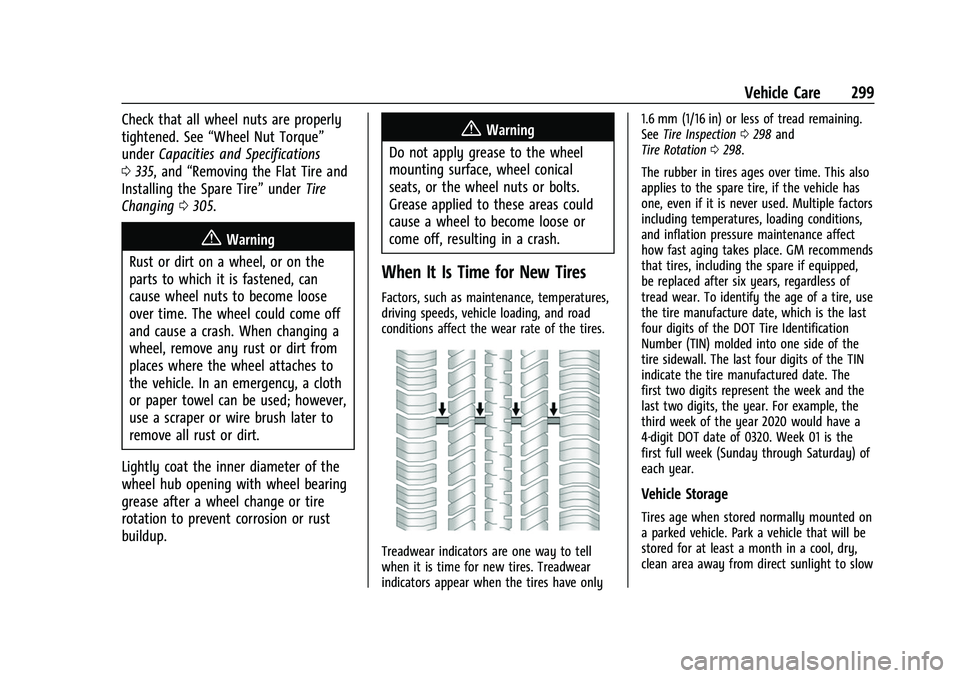
Treadwear indicators are one way to tell
when it is time for new tires. Treadwear
indicators appear when the tires have only 1.6 mm (1/16 in) or less of tread remaining.
See
Tire Inspection 0298 and
Tire Rotation 0298.
The rubber in tires ages over time. This also
applies to the spare tire, if the vehicle has
one, even if it is never used. Multiple factors
including temperatures, loading conditions,
and inflation pressure maintenance affect
how fast aging takes place. GM recommends
that tires, including the spare if equipped,
be replaced after six years, regardless of
tread wear. To identify the age of a tire, use
the tire manufacture date, which is the last
four digits of the DOT Tire Identification
Number (TIN) molded into one side of the
tire sidewall. The last four digits of the TIN
indicate the tire manufactured date. The
first two digits represent the week and the
last two digits, the year. For example, the
third week of the year 2020 would have a
4-digit DOT date of 0320. Week 01 is the
first full week (Sunday through Saturday) of
each year.
Vehicle Storage
Tires age when stored normally mounted on
a parked vehicle. Park a vehicle that will be
stored for at least a month in a cool, dry,
clean area away from direct sunlight to slow
Page 325 of 369
Chevrolet Traverse Owner Manual (GMNA-Localizing-U.S./Canada/Mexico-
16411537) - 2023 - CRC - 3/28/22
324 Vehicle Care
Instrument Panel, Leather, Vinyl, Other
Plastic Surfaces, Low Gloss Paint
Surfaces, and Natural Open Pore Wood
Surfaces
Use a soft bristle brush to remove dust from
knobs and crevices on the instrument
cluster. Use a soft microfiber cloth
dampened with water to remove dust and
loose dirt. For a more thorough cleaning,
use a soft microfiber cloth dampened with a
mild soap and water solution.
Caution
Soaking or saturating leather, especially
perforated leather, as well as other
interior surfaces, may cause permanent
damage. Wipe excess moisture from
these surfaces after cleaning and allow
them to dry naturally. Never use heat,
steam, or spot removers. Do not use
liquids that contain alcohol or solvents on
leather seats. Do not use cleaners that
contain silicone or wax-based products.
Cleaners containing these solvents can
permanently change the appearance and
feel of leather or soft trim, and are not
recommended.Do not use cleaners that increase gloss,
especially on the instrument panel. Reflected
glare can decrease visibility through the
windshield under certain conditions.
Caution
Use of air fresheners may cause
permanent damage to plastics and
painted surfaces. If an air freshener
comes in contact with any plastic or
painted surface in the vehicle, blot
immediately and clean with a soft cloth
dampened with a mild soap solution.
Damage caused by air fresheners would
not be covered by the vehicle warranty.
Cargo Cover and Convenience Net
If equipped, wash with warm water and
mild detergent. Do not use chlorine bleach.
Rinse with cold water, and then dry
completely.
Care of Seat Belts
Keep belts clean and dry.
{Warning
Do not bleach or dye seat belt webbing.
It may severely weaken the webbing. In
a crash, they might not be able to
provide adequate protection. Clean and
rinse seat belt webbing only with mild
soap and lukewarm water. Allow the
webbing to dry.
Floor Mats
{Warning
If a floor mat is the wrong size or is not
properly installed, it can interfere with
the pedals. Interference with the pedals
can cause unintended acceleration and/or
increased stopping distance which can
cause a crash and injury. Make sure the
floor mat does not interfere with the
pedals.
Use the following guidelines for proper floor
mat use:
.The original equipment floor mats are
designed for your vehicle. If the floor
mats need to be replaced, it is
recommended that GM-certified floor