start stop button CHEVROLET TRAX 2018 Owner's Manual
[x] Cancel search | Manufacturer: CHEVROLET, Model Year: 2018, Model line: TRAX, Model: CHEVROLET TRAX 2018Pages: 366, PDF Size: 5.44 MB
Page 27 of 366
Chevrolet TRAX Owner Manual (GMNA-Localizing-U.S./Canada/Mexico-
11354406) - 2018 - crc - 10/12/17
26 In Brief
Driver Information Center (DIC)
when it is necessary to change the
engine oil and filter.
The oil life system should be reset
to 100% only following an oil
change.
Resetting the Oil Life System
Reset the system whenever the
engine oil is changed so that the
system can calculate the next
engine oil change. It will not reset
itself. To reset the system:
Base Level Cluster1. Press the MENU button to show Remaining Oil Life on the
display. This display shows an
estimate of the oil’s remaining
useful life. If 99% is displayed,
that means that 99% of the
current oil life remains.
2. To reset the engine oil life system, press SET/CLR while
the oil life display is active.
After a few seconds, the oil life
will be reset to 100%. Be
careful not to reset the oil life
display accidentally at any time other than after the oil is
changed. It cannot be reset
accurately.
If the
:% CHANGE message in
the DIC comes back on when the
vehicle is started, the engine oil life
system has not reset. Repeat the
procedure.
Uplevel Cluster
1. Turn the ignition on without starting the engine.
2. Press the DIC MENU button on the turn signal lever to enter
the Vehicle Information Menu.
Use the thumbwheel to scroll
through the menu items until
you reach REMAINING
OIL LIFE.
3. Press SET/CLR to reset the oil life at 100%.
4. Turn the ignition off.
See Engine Oil Life System 0236.
Driving for Better Fuel
Economy
Driving habits can affect fuel
mileage. Here are some driving tips
to get the best fuel economy
possible.
.
Avoid fast starts and accelerate
smoothly.
. Brake gradually and avoid
abrupt stops.
. Avoid idling the engine for long
periods of time.
. When road and weather
conditions are appropriate, use
cruise control.
. Always follow posted speed
limits or drive more slowly when
conditions require.
. Keep vehicle tires properly
inflated.
. Combine several trips into a
single trip.
. Replace the vehicle's tires with
the same TPC Spec number
molded into the tire's sidewall
near the size.
Page 38 of 366
Chevrolet TRAX Owner Manual (GMNA-Localizing-U.S./Canada/Mexico-
11354406) - 2018 - crc - 10/12/17
Keys, Doors, and Windows 37
Programming with Recognized
Transmitters
A new transmitter can be
programmed to the vehicle when
there are two recognized
transmitters. To program, the vehicle
must be off and all of the
transmitters, both currently
recognized and new, must be
with you.
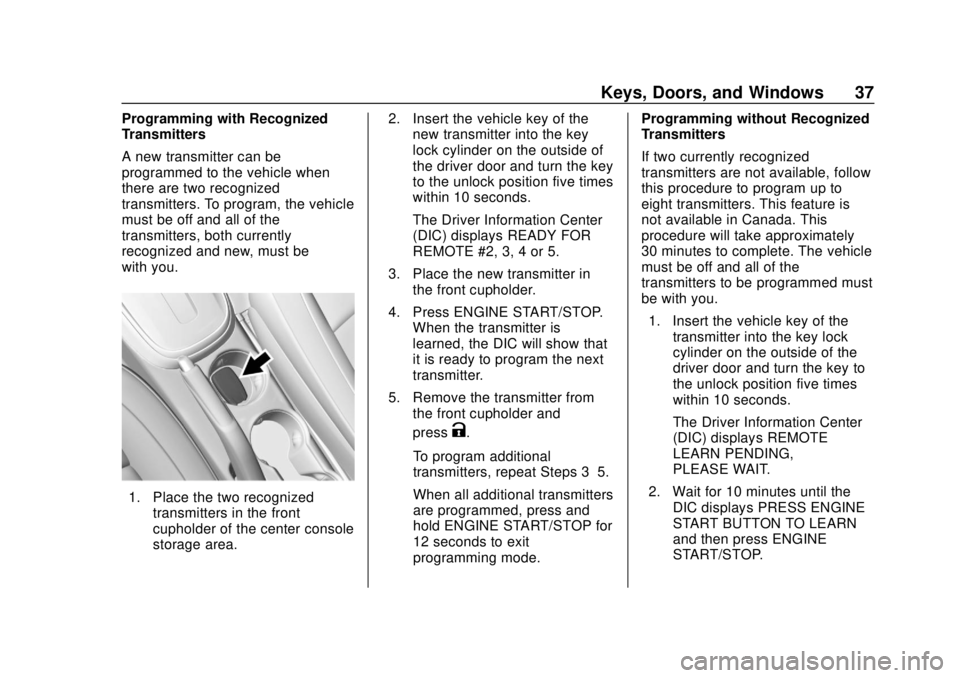
1. Place the two recognizedtransmitters in the front
cupholder of the center console
storage area. 2. Insert the vehicle key of the
new transmitter into the key
lock cylinder on the outside of
the driver door and turn the key
to the unlock position five times
within 10 seconds.
The Driver Information Center
(DIC) displays READY FOR
REMOTE #2, 3, 4 or 5.
3. Place the new transmitter in the front cupholder.
4. Press ENGINE START/STOP. When the transmitter is
learned, the DIC will show that
it is ready to program the next
transmitter.
5. Remove the transmitter from the front cupholder and
press
K.
To program additional
transmitters, repeat Steps 3–5.
When all additional transmitters
are programmed, press and
hold ENGINE START/STOP for
12 seconds to exit
programming mode. Programming without Recognized
Transmitters
If two currently recognized
transmitters are not available, follow
this procedure to program up to
eight transmitters. This feature is
not available in Canada. This
procedure will take approximately
30 minutes to complete. The vehicle
must be off and all of the
transmitters to be programmed must
be with you.
1. Insert the vehicle key of the transmitter into the key lock
cylinder on the outside of the
driver door and turn the key to
the unlock position five times
within 10 seconds.
The Driver Information Center
(DIC) displays REMOTE
LEARN PENDING,
PLEASE WAIT.
2. Wait for 10 minutes until the DIC displays PRESS ENGINE
START BUTTON TO LEARN
and then press ENGINE
START/STOP.
Page 189 of 366
Chevrolet TRAX Owner Manual (GMNA-Localizing-U.S./Canada/Mexico-
11354406) - 2018 - crc - 10/12/17
188 Driving and Operating
{Warning
Things you put inside the
vehicle can strike and injure
people in a sudden stop or
turn, or in a crash.
.Put things in the cargo
area of the vehicle. Try to
spread the weight evenly.
.Never stack heavier
things, like suitcases,
inside the vehicle so that
some of them are above
the tops of the seats.
.Do not leave an
unsecured child restraint
in the vehicle.
.When you carry
something inside the
vehicle, secure it
whenever you can.
.Do not leave a seat
folded down unless you
need to.
Starting and
Operating
New Vehicle Break-In
Caution
The vehicle does not need an
elaborate break-in. But it will
perform better in the long run if
you follow these guidelines: . Do not drive at any one
constant speed, fast or slow,
for the first 805 km (500 mi).
Do not make full-throttle
starts. Avoid downshifting to
brake or slow the vehicle.
. Avoid making hard stops for
the first 322 km (200 mi) or
so. During this time the new
brake linings are not yet
broken in. Hard stops with
new linings can mean
premature wear and earlier
replacement. Follow this
(Continued)
Caution (Continued)
breaking-in guideline every
time you get new brake
linings.
Following break-in, engine speed
and load can be gradually
increased.
Ignition Positions
(Keyless Access)
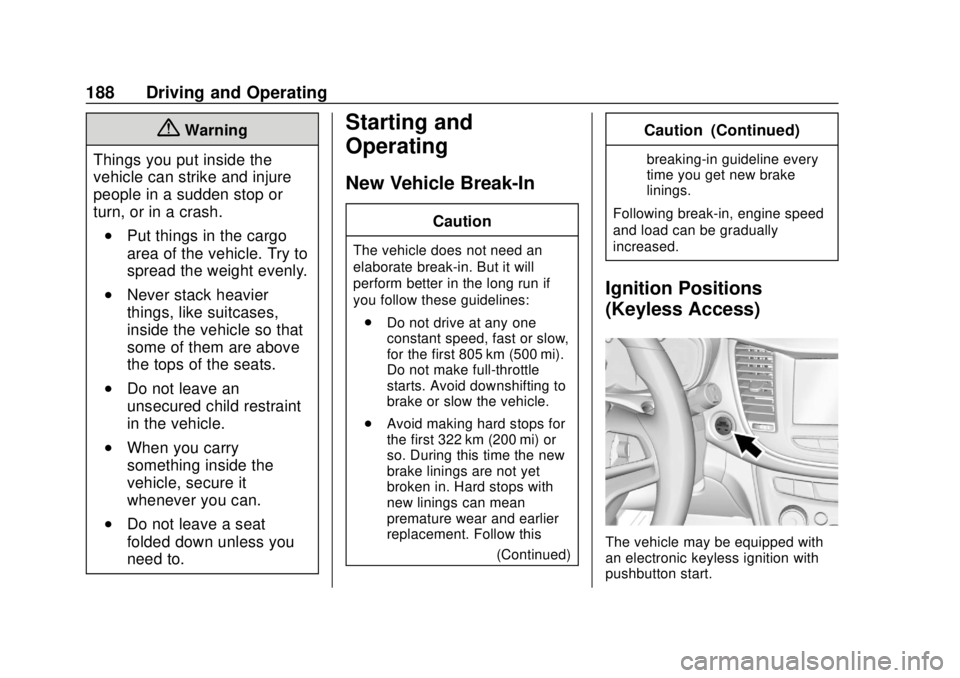
The vehicle may be equipped with
an electronic keyless ignition with
pushbutton start.
Page 194 of 366

Chevrolet TRAX Owner Manual (GMNA-Localizing-U.S./Canada/Mexico-
11354406) - 2018 - crc - 10/12/17
Driving and Operating 193
Caution
Cranking the engine for long
periods of time, by returning the
ignition to the START position
immediately after cranking has
ended, can overheat and damage
the cranking motor, and drain the
battery. Wait at least 15 seconds
between each try, to let the
cranking motor cool down.
2. If the engine does not start after five to 10 seconds,
especially in very cold weather
(below −18 °C or 0 °F), it could
be flooded with too much
gasoline. Try pushing the
accelerator pedal all the way to
the floor and holding it there as
you hold the key in START for
up to a maximum of
15 seconds. Wait at least
15 seconds between each try,
to allow the cranking motor to
cool down. When the engine
starts, let go of the key and the
accelerator. If the vehicle starts briefly but then stops again, do
the same thing. This clears the
extra gasoline from the engine.
Do not race the engine
immediately after starting it.
Operate the engine and
transmission gently until the oil
warms up and lubricates all
moving parts.
Starting Procedure (Keyless
Access) 1. With the Keyless Access system, the RKE transmitter
must be in the vehicle. Press
ENGINE START/STOP with the
brake pedal applied. When the
engine begins cranking, let go
of the button.
The idle speed will go down as
the engine gets warm. Do not
race the engine immediately
after starting it.
If the RKE transmitter is not in
the vehicle, if there is
interference, or if the RKE
transmitter battery is low, the
Driver Information Center (DIC)
will display a message. See
Driver Information Center
(DIC) 0127 andRemote
Keyless Entry (RKE) System
Operation (Key Access) 031 or
Remote Keyless Entry (RKE)
System Operation (Keyless
Access) 034.
Caution
Cranking the engine for long
periods of time, by returning the
ignition to the START position
immediately after cranking has
ended, can overheat and damage
the cranking motor, and drain the
battery. Wait at least 15 seconds
between each try, to let the
cranking motor cool down.
2. If the engine does not start after five to 10 seconds,
especially in very cold weather
(below −18 °C or 0 °F), it could
be flooded with too much
gasoline. Try pushing the
accelerator pedal all the way to
the floor and holding it there as
you hold ENGINE START/
Page 195 of 366
Chevrolet TRAX Owner Manual (GMNA-Localizing-U.S./Canada/Mexico-
11354406) - 2018 - crc - 10/12/17
194 Driving and Operating
STOP, for up to a maximum of
15 seconds. Wait at least
15 seconds between each try,
to allow the cranking motor to
cool down.
When the engine starts, let go
of the button and the
accelerator. If the vehicle starts
briefly but then stops again,
follow the same steps. This
clears the extra gasoline from
the engine.
Do not race the engine
immediately after starting it.
Operate the engine and
transmission gently until the oil
warms up and lubricates all
moving parts.
Engine Heater
Vehicles with the 1.4L engine may
have an engine heater. The engine
heater can help in cold weather
conditions at or below−18 °C (0 °F)
for easier starting and better fuel
economy during engine warm-up.
Plug in the heater at least four hours
before starting the vehicle. An internal thermostat in the plug end
of the cord will prevent engine
heater operation at temperatures
above
−18 °C (0 °F).
{Warning
Do not plug in the engine block
heater while the vehicle is parked
in a garage or under a carport.
Property damage or personal
injury may result. Always park the
vehicle in a clear open area away
from buildings or structures.
To Use the Engine Heater
1. Turn off the engine.
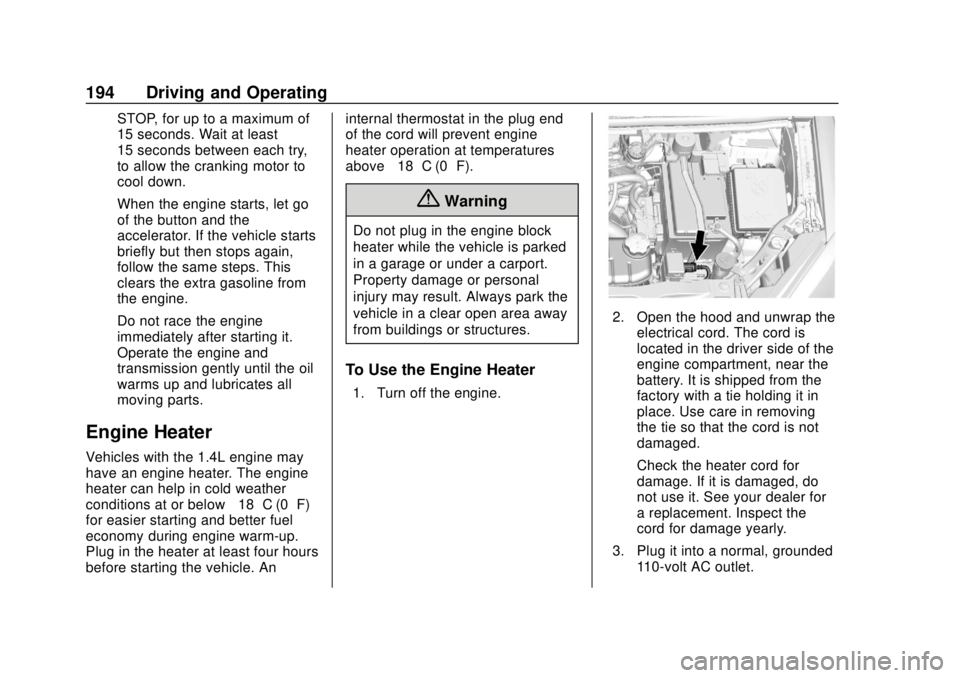
2. Open the hood and unwrap the
electrical cord. The cord is
located in the driver side of the
engine compartment, near the
battery. It is shipped from the
factory with a tie holding it in
place. Use care in removing
the tie so that the cord is not
damaged.
Check the heater cord for
damage. If it is damaged, do
not use it. See your dealer for
a replacement. Inspect the
cord for damage yearly.
3. Plug it into a normal, grounded 110-volt AC outlet.
Page 201 of 366
Chevrolet TRAX Owner Manual (GMNA-Localizing-U.S./Canada/Mexico-
11354406) - 2018 - crc - 10/12/17
200 Driving and Operating
Automatic
Transmission
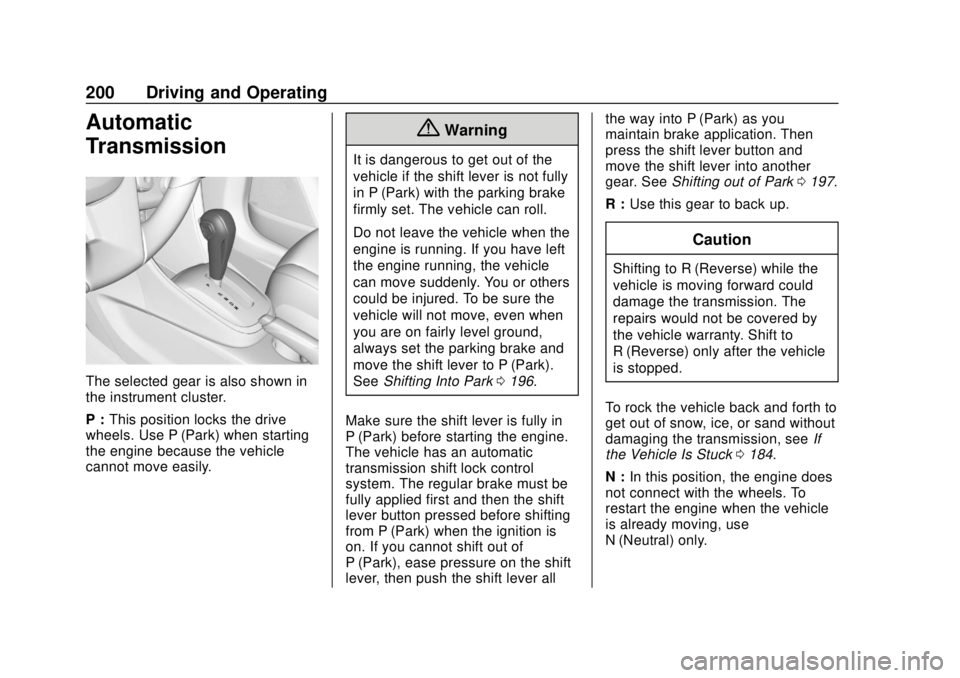
The selected gear is also shown in
the instrument cluster.
P :This position locks the drive
wheels. Use P (Park) when starting
the engine because the vehicle
cannot move easily.
{Warning
It is dangerous to get out of the
vehicle if the shift lever is not fully
in P (Park) with the parking brake
firmly set. The vehicle can roll.
Do not leave the vehicle when the
engine is running. If you have left
the engine running, the vehicle
can move suddenly. You or others
could be injured. To be sure the
vehicle will not move, even when
you are on fairly level ground,
always set the parking brake and
move the shift lever to P (Park).
See Shifting Into Park 0196.
Make sure the shift lever is fully in
P (Park) before starting the engine.
The vehicle has an automatic
transmission shift lock control
system. The regular brake must be
fully applied first and then the shift
lever button pressed before shifting
from P (Park) when the ignition is
on. If you cannot shift out of
P (Park), ease pressure on the shift
lever, then push the shift lever all the way into P (Park) as you
maintain brake application. Then
press the shift lever button and
move the shift lever into another
gear. See
Shifting out of Park 0197.
R : Use this gear to back up.
Caution
Shifting to R (Reverse) while the
vehicle is moving forward could
damage the transmission. The
repairs would not be covered by
the vehicle warranty. Shift to
R (Reverse) only after the vehicle
is stopped.
To rock the vehicle back and forth to
get out of snow, ice, or sand without
damaging the transmission, see If
the Vehicle Is Stuck 0184.
N : In this position, the engine does
not connect with the wheels. To
restart the engine when the vehicle
is already moving, use
N (Neutral) only.
Page 205 of 366
Chevrolet TRAX Owner Manual (GMNA-Localizing-U.S./Canada/Mexico-
11354406) - 2018 - crc - 10/12/17
204 Driving and Operating
2 (Second). Slowly let up on the
clutch pedal as you press the
accelerator pedal. Upshifts should
occur between 2000 and 3000 rpm
and downshifts should occur
between 2000 and 1000 rpm.
To stop, let up on the accelerator
pedal and press the brake pedal.
Just before the vehicle stops, press
the clutch pedal and the brake
pedal, and shift to Neutral.
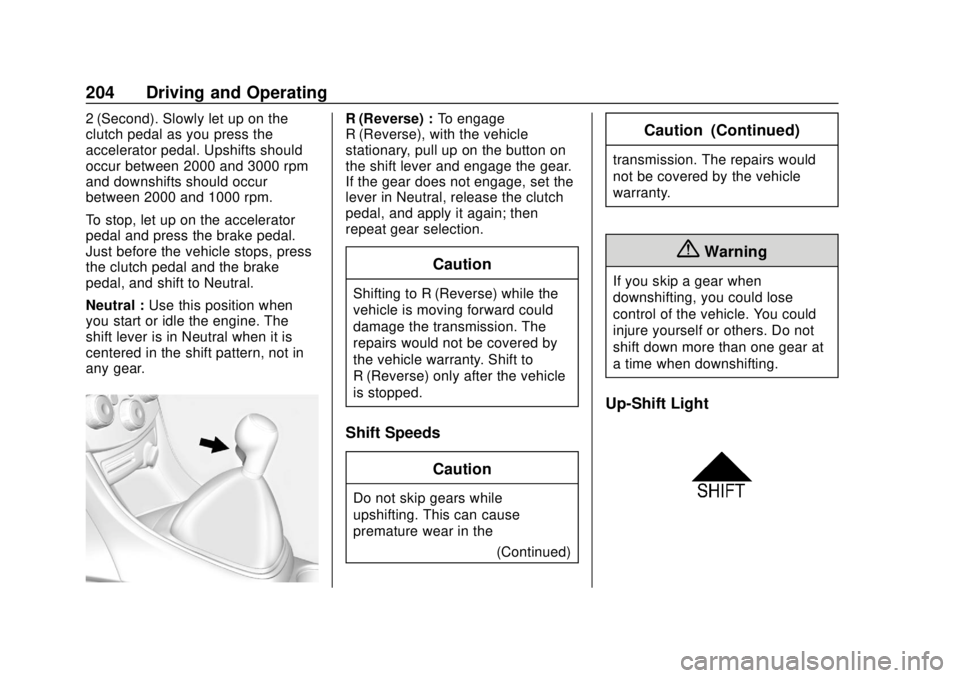
Neutral :Use this position when
you start or idle the engine. The
shift lever is in Neutral when it is
centered in the shift pattern, not in
any gear.R (Reverse) : To engage
R (Reverse), with the vehicle
stationary, pull up on the button on
the shift lever and engage the gear.
If the gear does not engage, set the
lever in Neutral, release the clutch
pedal, and apply it again; then
repeat gear selection.
Caution
Shifting to R (Reverse) while the
vehicle is moving forward could
damage the transmission. The
repairs would not be covered by
the vehicle warranty. Shift to
R (Reverse) only after the vehicle
is stopped.
Shift Speeds
Caution
Do not skip gears while
upshifting. This can cause
premature wear in the (Continued)
Caution (Continued)
transmission. The repairs would
not be covered by the vehicle
warranty.
{Warning
If you skip a gear when
downshifting, you could lose
control of the vehicle. You could
injure yourself or others. Do not
shift down more than one gear at
a time when downshifting.
Up-Shift Light
Page 208 of 366
Chevrolet TRAX Owner Manual (GMNA-Localizing-U.S./Canada/Mexico-
11354406) - 2018 - crc - 10/12/17
Driving and Operating 207
With the brake pedal applied, pull
up firmly on the parking brake
handle without pressing the release
button.
SeeShifting Into Park 0196 or
Parking 0198. If the ignition is in
the ON/RUN position, the brake
system warning light will come on.
See Brake System Warning Light
0 121.
To release the parking brake: 1. Hold the brake pedal down.
2. Pull the parking brake handle up until you can press the
release button.
3. Hold the release button in as you move the brake handle all
the way down.
Caution
Driving with the parking brake on
can overheat the brake system
and cause premature wear or
damage to brake system parts.
(Continued)
Caution (Continued)
Make sure that the parking brake
is fully released and the brake
warning light is off before driving.
Driving with the parking brake
applied will cause a warning chime
to sound and a DIC message to
display. Release the parking brake
or stop the vehicle.
Brake Assist
If equipped, Brake Assist is
designed to assist in stopping or
decreasing vehicle speed in
emergency driving conditions. This
feature uses the stability system
hydraulic brake control module to
supplement the power brake system
under conditions where the driver
has quickly and forcefully applied
the brake pedal in an attempt to
quickly stop or slow down the
vehicle. The stability system
hydraulic brake control module
increases brake pressure at each
corner of the vehicle until the ABS activates. Minor brake pedal
pulsation or pedal movement during
this time is normal and the driver
should continue to apply the brake
pedal as the driving situation
dictates. The brake assist feature
will automatically disengage when
the brake pedal is released or brake
pedal pressure is quickly
decreased.
Hill Start Assist (HSA)
If equipped, Hill Start Assist (HSA)
may be useful when the vehicle is
stopped on a grade. This feature is
designed to prevent the vehicle from
rolling, either forward or rearward,
during vehicle drive off. After the
driver completely stops and holds
the vehicle in a complete standstill
on a grade, HSA will be
automatically activated. During the
transition period between when the
driver releases the brake pedal and
starts to accelerate to drive off on a
grade, HSA holds the braking
pressure to ensure that there is no
rolling. The brakes will automatically
release when the accelerator pedal
Page 280 of 366
Chevrolet TRAX Owner Manual (GMNA-Localizing-U.S./Canada/Mexico-
11354406) - 2018 - crc - 10/12/17
Vehicle Care 279
installed and the sensor
matching process is performed
successfully. See your dealer for
service.
. Replacement tires or wheels do
not match the original equipment
tires or wheels. Tires and wheels
other than those recommended
could prevent the TPMS from
functioning properly. See Buying
New Tires 0282.
. Operating electronic devices or
being near facilities using radio
wave frequencies similar to the
TPMS could cause the TPMS
sensors to malfunction.
If the TPMS is not functioning
properly, it cannot detect or signal a
low tire pressure condition. See
your dealer for service if the TPMS
malfunction light and DIC message,
if equipped, come on and stay on.
TPMS Sensor Matching
Process
Each TPMS sensor has a unique
identification code. The identification
code needs to be matched to a new
tire/wheel position after rotating the vehicle’s tires or replacing one or
more of the TPMS sensors. Also,
the TPMS sensor matching process
should be performed after replacing
a spare tire with a road tire
containing the TPMS sensor. The
malfunction light and the DIC
message, if equipped, should go off
at the next ignition cycle. The
sensors are matched to the tire/
wheel positions, using a TPMS
relearn tool, in the following order:
driver side front tire, passenger side
front tire, passenger side rear tire,
and driver side rear. See your
dealer for service or to purchase a
relearn tool. A TPMS relearn tool
can also be purchased. See Tire
Pressure Monitor Sensor Activation
Tool at
www.gmtoolsandequipment.com or
call 1-800-GM TOOLS
(1-800-468-6657).
There are two minutes to match the
first tire/wheel position, and
five minutes overall to match all four
tire/wheel positions. If it takes
longer, the matching process stops
and must be restarted.
The TPMS sensor matching
process is:
1. Set the parking brake.
2. Turn the ignition on without starting the vehicle or place the
vehicle in Service Mode.
See Ignition Positions (Key
Access) 0190 orIgnition
Positions (Keyless Access)
0 188.
3. Use the MENU button to select the Vehicle Information Menu
(Menu 2) in the Driver
Information Center (DIC). See
Driver Information Center (DIC)
0127.
4. Use the thumbwheel (or up and down arrows) to scroll to the
Tire Pressure Menu Item
screen.
5. Press and hold the SET/CLR button to begin the sensor
matching process.
A message requesting
acceptance of the process may
display.
Page 346 of 366
Chevrolet TRAX Owner Manual (GMNA-Localizing-U.S./Canada/Mexico-
11354406) - 2018 - crc - 10/12/17
OnStar 345
After initial set-up, your vehicle’s
Wi-Fi hotspot will connect
automatically to your mobile
devices. Manage data usage by
turning Wi-Fi on or off on your
mobile device, using the
myChevrolet mobile app, or by
contacting an OnStar Advisor. On
some vehicles, Wi-Fi can also be
managed from the Wi-Fi
Hotspot menu.
MyChevrolet Mobile App (If
Available)
Download the myChevrolet mobile
app to compatible Apple and
Android smartphones. Chevrolet
users can access the following
services from a smartphone:
.Remotely start/stop the vehicle,
if factory-equipped.
. Lock/unlock doors, if equipped
with automatic locks.
. Activate the horn and lamps.
. Check the vehicle’s fuel level, oil
life, or tire pressure,
if factory-equipped with the Tire
Pressure Monitor System. .
Send destinations to the vehicle.
. Locate the vehicle on a map
(U.S. market only).
. Turn the vehicle's Wi-Fi hotspot
on/off, manage settings, and
monitor data consumption,
if equipped.
. Locate a dealer and schedule
service.
. Request roadside assistance.
. Set a parking reminder with pin
drop, take a photo, make a note,
and set a timer.
. Connect with Chevrolet on social
media.
For myChevrolet mobile app
information and compatibility, see
www.my.chevrolet.com.
An active OnStar service,
A compatible device,
factory-installed remote start, and
power locks are required. Data rates
apply. See onstar.com for details
and system limitations.Remote Services
Contact an OnStar Advisor to
unlock the doors or sound the horn
and flash the lamps.
OnStar AtYourService
OnStar Advisors can provide offers
from restaurants and retailers on
your route, help locate hotels,
or book a room. These services
vary by market.
OnStar Hands-Free Calling
Make and receive calls with the
built-in wireless calling service,
which requires available minutes.
Functionality of the Voice Command
button may vary by vehicle and
region. For some vehicles, press
=
to open the OnStar app on the
infotainment display, then select
Hands-Free calling. For other
vehicles press
=as follows.
Make a Call
1. Press
=. System responds:
“OnStar ready.”